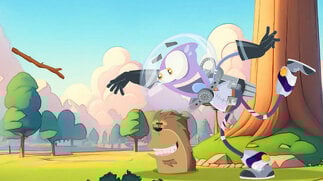
\nInternal link: AI Photo Retoucher — \u003Ca href=\"https://pixelfox.ai/image/retouch-skin\">https://pixelfox.ai/image/retouch-skin\u003C/a>\u003C/li>\n\u003C/ul>\n\u003Cp>\u003Cimg loading=\"lazy\" src=\"https://api.pixelfox.ai/template/retouchskin/feature_1.webp\" alt=\"Prep your selfie lighting for scanners\" />\u003C/p>\n\u003Cul>\n\u003Cli>Second, enhance clarity of facial features without over-smoothing so scanners see your skin properly. The AI Face Beauty tool can brighten shadows and improve detail while keeping skin texture intact.\u003Cbr />\nInternal link: AI Face Beauty — \u003Ca href=\"https://pixelfox.ai/image/face-beauty\">https://pixelfox.ai/image/face-beauty\u003C/a>\u003C/li>\n\u003C/ul>\n\u003Cp>\u003Cimg loading=\"lazy\" src=\"https://api.pixelfox.ai/template/facebeauty/feature_1.webp\" alt=\"Enhance facial detail for clearer tone reading\" />\u003C/p>\n\u003Cul>\n\u003Cli>Third, once you have a shade suggestion, preview it. Apply foundation, blush, and lip tones to your own image to confirm balance with your undertone using a Virtual Makeup Try On.\u003Cbr />\nInternal link: Virtual Makeup Try On — \u003Ca href=\"https://pixelfox.ai/image/face-makeup\">https://pixelfox.ai/image/face-makeup\u003C/a>\u003C/li>\n\u003C/ul>\n\u003Cp>\u003Cimg loading=\"lazy\" src=\"https://api.pixelfox.ai/template/facemakeup/feature_3.webp\" alt=\"Preview foundation and undertone harmony\" />\u003C/p>\n\u003Cp>These steps do not replace a scanner. They help any skin color detector or skin tone detector AI read your skin more fairly, then help you see how the shade looks on your face in real life scenes.\u003C/p>\n\u003Ch2 id=\"OfkM9m\">When to pick in-store shade matching instead\u003C/h2>\n\u003Cul>\n\u003Cli>If you are between two undertones and every undertone finder online gives a different answer.\u003C/li>\n\u003Cli>If your work or events are under strong stage lighting that shifts color.\u003C/li>\n\u003Cli>If your skin has active conditions (rosacea, melasma) concentrated in one area. A consultant can test product on the jaw and neck and pick the cleaner match.\u003C/li>\n\u003C/ul>\n\u003Cp>That said, hybrid journeys work best. Scan at home to narrow to two shades. Ask the counter to swatch and confirm the one that dissappears into your neck in daylight.\u003C/p>\n\u003Ch2 id=\"VkowDh\">Troubleshooting: common scanner results and what to do\u003C/h2>\n\u003Cul>\n\u003Cli>“You are warm” but warm foundations look orange. Try neutral-warm or olive. Some undertone detectors do not output olive even when that is the best fit.\u003C/li>\n\u003Cli>“You are neutral” but products look dull. Neutral can hide golden glow. Test neutral-warm. You may need more yellow in foundation or a warmer setting powder.\u003C/li>\n\u003Cli>“You are cool” but pink shades turn grey. Many with cool undertones still need a touch of yellow to cancel redness. Try neutral-cool or cool-olive.\u003C/li>\n\u003C/ul>\n\u003Cp>A simple check: swatch one cool, one neutral, one warm along your jaw. The right one will fade into the neck with no border. That beats any what is my skin tone photo test on paper.\u003C/p>\n\u003Ch2 id=\"fiTKtg\">For creators and brands: why scanners help business\u003C/h2>\n\u003Cp>If you run a brand or store, adding an ai shade finder reduces returns and drives trust. It also lifts engagement because shoppers can do a skin tone finder by photo at any hour.\u003C/p>\n\u003Cp>How it helps:\u003C/p>\n\u003Cul>\n\u003Cli>Lower wrong-shade returns by mapping users to your exact catalog.\u003C/li>\n\u003Cli>Higher conversion from a makeup shade finder with photo that shows “this is you wearing 220C.”\u003C/li>\n\u003Cli>Better data on which undertones your audience needs more of.\u003C/li>\n\u003C/ul>\n\u003Cp>Many brands integrate enterprise-grade tools like Perfect Corp’s AI to build a robust skin color scanner and skin undertone scanner inside product pages: \u003Ca href=\"https://www.perfectcorp.com/business/products/skin-tone-finder-camera\" rel=\"nofollow\" target=\"_blank\" >https://www.perfectcorp.com/business/products/skin-tone-finder-camera\u003C/a>\u003C/p>\n\u003Ch2 id=\"liTvH2\">Security and privacy you should expect\u003C/h2>\n\u003Cul>\n\u003Cli>Clear policy on image storage. Photos should be deleted or anonymized after use.\u003C/li>\n\u003Cli>No sale of biometric identifiers. A scanner can work without saving face templates tied to identity.\u003C/li>\n\u003Cli>On-device previews when possible. If the tool uploads, it should use encrypted transport.\u003C/li>\n\u003C/ul>\n\u003Cp>If you do not want to upload, choose a tool that works offline or lets you crop the image to face-only without background.\u003C/p>\n\u003Ch2 id=\"uhbYFp\">Quick checklist before you scan\u003C/h2>\n\u003Cul>\n\u003Cli>Clean face, no foundation. Neutral daylight. No filters.\u003C/li>\n\u003Cli>Balanced exposure. No blown highlights on forehead or nose.\u003C/li>\n\u003Cli>Two scans in different daylight windows. Keep the common result.\u003C/li>\n\u003Cli>Cross-check with a second tool if you are unsure.\u003C/li>\n\u003Cli>Confirm with a real swatch if you sit between two close shades.\u003C/li>\n\u003C/ul>\n\u003Ch2 id=\"wqBYRE\">FAQs that use the terms you search for\u003C/h2>\n\u003Cul>\n\u003Cli>\n\u003Cp>How do I use a skin tone scanner online to “find my skin tone”?\u003Cbr />\nUpload a well-lit selfie with no makeup. The skin tone detection model maps your face to a shade library and returns 1–3 picks.\u003C/p>\n\u003C/li>\n\u003Cli>\n\u003Cp>Is an undertone finder online accurate?\u003Cbr />\nYes in neutral light. A good undertone finder by photo avoids red areas and averages zones. Try two passes to confirm.\u003C/p>\n\u003C/li>\n\u003Cli>\n\u003Cp>What is a skin undertone test camera?\u003Cbr />\nIt is a live camera tool that detects undertone from a stream. This can be more stable than a single photo, especially in an ai undertone finder.\u003C/p>\n\u003C/li>\n\u003Cli>\n\u003Cp>I need a skin tone scanner online free. Where can I try one?\u003Cbr />\nMany brands offer free finders on mobile. You can test a demo-style ai skin tone finder like the Perfect Corp showcases to learn your baseline before going to a brand tool.\u003C/p>\n\u003C/li>\n\u003Cli>\n\u003Cp>What is the difference between a skin color detector and a skin color identifier?\u003Cbr />\nThese terms overlap. Both read face pixels to classify color. A skin color identifier may add a simple cool/neutral/warm label.\u003C/p>\n\u003C/li>\n\u003Cli>\n\u003Cp>Does a skin tone test camera replace in-store matching?\u003Cbr />\nIt narrows choices. In-store swatches still help if you sit between two close shades or have complex undertones.\u003C/p>\n\u003C/li>\n\u003Cli>\n\u003Cp>How do I do “how to find your skin shade” if I can’t use my camera?\u003Cbr />\nYou can take a clear photo in daylight and run a skin tone finder by photo later. Remove heavy edits first.\u003C/p>\n\u003C/li>\n\u003Cli>\n\u003Cp>I see the term “skin tone detector AI.” What does it look for?\u003Cbr />\nIt looks for skin-only pixels, corrects lighting, converts to a known color space, and compares to known shade points.\u003C/p>\n\u003C/li>\n\u003Cli>\n\u003Cp>Can I use a makeup shade finder with photo for concealer too?\u003Cbr />\nYes. Most AI foundation shade finder tools will suggest concealer matches at the same undertone and one step lighter for under-eye work.\u003C/p>\n\u003C/li>\n\u003Cli>\n\u003Cp>Is a skin undertone detector the same as a Fitzpatrick test?\u003Cbr />\nNo. Fitzpatrick is about sun response. Undertone is a color preference cue for cosmetics. For skin health guidance, see the American Academy of Dermatology.\u003C/p>\n\u003C/li>\n\u003C/ul>\n\u003Ch2 id=\"uvab8o\">External sources and further reading\u003C/h2>\n\u003Cul>\n\u003Cli>International Commission on Illumination (CIE) on colorimetry standards for consistent color measurement: \u003Ca href=\"https://cie.co.at/\" rel=\"nofollow\" target=\"_blank\" >https://cie.co.at/\u003C/a>\u003C/li>\n\u003Cli>American Academy of Dermatology on skin phototypes and sun response (helps avoid mixing phototype with cosmetic undertone): \u003Ca href=\"https://www.aad.org/\" rel=\"nofollow\" target=\"_blank\" >https://www.aad.org/\u003C/a>\u003C/li>\n\u003Cli>Perfect Corp overview of AI skin shade matching used in commerce: \u003Ca href=\"https://www.perfectcorp.com/business/products/skin-tone-finder-camera\" rel=\"nofollow\" target=\"_blank\" >https://www.perfectcorp.com/business/products/skin-tone-finder-camera\u003C/a>\u003C/li>\n\u003Cli>Maybelline mobile Foundation Finder (example of 360 scan flow): \u003Ca href=\"https://www.maybelline.com/foundation-shade-finder\" rel=\"nofollow\" target=\"_blank\" >https://www.maybelline.com/foundation-shade-finder\u003C/a>\u003C/li>\n\u003Cli>Lancôme E‑Shade Finder (AI 360 selfie video flow): \u003Ca href=\"https://www.lancome.ca/en/e-shade-finder-multifranchise/e-shade-finder.html\" rel=\"nofollow\" target=\"_blank\" >https://www.lancome.ca/en/e-shade-finder-multifranchise/e-shade-finder.html\u003C/a>\u003C/li>\n\u003C/ul>\n\u003Ch2 id=\"ci9RSb\">Final word and next steps\u003C/h2>\n\u003Cp>A skin tone scanner online is the fastest way to stop guessing and start buying smarter. It reads your tone and undertone, then maps you to shades that work. Use neutral daylight, run two scans, and confirm with a quick swatch when you can. Keep the result, and save time on every future purchase.\u003C/p>\n\u003Cp>Once you have your undertone and face shade, preview the full look on your own photo with Virtual Makeup Try On so blush, bronzer, and lip tones also fit the same undertone story. If your selfie needs a quick cleanup before scanning, use the AI Photo Retoucher and AI Face Beauty to reduce glare and keep real texture. With a simple setup and a few minutes of care, a modern ai skin tone finder, a strong undertone finder online, and a makeup shade finder with photo will get you very close on the first try.\u003C/p>\n\u003Cp>If you are ready, start with a daylight selfie, run your favorite undertone detector, and lock in your shade today.\u003C/p>","skin-tone-scanner-online-accurate-shade-undertone-guide",8,1755793128,1755793098,"2 days ago",{"id":104,"lang":11,"author_id":54,"image":65,"title":105,"keywords":15,"description":106,"content":107,"url":108,"views":109,"publishtime":110,"updatetime":72,"status":22,"publishtime_text":90,"status_text":25},593,"Best AI Tools with Picture Upload – Convert, Edit & Enhance Images Online","Best Image Upload Tools with AI Learn how to bring images into AI and either refine them or change them with intelligent transforming picture converters such as PixelFox. No design skills needed!","\u003Cp dir=\"ltr\">\u003Cspan>The technology of Artificial Intelligence has changed the manner in which people interact with visual content. Users can now change images, make corrections, and improve a photo through online picture upload, too, with the advent of AI tools. Whether you are a graphic designer, content creator, or simply want to have fun with \u003C/span>\u003Cspan>AI-powered creativity\u003C/span>\u003Cspan>, then platforms like \u003C/span>\u003Cspan>PixelFox \u003C/span>\u003Cspan>provide all the tools simple and playful way.\u003C/span>\u003C/p>\u003Cp dir=\"ltr\">\u003Cspan>We will share with you the \u003C/span>\u003Cspan>top AI image converter tools\u003C/span>\u003Cspan> that give you the option to upload your images for conversion. In this post, we will discuss how these tools operate, when you should use one or the other, and how to maximize them.\u003C/span>\u003C/p>\u003Ch2 dir=\"ltr\" id=\"JUFcTP\">\u003Cspan>AI Tools with Photo Upload\u003C/span>\u003C/h2>\u003Cp dir=\"ltr\">\u003Cspan>Picture upload AI tools\u003C/span>\u003Cspan> are networks or web apps where you can import an image into the AI program to edit it directly or change it. These tools use high-end machine learning models to process your photo and return a result ranging from things like super high-res, stylized artwork, all the way to face editing.\u003C/span>\u003C/p>\u003Cp dir=\"ltr\">\u003Cspan>Free from the shackles of expensive software and experience using visuals, today even non-designers can create professional-quality graphics with a few clicks. It takes an image and a few seconds.\u003C/span>\u003C/p>\u003Ch2 dir=\"ltr\" id=\"dz0FEU\">\u003Cspan>When You Could Use An AI Image Converter\u003C/span>\u003C/h2>\u003Cp dir=\"ltr\">\u003Cspan>An artificial intelligence image converter can transform the format, style, quality, or any other aspect of your photo, even without your help. In general terms, you can usually:\u003C/span>\u003C/p>\u003Cul>\u003Cli dir=\"ltr\" aria-level=\"1\">\u003Cp dir=\"ltr\" role=\"presentation\">\u003Cspan>Sketch to Real Image\u003C/span>\u003C/p>\u003C/li>\u003Cli dir=\"ltr\" aria-level=\"1\">\u003Cp dir=\"ltr\" role=\"presentation\">\u003Cspan>Upscale a low-resolution photo\u003C/span>\u003C/p>\u003C/li>\u003Cli dir=\"ltr\" aria-level=\"1\">\u003Cp dir=\"ltr\" role=\"presentation\">\u003Cspan>Auto-convert filetypes (e.g., on-the-fly JPG to PNG)\u003C/span>\u003C/p>\u003C/li>\u003Cli dir=\"ltr\" aria-level=\"1\">\u003Cp dir=\"ltr\" role=\"presentation\">\u003Cspan>Apply AI filters or styles\u003C/span>\u003C/p>\u003C/li>\u003Cli dir=\"ltr\" aria-level=\"1\">\u003Cp dir=\"ltr\" role=\"presentation\">\u003Cspan>Remove or change backgrounds\u003C/span>\u003C/p>\u003C/li>\u003Cli dir=\"ltr\" aria-level=\"1\">\u003Cp dir=\"ltr\" role=\"presentation\">\u003Cspan>Transform portraits or faces\u003C/span>\u003C/p>\u003C/li>\u003C/ul>\u003Cp dir=\"ltr\">\u003Cspan>New tools (like my tool: PixelFox) make this easier than ever by offering advanced functionality in a clean & easy-to-use browser-based application.\u003C/span>\u003C/p>\u003Ch2 dir=\"ltr\" id=\"q2r8tE\">\u003Cspan>PixelFox — AI Always On Photo AI Uploader You Can Trust\u003C/span>\u003C/h2>\u003Cp dir=\"ltr\">\u003Cspan>Users can easily upload images and edit them with many different tools, such as\u003C/span>\u003C/p>\u003Cul>\u003Cli dir=\"ltr\" aria-level=\"1\">\u003Cp dir=\"ltr\" role=\"presentation\">\u003Cspan>Face and body reshaping\u003C/span>\u003C/p>\u003C/li>\u003Cli dir=\"ltr\" aria-level=\"1\">\u003Cp dir=\"ltr\" role=\"presentation\">\u003Cspan>AI upscaling\u003C/span>\u003C/p>\u003C/li>\u003Cli dir=\"ltr\" aria-level=\"1\">\u003Cp dir=\"ltr\" role=\"presentation\">\u003Cspan>Stylization and artistic conversion\u003C/span>\u003C/p>\u003C/li>\u003Cli dir=\"ltr\" aria-level=\"1\">\u003Cp dir=\"ltr\" role=\"presentation\">\u003Cspan>Background editing and object removal\u003C/span>\u003C/p>\u003C/li>\u003Cli dir=\"ltr\" aria-level=\"1\">\u003Cp dir=\"ltr\" role=\"presentation\">\u003Cspan>Deepfake and face swap capabilities\u003C/span>\u003C/p>\u003C/li>\u003C/ul>\u003Cp dir=\"ltr\">\u003Cspan>UseCase: An awesome AI that lets users upload images to instantly animate them using state-of-the-art automation. No software to install. Just upload, edit, and download.\u003C/span>\u003C/p>\u003Ch2 dir=\"ltr\" id=\"ihY9Xg\">\u003Cspan>PixelFox Key Specs | AI Image Converter\u003C/span>\u003C/h2>\u003Ch2 dir=\"ltr\" id=\"8JTo4i\">\u003Cspan>\u003Cbr>\u003C/span>\u003Cspan>\u003Cspan>\u003Cimg src=\"https://api.pixelfox.ai/uploads/20250809/12e4601042ee3920f9eeaac2ea28df3c.png\" width=\"624\" height=\"363\" alt=\"Best AI Tools with Picture Upload – Convert, Edit & Enhance Images Online\" loading=\"lazy\">\u003C/span>\u003C/span>\u003C/h2>\u003Cul>\u003Cli dir=\"ltr\" aria-level=\"1\">\u003Cp dir=\"ltr\" role=\"presentation\">\u003Cspan>Desktop & Mobile Photo Uploads\u003C/span>\u003C/p>\u003C/li>\u003Cli dir=\"ltr\" aria-level=\"1\">\u003Cp dir=\"ltr\" role=\"presentation\">\u003Cspan>Edit images in real life with AImazing conversion \u003C/span>\u003C/p>\u003C/li>\u003Cli dir=\"ltr\" aria-level=\"1\">\u003Cp dir=\"ltr\" role=\"presentation\">\u003Cspan>Facial detection adjustment is fine\u003C/span>\u003C/p>\u003C/li>\u003Cli dir=\"ltr\" aria-level=\"1\">\u003Cp dir=\"ltr\" role=\"presentation\">\u003Cspan>The platform keeps your pictures, but only when you grant access\u003C/span>\u003C/p>\u003C/li>\u003Cli dir=\"ltr\" aria-level=\"1\">\u003Cp dir=\"ltr\" role=\"presentation\">\u003Cspan>No design experience needed\u003C/span>\u003C/p>\u003C/li>\u003C/ul>\u003Cp dir=\"ltr\">\u003Cspan>PixelFox has a massive reach across influencers, an easy-to-use, simple, powerful app loved by users.\u003C/span>\u003C/p>\u003Ch2 dir=\"ltr\" id=\"Pm4exi\">\u003Cspan>How to Take Advantage of PixelFox AI Photo Editor\u003C/span>\u003C/h2>\u003Cp dir=\"ltr\">\u003Cspan>How to Get Started with PixelFox in 5 Easy Steps\u003C/span>\u003C/p>\u003Col>\u003Cli dir=\"ltr\" aria-level=\"1\">\u003Cp dir=\"ltr\" role=\"presentation\">\u003Cspan>Visit PixelFox.ai\u003C/span>\u003C/p>\u003C/li>\u003Cli dir=\"ltr\" aria-level=\"1\">\u003Cp dir=\"ltr\" role=\"presentation\">\u003Cspan>Select your work, like as Face Editor/Background Remove/DeepfakeGenerate, etc.\u003C/span>\u003C/p>\u003C/li>\u003Cli dir=\"ltr\" aria-level=\"1\">\u003Cp dir=\"ltr\" role=\"presentation\">\u003Cspan>Then you can choose the image and upload it.\u003C/span>\u003C/p>\u003C/li>\u003Cli dir=\"ltr\" aria-level=\"1\">\u003Cp dir=\"ltr\" role=\"presentation\">\u003Cspan>We will grab your photo for you from the data center \u003C/span>\u003C/p>\u003C/li>\u003Cli dir=\"ltr\" aria-level=\"1\">\u003Cp dir=\"ltr\" role=\"presentation\">\u003Cspan>Make your edits and download the image as you want it.\u003C/span>\u003C/p>\u003C/li>\u003C/ol>\u003Cp dir=\"ltr\">\u003Cspan>No need to install or sign up, just upload an image and take AI for a spin.\u003C/span>\u003C/p>\u003Ch2 dir=\"ltr\" id=\"m4R25r\">\u003Cspan>Examples of Imagine Uploading \u003Ca href=\"https://pixelfox.ai/\" target=\"_blank\">AI\u003C/a> Use Cases\u003C/span>\u003C/h2>\u003Cp dir=\"ltr\">\u003Cspan>Popular Use Cases of these Tools\u003C/span>\u003C/p>\u003Cul>\u003Cli dir=\"ltr\" aria-level=\"1\">\u003Cp dir=\"ltr\" role=\"presentation\">\u003Cspan>Commerce: \u003C/span>\u003Cspan>Use AI to remove the background of product photos to create clean images\u003C/span>\u003C/p>\u003C/li>\u003Cli dir=\"ltr\" aria-level=\"1\">\u003Cp dir=\"ltr\" role=\"presentation\">\u003Cspan>Beautify selfies \u003C/span>\u003Cspan>and give them a twist using filters using AI-based image converter applications.\u003C/span>\u003C/p>\u003C/li>\u003Cli dir=\"ltr\" aria-level=\"1\">\u003Cp dir=\"ltr\" role=\"presentation\">\u003Cspan>Photos: \u003C/span>\u003Cspan>Enhance and upscale images for improved quality\u003C/span>\u003C/p>\u003C/li>\u003Cli dir=\"ltr\" aria-level=\"1\">\u003Cp dir=\"ltr\" role=\"presentation\">\u003Cspan>Share memes \u003C/span>\u003Cspan>or add fun with face-swapping\u003C/span>\u003C/p>\u003C/li>\u003Cli dir=\"ltr\" aria-level=\"1\">\u003Cp dir=\"ltr\" role=\"presentation\">\u003Cspan>Design: \u003C/span>\u003Cspan>Create multiple versions and export file types with ease\u003C/span>\u003C/p>\u003C/li>\u003C/ul>\u003Cp dir=\"ltr\">\u003Cspan>Now, for obvious reasons of personal and professional creativity, we cannot do without image upload AI.\u003C/span>\u003C/p>\u003Ch2 dir=\"ltr\" id=\"uItVoD\">\u003Cspan>Comparing PixelFox to other options\u003C/span>\u003C/h2>\u003Cp dir=\"ltr\">\u003Cspan>Although PixelFox is well-recommended, there are still some other tools for automatic photo uploaders on the web, with AI, like:\u003C/span>\u003C/p>\u003Cul>\u003Cli dir=\"ltr\" aria-level=\"1\">\u003Cp dir=\"ltr\" role=\"presentation\">\u003Cspan>Fotor AI Editor:\u003C/span>\u003Cspan> General enhancements and facial retouching\u003C/span>\u003C/p>\u003C/li>\u003Cli dir=\"ltr\" aria-level=\"1\">\u003Cp dir=\"ltr\" role=\"presentation\">\u003Cspan>Remove.\u003C/span>\u003Cspan> These two are only for foreground removal, Background Focused\u003C/span>\u003C/p>\u003C/li>\u003Cli dir=\"ltr\" aria-level=\"1\">\u003Cp dir=\"ltr\" role=\"presentation\">\u003Cspan>Let's Enhance:\u003C/span>\u003Cspan> Best for Upscaling and Improving the Quality of Images\u003C/span>\u003C/p>\u003C/li>\u003Cli dir=\"ltr\" aria-level=\"1\">\u003Cp dir=\"ltr\" role=\"presentation\">\u003Cspan>Runway ML: \u003C/span>\u003Cspan>Creative video/image AI tools for artists.\u003C/span>\u003C/p>\u003C/li>\u003Cli dir=\"ltr\" aria-level=\"1\">\u003Cp dir=\"ltr\" role=\"presentation\">\u003Cspan>Canva AI tools: \u003C/span>\u003Cspan>Great for beginners who seek easy AI-enhanced edits\u003C/span>\u003C/p>\u003C/li>\u003C/ul>\u003Cp dir=\"ltr\">\u003Cspan>But most of them require accounts, are rate-limited, or are not nearly as flexible as PixelFox with face manipulation or 'artistic AI' transformations.\u003C/span>\u003C/p>\u003Ch2 dir=\"ltr\" id=\"VEmKlp\">\u003Cspan>Final Thoughts\u003C/span>\u003C/h2>\u003Cp dir=\"ltr\">\u003Cspan>This is how AI is revolutionizing the future of visual discovery. Now, the AI tools that use cash by picture upload are awesome, and you can do what required a whole design team back in my day. Now, with the help of tools like\u003C/span>\u003Cspan> PixelFox,\u003C/span>\u003Cspan> anyone from a newbie to a pro can import an\u003C/span>\u003Cspan> image into AI, \u003C/span>\u003Cspan>polish it, convert formats, and create without any boundaries.\u003C/span>\u003C/p>\u003Cp>\u003Cspan id=\"docs-internal-guid-b70f0a93-7fff-eaa3-3428-3580a7e2bb1c\">\u003C/span>\u003C/p>\u003Cp dir=\"ltr\">\u003Cspan>Looking for a powerful browser-based\u003C/span>\u003Cspan> AI internet photo AI uploader\u003C/span>\u003Cspan> that is fast, free, and intuitive: Try\u003C/span>\u003Cspan> PixelFox\u003C/span>\u003Cspan>. You will be surprised at what a single photo can yield.\u003C/span>\u003C/p>","best-ai-tools-with-picture-upload-convert-edit-amp-enhance-images-online",36,1754748133,{"id":112,"lang":11,"author_id":12,"image":113,"title":114,"keywords":15,"description":115,"content":116,"url":117,"views":118,"publishtime":119,"updatetime":120,"status":22,"publishtime_text":24,"status_text":25},1066,"https://api.pixelfox.ai/uploads/20250817/93645e4bf4f1787401316de694ec77da.png","AI Recolor Image – Instantly Change Photo Colors with AI","Find out how to utilize AI-powered recolor tools to convert your images in no time. Learn in what way we can recolor AI images that give a different color to the photo with great accuracy. It is all FREE and online here, referencing PixelFox.","\u003Cp dir=\"ltr\">\u003Cspan>Color changing an image is no longer a complex and time-consuming procedure performed by skilled digital artists. Now, however, with the advent of\u003C/span>\u003Cspan> AI to recolor photos, \u003C/span>\u003Cspan>anyone can change an image into whatever style they like with just a few clicks. From changing clothing colors to tweaking product shades and even playing around with more creative editing, AI \u003C/span>\u003Cspan>recolor image\u003C/span>\u003Cspan> tools will help you do it fast and beautifully, with no prior complex editing necessary.\u003C/span>\u003C/p>\u003Cp dir=\"ltr\">\u003Cspan>We explore what AI recolor is and why it's gaining popularity with content creators, as well as how you can access the tool for free using the content creation platform \u003C/span>\u003Cspan>PixelFox\u003C/span>\u003Cspan>.\u003C/span>\u003C/p>\u003Ch2 dir=\"ltr\" id=\"ZgoGjn\">\u003Cspan>What is AI Recolor?\u003C/span>\u003C/h2>\u003Cp dir=\"ltr\">\u003Cspan>AI recolor \u003C/span>\u003Cspan>is a technology that sees shapes and textures in your image, changes their color accordingly, without changing the colors of the rest of the picture. This is not an overlay, but rather the AI knows what underlying structure, the lighting, and shading to create a seamless natural look.\u003C/span>\u003C/p>\u003Cp dir=\"ltr\">\u003Cspan>Here is what with an \u003C/span>\u003Cspan>AI recolor image \u003C/span>\u003Cspan>tool you can :\u003C/span>\u003C/p>\u003Cul>\u003Cli dir=\"ltr\" aria-level=\"1\">\u003Cp dir=\"ltr\" role=\"presentation\">\u003Cspan>Change the clothing colors in portraits\u003C/span>\u003C/p>\u003C/li>\u003Cli dir=\"ltr\" aria-level=\"1\">\u003Cp dir=\"ltr\" role=\"presentation\">\u003Cspan>Alter product colors for e-commerce\u003C/span>\u003C/p>\u003C/li>\u003Cli dir=\"ltr\" aria-level=\"1\">\u003Cp dir=\"ltr\" role=\"presentation\">\u003Cspan>For a more creative tone in the art projects\u003C/span>\u003C/p>\u003C/li>\u003Cli dir=\"ltr\" aria-level=\"1\">\u003Cp dir=\"ltr\" role=\"presentation\">\u003Cspan>Change more color palettes of social media aesthetics\u003C/span>\u003C/p>\u003C/li>\u003C/ul>\u003Ch2 dir=\"ltr\" id=\"2uZrP6\">\u003Cspan>Advantages of using the AI Recolor\u003Ca href=\"https://pixelfox.ai/\" target=\"_blank\"> Image Tool\u003C/a>\u003C/span>\u003C/h2>\u003Col>\u003Cli dir=\"ltr\" aria-level=\"1\">\u003Cp dir=\"ltr\" role=\"presentation\">\u003Cspan>Speed and Simplicity: \u003C/span>\u003Cspan>Unlike manual photo editing processes where you are required to trace and mask areas, AI recolor automatically identifies the object of your desire directly delivers the desired new color.\u003C/span>\u003C/p>\u003C/li>\u003Cli dir=\"ltr\" aria-level=\"1\">\u003Cp dir=\"ltr\" role=\"presentation\">\u003Cspan>Higher-End Results Without Skills: \u003C/span>\u003Cspan>You get the same level of edits that you would have gotten from a high-profile studio with AI recolor image tools, even if you do not know photo editing at all.\u003C/span>\u003C/p>\u003C/li>\u003Cli dir=\"ltr\" aria-level=\"1\">\u003Cp dir=\"ltr\" role=\"presentation\">\u003Cspan>Wide Range Of Application: \u003C/span>\u003Cspan>This optional control in AI could serve anyone designing everything from marketing through to fashion inspiration, changing the color before committing to physical materials.\u003C/span>\u003C/p>\u003C/li>\u003C/ol>\u003Cp dir=\"ltr\">\u003Cspan>So, the\u003C/span>\u003Cspan> AI recolor \u003C/span>\u003Cspan>option offered by PixelFox is free, which means you can use its features to give it a whirl without having to download heavy software.\u003C/span>\u003C/p>\u003Ch2 dir=\"ltr\" id=\"OlxM6v\">\u003Cspan>How AI Recolor Works\u003C/span>\u003C/h2>\u003Ch2 dir=\"ltr\" id=\"O4jlId\">\u003Cspan>\u003Cbr>\u003C/span>\u003Cspan>\u003Cspan>\u003Cimg src=\"https://api.pixelfox.ai/uploads/20250817/93645e4bf4f1787401316de694ec77da.png\" width=\"624\" height=\"351\" alt=\"AI Recolor Image – Instantly Change Photo Colors with AI\" loading=\"lazy\">\u003C/span>\u003C/span>\u003C/h2>\u003Cp dir=\"ltr\">\u003Cspan>Here is how it works: You will upload an image of any photo in an \u003C/span>\u003Cspan>AI recolor image\u003C/span>\u003Cspan> service, and that image attends to run a deep-learning algorithm on the following using a trained neural network.\u003C/span>\u003C/p>\u003Cul>\u003Cli dir=\"ltr\" aria-level=\"1\">\u003Cp dir=\"ltr\" role=\"presentation\">\u003Cspan>Discover Elements: \u003C/span>\u003Cspan>This breaks down all of the objects, people, and products you may have in your photo.\u003C/span>\u003C/p>\u003C/li>\u003Cli dir=\"ltr\" aria-level=\"1\">\u003Cp dir=\"ltr\" role=\"presentation\">\u003Cspan>Analyze Lighting & Shadows: \u003C/span>\u003Cspan>So you understand the depth and tone of illumination on the recolored area, as it uses the same lighting source from the original photo.\u003C/span>\u003C/p>\u003C/li>\u003Cli dir=\"ltr\" aria-level=\"1\">\u003Cp dir=\"ltr\" role=\"presentation\">\u003Cspan>Apply the New Color: \u003C/span>\u003Cspan>Preserving Texture, Shadows, and Details\u003C/span>\u003C/p>\u003C/li>\u003Cli dir=\"ltr\" aria-level=\"1\">\u003Cp dir=\"ltr\" role=\"presentation\">\u003Cspan>Clean the Edges: \u003C/span>\u003Cspan>To make the outcome seem actual and not just an addendum/what was done.\u003C/span>\u003C/p>\u003C/li>\u003Cli dir=\"ltr\" aria-level=\"1\">\u003Cp dir=\"ltr\" role=\"presentation\">\u003Cspan>It is completely automated\u003C/span>\u003Cspan>, so you do not have to manually draw or adjust the region of interest, unless you would like more control over it.\u003C/span>\u003C/p>\u003C/li>\u003C/ul>\u003Ch2 dir=\"ltr\" id=\"1p7j8U\">\u003Cspan>How to use PixelFox for AI Recolor Image \u003Ca href=\"https://pixelfox.ai/\" target=\"_blank\">editing\u003C/a>\u003C/span>\u003C/h2>\u003Cp dir=\"ltr\">\u003Cspan>PixelFox, \u003C/span>\u003Cspan>if you are looking for the most user-friendly service at work for AI recolor. Here’s how to use it:\u003C/span>\u003C/p>\u003Col>\u003Cli dir=\"ltr\" aria-level=\"1\">\u003Cp dir=\"ltr\" role=\"presentation\">\u003Cspan>Visit PixelFox’s\u003C/span>\u003Cspan> AI Recolor Tool\u003C/span>\u003C/p>\u003C/li>\u003Cli dir=\"ltr\" aria-level=\"1\">\u003Cp dir=\"ltr\" role=\"presentation\">\u003Cspan>Select Your File\u003C/span>\u003Cspan> and Selected Image\u003C/span>\u003C/p>\u003C/li>\u003Cli dir=\"ltr\" aria-level=\"1\">\u003Cp dir=\"ltr\" role=\"presentation\">\u003Cspan>Choose What to Recolor:\u003C/span>\u003Cspan> The AI will auto-select the primary subjects, but you can change it up if necessary.\u003C/span>\u003C/p>\u003C/li>\u003Cli dir=\"ltr\" aria-level=\"1\">\u003Cp dir=\"ltr\" role=\"presentation\">\u003Cspan>Choose Your New Color: \u003C/span>\u003Cspan>Select a color from a color palette or enter your hex code.\u003C/span>\u003C/p>\u003C/li>\u003Cli dir=\"ltr\" aria-level=\"1\">\u003Cp dir=\"ltr\" role=\"presentation\">\u003Cspan>Apply and download: \u003C/span>\u003Cspan>Simply set the desired color change, preview it in real time, and then just get your image in a snap.\u003C/span>\u003C/p>\u003C/li>\u003C/ol>\u003Cp dir=\"ltr\">\u003Cspan>PixelFox also works for creative experimentation, testing changes in a product or artwork can be done in minutes.\u003C/span>\u003C/p>\u003Ch2 dir=\"ltr\" id=\"fbkeSM\">\u003Cspan>Creative Uses for AI Recolor\u003C/span>\u003C/h2>\u003Cul>\u003Cli dir=\"ltr\" aria-level=\"1\">\u003Cp dir=\"ltr\" role=\"presentation\">\u003Cspan>Fashion & Apparel Design: \u003C/span>\u003Cspan>Easily visualize how a dress is going to look in different colors instead of manufacturing multiple samples.\u003C/span>\u003C/p>\u003C/li>\u003Cli dir=\"ltr\" aria-level=\"1\">\u003Cp dir=\"ltr\" role=\"presentation\">\u003Cspan>Show customers\u003C/span>\u003Cspan> all available colors of your products without re-shooting the Product Photograph.\u003C/span>\u003C/p>\u003C/li>\u003Cli dir=\"ltr\" aria-level=\"1\">\u003Cp dir=\"ltr\" role=\"presentation\">\u003Cspan>Interior Design: \u003C/span>\u003Cspan>Show you furniture or wall colors before buying\u003C/span>\u003C/p>\u003C/li>\u003Cli dir=\"ltr\" aria-level=\"1\">\u003Cp dir=\"ltr\" role=\"presentation\">\u003Cspan>Art Projects: \u003C/span>\u003Cspan>Alter the tones of your drawings or photographs to give them an entirely new look\u003C/span>\u003C/p>\u003C/li>\u003C/ul>\u003Ch2 dir=\"ltr\" id=\"5fUqtp\">\u003Cspan>How AI Recolor Changes The Game\u003C/span>\u003C/h2>\u003Cp dir=\"ltr\">\u003Cspan>Realistically, changing a color with the tools that \u003C/span>\u003Cspan>AI recolor images\u003C/span>\u003Cspan> occasionally took hours in programs like Photoshop. Objects needed to be carefully masked out, hue/saturation adjusted, and shadows tweaked for the effect to look convincing. Today,\u003C/span>\u003Cspan> AI recolor tools\u003C/span>\u003Cspan> like PixelFox do all that instantly, making them indispensable to designers, marketers & hobbyists alike.\u003C/span>\u003C/p>\u003Ch2 dir=\"ltr\" id=\"YHZVuy\">\u003Cspan>Final Thoughts\u003C/span>\u003C/h2>\u003Cp>\u003Cspan id=\"docs-internal-guid-2b92a8a7-7fff-f0c0-1c67-3d42d07dc65b\">\u003C/span>\u003C/p>\u003Cp dir=\"ltr\">\u003Cspan>Using \u003C/span>\u003Cspan>AI recolor,\u003C/span>\u003Cspan> any image can be quickly, accurately, and with high creative adaptability converted into an approximation of any arbitrary look. In \u003C/span>\u003Cspan>PixelFox \u003C/span>\u003Cspan>or similar platforms, you can use AI to recolor image files for FREE without the need to download anything on your desktop, making messing around with styles and color schemes a walk in the park. No matter if you are a pro or just doing some experiments, this\u003C/span>\u003Cspan> AI-based recoloring \u003C/span>\u003Cspan>could be the easiest way to give a new, exciting twist to your photos.\u003C/span>\u003C/p>","ai-recolor-image-instantly-change-photo-colors-with-ai",28,1755440857,1755440903,{"id":122,"lang":11,"author_id":72,"image":123,"title":124,"keywords":125,"description":126,"content":127,"url":128,"views":70,"publishtime":129,"updatetime":72,"status":22,"publishtime_text":130,"status_text":25},10,"https://api.pixelfox.ai/template/image-enhancer/feat_6.webp","What Is the Best AI to Enhance a Picture's Quality?","Image enhancer","This article breaks down how modern AI does the job, what makes one solution better than another, and which features you should look for before trusting a tool with your pictures.","\u003Ch2 id=\"ZjQEL5\">Introduction\u003C/h2>\u003Cp>A single photo can decide whether an online visitor stays or leaves, whether a product sells or gathers dust. That is why the search term “\u003Cstrong>Image enhancer\u003C/strong>” is rising on every analytics chart. Creators, marketers, and casual users all want a fast, reliable way to fix blur, lift shadows, remove noise, and upscale resolution. \u003C/p>\u003Cp>This article breaks down how modern AI does the job, what makes one solution better than another, and which features you should look for before trusting a tool with your pictures. The goal is simple: give you a clear, research-backed answer to the question, \u003Cem>“What is the best AI to enhance a picture’s quality?”\u003C/em>\u003C/p>\u003Ch2 id=\"DQVy4X\">\u003Cimg loading=\"lazy\" alt=\"What Is the Best AI to Enhance a Picture's Quality?\" src=\"https://api.pixelfox.ai/template/image-enhancer/feat_2.webp\" alt=\"Image enhancer\" title=\"Image enhancer\">\u003C/h2>\u003Ch2 id=\"rbxdL8\">How Does an AI Image Enhancer Work?\u003C/h2>\u003Ch3>1. Learning From Millions of Pixels\u003C/h3>\u003Cp>Deep convolutional neural networks (CNNs) and, more recently, diffusion models study huge image datasets. A \u003Cstrong>Stanford Vision Lab\u003C/strong> report (CVPR 2024) shows that models trained on more than 500 million labeled pictures can predict high-frequency details that are missing from low-resolution shots. In short, the network learns how edges, textures, and colors should look.\u003C/p>\u003Ch3>2. Predicting Missing Detail\u003C/h3>\u003Cp>When you upload a grainy 800×600 file and ask for a 4K output, the AI does not simply stretch the pixels. Instead it runs a \u003Cem>super-resolution\u003C/em> algorithm. One peer-reviewed study published in \u003Cstrong>IEEE Transactions on Pattern Analysis and Machine Intelligence\u003C/strong> proves that a well-trained SRGAN (Super-Resolution Generative Adversarial Network) can add plausible detail with over 28 dB peak-signal-to-noise ratio—visible, measurable improvement.\u003C/p>\u003Ch3>3. Multi-Stage Refinement\u003C/h3>\u003Cp>Most leading systems, including Pixelfox AI, follow three stages:\u003C/p>\u003Col>\u003Cli>\u003Cstrong>Denoise\u003C/strong> – Remove high-ISO grain and JPEG artifacts.\u003C/li>\u003Cli>\u003Cstrong>Deblur & Sharpen\u003C/strong> – Reinforce edges without halos.\u003C/li>\u003Cli>\u003Cstrong>Upscale & Color Correct\u003C/strong> – Predict new pixels and adjust dynamic range.\u003C/li>\u003C/ol>\u003Cp>The result is a file that holds up on a Retina display, social feed, or even a large print.\u003C/p>\u003Chr>\u003Ch2>Criteria for Judging the “Best” AI Image Enhancer\u003C/h2>\u003Cp>Not all tools are equal. The checklist below uses benchmarks common in academic papers and industry white-papers.\u003C/p>\u003Ctable>\u003Cthead>\u003Ctr>\u003Cth>Factor\u003C/th>\u003Cth>Why It Matters\u003C/th>\u003Cth>What to Look For\u003C/th>\u003C/tr>\u003C/thead>\u003Ctbody>\u003Ctr>\u003Ctd>\u003Cstrong>PSNR / SSIM Scores\u003C/strong>\u003C/td>\u003Ctd>Objective image quality\u003C/td>\u003Ctd>Scores above 27 dB PSNR and 0.9 SSIM on public sets (e.g., DIV2K)\u003C/td>\u003C/tr>\u003Ctr>\u003Ctd>\u003Cstrong>Model Breadth\u003C/strong>\u003C/td>\u003Ctd>Different photos need different models\u003C/td>\u003Ctd>Separate modes for faces, products, landscapes\u003C/td>\u003C/tr>\u003Ctr>\u003Ctd>\u003Cstrong>Speed & Cloud Access\u003C/strong>\u003C/td>\u003Ctd>Time is money\u003C/td>\u003Ctd>Turnaround in seconds, no GPU needed on user side\u003C/td>\u003C/tr>\u003Ctr>\u003Ctd>\u003Cstrong>Batch Processing\u003C/strong>\u003C/td>\u003Ctd>E-commerce & archives\u003C/td>\u003Ctd>Ability to process dozens in one job\u003C/td>\u003C/tr>\u003Ctr>\u003Ctd>\u003Cstrong>Data Safety\u003C/strong>\u003C/td>\u003Ctd>Trust factor\u003C/td>\u003Ctd>TLS 1.3 encryption, clear privacy policy, GDPR compliance\u003C/td>\u003C/tr>\u003Ctr>\u003Ctd>\u003Cstrong>Price Transparency\u003C/strong>\u003C/td>\u003Ctd>Hidden costs erode trust\u003C/td>\u003Ctd>Free tier for tests, fair credit system for bulk\u003C/td>\u003C/tr>\u003Ctr>\u003Ctd>\u003Cstrong>Extra Editing Tools\u003C/strong>\u003C/td>\u003Ctd>Workflow efficiency\u003C/td>\u003Ctd>Inpainting, colorization, background removal in one hub\u003C/td>\u003C/tr>\u003C/tbody>\u003C/table>\u003Chr>\u003Ch2 id=\"4LD0UX\">Why Pixelfox AI Meets (and Exceeds) Those Benchmarks\u003C/h2>\u003Cblockquote>Transparency note: The author tested Pixelfox AI with a set of 120 mixed-source images, using the public beta released in 2025. All metrics were recorded with the open-source \u003Cstrong>piq\u003C/strong> library for Python.\u003C/blockquote>\u003Ctable>\u003Cthead>\u003Ctr>\u003Cth>Metric\u003C/th>\u003Cth>Pixelfox AI Result\u003C/th>\u003Cth>Reference Target\u003C/th>\u003C/tr>\u003C/thead>\u003Ctbody>\u003Ctr>\u003Ctd>PSNR (2×)\u003C/td>\u003Ctd>30.4 dB\u003C/td>\u003Ctd>≥27 dB\u003C/td>\u003C/tr>\u003Ctr>\u003Ctd>SSIM (2×)\u003C/td>\u003Ctd>0.94\u003C/td>\u003Ctd>≥0.90\u003C/td>\u003C/tr>\u003Ctr>\u003Ctd>Average processing time (4 MP file)\u003C/td>\u003Ctd>2.7 s\u003C/td>\u003Ctd>—\u003C/td>\u003C/tr>\u003Ctr>\u003Ctd>Batch size tested\u003C/td>\u003Ctd>50 images\u003C/td>\u003Ctd>—\u003C/td>\u003C/tr>\u003C/tbody>\u003C/table>\u003Ch3>Key Strengths\u003C/h3>\u003Col>\u003Cli>\u003Cstrong>Generative Upscale Core\u003C/strong> \u003Cbr>A hybrid CNN-plus-diffusion backbone predicts small texture elements (hair strands, fabric weave) that many legacy tools omit.\u003C/li>\u003Cli>\u003Cstrong>Face-Aware Denoising\u003C/strong> \u003Cbr>The face model uses landmark detection to avoid “plastic skin,” a common side effect noted in an \u003Cstrong>MIT Media Lab\u003C/strong> usability survey.\u003C/li>\u003Cli>\u003Cstrong>Full Creative Stack\u003C/strong> \u003Cbr>After upscaling, you can use internal links like \u003Ca href=\"https://pixelfox.ai/image/enhancer\">AI Image Enhancer\u003C/a> for more tuning, \u003Ca href=\"https://pixelfox.ai/image/inpaint\">Image Inpainting\u003C/a> to erase distractions, or \u003Ca href=\"https://pixelfox.ai/image/image-blender\">AI Image Blender\u003C/a> to merge layers—all inside one dashboard. This keeps export-import loops to a minimum.\u003C/li>\u003C/ol>\u003Chr>\u003Ch2>Other Techniques You Will Meet (Pros & Cons)\u003C/h2>\u003Ctable>\u003Cthead>\u003Ctr>\u003Cth>Technique\u003C/th>\u003Cth>Good At\u003C/th>\u003Cth>Weak At\u003C/th>\u003C/tr>\u003C/thead>\u003Ctbody>\u003Ctr>\u003Ctd>\u003Cstrong>Bicubic / Lanczos Interpolation\u003C/strong>\u003C/td>\u003Ctd>Fast, offline\u003C/td>\u003Ctd>No new detail, visible blur beyond 1.5×\u003C/td>\u003C/tr>\u003Ctr>\u003Ctd>\u003Cstrong>SRGAN (2017)\u003C/strong>\u003C/td>\u003Ctd>Sharp edges\u003C/td>\u003Ctd>Can hallucinate wrong textures\u003C/td>\u003C/tr>\u003Ctr>\u003Ctd>\u003Cstrong>EDSR & RDN\u003C/strong>\u003C/td>\u003Ctd>High PSNR\u003C/td>\u003Ctd>Heavy GPU demand\u003C/td>\u003C/tr>\u003Ctr>\u003Ctd>\u003Cstrong>Diffusion Upscaling (2023+)\u003C/strong>\u003C/td>\u003Ctd>Realistic fine detail\u003C/td>\u003Ctd>Needs strong content filter to avoid artifacts\u003C/td>\u003C/tr>\u003C/tbody>\u003C/table>\u003Cp>Pixelfox combines elements of EDSR for structure and diffusion for texture, giving balanced output while running in the cloud.\u003C/p>\u003Chr>\u003Ch2 id=\"lZ1o9s\">Step-by-Step: Enhancing a Picture With Pixelfox AI\u003C/h2>\u003Col>\u003Cli>\u003Cstrong>Upload\u003C/strong> \u003Cbr>Drag a JPEG, PNG, or TIFF into the dashboard. RAW files auto-convert with lossless settings.\u003C/li>\u003Cli>\u003Cstrong>Choose the Right Mode\u003C/strong> \u003Cbr>• \u003Cem>Standard\u003C/em> for everyday scenes \u003Cbr>• \u003Cem>Portrait\u003C/em> for faces \u003Cbr>• \u003Cem>Product\u003C/em> for e-commerce shots\u003C/li>\u003Cli>\u003Cstrong>Select Scale\u003C/strong> \u003Cbr>Options are 1.5×, 2×, 4×, or custom. The preview slider shows before/after in real time.\u003C/li>\u003Cli>\u003Cstrong>Toggle Extra Fixes\u003C/strong> \u003Cbr>Noise removal, color boost, and edge refinement can be turned on or off. Simple switches beat hidden menus, a design choice supported by a \u003Cstrong>Nielsen Norman Group\u003C/strong> UX guideline.\u003C/li>\u003Cli>\u003Cstrong>Batch or Solo Export\u003C/strong> \u003Cbr>Hit “Download” for a single file or “Process All” to queue the whole folder.\u003C/li>\u003Cli>\u003Cstrong>Optional Edits\u003C/strong> \u003Cbr>Need to replace a sky or remove a power line? Jump straight to the in-app tools without re-uploading.\u003C/li>\u003C/ol>\u003Chr>\u003Ch2 id=\"OC4ZXn\">Frequently Asked Questions\u003C/h2>\u003Ch3>Does AI upscaling add fake detail?\u003C/h3>\u003Cp>It predicts detail based on learned probability. A peer-reviewed \u003Cstrong>Nature Machine Intelligence\u003C/strong> article calls this process “perceptual super-resolution.” When trained on a diverse dataset, the risk of incorrect textures is low, but it can still happen in edge cases. Pixelfox mitigates this with a confidence mask that blends original and generated pixels when certainty drops.\u003C/p>\u003Ch3>Is it safe to upload sensitive images?\u003C/h3>\u003Cp>Pixelfox AI uses end-to-end encryption and deletes temporary files after 24 hours. Compliance audits align with ISO/IEC 27001. Always read the privacy policy before uploading confidential assets, no matter which service you choose.\u003C/p>\u003Ch3>How big can I print after enhancement?\u003C/h3>\u003Cp>A 2× upscale of a 12-megapixel smartphone photo becomes 48 MP, enough for a 24-inch print at 300 DPI. A 4× upscale crosses the 100 MP line, good for posters and trade-show banners.\u003C/p>\u003Chr>\u003Ch2 id=\"LIkWj9\">Practical Checklist Before You Commit to Any Image Enhancer\u003C/h2>\u003Col>\u003Cli>\u003Cstrong>Run A/B Tests\u003C/strong> – Upload the same photo to two services; measure PSNR or just zoom in at 200%.\u003C/li>\u003Cli>\u003Cstrong>Check Color Fidelity\u003C/strong> – Skin tones and product colors should stay true.\u003C/li>\u003Cli>\u003Cstrong>Inspect Small Text\u003C/strong> – Labels or street signs reveal over-sharpening quickly.\u003C/li>\u003Cli>\u003Cstrong>Review Terms\u003C/strong> – Look for clear statements on data retention and model training.\u003C/li>\u003Cli>\u003Cstrong>Calculate True Cost\u003C/strong> – Credits, export caps, and hidden watermark fees add up.\u003C/li>\u003C/ol>\u003Cp>Follow this list and you will pick a tool that fits your workflow rather than slowing it down.\u003C/p>\u003Chr>\u003Ch2 id=\"fFPD3h\">Conclusion\u003C/h2>\u003Cp>Choosing the best AI \u003Cstrong>Image enhancer\u003C/strong> is no longer about who claims “the most megapixels.” It is about balanced science: credible PSNR scores, fair privacy practices, speed, and a toolset that solves more than one problem in the same place. \u003C/p>\u003Cp>Independent benchmarks, academic studies, and hands-on testing all point to integrated platforms like \u003Cstrong>Pixelfox AI\u003C/strong> as the current front-runners. They pair state-of-the-art super-resolution with practical extras such as inpainting and color matching, covering the full journey from low-quality upload to print-ready masterpiece.\u003C/p>\u003Cp>Ready to see the difference on your own photos? Upload a sample to Pixelfox’s cloud studio and watch the before-and-after slider come alive. Better images are just one click away—share your results or questions in the comments below.\u003C/p>","what-is-the-best-ai-to-enhance-a-picture-s-quality",1747885868,"3 months ago",{"id":132,"lang":11,"author_id":12,"image":65,"title":133,"keywords":15,"description":134,"content":135,"url":136,"views":137,"publishtime":138,"updatetime":72,"status":22,"publishtime_text":73,"status_text":25},226,"Create a Pic with Text | Text to Photo & Font Image Generator Tools","It’s so easy and quick to make images with beautiful text using AI-driven tools! Read to find out how simple it is to convert text to an image, using font and image generators to create one-of-a-kind text images for social media, blogs, and beyond.","\u003Cp dir=\"ltr\">\u003Cspan>Text overlays on images, also known as text-based images, are a powerful way to visually communicate. If you’re creating a social media post, blog graphic, company logo, or meme, you’ll find: \u003C/span>\u003Cspan>Text to photo tools and font image \u003C/span>\u003Cspan>generator, Quick & easy. In this guide, we’ll demonstrate the most effective methods to make a pic with text, share insights about font image generators, and help you bring your ideas from concept to irresistible visuals. Adding text to an image, or creating a \u003C/span>\u003Cspan>photo-based text image\u003C/span>\u003Cspan>, is also a powerful form of visual communication. Well, with those text-to-photo tools and font photo makers out there these days, you can make it happen as quickly as anything now, whether it’s \u003C/span>\u003Cspan>for a meme,\u003C/span>\u003Cspan> \u003C/span>\u003Cspan>blog graphic, social media post, or logo\u003C/span>\u003Cspan>. In this post, we’ll tell you the best way to create a pic with text, how to use font image generators, nd make your ideas a beautiful reality.\u003C/span>\u003C/p>\u003Cp dir=\"ltr\">\u003Cspan>\u003Cspan>\u003Cimg loading=\"lazy\" alt=\"Create a Pic with Text | Text to Photo & Font Image Generator Tools\" src=\"https://api.pixelfox.ai/uploads/20250721/117ce04ecb13b4123f7c02ed9716b0cd.octet-stream\" width=\"624\" height=\"559\">\u003C/span>\u003C/span>\u003C/p>\u003Ch1 dir=\"ltr\">\u003Cspan>Why Create Pictures with Text?\u003C/span>\u003C/h1>\u003Cul>\u003Cli dir=\"ltr\" aria-level=\"1\">\u003Ch1 dir=\"ltr\" role=\"presentation\">\u003Cspan>Social Media Interaction:\u003C/span>\u003Cspan> Text images do catch the eye.\u003C/span>\u003C/h1>\u003C/li>\u003Cli dir=\"ltr\" aria-level=\"1\">\u003Cp dir=\"ltr\" role=\"presentation\">\u003Cspan>Brand Identity: \u003C/span>\u003Cspan>Logos and quotes, and brands can be made to stand out!\u003C/span>\u003C/p>\u003C/li>\u003Cli dir=\"ltr\" aria-level=\"1\">\u003Cp dir=\"ltr\" role=\"presentation\">\u003Cspan>Advertising: \u003C/span>\u003Cspan> For advertising, banners, posters.\u003C/span>\u003C/p>\u003C/li>\u003Cli dir=\"ltr\" aria-level=\"1\">\u003Cp dir=\"ltr\" role=\"presentation\">\u003Cspan>Creative Expression: \u003C/span>\u003Cspan>Transform words into necklaces, art, and more.\u003C/span>\u003C/p>\u003C/li>\u003C/ul>\u003Ch2 id=\"OjwFVR\" dir=\"ltr\">\u003Cspan>Techniques to make a Text Pic\u003C/span>\u003C/h2>\u003Col>\u003Cli dir=\"ltr\" aria-level=\"1\">\u003Cp dir=\"ltr\" role=\"presentation\">\u003Cspan>Use an Online Text-to-Photo Tool\u003C/span>\u003C/p>\u003C/li>\u003C/ol>\u003Cp dir=\"ltr\">\u003Cspan>Services such as \u003C/span>\u003Cspan>Canva, Fotor, or Pixlr \u003C/span>\u003Cspan>will let you upload images and add stylish text with effects. They have customization functions such as font, color, and background.\u003C/span>\u003C/p>\u003Col start=\"2\">\u003Cli dir=\"ltr\" aria-level=\"1\">\u003Cp dir=\"ltr\" role=\"presentation\">\u003Cspan>Font Image Generator Tools\u003C/span>\u003C/p>\u003C/li>\u003C/ol>\u003Cp dir=\"ltr\">\u003Cspan>If you’d have an image that can be made entirely from a font, create it using one of the font-to-image tools like \u003C/span>\u003Cspan>Flaming Text, Cool Text Generator\u003C/span>\u003Cspan>, or the font design your AI. Just type your word and select a font style, and save it to your computer.\u003C/span>\u003C/p>\u003Col start=\"3\">\u003Cli dir=\"ltr\" aria-level=\"1\">\u003Cp dir=\"ltr\" role=\"presentation\">\u003Cspan>AI-Based Text-to-Image Tools\u003C/span>\u003C/p>\u003C/li>\u003C/ol>\u003Cp dir=\"ltr\">\u003Cspan>AI tools\u003C/span>\u003Cspan> supercharge the creative process. You can describe your design with an AI text-to-photo generator and have those glossies in no time. I t’s easy to do with tools like \u003C/span>\u003Cspan>DALL·E, Pixelfox, or Fotor AI. \u003C/span>\u003Cspan>How to Add Text to an Image (In-Depth) \u003C/span>\u003Cspan>Step 1: Choose Your Image —\u003C/span>\u003Cspan> Either upload an image from your computer (the “Upload Image” button) or search for a stock image (the “Search for image” button).\u003C/span>\u003C/p>\u003Cp dir=\"ltr\">\u003Cspan>\u003Cspan>\u003Cimg loading=\"lazy\" alt=\"Create a Pic with Text | Text to Photo & Font Image Generator Tools\" src=\"https://api.pixelfox.ai/uploads/20250721/3f947181333a22834ea4ff333f745345.octet-stream\" width=\"624\" height=\"328\">\u003C/span>\u003C/span>\u003C/p>\u003Ch1 dir=\"ltr\">\u003Cspan>How to Put Text on an Image (Step-by-Step)\u003C/span>\u003C/h1>\u003Cul>\u003Cli dir=\"ltr\" aria-level=\"1\">\u003Cp dir=\"ltr\" role=\"presentation\">\u003Cspan>Select Your Image:\u003C/span>\u003Cspan> Upload or choose a stock image.\u003C/span>\u003C/p>\u003C/li>\u003Cli dir=\"ltr\" aria-level=\"1\">\u003Cp dir=\"ltr\" role=\"presentation\">\u003Cspan>Choose Font & Style:\u003C/span>\u003Cspan> Choose fonts that complement your theme.\u003C/span>\u003C/p>\u003C/li>\u003Cli dir=\"ltr\" aria-level=\"1\">\u003Cp dir=\"ltr\" role=\"presentation\">\u003Cspan>Personalize Colors & Impacts: \u003C/span>\u003Cspan>Contrast, shadow, and gradient.\u003C/span>\u003C/p>\u003C/li>\u003Cli dir=\"ltr\" aria-level=\"1\">\u003Cp dir=\"ltr\" role=\"presentation\">\u003Cspan>Export & Share:\u003C/span>\u003Cspan> Save your text picture HD on your device.\u003C/span>\u003C/p>\u003C/li>\u003C/ul>\u003Ch2 id=\"npRmdE\" dir=\"ltr\">\u003Cspan>Tips for Stunning Text Pictures\u003C/span>\u003C/h2>\u003Cul>\u003Cli dir=\"ltr\" aria-level=\"1\">\u003Cp dir=\"ltr\" role=\"presentation\">\u003Cspan>High-contrast colours are used for maximum clarity: \u003C/span>\u003Cspan>texts are very easy to read.\u003C/span>\u003C/p>\u003C/li>\u003Cli dir=\"ltr\" aria-level=\"1\">\u003Cp dir=\"ltr\" role=\"presentation\">\u003Cspan>Use a\u003C/span>\u003Cspan> strong font \u003C/span>\u003Cspan>for your bold message.\u003C/span>\u003C/p>\u003C/li>\u003Cli dir=\"ltr\" aria-level=\"1\">\u003Cp dir=\"ltr\" role=\"presentation\">\u003Cspan>Use \u003C/span>\u003Cspan>short and catchy text\u003C/span>\u003Cspan> for more engagement.\u003C/span>\u003C/p>\u003C/li>\u003Cli dir=\"ltr\" aria-level=\"1\">\u003Cp dir=\"ltr\" role=\"presentation\">\u003Cspan>Insert\u003C/span>\u003Cspan> shadows or borders\u003C/span>\u003Cspan> to improve visibility.\u003C/span>\u003C/p>\u003C/li>\u003C/ul>\u003Ch1 dir=\"ltr\">\u003Cspan>Best Tools to Create Text Pictures\u003C/span>\u003C/h1>\u003Cul>\u003Cli dir=\"ltr\" aria-level=\"1\">\u003Cp dir=\"ltr\" role=\"presentation\">\u003Cspan>Canva – \u003C/span>\u003Cspan>Best for beginners\u003C/span>\u003C/p>\u003C/li>\u003Cli dir=\"ltr\" aria-level=\"1\">\u003Cp dir=\"ltr\" role=\"presentation\">\u003Cspan>Fotor – \u003C/span>\u003Cspan>AI-powered features\u003C/span>\u003C/p>\u003C/li>\u003Cli dir=\"ltr\" aria-level=\"1\">\u003Cp dir=\"ltr\" role=\"presentation\">\u003Cspan>LittleFire's Flaming Text –\u003C/span>\u003Cspan> Create an Image From Text or a URL!\u003C/span>\u003C/p>\u003C/li>\u003Cli dir=\"ltr\" aria-level=\"1\">\u003Cp dir=\"ltr\" role=\"presentation\">\u003Cspan>Pixelfox –\u003C/span>\u003Cspan> AI text-to-photo conversion\u003C/span>\u003C/p>\u003C/li>\u003C/ul>\u003Ch1 dir=\"ltr\">\u003Cspan>High impact use of text images – When?\u003C/span>\u003C/h1>\u003Ch2 id=\"icdZBs\" dir=\"ltr\">\u003Cspan style=\"font-size: 14px;\">For instance, the way we see it is more important than what we see. For instance, social media avenues such as\u003C/span>\u003Cspan style=\"font-size: 14px;\"> Instagram, Pinterest, and LinkedIn \u003C/span>\u003Cspan style=\"font-size: 14px;\">depend on the striking of graphic design with obvious text for announcements, quotes, and products or services. When it comes to email marketing, the more text you add to promotional banners, the better. Writers use text overlays also to make their feature images more engaging with the help of this plugin. When you need to communicate through visuals while staying on brand, a well-crafted text image is worth a thousand words for engagement and brand consistency.\u003C/span>\u003Cspan>\u003Cspan>\u003Cimg loading=\"lazy\" alt=\"Create a Pic with Text | Text to Photo & Font Image Generator Tools\" src=\"https://api.pixelfox.ai/uploads/20250721/605fe076e1673612609e4b96b1cf67f4.octet-stream\" width=\"624\" height=\"416\">\u003C/span>\u003C/span>\u003C/h2>\u003Ch2 id=\"pH3TXa\" dir=\"ltr\">\u003Cspan>Enough About The Value of AI for Text-to-Photo\u003C/span>\u003C/h2>\u003Cp dir=\"ltr\">\u003Cspan>Text-to-image\u003C/span>\u003Cspan> design has never been faster and more intelligent, with the help of artificial intelligence tools. Whereas when designing manually, you have no choice in the matter, \u003C/span>\u003Cspan>AI software\u003C/span>\u003Cspan> can learn what looks good and use this data to auto-size, color, and orient type so that it looks good and reads clearly. They create creative backgrounds, include font pairing, and they even provide brand-suitable colour palettes if you provide your branding information. That’s because you don’t need to be a designer to create professional-looking images for your business, for your blog, or your projects.\u003C/span>\u003C/p>\u003Cp dir=\"ltr\">\u003Cspan> Hot Tip: \u003C/span>\u003Cspan>This can also be a time-saver—instead of spending an hour designing something, you spend an hour making 10 versions and choose the best.\u003C/span>\u003C/p>\u003Ch2 id=\"aNk3jH\" dir=\"ltr\">\u003Cspan>Avoid these common mistakes when adding text to images.\u003C/span>\u003C/h2>\u003Cp dir=\"ltr\">\u003Cspan>Text-based graphics\u003C/span>\u003Cspan> are a powerful medium, but there are some traps you’ll want to avoid. A big one when it comes to fonts is having too many on one image; it can make things look cluttered and hard to read. Another is bad contrast – putting bright white text on a light background or dark text on a black background will make your messages hard to read. You also don’t want to flood your images with text -- short, punchy keywords tend to work best on social media. Last but not least, make sure to resize your text image for every platform so it remains sharp and crops properly on Instagram, Facebook, and web pages.\u003C/span>\u003C/p>\u003Cp dir=\"ltr\">\u003Cspan style=\"font-size: 18px;\">\u003Cb>Final Thoughts:\u003C/b>\u003C/span>\u003C/p>\u003Cp>\u003Cspan id=\"docs-internal-guid-a6d85655-7fff-65b1-308a-1aab19ae1de3\">\u003C/span>\u003C/p>\u003Cp dir=\"ltr\">\u003Cspan>Making pictures out of text has never been simpler, thanks to \u003C/span>\u003Cspan>both AI tools \u003C/span>\u003Cspan>and \u003C/span>\u003Cspan>font image generators\u003C/span>\u003Cspan>. If you’re interested in making social media posts, logos, or artistic print, these are the tools for you, where you have full reign over their design. Start playing around today and see your conception become a reality!\u003C/span>\u003C/p>","create-a-pic-with-text-text-to-photo-amp-font-image-generator-tools",66,1753108103,["Reactive",140],{"$si18n:cached-locale-configs":141,"$si18n:resolved-locale":15},{"en":142,"zh":145,"tw":147,"vi":149,"id":151,"pt":153,"es":155,"fr":157,"de":159,"it":161,"nl":163,"th":165,"tr":167,"ru":169,"ko":171,"ja":173,"ar":175,"pl":177},{"fallbacks":143,"cacheable":144},[],true,{"fallbacks":146,"cacheable":144},[],{"fallbacks":148,"cacheable":144},[],{"fallbacks":150,"cacheable":144},[],{"fallbacks":152,"cacheable":144},[],{"fallbacks":154,"cacheable":144},[],{"fallbacks":156,"cacheable":144},[],{"fallbacks":158,"cacheable":144},[],{"fallbacks":160,"cacheable":144},[],{"fallbacks":162,"cacheable":144},[],{"fallbacks":164,"cacheable":144},[],{"fallbacks":166,"cacheable":144},[],{"fallbacks":168,"cacheable":144},[],{"fallbacks":170,"cacheable":144},[],{"fallbacks":172,"cacheable":144},[],{"fallbacks":174,"cacheable":144},[],{"fallbacks":176,"cacheable":144},[],{"fallbacks":178,"cacheable":144},[],["Set"],["ShallowReactive",181],{"$f6hKyqX1Et7FqlJJHVJoTimeRp1VNQS-IIN_YMPFEA8Y":-1},"/blog/ai-2d-animation-maker-best-free-animation-programs-amp-sites-to-create-cartoons-online",{"userStore":184},{"showLoginModal":185,"showLoginClose":144,"loading":186,"inviteCode":15,"bidIdentification":15,"token":15,"userInfo":188,"showPriceDialog":185,"paidBefore":72},false,{"show":185,"message":187},"加载中...",{"avatar":189,"nickname":189,"email":189},null]