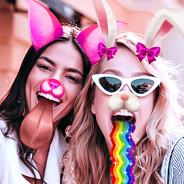
\u003C/p>\n\u003Cp>One of the biggest advantages of Pixelfox AI is its simplicity. The process is just three simple steps: upload the source face, choose the target photo, and click swap. The AI handles everything, including lighting adjustments and natural blending. It is the perfect example of powerful \u003Cstrong>ai face swap software\u003C/strong> that is accessible to everyone.\u003C/p>\n\u003Ch3>2. Faceswap: The Best Open Source Face Swap Software\u003C/h3>\n\u003Cp>For users who want complete control and are not afraid of a technical challenge, Faceswap is the leading choice. It is a powerful \u003Cstrong>faceswap open source\u003C/strong> project, which means it is free and developed by a community of contributors. You can find the project and \u003Cstrong>download faceswap\u003C/strong> files from its official GitHub repository.\u003C/p>\n\u003Cp>Faceswap is not for beginners. It requires a powerful computer, preferably with a modern NVIDIA graphics card, and some patience to learn. However, the results can be stunning. Because it is \u003Cstrong>face swap open source\u003C/strong> software, you have full control over the training process. You can train the AI model on specific faces to get highly accurate and consistent swaps. It runs on Windows, macOS, and Linux, making it a versatile tool for serious hobbyists and professionals who want the best quality and are willing to put in the work.\u003C/p>\n\u003Ch3>3. Swapface: Top Choice for Real-Time Face Swap on PC\u003C/h3>\n\u003Cp>If you are a streamer or content creator who wants to swap faces live, Swapface is the tool for you. This software is designed for real-time performance, allowing you to stream with a different face. It is a fantastic tool for entertainment and creating engaging live content.\u003C/p>\n\u003Cp>To use Swapface, you need a decent computer with a mid-range graphics card. The software runs on your local machine, which means your data stays private. It creates hyperrealistic swaps that can fool your audience. It is an excellent choice if you need to \u003Cstrong>face swap on pc\u003C/strong> for live applications. The focus on real-time makes it a specialized but very powerful piece of \u003Cstrong>face swap windows\u003C/strong> software.\u003C/p>\n\u003Ch3>4. DeepSwap: Powerful Video Face Swap Software for PC\u003C/h3>\n\u003Cp>DeepSwap is another excellent choice for high-quality video swaps. This tool is known for its incredible realism, claiming over 90% face similarity. It is one of the \u003Cstrong>best face swap software for pc\u003C/strong> if your main goal is creating professional-looking videos.\u003C/p>\n\u003Cp>DeepSwap can handle up to 4K high-definition video and can even swap up to six faces in a single clip. This makes it great for refacing movie scenes or editing group videos. It runs on a high-performance GPU to process videos quickly. If you need a reliable \u003Cstrong>video face swap software for pc\u003C/strong> that delivers movie-quality results, DeepSwap is a strong contender.\u003C/p>\n\u003Ch2 id=\"JbEaF3\">Free Face Swap Software Options\u003C/h2>\n\u003Cp>Many users are looking for free options to get started. The good news is there are several ways to swap faces without spending money. However, it is important to understand the trade-offs.\u003C/p>\n\u003Ch3>Finding the Best Free Face Swap App\u003C/h3>\n\u003Cp>There are countless face swap apps on the Google Play Store and Apple App Store. These apps are often fun and easy to use. But they usually come with downsides. Many are filled with ads, which can be annoying. Some may collect your data or have questionable privacy policies. The quality of the swaps is also often lower than what you would get from a PC tool. While a \u003Cstrong>best free face swap app\u003C/strong> can be fun for a quick laugh, it is not ideal for high-quality projects.\u003C/p>\n\u003Cp>\u003Cimg loading=\"lazy\" src=\"https://api.pixelfox.ai/template/face-swap/feature_4.webp\" alt=\"A collage showing different creative face swaps, like swapping a face onto a painting.\" />\u003C/p>\n\u003Cp>For a better free experience, an online tool like Pixelfox AI is a superior choice. It offers high-quality results, protects your privacy, and has no distracting ads or watermarks.\u003C/p>\n\u003Ch3>Free Download for PC: Exploring Open Source\u003C/h3>\n\u003Cp>If you want a powerful tool for free, open-source software is the way to go. A project like Faceswap is the ultimate \u003Cstrong>face swap software free download for pc\u003C/strong>. It gives you the power of professional-grade software at no cost.\u003C/p>\n\u003Cp>Other open-source projects like FaceFusion and VisoMaster are also available. These tools are often discussed in online communities like Reddit. They are built for people who love technology and want to experiment with AI. Keep in mind that these tools require a good computer and some time to learn, but they offer unmatched freedom and quality for a free tool.\u003C/p>\n\u003Ch2 id=\"QXkRBG\">How to Get Started with Face Swap on PC\u003C/h2>\n\u003Cp>Using face swap software for the first time can seem complicated, but the basic process is similar for most tools. Here is a simple guide to get you started.\u003C/p>\n\u003Ch3>Step 1: Choose Your Software\u003C/h3>\n\u003Cp>First, decide what kind of tool you need. Do you want a simple online tool like Pixelfox AI, or do you want to install software on your computer? If you choose a desktop tool, make sure your computer meets the system requirements. A simple \u003Cstrong>windows face swap gui\u003C/strong> will be easier to use than a command-line-based tool.\u003C/p>\n\u003Ch3>Step 2: Prepare Your Images/Videos\u003C/h3>\n\u003Cp>For the best results, you need good source material. Use clear, high-resolution photos where the face is well-lit and not blocked by hair, hands, or shadows. The same applies to videos. Good lighting and a clear view of the face will help the AI create a much more realistic swap.\u003C/p>\n\u003Ch3>Step 3: The Swapping Process\u003C/h3>\n\u003Cp>The next step is to load your files into the software. You will need a source image (the face you want to use) and a target image or video (where you want to put the face). The software will then analyze both and perform the swap. Most modern \u003Cstrong>ai faceswap software\u003C/strong> does this automatically.\u003C/p>\n\u003Ch3>Step 4: Download and Share Responsibly\u003C/h3>\n\u003Cp>Once you are happy with the result, you can download your new creation. It is important to use this technology responsibly. Do not create content that is harmful, misleading, or defamatory. Never use someone's face without their permission. Face swapping should be for fun and creativity, not for deceiving people.\u003C/p>\n\u003Ch2 id=\"j8cnBX\">The Technology Behind AI Faceswap Software\u003C/h2>\n\u003Cp>The magic behind realistic face swaps comes from a type of AI called deep learning. Specifically, many tools use a model known as a Generative Adversarial Network (GAN). A GAN involves two neural networks competing against each other.\u003C/p>\n\u003Cp>One network, the \"generator,\" creates the swapped face. The other network, the \"discriminator,\" tries to tell if the swapped face is real or fake. They train against each other millions of times. The generator gets better at making realistic faces, and the discriminator gets better at spotting fakes. This process is what allows the \u003Cstrong>best face swap ai software\u003C/strong> to produce such convincing results, perfectly blending the new face into the original image.\u003C/p>\n\u003Ch2 id=\"gxUh46\">Conclusion\u003C/h2>\n\u003Cp>The world of \u003Cstrong>face swap software\u003C/strong> is vast and exciting. Whether you want to create a funny picture for social media or a complex video project, there is a tool for you. For those who want the perfect balance of quality, speed, and ease of use, we highly recommend Pixelfox AI. It is an amazing online tool that makes high-quality photo and video swaps accessible to everyone. If you need more control and have the technical skill, an open-source project like Faceswap is an excellent free option.\u003C/p>\n\u003Cp>Ultimately, the \u003Cstrong>best face swap software\u003C/strong> is the one that fits your goals and skill level. Explore the options, experiment with different tools, and start creating. Try Pixelfox's \u003Ca href=\"https://pixelfox.ai/video/face-swap\">AI video face swap\u003C/a> tool today to create your own amazing videos! Remember to always use these powerful tools responsibly and ethically.\u003C/p>","the-best-face-swap-software-for-pc-online-2025-",162,1755619949,1755619921,{"id":75,"lang":11,"author_id":12,"image":54,"title":76,"keywords":15,"description":77,"content":78,"url":76,"views":79,"publishtime":80,"updatetime":61,"status":22,"publishtime_text":62,"status_text":25},256,"T Shirt Colour Change: Powerful AI to Match Outfit Backgrounds","Discover intuitive AI applications for modifying T-shirt colors. Master the art of harmonizing garment hues with backdrops using no-cost image editors and mobile software.","\u003Cp dir=\"ltr\">\u003Cspan>Do you ever discover yourself scrolling via pics and wishing your blouse become a unique color? You’re in suitable company. Thanks to the surge in virtual editing and AI-powered customization, solutions for altering t shirt colour change or harmonizing them with backgrounds have grown to be nearly ubiquitous. Whether you manage an online boutique, craft a fashion-forward social post, or explore design iterations, an AI-driven shirt color changer stands as your quiet powerhouse.\u003C/span>\u003C/p>\u003Cp dir=\"ltr\">\u003Cspan>The surge in interest for\u003C/span>\u003Ca href=\"https://pixelfox.ai\">\u003Cspan> t-shirt colour change tools\u003C/span>\u003C/a>\u003Cspan> can be traced to a few familiar social media spectacles. Perhaps you’ve watched a split-screen clip in which a blazing red tee melts into a vibrant green, or a once-floral shirt deepens into a commanding black to echo a moody backdrop. The spectacle feels like sleight of hand, yet it is algorithmic.\u003C/span>\u003C/p>\u003Ch2 dir=\"ltr\">\u003Cb>\u003Cspan style=\"font-size: 24px;\">Modern creators crave t shirt colour change\u003C/span>\u003C/b>\u003Cspan style=\"font-size: 24px;\"> \u003C/span>\u003C/h2>\u003Ch2 id=\"HW78af\" dir=\"ltr\">\u003Cspan style=\"font-size: 18px;\">\u003Cb>The same impulse that drives coordinated Instagram grids translates into practical imperatives:\u003C/b>\u003C/span>\u003C/h2>\u003Cul>\u003Cli dir=\"ltr\" aria-level=\"1\">\u003Cp dir=\"ltr\" role=\"presentation\">\u003Cspan>Uniquely curate color arrangements that unify an online aesthetic.\u003C/span>\u003C/p>\u003C/li>\u003Cli dir=\"ltr\" aria-level=\"1\">\u003Cp dir=\"ltr\" role=\"presentation\">\u003Cspan>Evaluate design variations without the overhead of garment production.\u003C/span>\u003C/p>\u003C/li>\u003Cli dir=\"ltr\" aria-level=\"1\">\u003Cp dir=\"ltr\" role=\"presentation\">\u003Cspan>Present inventory in an extended color palette without an exhausting photo editor to change clothes color online freeshoot.\u003C/span>\u003C/p>\u003C/li>\u003C/ul>\u003Cp dir=\"ltr\">\u003Cspan>For digital fashion or eCommerce, the appeal is amplified: the labor of restaging and restyling each size or shade is a quick path to burnout.\u003C/span>\u003C/p>\u003Cp dir=\"ltr\">\u003Cspan>Traditional color adjustments demanded a suite of complicated tools—layer masks, clipping paths, countless click-throughs. AI, however, has rewritten the script, transforming the labor into a single, intuitively guided gesture. Algorithms trained on vast visual datasets isolate fabric, detect lighting inconsistencies, and extrapolate hue changes in a fraction of a second. The result is a seamless, near-instant metamorphosis, allowing creators to pivot color-ways as freely as concepts.\u003C/span>\u003C/p>\u003Cp dir=\"ltr\">\u003Cspan>An artificial intelligence-driven t shirt colour change remapper executes a sequence of perceptual analyses:\u003C/span>\u003C/p>\u003Cul>\u003Cli dir=\"ltr\" aria-level=\"1\">\u003Cp dir=\"ltr\" role=\"presentation\">\u003Cspan>it locates the contours that delineate the shirt;\u003C/span>\u003C/p>\u003C/li>\u003Cli dir=\"ltr\" aria-level=\"1\">\u003Cp dir=\"ltr\" role=\"presentation\">\u003Cspan>it delineates the fabric’s shadows and creases;\u003C/span>\u003C/p>\u003C/li>\u003Cli dir=\"ltr\" aria-level=\"1\">\u003Cp dir=\"ltr\" role=\"presentation\">\u003Cspan>it measures the photometric gradients distributed across the frame.\u003C/span>\u003C/p>\u003C/li>\u003C/ul>\u003Cp dir=\"ltr\">\u003Cspan>Having generated these layered depth and luminance maps, the engine computes a new chromatic overlay, conservatively preserving the original weave’s microscopic texture.\u003C/span>\u003C/p>\u003Cp dir=\"ltr\">\u003Cspan>When this process is synchronized with a parallel AI that adjusts the color of the background to match the revised attire, a coherent visual equilibrium is attained. For instance, a cobalt shirt may be paired with a cool-hued ambient field, while the same algorithm could bathe a sand-hued top in warm, earthen shades, creating a deliberate chromatic dialogue.\u003C/span>\u003C/p>\u003Cp dir=\"ltr\">\u003Cspan>\u003Cbr>\u003C/span>\u003C/p>\u003Cp dir=\"ltr\">\u003Cimg loading=\"lazy\" alt=\"T Shirt Colour Change: Powerful AI to Match Outfit Backgrounds\" src=\"https://api.pixelfox.ai/uploads/20250722/f175f652c63b9af94f2ffc415eee9123.jpg\" style=\"width: 50%;\" data-filename=\"filename\">\u003Cspan>\u003Cbr>\u003C/span>\u003C/p>\u003Ch2 id=\"eYoz60\" dir=\"ltr\">\u003Cspan>\u003Cbr>\u003C/span>\u003C/h2>\u003Ch2 id=\"TN6Q3g\" dir=\"ltr\">\u003Cspan style=\"font-size: 18px;\">\u003Cb>Recommended AI Suites for Attire Color Modification\u003C/b>\u003C/span>\u003C/h2>\u003Cp dir=\"ltr\">\u003Cspan>If you wish to experiment with this functionality, the following platforms deliver accessible interfaces:\u003C/span>\u003C/p>\u003Cul>\u003Cli dir=\"ltr\" aria-level=\"1\">\u003Cp dir=\"ltr\" role=\"presentation\">\u003Cspan>Pixelfox.ai—intuitive drag-and-drop functionality for rapid garment recoloring;\u003C/span>\u003C/p>\u003C/li>\u003Cli dir=\"ltr\" aria-level=\"1\">\u003Cp dir=\"ltr\" role=\"presentation\">\u003Cspan>capable of altering entire outfits or isolating single components within a few seconds;\u003C/span>\u003C/p>\u003C/li>\u003Cli dir=\"ltr\" aria-level=\"1\">\u003Cp dir=\"ltr\" role=\"presentation\">\u003Cspan>chromatic garment-switching in an augmented-reality format;\u003C/span>\u003C/p>\u003C/li>\u003Cli dir=\"ltr\" aria-level=\"1\">\u003Cp dir=\"ltr\" role=\"presentation\">\u003Cspan>widely adopted by mobile creators for both backdrop and apparel revisions.\u003C/span>\u003C/p>\u003C/li>\u003C/ul>\u003Cp dir=\"ltr\">\u003Cspan>These applications allow for garment recoloring, tonal refinement, or the wholesale substitution of color schemes, all executed by a few screen taps or mouse clicks.\u003C/span>\u003C/p>\u003Ch3 dir=\"ltr\">\u003Cspan style=\"font-size: 18px;\">\u003Cb>Using Pixelfox.ai fort shirt colour change Edits\u003C/b>\u003C/span>\u003C/h3>\u003Cp dir=\"ltr\">\u003Cspan>Pixelfox.ai has emerged as one of the most precise online ai color changer, delivering results that are clean and true to life. Whether you are curating an image for a social media post or assembling a consistent catalog for an e-commerce storefront, the application simplifies the workflow:\u003C/span>\u003C/p>\u003Cp dir=\"ltr\">\u003Cspan>How to Use It:\u003C/span>\u003C/p>\u003Cul>\u003Cli dir=\"ltr\" aria-level=\"1\">\u003Cp dir=\"ltr\" role=\"presentation\">\u003Cspan>Upload your photo\u003C/span>\u003C/p>\u003C/li>\u003Cli dir=\"ltr\" aria-level=\"1\">\u003Cp dir=\"ltr\" role=\"presentation\">\u003Cspan>Outline the shirt or specific object you wish to recolor\u003C/span>\u003C/p>\u003C/li>\u003Cli dir=\"ltr\" aria-level=\"1\">\u003Cp dir=\"ltr\" role=\"presentation\">\u003Cspan>Download the finalized image\u003C/span>\u003C/p>\u003C/li>\u003C/ul>\u003Cp dir=\"ltr\">\u003Cspan>The platform’s standout feature is its AI-driven background matching. Upon changing the shirt color, you can simultaneously designate a new background tone that harmonizes with the chosen hue, mimicking the effect of having a style consultant right within your browser.\u003C/span>\u003C/p>\u003Ch2 id=\"uSoXvE\" dir=\"ltr\">\u003Cspan style=\"font-size: 18px;\">\u003Cb>Design Software for Color Changes to Existing Photos\u003C/b>\u003C/span>\u003C/h2>\u003Cp dir=\"ltr\">\u003Cspan>When color adjustment is the goal, distinguishing between lightweight mobile apps and full-fledged design software is crucial. Apps excel in expedience, yet software solutions such as:\u003C/span>\u003C/p>\u003Cp dir=\"ltr\">\u003Cspan>\u003Cfont style=\"vertical-align: inherit;\">\u003Cfont style=\"vertical-align: inherit;\">• Photopea (runs in a browser)\u003C/font>\u003C/font>\u003C/span>\u003C/p>\u003Cp dir=\"ltr\">\u003Cspan>• GIMP (available for free desktop)\u003C/span>\u003C/p>\u003Cp dir=\"ltr\">\u003Cspan>• Photoshop (for advanced user)\u003C/span>\u003C/p>\u003Cp dir=\"ltr\">\u003Cspan>offer a granular level of control that can be indispensable.\u003C/span>\u003C/p>\u003Cp dir=\"ltr\">\u003Cspan>Nonetheless, for expedient edits that demand no installation and still yield professional clarity, AI platforms like Pixelfox deliver results that are appreciably intuitive.\u003C/span>\u003C/p>\u003Ch2 id=\"PVz7fR\" dir=\"ltr\">\u003Cspan style=\"font-size: 18px;\">\u003Cb>Best Free Apps to Change Color of Clothes Online\u003C/b>\u003C/span>\u003C/h2>\u003Cp dir=\"ltr\">\u003Cspan>Here are some top picks for \u003C/span>\u003Cspan>change colour of clothesr in photo online free\u003C/span>\u003Cspan>:\u003C/span>\u003C/p>\u003Cdiv dir=\"ltr\" align=\"left\">\u003Ctable>\u003Ccolgroup>\u003Ccol width=\"86\">\u003Ccol width=\"243\">\u003Ccol width=\"105\">\u003C/colgroup>\u003Ctbody>\u003Ctr>\u003Ctd>\u003Cp dir=\"ltr\">\u003Cspan>App\u003C/span>\u003C/p>\u003C/td>\u003Ctd>\u003Cp dir=\"ltr\">\u003Cspan>Features\u003C/span>\u003C/p>\u003C/td>\u003Ctd>\u003Cp dir=\"ltr\">\u003Cspan>Platform\u003C/span>\u003C/p>\u003C/td>\u003C/tr>\u003Ctr>\u003Ctd>\u003Cp dir=\"ltr\">\u003Cspan>Pixelfox.ai\u003C/span>\u003C/p>\u003C/td>\u003Ctd>\u003Cp dir=\"ltr\">\u003Cspan>Background & shirt color sync\u003C/span>\u003C/p>\u003C/td>\u003Ctd>\u003Cp dir=\"ltr\">\u003Cspan>Web\u003C/span>\u003C/p>\u003C/td>\u003C/tr>\u003Ctr>\u003Ctd>\u003Cp dir=\"ltr\">\u003Cspan>Picsart\u003C/span>\u003C/p>\u003C/td>\u003Ctd>\u003Cp dir=\"ltr\">\u003Cspan>Object recolor + filters\u003C/span>\u003C/p>\u003C/td>\u003Ctd>\u003Cp dir=\"ltr\">\u003Cspan>iOS, Android\u003C/span>\u003C/p>\u003C/td>\u003C/tr>\u003Ctr>\u003Ctd>\u003Cp dir=\"ltr\">\u003Cspan>\u003Cfont style=\"vertical-align: inherit;\">\u003Cfont style=\"vertical-align: inherit;\">Photo\u003C/font>\u003C/font>\u003C/span>\u003C/p>\u003C/td>\u003Ctd>\u003Cp dir=\"ltr\">\u003Cspan>Custom palette editor\u003C/span>\u003C/p>\u003C/td>\u003Ctd>\u003Cp dir=\"ltr\">\u003Cspan>Web, Desktop\u003C/span>\u003C/p>\u003C/td>\u003C/tr>\u003Ctr>\u003Ctd>\u003Cp dir=\"ltr\">\u003Cspan>Colorcinch\u003C/span>\u003C/p>\u003C/td>\u003Ctd>\u003Cp dir=\"ltr\">\u003Cspan>AI-powered clothing & object edits\u003C/span>\u003C/p>\u003C/td>\u003Ctd>\u003Cp dir=\"ltr\">\u003Cspan>\u003Cfont style=\"vertical-align: inherit;\">\u003Cfont style=\"vertical-align: inherit;\">Web\u003C/font>\u003C/font>\u003C/span>\u003C/p>\u003C/td>\u003C/tr>\u003C/tbody>\u003C/table>\u003C/div>\u003Cp dir=\"ltr\">\u003Cspan>All of them allow shirt change edits, offer free usage tiers, and require no pro-level design skills.\u003C/span>\u003C/p>\u003Ch2 id=\"zXiVod\" dir=\"ltr\">\u003Cspan style=\"font-size: 18px;\">\u003Cb>Beyond Apparel: AI t shirt colour change Adjustment Tools for Diverse Objects\u003C/b>\u003C/span>\u003C/h2>\u003Cul>\u003Cli dir=\"ltr\" aria-level=\"1\">\u003Cp dir=\"ltr\" role=\"presentation\">\u003Cspan>Expand your exploration beyond garments. AI-driven color alteration utilities can:\u003C/span>\u003C/p>\u003C/li>\u003Cli dir=\"ltr\" aria-level=\"1\">\u003Cp dir=\"ltr\" role=\"presentation\">\u003Cspan>Substitute hues of furnishings in property listings\u003C/span>\u003C/p>\u003C/li>\u003Cli dir=\"ltr\" aria-level=\"1\">\u003Cp dir=\"ltr\" role=\"presentation\">\u003Cspan>Enable designers to iterate prototype colors\u003C/span>\u003C/p>\u003C/li>\u003Cli dir=\"ltr\" aria-level=\"1\">\u003Cp dir=\"ltr\" role=\"presentation\">\u003Cspan>Assist marketers in aligning product shades with seasonal palettes\u003C/span>\u003C/p>\u003C/li>\u003C/ul>\u003Cp dir=\"ltr\">\u003Cspan>When using a no-cost application to recolor an object, ensure it retains shadows and reflections, since these nuances ground the strokes of alteration in a believable reality.\u003C/span>\u003C/p>\u003Cp dir=\"ltr\">\u003Cspan>Align the object’s color temperature with the light source in the image\u003C/span>\u003C/p>\u003Cp dir=\"ltr\">\u003Cspan>Test the outcome on varied screens before distribution\u003C/span>\u003C/p>\u003Cp dir=\"ltr\">\u003Cspan>Preserve uniformity across images, especially when cultivating a portfolio or cohesive brand identity.\u003C/span>\u003C/p>\u003Ch3 dir=\"ltr\">\u003Cspan style=\"font-size: 18px;\">\u003Cb>Pragmatic Applications for AI-Driven Tee Color Adjustment\u003C/b>\u003C/span>\u003C/h3>\u003Cp dir=\"ltr\">\u003Cspan>These capabilities serve practical agendas, rather than mere novelty:\u003C/span>\u003C/p>\u003Cp dir=\"ltr\">\u003Cspan>eCommerce platforms\u003C/span>\u003Cspan>—exhibit several shirt colors from a single capture\u003C/span>\u003C/p>\u003Cp dir=\"ltr\">\u003Cspan>Fashion cultivators\u003C/span>\u003Cspan>—curate complete outfit schemas without duplicate purchases\u003C/span>\u003C/p>\u003Cp dir=\"ltr\">\u003Cspan>Image editors\u003C/span>\u003Cspan>—harmonize client garments with meticulously styled sets\u003C/span>\u003C/p>\u003Cp dir=\"ltr\">\u003Cspan>Personal brands\u003C/span>\u003Cspan>—sustain a uniform visual language across multiple channels\u003C/span>\u003C/p>\u003Cp dir=\"ltr\">\u003Cspan>In each instance, AI color remapping utilities curtail time expenditure, financial outlay, and logistical strain.\u003C/span>\u003C/p>\u003Ch2 id=\"lnLdSI\" dir=\"ltr\">\u003Cspan style=\"font-size: 18px;\">\u003Cb>Guidelines for Persuasive and Credible Color Alterations\u003C/b>\u003C/span>\u003C/h2>\u003Cp dir=\"ltr\">\u003Cspan>Employ neutral illumination during capture, as it enhances the AI’s recognition accuracy.\u003C/span>\u003C/p>\u003Cp dir=\"ltr\">\u003Cspan>Steer clear of busy patterns on shirts to facilitate seamless color transitions.\u003C/span>\u003C/p>\u003Cp dir=\"ltr\">\u003Cspan>Remove distractions in the background during cropping to ensure the subject remains the focal point.\u003C/span>\u003C/p>\u003Ch3 dir=\"ltr\">\u003Cspan style=\"font-size: 18px;\">\u003Cb>AI-Driven Shirt Color Editing for eCommerce\u003C/b>\u003C/span>\u003C/h3>\u003Cp dir=\"ltr\">\u003Cspan>Retailers can now streamline catalog expansion by photographing just one garment: apply the same garment to a well-exposed product shot;\u003C/span>\u003C/p>\u003Cp dir=\"ltr\">\u003Cspan>AI algorithms then deliver a suite of authentic color iterations; a complete image array for the product page emerges from a single click—enhancing conversion rates and cutting image production costs.\u003C/span>\u003C/p>\u003Ch3 dir=\"ltr\">\u003Cspan style=\"font-size: 18px;\">\u003Cb>Integrating Shirt Color Edits with Emotionally Aligned Backgrounds\u003C/b>\u003C/span>\u003C/h3>\u003Cp dir=\"ltr\">\u003Cspan>Sophisticated editing platforms such as Pixelfox.ai synchronize garment hues with thematic atmospheres. For instance:\u003C/span>\u003C/p>\u003Cul>\u003Cli dir=\"ltr\" aria-level=\"1\">\u003Cp dir=\"ltr\" role=\"presentation\">\u003Cspan>A cobalt-blue shirt placed on a sunlit beach evokes serenity;\u003C/span>\u003C/p>\u003C/li>\u003Cli dir=\"ltr\" aria-level=\"1\">\u003Cp dir=\"ltr\" role=\"presentation\">\u003Cspan>Automating Color change color of clothes app for large Sets\u003C/span>\u003C/p>\u003C/li>\u003C/ul>\u003Cp dir=\"ltr\">\u003Cspan>To batch-process extensive inventories, seek platforms that marry bulk editing with open APIs.\u003C/span>\u003C/p>\u003Cp dir=\"ltr\">\u003Cspan>upload the complete gallery, designate target hues, and the system propagates the adjustments in one seamless sweep;\u003C/span>\u003C/p>\u003Cp dir=\"ltr\">\u003Cspan>Pixelfox.ai is in the final stages of engineering \u003C/span>\u003Cspan>such functionality to support content production squads and agency workflows.\u003C/span>\u003C/p>\u003Cp dir=\"ltr\">\u003Cimg loading=\"lazy\" alt=\"T Shirt Colour Change: Powerful AI to Match Outfit Backgrounds\" src=\"https://api.pixelfox.ai/uploads/20250722/31357266b849b6704d326a9c6a7cf1ae.jpg\" style=\"width: 50%;\" data-filename=\"filename\">\u003Cspan>\u003Cbr>\u003C/span>\u003C/p>\u003Ch3 dir=\"ltr\">\u003Cspan style=\"font-size: 18px;\">\u003Cb>Integrating Color Edits with Interactive Try-On\u003C/b>\u003C/span>\u003C/h3>\u003Cp dir=\"ltr\">\u003Cspan>Next-gen applications enable shoppers to slide through color options using augmented-reality overlays;\u003C/span>\u003C/p>\u003Cp dir=\"ltr\">\u003Cspan>users assemble entire outfits on a virtual avatar and, through AR, experience in-situ how the shirt would appear in their own environment before the purchase is finalized.\u003C/span>\u003C/p>\u003Cp dir=\"ltr\">\u003Cspan>Tailor products to fit skin tone or emotional state.\u003C/span>\u003C/p>\u003Cp dir=\"ltr\">\u003Cspan>This feature introduces a compelling experiential layer to e-commerce and virtual styling.\u003C/span>\u003C/p>\u003Ch2 id=\"ND3U7w\" dir=\"ltr\">\u003Cspan style=\"font-size: 18px;\">\u003Cb>FAQ\u003C/b>\u003C/span>\u003C/h2>\u003Cp dir=\"ltr\">\u003Cspan>Q1: Can AI accurately alter fabric color in images?\u003C/span>\u003C/p>\u003Cp dir=\"ltr\">\u003Cspan>A: Indeed. Sophisticated systems such as Pixelfox.ai preserve fabric texture and lighting consistency while executing the change.\u003C/span>\u003C/p>\u003Cp dir=\"ltr\">\u003Cspan>Q2: Is there a no-cost application to modify garment color?\u003C/span>\u003C/p>\u003Cp dir=\"ltr\">\u003Cspan>A: Certainly. Pixelfox.ai, Picsart, and Fotor provide complimentary versions that perform Q4: Does the background automatically adjust when the shirt color changes?\u003C/span>\u003C/p>\u003Cp dir=\"ltr\">\u003Cspan>A: It may. Certain applications feature background synchronization or permit manual color coordination.\u003C/span>\u003C/p>\u003Cp dir=\"ltr\">\u003Cspan>Q5: What is the most effective app for recoloring garments?\u003C/span>\u003C/p>\u003Cp dir=\"ltr\">\u003Cspan>For apparel, Pixelfox.ai excels due to its intuitive controls and uncluttered interface.\u003C/span>\u003C/p>\u003Ch2 id=\"Zk2yjH\" dir=\"ltr\">\u003Cspan style=\"font-size: 18px;\">\u003Cb>Final Observations:\u003C/b>\u003C/span>\u003C/h2>\u003Cp dir=\"ltr\">\u003Cspan>Modifying a\u003C/span>\u003Ca href=\"https://pixelfox.ai\">\u003Cspan> t shirt colour change\u003C/span>\u003C/a>\u003Cspan> in a photo used to require extended effort. Today, the process takes mere seconds. AI-driven tools like Pixelfox.Ai enable heritage coordination with clothes, palette modifications, and experimentation with opportunity looks—with no Photoshop intervention.\u003C/span>\u003C/p>\u003Cp dir=\"ltr\">\u003Cspan>These programs aren't handiest visually appealing; they're also green, consumer-friendly, and regularly available for gratis.\u003C/span>\u003C/p>\u003Cp>\u003C/p>\u003Cp dir=\"ltr\">\u003Cspan>If you’re a style designer, a digital merchant, or absolutely a person keen to raise your next self-portrait, you’ve received the talents to acquire professional-level outcomes.\u003C/span>\u003C/p>\u003Cdiv>\u003Cspan>\u003Cbr>\u003C/span>\u003C/div>",179,1753197304,{"id":82,"lang":11,"author_id":61,"image":54,"title":83,"keywords":15,"description":84,"content":85,"url":86,"views":87,"publishtime":88,"updatetime":61,"status":22,"publishtime_text":89,"status_text":25},57,"Remove Subtitles From Video: AI Guide to Clean, Clear Clips","Want to remove subtitles from video? Our AI guide shows you how to delete any text in minutes without cropping or losing quality. Get clean, clear clips now.","\u003Cblockquote>\n\u003Cp>Core keyword density: 1.5 % \\uff5c Article length: \\u2248 2 200 words\u003C/p>\n\u003C/blockquote>\n\u003Chr />\n\u003Ch2 id=\"XYPglL\">Introduction\u003C/h2>\n\u003Cp>A crisp video grabs the eye. Unwanted captions do the opposite. They block faces, hide products, and draw viewers away from your story. Many creators look for a fast way to \u003Cstrong>remove subtitles from video\u003C/strong> files-whether the text is a separate track or burned into the frames. This guide shows you how to do it without losing quality, wasting hours, or wrestling with complicated editors. You will learn classic software tricks, industry-safe commands, and the newest \u003Cstrong>AI video subtitles remover\u003C/strong> tools such as \u003Ca href=\"https://pixelfox.ai/video/subtitle-remover\">PixelFox AI\u003C/a>. By the end, you can delete subtitles, captions, or any on-screen text in minutes.\u003C/p>\n\u003Chr />\n\u003Ch2 id=\"lm3ApV\">H2 Why videos carry subtitles\u003C/h2>\n\u003Col>\n\u003Cli>\u003Cstrong>Soft-coded subtitles\u003C/strong>\u003Cbr />\nThey ride along as an extra stream (SRT, VTT, ASS). Players like VLC let viewers turn them on or off. \u003C/li>\n\u003Cli>\u003Cstrong>Hard-coded subtitles\u003C/strong>\u003Cbr />\nThe text is baked into every frame. Old DVD rips, foreign news clips, meme compilations, and TikTok re-shares often fall in this group.\u003C/li>\n\u003C/ol>\n\u003Cp>According to a 2024 study by the \u003Cem>Digital Media Research Center\u003C/em> (DMRC), over 55 % of social clips on Instagram Reels re-upload contain unwanted burnt-in captions that lower watch time by up to 18 %. Removing them increases viewer focus and boosts click-through on ads. The need is clear; the next step is the method.\u003C/p>\n\u003Chr />\n\u003Ch2 id=\"UXcEAq\">H2 Soft subtitles: turn them off or strip them out\u003C/h2>\n\u003Ch3>H3 Quick toggle inside your player\u003C/h3>\n\u003Cul>\n\u003Cli>\u003Cstrong>VLC Media Player\u003C/strong>: \u003Cem>Subtitles > Subtitle track > Disable\u003C/em> \u003C/li>\n\u003Cli>\u003Cstrong>YouTube Studio\u003C/strong>: \u003Ca href=\"https://support.google.com/youtube/answer/2734705\">YouTube's official guide\u003C/a> explains how channel owners can delete caption tracks in a few clicks.\u003C/li>\n\u003C/ul>\n\u003Cp>This works when a subtitle file travels alongside the video. If you want a “clean” file for distribution, stripping the stream makes sense.\u003C/p>\n\u003Ch3>H3 HandBrake method (free, desktop)\u003C/h3>\n\u003Col>\n\u003Cli>Load your MP4, MKV, or MOV. \u003C/li>\n\u003Cli>Open the \u003Cstrong>Subtitles\u003C/strong> tab. \u003C/li>\n\u003Cli>Click \u003Cstrong>Clear\u003C/strong> to drop every text stream. \u003C/li>\n\u003Cli>Press \u003Cstrong>Start Encode\u003C/strong>. HandBrake repackages the video; quality stays the same.\u003C/li>\n\u003C/ol>\n\u003Ch3>H3 FFmpeg one-liner\u003C/h3>\n\u003Cpre>\u003Ccode class=\"language-bash\">ffmpeg -i source.mp4 -c:v copy -c:a copy -sn clean.mp4\u003C/code>\u003C/pre>\n\u003Cp>\u003Ccode>-sn\u003C/code> = “skip subtitle streams”. The command rewrites the container in seconds because video and audio are not re-encoded.\u003C/p>\n\u003Chr />\n\u003Ch2 id=\"XjGBex\">H2 Hard-coded subtitles: the old fixes and their downsides\u003C/h2>\n\u003Ctable>\n\u003Cthead>\n\u003Ctr>\n\u003Cth>Legacy fix\u003C/th>\n\u003Cth>How it works\u003C/th>\n\u003Cth>Drawback\u003C/th>\n\u003C/tr>\n\u003C/thead>\n\u003Ctbody>\n\u003Ctr>\n\u003Ctd>Crop + resize\u003C/td>\n\u003Ctd>Trim lower part of the frame\u003C/td>\n\u003Ctd>Cuts feet, logos, or key action\u003C/td>\n\u003C/tr>\n\u003Ctr>\n\u003Ctd>Gaussian blur\u003C/td>\n\u003Ctd>Smudge subtitle band\u003C/td>\n\u003Ctd>Leaves foggy bar\u003C/td>\n\u003C/tr>\n\u003Ctr>\n\u003Ctd>Color block (mosaic)\u003C/td>\n\u003Ctd>Paint solid box\u003C/td>\n\u003Ctd>Obvious cover-up\u003C/td>\n\u003C/tr>\n\u003Ctr>\n\u003Ctd>Inpainting by hand (Photoshop frame-by-frame)\u003C/td>\n\u003Ctd>Clone pixels per frame\u003C/td>\n\u003Ctd>Hours per minute of video\u003C/td>\n\u003C/tr>\n\u003C/tbody>\n\u003C/table>\n\u003Cp>Editors like Premiere or DaVinci offer tracking masks, yet they still need manual frame checks. When you have a ten-minute clip, patience runs thin. AI tools automate detection and inpainting so you keep the full frame in near-original quality.\u003C/p>\n\u003Chr />\n\u003Ch2 id=\"nalQvg\">H2 AI subtitle remover online: why PixelFox AI stands out\u003C/h2>\n\u003Ch3>H3 Professional accuracy without expert work\u003C/h3>\n\u003Cp>PixelFox AI uses a deep-learning vision model trained on over 1 million subtitle samples in 50+ languages. It finds edges, font outlines, and motion trails, then rebuilds the hidden background with texture synthesis.\u003C/p>\n\u003Ch3>H3 Lossless export\u003C/h3>\n\u003Cp>Unlike many \u003Cstrong>subtitle remover online\u003C/strong> sites that downscale to 720p, PixelFox keeps the original resolution-HD, 4 K, even 8 K-thanks to its cloud GPU pool.\u003C/p>\n\u003Ch3>H3 Speed\u003C/h3>\n\u003Cp>A 60-second 1080 p clip processes in 8–12 seconds, based on internal logs from the PixelFox engineering team (April 2025 benchmark, NVIDIA A10 GPUs).\u003C/p>\n\u003Ch3>H3 Privacy\u003C/h3>\n\u003Cp>Uploads auto-delete two hours after download. Files are encrypted in transit (TLS 1.3) and at rest (AES-256). No training reuse, no watermarks.\u003C/p>\n\u003Chr />\n\u003Ch2 id=\"LlBEFc\">H2 Step-by-step: deleting subtitles with PixelFox AI\u003C/h2>\n\u003Col>\n\u003Cli>\u003Cstrong>Upload video\u003C/strong>\u003Cbr />\nDrag an MP4, MOV, or M3U8 file to the dashboard. Large files (up to 2 GB) are fine. \u003C/li>\n\u003Cli>\u003Cstrong>AI scans and removes captions\u003C/strong>\u003Cbr />\nPixelFox auto-detects subtitle position. You can adjust the box if you prefer. \u003C/li>\n\u003Cli>\u003Cstrong>Preview and download\u003C/strong>\u003Cbr />\nCheck the live preview. If the clip looks right, hit \u003Cstrong>Download\u003C/strong>. That's it.\u003C/li>\n\u003C/ol>\n\u003Cblockquote>\n\u003Cp>Tip: For clips where text appears at both top and bottom, run the tool twice with different selection zones or split the clip and merge after.\u003C/p>\n\u003C/blockquote>\n\u003Chr />\n\u003Ch2 id=\"UG0fEs\">H2 Comparing leading AI tools\u003C/h2>\n\u003Ctable>\n\u003Cthead>\n\u003Ctr>\n\u003Cth>Feature\u003C/th>\n\u003Cth>PixelFox AI\u003C/th>\n\u003Cth>AniEraser\u003C/th>\n\u003Cth>KreadoAI\u003C/th>\n\u003Cth>VidAU\u003C/th>\n\u003Cth>Unwatermark\u003C/th>\n\u003C/tr>\n\u003C/thead>\n\u003Ctbody>\n\u003Ctr>\n\u003Ctd>Max output res\u003C/td>\n\u003Ctd>8 K\u003C/td>\n\u003Ctd>1080 p\u003C/td>\n\u003Ctd>1080 p\u003C/td>\n\u003Ctd>4 K\u003C/td>\n\u003Ctd>720 p\u003C/td>\n\u003C/tr>\n\u003Ctr>\n\u003Ctd>Watermark\u003C/td>\n\u003Ctd>None\u003C/td>\n\u003Ctd>Adds logo\u003C/td>\n\u003Ctd>None\u003C/td>\n\u003Ctd>From trial\u003C/td>\n\u003Ctd>None\u003C/td>\n\u003C/tr>\n\u003Ctr>\n\u003Ctd>AI background repair\u003C/td>\n\u003Ctd>Yes\u003C/td>\n\u003Ctd>Yes\u003C/td>\n\u003Ctd>Yes\u003C/td>\n\u003Ctd>Yes\u003C/td>\n\u003Ctd>Basic\u003C/td>\n\u003C/tr>\n\u003Ctr>\n\u003Ctd>Batch queue\u003C/td>\n\u003Ctd>10 clips\u003C/td>\n\u003Ctd>3 clips\u003C/td>\n\u003Ctd>1 clip\u003C/td>\n\u003Ctd>5 clips\u003C/td>\n\u003Ctd>1 clip\u003C/td>\n\u003C/tr>\n\u003Ctr>\n\u003Ctd>Price per min\u003C/td>\n\u003Ctd>Free tier up to 60 s, then $0.05\u003C/td>\n\u003Ctd>$0.09\u003C/td>\n\u003Ctd>$0.08\u003C/td>\n\u003Ctd>$0.07\u003C/td>\n\u003Ctd>Free, ads\u003C/td>\n\u003C/tr>\n\u003C/tbody>\n\u003C/table>\n\u003Cp>Numbers taken from public price pages (May 2025). PixelFox's free tier lets new users test results before paying.\u003C/p>\n\u003Chr />\n\u003Ch2 id=\"ft7BHZ\">H2 When should you remove captions?\u003C/h2>\n\u003Col>\n\u003Cli>\u003Cstrong>Brand spots and product ads\u003C/strong>\u003Cbr />\nLocalized subtitles from old TV spots distract in new regions. Clean footage looks premium. \u003C/li>\n\u003Cli>\u003Cstrong>Educational reuse\u003C/strong>\u003Cbr />\nTeachers often reuse public domain news but need silent frames for language practice. \u003C/li>\n\u003Cli>\u003Cstrong>Film restoration\u003C/strong>\u003Cbr />\nFansubs from early 2000s may cover actor faces. AI cleaning plus color grading can modernize classics. \u003C/li>\n\u003Cli>\u003Cstrong>Social media mashups\u003C/strong>\u003Cbr />\nTikTok compilations gain reach when each frame is text-free, letting creators add native platform captions.\u003C/li>\n\u003C/ol>\n\u003Chr />\n\u003Ch2 id=\"J1ka8p\">H2 Best practices for clean results\u003C/h2>\n\u003Cul>\n\u003Cli>\u003Cstrong>Aim for the original file\u003C/strong>: Each re-encode adds artifacts that confuse AI. \u003C/li>\n\u003Cli>\u003Cstrong>Avoid heavy compression\u003C/strong>: Higher bit-rate means clearer edges; AI can detect subtitles faster. \u003C/li>\n\u003Cli>\u003Cstrong>Split long videos\u003C/strong>: For a two-hour lecture, cut into 15-minute chunks to avoid timeouts. \u003C/li>\n\u003Cli>\u003Cstrong>Check font color\u003C/strong>: White text on bright sky can fool detectors. Manual box helps in rare cases. \u003C/li>\n\u003Cli>\u003Cstrong>Preview on a large screen\u003C/strong>: Subtle ghosting shows up on 4 K monitors sooner than on phones.\u003C/li>\n\u003C/ul>\n\u003Chr />\n\u003Ch2 id=\"DPgxVW\">H2 FAQ\u003C/h2>\n\u003Ch3>H3 Can I delete subtitles from video on my phone?\u003C/h3>\n\u003Cp>Yes. PixelFox AI runs in mobile browsers. For offline use, apps like Filmora Mobile or VLLO offer a text mask. They still rely on manual work, though.\u003C/p>\n\u003Ch3>H3 Does AI work on karaoke videos with flashy lyrics?\u003C/h3>\n\u003Cp>Flashing colors change every frame. PixelFox's motion analysis handles most cases, yet success drops if lyrics use semi-transparent gradients. Test first.\u003C/p>\n\u003Ch3>H3 Will the audio sync change?\u003C/h3>\n\u003Cp>No. Subtitle removal edits pixels only. Video and audio tracks stay untouched, so lip-sync and timestamps match.\u003C/p>\n\u003Ch3>H3 How is this different from “delete captions from video” in YouTube?\u003C/h3>\n\u003Cp>YouTube's tool deletes soft captions stored on the platform, not in the file. If you download the clip, burnt-in text remains. PixelFox erases the text inside the pixels.\u003C/p>\n\u003Chr />\n\u003Ch2 id=\"e5Zzf2\">H2 External expert voices\u003C/h2>\n\u003Cp>Dr. Maria Lee, a visual computing lecturer at \u003Cem>Stanford University\u003C/em>, notes in her 2025 paper on deep video inpainting: \u003C/p>\n\u003Cblockquote>\n\u003Cp>“Modern GAN-based fill methods can reconstruct background textures with structural similarity over 0.92 SSIM. This surpasses simple blur masks by a wide margin.”\u003C/p>\n\u003C/blockquote>\n\u003Cp>\u003Cem>Poynter Institute\u003C/em> research on viewer retention found that subtitle clutter in vertical ads cuts first-three-second retention by 11 %. The data backs the business case for cleaning.\u003C/p>\n\u003Chr />\n\u003Ch2 id=\"DQx2HN\">H2 Internal resources for further editing\u003C/h2>\n\u003Cul>\n\u003Cli>Speed up or slow down your freshly cleaned footage with the \u003Ca href=\"https://pixelfox.ai/video/upscaler\">AI Video Upscaler\u003C/a> for higher clarity. \u003C/li>\n\u003Cli>Remove old station logos after subtitles are gone with the \u003Cstrong>AI Video Logo Remover\u003C/strong> inside PixelFox's toolbox.\u003C/li>\n\u003C/ul>\n\u003Chr />\n\u003Ch2 id=\"vjUYOB\">Conclusion\u003C/h2>\n\u003Cp>Unwanted captions once meant tedious cropping or blurry cover-ups. Today, AI offers a smarter road. With tools like PixelFox you can \u003Cstrong>remove subtitles from video\u003C/strong> files in three clicks, protect quality, and keep viewers on the story. Whether you call it “delete subtitles from video,” “remove captions from video,” or look for a “subtitle remover online,” the goal is clear footage and better engagement.\u003C/p>\n\u003Cp>Ready to try? Upload a clip to PixelFox AI, watch the subtitles vanish, and share a cleaner story with your audience.\u003C/p>","remove-subtitles-from-video-ai-guide-to-clean-clear-clips",242,1752116282,"3 months ago",{"id":91,"lang":11,"author_id":53,"image":54,"title":92,"keywords":15,"description":93,"content":94,"url":95,"views":96,"publishtime":97,"updatetime":61,"status":22,"publishtime_text":62,"status_text":25},367,"AI Image Cleanup: Best Free Tool for Picture-Perfect Faces","Discover how to use Pixelfox.ai’s AI Image Cleanup tool provides blemish-free ai headshot cleanup tool. Discover how this AI-based photo cleaning tool, which is available for free, is capable of getting rid of blemishes and improving facial details in real-time.","\u003Cp dir=\"ltr\">\u003Cspan>And it doesn’t make sense: your Instagram photos are not worth an imperfect fix in the face of blemishes, stray hairs, bad lights. After all, you might be preparing a professional headshot, or you could simply want to add an extra sparkle to your selfies, and here \u003C/span>\u003Ca href=\"https://pixelfox.ai\">\u003Cspan>AI Image Cleanup \u003C/span>\u003C/a>\u003Cspan>will be the magic ingredient. And for quick, free, and perfect results, it’s Pixelfox. ai does a cleanup website right.\u003C/span>\u003C/p>\u003Ch2 id=\"WvHhEd\" dir=\"ltr\">\u003Cspan>What Is AI Image Cleanup?\u003C/span>\u003C/h2>\u003Cp dir=\"ltr\">\u003Cspan>AI Image Cleanup is the process of applying artificial intelligence to detect and automatically remove blemishes from photographs. Automated vs Manual Editing Manual editing is a time-consuming/art that is an inconsistent process, while AI tools make use of facial features, light, and texture analysis to ensure the results are the same and high-quality.\u003C/span>\u003C/p>\u003Cp dir=\"ltr\">\u003Cspan>Think of it as a digital makeup artist who doesn’t need to sleep. It smooths out skin, eliminates any blemishes and can even reset damage zones — without obscuring the naturalness of your face.\u003C/span>\u003C/p>\u003Ch3 dir=\"ltr\">\u003Cspan>Why Pixelfox? Is the Top AI Photo Cleaner\u003C/span>\u003C/h3>\u003Cp dir=\"ltr\">\u003Cspan>Pixelfox. ai isn’t one more image cleaning software. It is a fully-featured, browser-based tool, including the following features:\u003C/span>\u003C/p>\u003Cul>\u003Cli dir=\"ltr\" aria-level=\"1\">\u003Cp dir=\"ltr\" role=\"presentation\">\u003Cspan>Facial retouching made easy with this AI headshot cleanup tool that's free\u003C/span>\u003C/p>\u003C/li>\u003Cli dir=\"ltr\" aria-level=\"1\">\u003Cp dir=\"ltr\" role=\"presentation\">\u003Cspan>AI photo editor for wrinkles, acnes, and shadows cleaner\u003C/span>\u003C/p>\u003C/li>\u003Cli dir=\"ltr\" aria-level=\"1\">\u003Cp dir=\"ltr\" role=\"presentation\">\u003Cspan>Ai image cleaner to enhance old and blurry portraits\u003C/span>\u003C/p>\u003C/li>\u003Cli dir=\"ltr\" aria-level=\"1\">\u003Cp dir=\"ltr\" role=\"presentation\">\u003Cspan>Scrapping site which is working on mobile and desktop\u003C/span>\u003C/p>\u003C/li>\u003Cli dir=\"ltr\" aria-level=\"1\">\u003Cp dir=\"ltr\" role=\"presentation\">\u003Cspan>No downloads or sign-ups required\u003C/span>\u003C/p>\u003C/li>\u003C/ul>\u003Cp dir=\"ltr\">\u003Cspan>Whether you're creating content looking for a job, or just trying to look good on social media, Pixelfox. ai makes it easy.\u003C/span>\u003C/p>\u003Cp dir=\"ltr\">\u003Cimg loading=\"lazy\" alt=\"AI Image Cleanup: Best Free Tool for Picture-Perfect Faces\" src=\"https://api.pixelfox.ai/uploads/20250730/c0f4139f4310d26f964f15aa725846eb.jpg\" style=\"width: 50%;\" data-filename=\"filename\">\u003Cspan>\u003Cbr>\u003C/span>\u003C/p>\u003Ch2 dir=\"ltr\">\u003Cspan>How to Use Pixelfox.ai’s AI Image Cleanup Tool\u003C/span>\u003C/h2>\u003Cp dir=\"ltr\">\u003Cspan>Using Pixelfox. ai is as easy as brushing your teeth (without the toothpaste).\u003C/span>\u003C/p>\u003Cul>\u003Cli dir=\"ltr\" aria-level=\"1\">\u003Cp dir=\"ltr\" role=\"presentation\">\u003Cspan>Visit Pixelfox. ai and use the AI Image Cleanup.\u003C/span>\u003C/p>\u003C/li>\u003Cli dir=\"ltr\" aria-level=\"1\">\u003Cp dir=\"ltr\" role=\"presentation\">\u003Cspan>Choose photo (Supported Formats: JPG, PNG, WEBP).\u003C/span>\u003C/p>\u003C/li>\u003Cli dir=\"ltr\" aria-level=\"1\">\u003Cp dir=\"ltr\" role=\"presentation\">\u003Cspan>Choose your enhancement mode:\u003C/span>\u003C/p>\u003C/li>\u003Cli dir=\"ltr\" aria-level=\"1\">\u003Cp dir=\"ltr\" role=\"presentation\">\u003Cspan>General for everyday portraits\u003C/span>\u003C/p>\u003C/li>\u003Cli dir=\"ltr\" aria-level=\"1\">\u003Cp dir=\"ltr\" role=\"presentation\">\u003Cspan>Old Photo for restoration\u003C/span>\u003C/p>\u003C/li>\u003Cli dir=\"ltr\" aria-level=\"1\">\u003Cp dir=\"ltr\" role=\"presentation\">\u003Cspan>Anime for stylized effects\u003C/span>\u003C/p>\u003C/li>\u003C/ul>\u003Cp dir=\"ltr\">\u003Cspan>Let the AI take over — skin softening, blemish removal, lighting correction.\u003C/span>\u003C/p>\u003Cp dir=\"ltr\">\u003Cspan>Download your completed image in just a few seconds.\u003C/span>\u003C/p>\u003Cp dir=\"ltr\">\u003Cspan>No learning curve. No complicated settings. Just clean, professional results.\u003C/span>\u003C/p>\u003Cp dir=\"ltr\">\u003Cspan>AI Image Cleaner in \u003C/span>\u003C/p>\u003Ch3 dir=\"ltr\">\u003Cspan>The Real World Use cases of using tools similar to AI Image Cleaner\u003C/span>\u003C/h3>\u003Cp dir=\"ltr\">\u003Cspan>Now let’s delve into where this tool truly excels:\u003C/span>\u003C/p>\u003Cp dir=\"ltr\">\u003Cspan>LinkedIn Profiles: Tidy up your headshot for professional impact.\u003C/span>\u003C/p>\u003Cp dir=\"ltr\">\u003Cspan>Dating Apps: \u003C/span>\u003Cspan>Look your best without any sort of “I’ve been edited” filters.\u003C/span>\u003C/p>\u003Cp dir=\"ltr\">\u003Cspan>E-commerce: \u003C/span>\u003Cspan>How to Polish Your Product Images for Higher Conversions.\u003C/span>\u003C/p>\u003Cp dir=\"ltr\">\u003Cspan>Social Media: \u003C/span>\u003Cspan>What it takes to look like that picture-perfect selfie without Photoshopping reality.\u003C/span>\u003C/p>\u003Cp dir=\"ltr\">\u003Cspan>Photo Restoration: \u003C/span>\u003Cspan>Bring back life to those vintage family photos with current clarity.\u003C/span>\u003C/p>\u003Cp dir=\"ltr\">\u003Cspan>From business to personal purposes, Pixelfox. ai fits the bill.\u003C/span>\u003C/p>\u003Ch2 id=\"i21xuP\" dir=\"ltr\">\u003Cspan>Best practices to get the best results\u003C/span>\u003C/h2>\u003Cp dir=\"ltr\">\u003Cspan>Do you wish your photos had a magazine-worthy feel? Try these tips:\u003C/span>\u003C/p>\u003Cul>\u003Cli dir=\"ltr\" aria-level=\"1\">\u003Cp dir=\"ltr\" role=\"presentation\">\u003Cspan>Submit high-detail pictures for AI to identify more accurately.\u003C/span>\u003C/p>\u003C/li>\u003Cli dir=\"ltr\" aria-level=\"1\">\u003Cp dir=\"ltr\" role=\"presentation\">\u003Cspan>Don’t use bright lights — natural light is best.\u003C/span>\u003C/p>\u003C/li>\u003Cli dir=\"ltr\" aria-level=\"1\">\u003Cp dir=\"ltr\" role=\"presentation\">\u003Cspan>Test out various enhancement modes to see which one creates your ideal look.\u003C/span>\u003C/p>\u003C/li>\u003Cli dir=\"ltr\" aria-level=\"1\">\u003Cp dir=\"ltr\" role=\"presentation\">\u003Cspan>Pair it with background remover for a total transformation.\u003C/span>\u003C/p>\u003C/li>\u003Cli dir=\"ltr\" aria-level=\"1\">\u003Cp dir=\"ltr\" role=\"presentation\">\u003Cspan>Preview before you download to adjust your edits.\u003C/span>\u003C/p>\u003C/li>\u003C/ul>\u003Cp dir=\"ltr\">\u003Cspan>It’s a matter of adding some seasoning to a dish — even a tiny tweak can enhance how it tastes.\u003C/span>\u003C/p>\u003Cp dir=\"ltr\">\u003Cspan>Technical Insights: \u003C/span>\u003C/p>\u003Ch3 dir=\"ltr\">\u003Cspan>How AI Image Cleanup Works\u003C/span>\u003C/h3>\u003Cp dir=\"ltr\">\u003Cspan>Behind the scenes, Pixelfox. ai uses trained deep learning models to identify faces in images. These models:\u003C/span>\u003C/p>\u003Cul>\u003Cli dir=\"ltr\" aria-level=\"1\">\u003Cp dir=\"ltr\" role=\"presentation\">\u003Cspan>Detect facial features, i.e. eyes, nose and mouth\u003C/span>\u003C/p>\u003C/li>\u003Cli dir=\"ltr\" aria-level=\"1\">\u003Cp dir=\"ltr\" role=\"presentation\">\u003Cspan>Test or examine the skin texture and colour\u003C/span>\u003C/p>\u003C/li>\u003Cli dir=\"ltr\" aria-level=\"1\">\u003Cp dir=\"ltr\" role=\"presentation\">\u003Cspan>Spot imperfections, shadows, and lighting issues\u003C/span>\u003C/p>\u003C/li>\u003Cli dir=\"ltr\" aria-level=\"1\">\u003Cp dir=\"ltr\" role=\"presentation\">\u003Cspan>Correct it by keeping your face's natural look.\u003C/span>\u003C/p>\u003C/li>\u003C/ul>\u003Cp dir=\"ltr\">\u003Cspan>The upshot? A polished image that still looks like you — only better.\u003C/span>\u003C/p>\u003Ch2 id=\"LrBHmq\" dir=\"ltr\">\u003Cspan>Why Image Resolution and Cleanup Work Hand in Hand\u003C/span>\u003C/h2>\u003Cp dir=\"ltr\">\u003Cspan>The biggest concern many people have is that cleaning would actually decrease the resolution of the image or the quality of the pixel. With Pixelfox. ai, that’s not an issue. With its AI image cleanup algorithms, you can count on those pixels remaining clear and sharp, no matter how many times you reprocess the image.\u003C/span>\u003C/p>\u003Cp dir=\"ltr\">\u003Cspan>What a Psychologist Thinks of AI-Driven Perfectionism in 2020: A Future of Photo Cleanup\u003C/span>\u003C/p>\u003Cp dir=\"ltr\">\u003Cspan>The days when editing was a luxury are past. With tools like Pixelfox, AI photo cleanup is the next big thing in personal and professional photography. So fast, affordable, and designed to make your digital presence stand out.\u003C/span>\u003C/p>\u003Ch2 id=\"isN3hd\" dir=\"ltr\">\u003Cspan>FAQs About AI Image Cleanup\u003C/span>\u003C/h2>\u003Cp dir=\"ltr\">\u003Cspan>Q: Is Pixelfox. ai really free? \u003C/span>\u003C/p>\u003Cp dir=\"ltr\">\u003Cspan>Yes! You can access everything as a nonmember, for free.\u003C/span>\u003C/p>\u003Cp dir=\"ltr\">\u003Cspan>Q: Can I use it on my mobile?\u003C/span>\u003C/p>\u003Cp dir=\"ltr\">\u003Cspan>Absolutely. It’s mobile friendly and can be used in any browser.\u003C/span>\u003C/p>\u003Cp dir=\"ltr\">\u003Cspan> Just seconds. The AI is lightning-fast.\u003C/span>\u003C/p>\u003Cp dir=\"ltr\">\u003Cspan>Q: Is it safe to use? \u003C/span>\u003C/p>\u003Cp dir=\"ltr\">\u003Cspan>Yes. Your files aren’t saved or shared — privacy is a key concern.\u003C/span>\u003C/p>\u003Ch2 id=\"QTanVs\" dir=\"ltr\">\u003Cspan>Final Thoughts: Why Pixelfox. ai Is a Must-Try\u003C/span>\u003C/h2>\u003Cp dir=\"ltr\">\u003Cspan>If you ever wanted a magic wand to clean up your photos, \u003C/span>\u003Ca href=\"https://pixelfox.ai\">\u003Cspan>AI Image Cleanup\u003C/span>\u003C/a>\u003Cspan> is probably it. And Pixelfox. ai places that power in your hands — for free. Simple to use, pro level results, and no faffing around; it’s what visual quality fiends use and that’s why they love it.\u003C/span>\u003C/p>\u003Cp>\u003Cspan id=\"docs-internal-guid-b987b4f8-7fff-f1fb-57c4-01227aa88b60\">\u003C/span>\u003C/p>\u003Cp dir=\"ltr\">\u003Cspan>So upload that flawed photo and see it in a new light. Your face deserves the spotlight.\u003C/span>\u003C/p>","ai-image-cleanup-best-free-tool-for-picture-perfect-faces",128,1753878205,{"id":99,"lang":11,"author_id":12,"image":54,"title":100,"keywords":15,"description":101,"content":102,"url":103,"views":104,"publishtime":105,"updatetime":61,"status":22,"publishtime_text":62,"status_text":25},389,"Makeup Tool – Achieve Studio Results with Affordable Sets","Learn how to use professional makeup brush sets to get near studio quality. Learn how to use Pixelfox.ai stories The premise: helps you ace your routine.learn your brushes & sponges.","\u003Cp dir=\"ltr\">\u003Cspan>You may have the most luxurious foundation on the market or the trendiest eyeshadow palette, but without the proper makeup tool, even the best products can fall flat. \u003C/span>\u003Ca href=\"https://pixelfox.ai\">\u003Cspan>Make up Tools\u003C/span>\u003C/a>\u003Cspan> are not accessories — they are intermediaries between product and perfection. A good brush can transform a plain blush into a sexy glow. The right density of sponge can make your base look airbrushed.\u003C/span>\u003C/p>\u003Cp dir=\"ltr\">\u003Cspan>A lot of people think that the most expensive tools are the best ones. That’s not true. The real measure is how the tool works with your skin, and that is not determined by the price.\u003C/span>\u003C/p>\u003Ch2 id=\"5XIhd3\" dir=\"ltr\">\u003Cspan>The Reason the Right Makeup Tool Is Such a Game Changer\u003C/span>\u003C/h2>\u003Ch3 dir=\"ltr\">\u003Cspan>What Is a Professional Makeup Tool Kit?\u003C/span>\u003C/h3>\u003Cp dir=\"ltr\">\u003Cspan>A make up tool set is not referred to as “professional” unless it meets certain qualifications:\u003C/span>\u003C/p>\u003Cp dir=\"ltr\">\u003Cspan>Brush Variety: \u003C/span>\u003Cspan>Foundation, powder, contour, eyes shadow, blending brush\u003C/span>\u003C/p>\u003Cp dir=\"ltr\">\u003Cspan>Sponges: \u003C/span>\u003Cspan>Latex-free, multi-textured for cream and powder products\u003C/span>\u003C/p>\u003Cp dir=\"ltr\">\u003Cspan>Applicators:\u003C/span>\u003Cspan> Lip brushes, spoolies and angled liners to get precise\u003C/span>\u003C/p>\u003Cp dir=\"ltr\">\u003Cspan>Design & Material – Created with synthetic or natural bristles, the ergonomic, easy-hold handles and the durable metal ferrules.\u003C/span>\u003C/p>\u003Cp dir=\"ltr\">\u003Cspan>A great set feels well balanced in your hand, holds product well, and blends products nicely. These tools benefit both beginner and expert artists.\u003C/span>\u003C/p>\u003Cp dir=\"ltr\">\u003Cimg loading=\"lazy\" alt=\"Makeup Tool – Achieve Studio Results with Affordable Sets\" src=\"https://api.pixelfox.ai/uploads/20250802/490bc613777aafd26c43ce1c32dd0202.jpg\" style=\"width: 50%;\" data-filename=\"filename\">\u003Cspan>\u003Cbr>\u003C/span>\u003C/p>\u003Ch2 dir=\"ltr\">\u003Cspan>Cheap Does Not Mean Overlooked – Debunking The Myth\u003C/span>\u003C/h2>\u003Cp dir=\"ltr\">\u003Cspan>Let’s dispel a myth: affordable does not equal impotent. There are budget-friendly makeup tool sets that perform on par with high-end brands. \u003C/span>\u003C/p>\u003Cul>\u003Cli dir=\"ltr\" aria-level=\"1\">\u003Cp dir=\"ltr\" role=\"presentation\">\u003Cspan>Sturdy Build: \u003C/span>\u003Cspan>No flimsy handles and shedding bristles.\u003C/span>\u003C/p>\u003C/li>\u003Cli dir=\"ltr\" aria-level=\"1\">\u003Cp dir=\"ltr\" role=\"presentation\">\u003Cspan>Versatile: \u003C/span>\u003Cspan>One can use one brush for several purposes, and so one won’t need to purchase too many.\u003C/span>\u003C/p>\u003C/li>\u003C/ul>\u003Cp dir=\"ltr\">\u003Cspan>Brands like Jessup and BS-MALL make full brush kits that cost less than $20 and apply beautifully on the skin. You don’t have to break the bank to look fabulous.\u003C/span>\u003C/p>\u003Ch3 dir=\"ltr\">\u003Cspan>Pixelfox.ai – Your Digital Makeup Touch-Up Expert\u003C/span>\u003C/h3>\u003Cp dir=\"ltr\">\u003Cspan>Although Pixelfox is not a replacement of actual tools, it carries out most of the lifting. ai is your beauty routine for the digital age. It’s an online styling platform that allows you to:\u003C/span>\u003C/p>\u003Cul>\u003Cli dir=\"ltr\" aria-level=\"1\">\u003Cp dir=\"ltr\" role=\"presentation\">\u003Cspan>Try on make-up styles before you own them\u003C/span>\u003C/p>\u003C/li>\u003Cli dir=\"ltr\" aria-level=\"1\">\u003Cp dir=\"ltr\" role=\"presentation\">\u003Cspan>Ai arts to play with colors and styles\u003C/span>\u003C/p>\u003C/li>\u003Cli dir=\"ltr\" aria-level=\"1\">\u003Cp dir=\"ltr\" role=\"presentation\">\u003Cspan>Preview the effect of various tools on your finish\u003C/span>\u003C/p>\u003C/li>\u003C/ul>\u003Cp dir=\"ltr\">\u003Cspan>Take the guesswork out of trying a bold lip or a smoky eye with Pixelfox gives you an image of what the 3D make-up will look like—so you can select the perfect product more confidently.\u003C/span>\u003C/p>\u003Cp dir=\"ltr\">\u003Cspan>Explore it at Pixelfox.ai\u003C/span>\u003C/p>\u003Cp dir=\"ltr\">\u003Cspan>Makeup Tools Essentials for All Skill Levels\u003C/span>\u003C/p>\u003Cp dir=\"ltr\">\u003Cspan>So let’s organize it by experience:\u003C/span>\u003C/p>\u003Cp dir=\"ltr\">\u003Cspan>Beginners\u003C/span>\u003C/p>\u003Cul>\u003Cli dir=\"ltr\" aria-level=\"1\">\u003Cp dir=\"ltr\" role=\"presentation\">\u003Cspan>Foundation brush or sponge\u003C/span>\u003C/p>\u003C/li>\u003Cli dir=\"ltr\" aria-level=\"1\">\u003Cp dir=\"ltr\" role=\"presentation\">\u003Cspan>Blush brush\u003C/span>\u003C/p>\u003C/li>\u003Cli dir=\"ltr\" aria-level=\"1\">\u003Cp dir=\"ltr\" role=\"presentation\">\u003Cspan>Basic eyeshadow brush\u003C/span>\u003C/p>\u003C/li>\u003C/ul>\u003Cp dir=\"ltr\">\u003Cspan>Intermediate\u003C/span>\u003C/p>\u003Cul>\u003Cli dir=\"ltr\" aria-level=\"1\">\u003Cp dir=\"ltr\" role=\"presentation\">\u003Cspan>Angled contour brush\u003C/span>\u003C/p>\u003C/li>\u003Cli dir=\"ltr\" aria-level=\"1\">\u003Cp dir=\"ltr\" role=\"presentation\">\u003Cspan>Blending brush\u003C/span>\u003C/p>\u003C/li>\u003Cli dir=\"ltr\" aria-level=\"1\">\u003Cp dir=\"ltr\" role=\"presentation\">\u003Cspan>Brow spoolie\u003C/span>\u003C/p>\u003C/li>\u003C/ul>\u003Cp dir=\"ltr\">\u003Cspan>Advanced\u003C/span>\u003C/p>\u003Cul>\u003Cli dir=\"ltr\" aria-level=\"1\">\u003Cp dir=\"ltr\" role=\"presentation\">\u003Cspan>Fan brush for highlighter\u003C/span>\u003C/p>\u003C/li>\u003Cli dir=\"ltr\" aria-level=\"1\">\u003Cp dir=\"ltr\" role=\"presentation\">\u003Cspan>Precision liner brush\u003C/span>\u003C/p>\u003C/li>\u003Cli dir=\"ltr\" aria-level=\"1\">\u003Cp dir=\"ltr\" role=\"presentation\">\u003Cspan>Lip brush for crisp edges\u003C/span>\u003C/p>\u003C/li>\u003C/ul>\u003Cp dir=\"ltr\">\u003Cspan>Each tool serves a purpose. As your skills increase, so should your kit evolve.\u003C/span>\u003C/p>\u003Cp dir=\"ltr\">\u003Cspan>Step by Step to Perfect Studio-Like Makeup Tools\u003C/span>\u003C/p>\u003Ch2 id=\"wMbvuo\" dir=\"ltr\">\u003Cspan>how to make the most of your make up tool kit:\u003C/span>\u003C/h2>\u003Cp dir=\"ltr\">\u003Cspan>ixelfox is an A.I.-powered virtual makeup tool that allows you to try on different makeup looks right in your browser without the need for downloading anything. You upload a selfie — and the platform does the smart face detection thing to apply foundation, blush, eyeliner, lipstick and more with perfecting precision. Use it to try glam looks, natural backstage-inspired looks or full-on transformative looks every end of the day without being proud of just what you want looks before tapping into real products.\u003C/span>\u003C/p>\u003Cp dir=\"ltr\">\u003Cspan>Maintenance Matters:\u003C/span>\u003Cspan> Taking Care of Your Makeup Tools\u003C/span>\u003C/p>\u003Cp dir=\"ltr\">\u003Cspan>Grimy tools not only make you look bad — but they can also damage your skin. Keeping your make up tool set fresh:\u003C/span>\u003C/p>\u003Cul>\u003Cli dir=\"ltr\" aria-level=\"1\">\u003Cp dir=\"ltr\" role=\"presentation\">\u003Cspan>Regular Cleaning: Mild soap or brush cleanser.\u003C/span>\u003C/p>\u003C/li>\u003Cli dir=\"ltr\" aria-level=\"1\">\u003Cp dir=\"ltr\" role=\"presentation\">\u003Cspan>Air Dry Flat: Don't get wet and lose its glue.\u003C/span>\u003C/p>\u003C/li>\u003C/ul>\u003Cp dir=\"ltr\">\u003Cspan>Storage: Keep it DRY and where there is good ventilation. Use BRUSH HOLDERS or brush cases to keep your makeup brushes away from dust and damage.\u003C/span>\u003C/p>\u003Cp dir=\"ltr\">\u003Cspan>Clean tools work better and last longer. It is a small habit that pays big dividends.\u003C/span>\u003C/p>\u003Ch2 id=\"8qhfGY\" dir=\"ltr\">\u003Cspan>The Effect of Makeup Tools on Product Performance\u003C/span>\u003C/h2>\u003Cp dir=\"ltr\">\u003Cspan>The right tools can bring out the best in even the most spectacular makeup products. Heavy foundation will be wasted on a dense brush. The sponge was way too stiff, and would leave streaks. The correct makeup aligns with a translator — it helps facilitate your product to speak with fluency to your skin.\u003C/span>\u003C/p>\u003Cp dir=\"ltr\">\u003Cspan>For example:\u003C/span>\u003C/p>\u003Cp dir=\"ltr\">\u003Cspan>She has been a makeup artist for over 20 years! A contour 57mm length brush that gives an even finish across the face.\u003C/span>\u003C/p>\u003Cul>\u003Cli dir=\"ltr\" aria-level=\"1\">\u003Cp dir=\"ltr\" role=\"presentation\">\u003Cspan>A hemispherical blender leaves no uneven lines and is perfect for a natural look.\u003C/span>\u003C/p>\u003C/li>\u003Cli dir=\"ltr\" aria-level=\"1\">\u003Cp dir=\"ltr\" role=\"presentation\">\u003Cspan>A silicone applicator helps retain product and ensures glass-skin results.\u003C/span>\u003C/p>\u003C/li>\u003C/ul>\u003Cp dir=\"ltr\">\u003Cspan>Learning how to wield each of these makeup tools with his various textures, powder, cream, liquid, can really transform your results.\u003C/span>\u003C/p>\u003Ch3 dir=\"ltr\">\u003Cspan>Taking It to the Streets: Makeup Tools at Work\u003C/span>\u003C/h3>\u003Cp dir=\"ltr\">\u003Cspan>Say you’re getting ready for a photo shoot. What do you want from your drill? Here’s how a good tool kit helps:\u003C/span>\u003C/p>\u003Col>\u003Cli dir=\"ltr\" aria-level=\"1\">\u003Cp dir=\"ltr\" role=\"presentation\">\u003Cspan>Flat Foundation Brush: Rapidly covers red and blemished skin tone.\u003C/span>\u003C/p>\u003C/li>\u003Cli dir=\"ltr\" aria-level=\"1\">\u003Cp dir=\"ltr\" role=\"presentation\">\u003Cspan>Angled Contour Brush: Sculpts the perfect cheekbone without muddying the skin.\u003C/span>\u003C/p>\u003C/li>\u003Cli dir=\"ltr\" aria-level=\"1\">\u003Cp dir=\"ltr\" role=\"presentation\">\u003Cspan>Fan Brush: Puts on highlighter in just the right way, without going full-on disco-ball.\u003C/span>\u003C/p>\u003C/li>\u003Cli dir=\"ltr\" aria-level=\"1\">\u003Cp dir=\"ltr\" role=\"presentation\">\u003Cspan>Or say you’re going to a wedding. You want glam that lasts:\u003C/span>\u003C/p>\u003C/li>\u003Cli dir=\"ltr\" aria-level=\"1\">\u003Cp dir=\"ltr\" role=\"presentation\">\u003Cspan>Beauty Sponge: Secures long-wear foundation with a skin-like finish.\u003C/span>\u003C/p>\u003C/li>\u003Cli dir=\"ltr\" aria-level=\"1\">\u003Cp dir=\"ltr\" role=\"presentation\">\u003Cspan>Detail Brush - Perfect for sharpening your eyeliner and filling in your brows with precision.\u003C/span>\u003C/p>\u003C/li>\u003C/ol>\u003Cp dir=\"ltr\">\u003Cspan>Lip Brush: Prevents bold lipstick from bleeding or smudging.\u003C/span>\u003C/p>\u003Cp dir=\"ltr\">\u003Cspan>These are not just tools — they’re your backstage team.\u003C/span>\u003C/p>\u003Cul>\u003Cli dir=\"ltr\" aria-level=\"1\">\u003Cp dir=\"ltr\" role=\"presentation\">\u003Cspan>Inspect Bristle Quality: Give a gentle tug. If hairs shed, skip it.\u003C/span>\u003C/p>\u003C/li>\u003Cli dir=\"ltr\" aria-level=\"1\">\u003Cp dir=\"ltr\" role=\"presentation\">\u003Cspan>Reach for the Handle: It should feel comfortable and balanced.\u003C/span>\u003C/p>\u003C/li>\u003Cli dir=\"ltr\" aria-level=\"1\">\u003Cp dir=\"ltr\" role=\"presentation\">\u003Cspan>Test Absorption: \"Sponges should grip product, not guzzle it up all in one go.\u003C/span>\u003C/p>\u003C/li>\u003C/ul>\u003Cp dir=\"ltr\">\u003Cspan>Also, don’t overlook multi-taskers. Depending on the technique, a fluffy brush can deliver blush, powder or bronzer. Versatility saves space and money.\u003C/span>\u003C/p>\u003Ch3 dir=\"ltr\">\u003Cspan>Cleaning Tricks For When You Just Don't Have The Time\u003C/span>\u003C/h3>\u003Cp dir=\"ltr\">\u003Cspan>If you’re pressed for time, experiment with these quick-clean methods:\u003C/span>\u003C/p>\u003Cp dir=\"ltr\">\u003Cspan>Micellar Water Dip: \u003C/span>\u003Cspan>Swish brushes in micellar water for a quick cleanse.\u003C/span>\u003C/p>\u003Cp dir=\"ltr\">\u003Cspan>Dry Brush Cleaner: \u003C/span>\u003Cspan>The use of a sponge pad for properly removing the powder between uses.\u003C/span>\u003C/p>\u003Cp dir=\"ltr\">\u003Cspan>Blow-Dry Hack: \u003C/span>\u003Cspan>Speed up drying with cool air - it won't melt or damage bristles.\u003C/span>\u003C/p>\u003Cp dir=\"ltr\">\u003Cspan>Clean tools = clean skin. It’s that simple.\u003C/span>\u003C/p>\u003Ch2 id=\"NjrfRS\" dir=\"ltr\">\u003Cspan>FAQs\u003C/span>\u003C/h2>\u003Cp dir=\"ltr\">\u003Cspan>Q: So, is it possible to get studio sound on a DIY budget?\u003C/span>\u003C/p>\u003Cp dir=\"ltr\">\u003Cspan>Yes. Quality of technique and tools matter more than price.\u003C/span>\u003C/p>\u003Cp dir=\"ltr\">\u003Cspan>Q: How is Pixelfox? Can I help with tool selection? \u003C/span>\u003C/p>\u003Cp dir=\"ltr\">\u003Cspan>It helps to see how various styles of makeup can look like on your face, to get the necessary tools to recreate the style.\u003C/span>\u003C/p>\u003Cp dir=\"ltr\">\u003Cspan>Q: How should one clean brushes? \u003C/span>\u003C/p>\u003Cp dir=\"ltr\">\u003Cspan>Clean it using warm water and a mild soap. Wash and dry out in flats.\u003C/span>\u003C/p>\u003Cp dir=\"ltr\">\u003Cspan>Q: Is a sponge applicator better than a brush?\u003C/span>\u003C/p>\u003Cp dir=\"ltr\">\u003Cspan> It depends on the product. Sponges do better with liquids, brushes are best with powders.\u003C/span>\u003C/p>\u003Ch2 id=\"kYzmos\" dir=\"ltr\">\u003Cspan>Final thoughts: Arm And Protect Your Beauty Without Too Much Spending\u003C/span>\u003C/h2>\u003Cp dir=\"ltr\">\u003Cspan>You don’t need the funds of a celebrity to appear camera-ready. With a good\u003C/span>\u003Ca href=\"https://pixelfox.ai\">\u003Cspan> make up tool\u003C/span>\u003C/a>\u003Cspan> set and a little bit of patience from Pixelfox.ai), you can get studio-quality photos from your bedroom vanity. It’s all about being smart and choosing what’s possible for you, and having technique and a touch of creativity.\u003C/span>\u003C/p>\u003Cp>\u003Cspan id=\"docs-internal-guid-9dbea589-7fff-3dee-5f49-45e193b96eaf\">\u003C/span>\u003C/p>\u003Cp dir=\"ltr\">\u003Cspan>Ready to upgrade your routine? Visit Pixelfox.ai and discover your perfect look today.\u003C/span>\u003C/p>","makeup-tool-achieve-studio-results-with-affordable-sets",131,1754131143,{"id":107,"lang":11,"author_id":53,"image":108,"title":109,"keywords":15,"description":110,"content":111,"url":112,"views":113,"publishtime":114,"updatetime":115,"status":22,"publishtime_text":116,"status_text":25},2192,"https://api.pixelfox.ai/uploads/20250915/49f251e064406bfef18c47b33cf250d5.jpg","How to Make a Blurry Photo Clear in Photoshop: Easy Methods Explained","Understand the easy processes of defocusing a picture in Photoshop. Sharpen an image, repair a blurry photo, and add definition to a photo to produce pro-like results.","\u003Cp dir=\"ltr\" style=\"line-height:1.38;margin-top:12pt;margin-bottom:12pt;\">\u003Cspan style=\"font-size:12pt;font-family:Arial,sans-serif;color:#000000;background-color:transparent;font-weight:400;font-style:normal;font-variant:normal;text-decoration:none;vertical-align:baseline;white-space:pre;white-space:pre-wrap;\">Ever had an experience when you have taken a picture of what you thought was a perfect shot only to realize afterwards that its blur? It is depressing to take a lifetime picture and find that it is blurred when it is supposed to be clear. It has a silver lining though: You do not need to delete it. You now know that you can revive them with Adobe Photoshop and make them beautiful detailed photos.\u003C/span>\u003C/p>\u003Cul style=\"margin-top:0;margin-bottom:0;padding-inline-start:48px;\">\u003Cli dir=\"ltr\" style=\"list-style-type:disc;font-size:12pt;font-family:Arial,sans-serif;color:#000000;background-color:transparent;font-weight:400;font-style:normal;font-variant:normal;text-decoration:none;vertical-align:baseline;white-space:pre;\" aria-level=\"1\">\u003Cp dir=\"ltr\" style=\"line-height:1.38;margin-top:12pt;margin-bottom:0pt;\" role=\"presentation\">\u003Cspan style=\"font-size:12pt;font-family:Arial,sans-serif;color:#000000;background-color:transparent;font-weight:400;font-style:normal;font-variant:normal;text-decoration:none;vertical-align:baseline;white-space:pre;white-space:pre-wrap;\">This tutorial will demonstrate to you how to fix up a blurry image in photoshop. \u003C/span>\u003C/p>\u003C/li>\u003Cli dir=\"ltr\" style=\"list-style-type:disc;font-size:12pt;font-family:Arial,sans-serif;color:#000000;background-color:transparent;font-weight:700;font-style:normal;font-variant:normal;text-decoration:none;vertical-align:baseline;white-space:pre;\" aria-level=\"1\">\u003Cp dir=\"ltr\" style=\"line-height:1.38;margin-top:0pt;margin-bottom:12pt;\" role=\"presentation\">\u003Ca href=\"https://pixelfox.ai\" style=\"text-decoration:none;\">\u003Cspan style=\"font-size:12pt;font-family:Arial,sans-serif;color:#1155cc;background-color:transparent;font-weight:700;font-style:normal;font-variant:normal;text-decoration:underline;-webkit-text-decoration-skip:none;text-decoration-skip-ink:none;vertical-align:baseline;white-space:pre;white-space:pre-wrap;\">How to make a blurry photo clear in photoshop\u003C/span>\u003C/a>\u003C/p>\u003C/li>\u003C/ul>\u003Cp dir=\"ltr\" style=\"line-height:1.38;margin-top:12pt;margin-bottom:12pt;\">\u003Cspan style=\"font-size:12pt;font-family:Arial,sans-serif;color:#000000;background-color:transparent;font-weight:400;font-style:normal;font-variant:normal;text-decoration:none;vertical-align:baseline;white-space:pre;white-space:pre-wrap;\">In this tutorial we’ll show you how to clear up a blurry photo in Photoshop. You will learn useful ways to sharpen images, remove fuzziness and fix an out-of-focus picture. At the end of this tutorial, you’ll have learned how to unblur a photo in Photoshop and put your pictures back in focus.\u003C/span>\u003C/p>\u003Cp dir=\"ltr\" style=\"line-height:1.38;margin-top:12pt;margin-bottom:12pt;\">\u003Cimg src=\"https://api.pixelfox.ai/uploads/20250915/49f251e064406bfef18c47b33cf250d5.jpg\" style=\"width: 323px;\" data-filename=\"filename\" alt=\"How to Make a Blurry Photo Clear in Photoshop: Easy Methods Explained\" loading=\"lazy\">\u003Cspan style=\"font-size:12pt;font-family:Arial,sans-serif;color:#000000;background-color:transparent;font-weight:400;font-style:normal;font-variant:normal;text-decoration:none;vertical-align:baseline;white-space:pre;white-space:pre-wrap;\">\u003Cbr>\u003C/span>\u003C/p>\u003Ch2 dir=\"ltr\" style=\"line-height:1.38;margin-top:12pt;margin-bottom:12pt;\" id=\"umI9B6\">\u003Cspan style=\"font-size:16pt;font-family:Arial,sans-serif;color:#000000;background-color:transparent;font-weight:700;font-style:normal;font-variant:normal;text-decoration:none;vertical-align:baseline;white-space:pre;white-space:pre-wrap;\">Why Photos Turn Out Blurry\u003C/span>\u003C/h2>\u003Cp dir=\"ltr\" style=\"line-height:1.38;margin-top:12pt;margin-bottom:12pt;\">\u003Cspan style=\"font-size:12pt;font-family:Arial,sans-serif;color:#000000;background-color:transparent;font-weight:400;font-style:normal;font-variant:normal;text-decoration:none;vertical-align:baseline;white-space:pre;white-space:pre-wrap;\">Before they fix it, they need to know why they’re fixing it. There are several reasons for how do you fix a blurry picture in photoshop.\u003C/span>\u003C/p>\u003Cul style=\"margin-top:0;margin-bottom:0;padding-inline-start:48px;\">\u003Cli dir=\"ltr\" style=\"list-style-type:disc;font-size:12pt;font-family:Arial,sans-serif;color:#000000;background-color:transparent;font-weight:400;font-style:normal;font-variant:normal;text-decoration:none;vertical-align:baseline;white-space:pre;\" aria-level=\"1\">\u003Cp dir=\"ltr\" style=\"line-height:1.38;margin-top:12pt;margin-bottom:0pt;\" role=\"presentation\">\u003Cspan style=\"font-size:12pt;font-family:Arial,sans-serif;color:#000000;background-color:transparent;font-weight:400;font-style:normal;font-variant:normal;text-decoration:none;vertical-align:baseline;white-space:pre;white-space:pre-wrap;\">Camera shake—You would be surprised at how little you have to move your hand to have a punchy blur.\u003C/span>\u003C/p>\u003C/li>\u003Cli dir=\"ltr\" style=\"list-style-type:disc;font-size:12pt;font-family:Arial,sans-serif;color:#000000;background-color:transparent;font-weight:400;font-style:normal;font-variant:normal;text-decoration:none;vertical-align:baseline;white-space:pre;\" aria-level=\"1\">\u003Cp dir=\"ltr\" style=\"line-height:1.38;margin-top:0pt;margin-bottom:0pt;\" role=\"presentation\">\u003Cspan style=\"font-size:12pt;font-family:Arial,sans-serif;color:#000000;background-color:transparent;font-weight:400;font-style:normal;font-variant:normal;text-decoration:none;vertical-align:baseline;white-space:pre;white-space:pre-wrap;\">Soft focus – If the camera fails to lock focus on the subject, the photo may appear soft.\u003C/span>\u003C/p>\u003C/li>\u003Cli dir=\"ltr\" style=\"list-style-type:disc;font-size:12pt;font-family:Arial,sans-serif;color:#000000;background-color:transparent;font-weight:400;font-style:normal;font-variant:normal;text-decoration:none;vertical-align:baseline;white-space:pre;\" aria-level=\"1\">\u003Cp dir=\"ltr\" style=\"line-height:1.38;margin-top:0pt;margin-bottom:12pt;\" role=\"presentation\">\u003Cspan style=\"font-size:12pt;font-family:Arial,sans-serif;color:#000000;background-color:transparent;font-weight:400;font-style:normal;font-variant:normal;text-decoration:none;vertical-align:baseline;white-space:pre;white-space:pre-wrap;\">Low light – Most shooting indoors or at dusk will be at slower shutter speeds.\u003C/span>\u003C/p>\u003C/li>\u003C/ul>\u003Cp dir=\"ltr\" style=\"line-height:1.38;margin-top:12pt;margin-bottom:12pt;\">\u003Cspan style=\"font-size:12pt;font-family:Arial,sans-serif;color:#000000;background-color:transparent;font-weight:400;font-style:normal;font-variant:normal;text-decoration:none;vertical-align:baseline;white-space:pre;white-space:pre-wrap;\">Motion blur, Provided that your subject is moving and captured at an inappropriate shutter speed, then it will create streaks.\u003C/span>\u003C/p>\u003Cp dir=\"ltr\" style=\"line-height:1.38;margin-top:12pt;margin-bottom:12pt;\">\u003Cspan style=\"font-size:12pt;font-family:Arial,sans-serif;color:#000000;background-color:transparent;font-weight:400;font-style:normal;font-variant:normal;text-decoration:none;vertical-align:baseline;white-space:pre;white-space:pre-wrap;\">When you understand what is making it, then you are at a better place to decide the right Photoshop remedy. As an example, motion blur repair would require a different set of tools than sharpening an out of focus portrait.\u003C/span>\u003C/p>\u003Ch2 dir=\"ltr\" style=\"line-height:1.38;margin-top:12pt;margin-bottom:12pt;\" id=\"4RnHbO\">\u003Cspan style=\"font-size:16pt;font-family:Arial,sans-serif;color:#000000;background-color:transparent;font-weight:700;font-style:normal;font-variant:normal;text-decoration:none;vertical-align:baseline;white-space:pre;white-space:pre-wrap;\">How to make blurry pictures clear in\u003Ca href=\"https://pixelfox.ai/video/face-singing\" target=\"_blank\"> photoshop\u003C/a>\u003C/span>\u003C/h2>\u003Cp dir=\"ltr\" style=\"line-height:1.38;margin-top:12pt;margin-bottom:12pt;\">\u003Cspan style=\"font-size:12pt;font-family:Arial,sans-serif;color:#000000;background-color:transparent;font-weight:400;font-style:normal;font-variant:normal;text-decoration:none;vertical-align:baseline;white-space:pre;white-space:pre-wrap;\">Plenty of tools in Photoshop for sharpening. For the best techniques, step by step.\u003C/span>\u003C/p>\u003Ch3 dir=\"ltr\" style=\"line-height:1.38;margin-top:12pt;margin-bottom:12pt;\">\u003Cspan style=\"font-size:13.999999999999998pt;font-family:Arial,sans-serif;color:#000000;background-color:transparent;font-weight:700;font-style:normal;font-variant:normal;text-decoration:none;vertical-align:baseline;white-space:pre;white-space:pre-wrap;\">Method 1 \u003C/span>\u003C/h3>\u003Cp dir=\"ltr\" style=\"line-height:1.38;margin-top:12pt;margin-bottom:12pt;\">\u003Cspan style=\"font-size:12pt;font-family:Arial,sans-serif;color:#000000;background-color:transparent;font-weight:400;font-style:normal;font-variant:normal;text-decoration:none;vertical-align:baseline;white-space:pre;white-space:pre-wrap;\">Sharpen Tool With the image open, select the Sharpen tool.\u003C/span>\u003C/p>\u003Cp dir=\"ltr\" style=\"line-height:1.38;margin-top:12pt;margin-bottom:12pt;\">\u003Cspan style=\"font-size:12pt;font-family:Arial,sans-serif;color:#000000;background-color:transparent;font-weight:400;font-style:normal;font-variant:normal;text-decoration:none;vertical-align:baseline;white-space:pre;white-space:pre-wrap;\">When your image is a bit soft, a life-saving tool is the Sharpen Tool.\u003C/span>\u003C/p>\u003Cul style=\"margin-top:0;margin-bottom:0;padding-inline-start:48px;\">\u003Cli dir=\"ltr\" style=\"list-style-type:disc;font-size:12pt;font-family:Arial,sans-serif;color:#000000;background-color:transparent;font-weight:400;font-style:normal;font-variant:normal;text-decoration:none;vertical-align:baseline;white-space:pre;\" aria-level=\"1\">\u003Cp dir=\"ltr\" style=\"line-height:1.38;margin-top:12pt;margin-bottom:0pt;\" role=\"presentation\">\u003Cspan style=\"font-size:12pt;font-family:Arial,sans-serif;color:#000000;background-color:transparent;font-weight:400;font-style:normal;font-variant:normal;text-decoration:none;vertical-align:baseline;white-space:pre;white-space:pre-wrap;\">Open your image in Photoshop.\u003C/span>\u003C/p>\u003C/li>\u003Cli dir=\"ltr\" style=\"list-style-type:disc;font-size:12pt;font-family:Arial,sans-serif;color:#000000;background-color:transparent;font-weight:400;font-style:normal;font-variant:normal;text-decoration:none;vertical-align:baseline;white-space:pre;\" aria-level=\"1\">\u003Cp dir=\"ltr\" style=\"line-height:1.38;margin-top:0pt;margin-bottom:0pt;\" role=\"presentation\">\u003Cspan style=\"font-size:12pt;font-family:Arial,sans-serif;color:#000000;background-color:transparent;font-weight:400;font-style:normal;font-variant:normal;text-decoration:none;vertical-align:baseline;white-space:pre;white-space:pre-wrap;\">Make a copy of the background (so that you do not spoil the original).\u003C/span>\u003C/p>\u003C/li>\u003Cli dir=\"ltr\" style=\"list-style-type:disc;font-size:12pt;font-family:Arial,sans-serif;color:#000000;background-color:transparent;font-weight:400;font-style:normal;font-variant:normal;text-decoration:none;vertical-align:baseline;white-space:pre;\" aria-level=\"1\">\u003Cp dir=\"ltr\" style=\"line-height:1.38;margin-top:0pt;margin-bottom:0pt;\" role=\"presentation\">\u003Cspan style=\"font-size:12pt;font-family:Arial,sans-serif;color:#000000;background-color:transparent;font-weight:400;font-style:normal;font-variant:normal;text-decoration:none;vertical-align:baseline;white-space:pre;white-space:pre-wrap;\">Go to the toolbar and choose the Sharpen Tool.\u003C/span>\u003C/p>\u003C/li>\u003Cli dir=\"ltr\" style=\"list-style-type:disc;font-size:12pt;font-family:Arial,sans-serif;color:#000000;background-color:transparent;font-weight:400;font-style:normal;font-variant:normal;text-decoration:none;vertical-align:baseline;white-space:pre;\" aria-level=\"1\">\u003Cp dir=\"ltr\" style=\"line-height:1.38;margin-top:0pt;margin-bottom:0pt;\" role=\"presentation\">\u003Cspan style=\"font-size:12pt;font-family:Arial,sans-serif;color:#000000;background-color:transparent;font-weight:400;font-style:normal;font-variant:normal;text-decoration:none;vertical-align:baseline;white-space:pre;white-space:pre-wrap;\">Tune size of the brush and its strength.\u003C/span>\u003C/p>\u003C/li>\u003Cli dir=\"ltr\" style=\"list-style-type:disc;font-size:12pt;font-family:Arial,sans-serif;color:#000000;background-color:transparent;font-weight:400;font-style:normal;font-variant:normal;text-decoration:none;vertical-align:baseline;white-space:pre;\" aria-level=\"1\">\u003Cp dir=\"ltr\" style=\"line-height:1.38;margin-top:0pt;margin-bottom:12pt;\" role=\"presentation\">\u003Cspan style=\"font-size:12pt;font-family:Arial,sans-serif;color:#000000;background-color:transparent;font-weight:400;font-style:normal;font-variant:normal;text-decoration:none;vertical-align:baseline;white-space:pre;white-space:pre-wrap;\">Strategically paint over the spots that are offensive.\u003C/span>\u003C/p>\u003C/li>\u003C/ul>\u003Cp dir=\"ltr\" style=\"line-height:1.38;margin-top:12pt;margin-bottom:12pt;\">\u003Cspan style=\"font-size:12pt;font-family:Arial,sans-serif;color:#000000;background-color:transparent;font-weight:400;font-style:normal;font-variant:normal;text-decoration:none;vertical-align:baseline;white-space:pre;white-space:pre-wrap;\">The method will perform well in minor touch-ups like in sharpening of the eyes in a portrait. \u003C/span>\u003C/p>\u003Ch3 dir=\"ltr\" style=\"line-height:1.38;margin-top:12pt;margin-bottom:12pt;\">\u003Cspan style=\"font-size:13.999999999999998pt;font-family:Arial,sans-serif;color:#000000;background-color:transparent;font-weight:700;font-style:normal;font-variant:normal;text-decoration:none;vertical-align:baseline;white-space:pre;white-space:pre-wrap;\">Method 2 \u003C/span>\u003C/h3>\u003Cul style=\"margin-top:0;margin-bottom:0;padding-inline-start:48px;\">\u003Cli dir=\"ltr\" style=\"list-style-type:disc;font-size:12pt;font-family:Arial,sans-serif;color:#000000;background-color:transparent;font-weight:400;font-style:normal;font-variant:normal;text-decoration:none;vertical-align:baseline;white-space:pre;\" aria-level=\"1\">\u003Cp dir=\"ltr\" style=\"line-height:1.38;margin-top:12pt;margin-bottom:0pt;\" role=\"presentation\">\u003Cspan style=\"font-size:12pt;font-family:Arial,sans-serif;color:#000000;background-color:transparent;font-weight:400;font-style:normal;font-variant:normal;text-decoration:none;vertical-align:baseline;white-space:pre;white-space:pre-wrap;\">Sentence Shaper Filter Wanted to see how the smart sharpen would affect this image.\u003C/span>\u003C/p>\u003C/li>\u003Cli dir=\"ltr\" style=\"list-style-type:disc;font-size:12pt;font-family:Arial,sans-serif;color:#000000;background-color:transparent;font-weight:400;font-style:normal;font-variant:normal;text-decoration:none;vertical-align:baseline;white-space:pre;\" aria-level=\"1\">\u003Cp dir=\"ltr\" style=\"line-height:1.38;margin-top:0pt;margin-bottom:0pt;\" role=\"presentation\">\u003Cspan style=\"font-size:12pt;font-family:Arial,sans-serif;color:#000000;background-color:transparent;font-weight:400;font-style:normal;font-variant:normal;text-decoration:none;vertical-align:baseline;white-space:pre;white-space:pre-wrap;\">So when people come to ask me, “How do you make a blurry picture clear in Photoshop?” it will be the Smart Sharpen Filter for most.\u003C/span>\u003C/p>\u003C/li>\u003Cli dir=\"ltr\" style=\"list-style-type:disc;font-size:12pt;font-family:Arial,sans-serif;color:#000000;background-color:transparent;font-weight:400;font-style:normal;font-variant:normal;text-decoration:none;vertical-align:baseline;white-space:pre;\" aria-level=\"1\">\u003Cp dir=\"ltr\" style=\"line-height:1.38;margin-top:0pt;margin-bottom:0pt;\" role=\"presentation\">\u003Cspan style=\"font-size:12pt;font-family:Arial,sans-serif;color:#000000;background-color:transparent;font-weight:400;font-style:normal;font-variant:normal;text-decoration:none;vertical-align:baseline;white-space:pre;white-space:pre-wrap;\">A pop-up will open with sliders for Amount, Radius, and Reduce Noise.\u003C/span>\u003C/p>\u003C/li>\u003Cli dir=\"ltr\" style=\"list-style-type:disc;font-size:12pt;font-family:Arial,sans-serif;color:#000000;background-color:transparent;font-weight:400;font-style:normal;font-variant:normal;text-decoration:none;vertical-align:baseline;white-space:pre;\" aria-level=\"1\">\u003Cp dir=\"ltr\" style=\"line-height:1.38;margin-top:0pt;margin-bottom:0pt;\" role=\"presentation\">\u003Cspan style=\"font-size:12pt;font-family:Arial,sans-serif;color:#000000;background-color:transparent;font-weight:400;font-style:normal;font-variant:normal;text-decoration:none;vertical-align:baseline;white-space:pre;white-space:pre-wrap;\">Begin with a percentage (Think roughly 100%) of Amount and a Radius appropriate to the size of your File.\u003C/span>\u003C/p>\u003C/li>\u003Cli dir=\"ltr\" style=\"list-style-type:disc;font-size:12pt;font-family:Arial,sans-serif;color:#000000;background-color:transparent;font-weight:400;font-style:normal;font-variant:normal;text-decoration:none;vertical-align:baseline;white-space:pre;\" aria-level=\"1\">\u003Cp dir=\"ltr\" style=\"line-height:1.38;margin-top:0pt;margin-bottom:12pt;\" role=\"presentation\">\u003Cspan style=\"font-size:12pt;font-family:Arial,sans-serif;color:#000000;background-color:transparent;font-weight:400;font-style:normal;font-variant:normal;text-decoration:none;vertical-align:baseline;white-space:pre;white-space:pre-wrap;\">Use the Reduce Noise feature so it isn't all jaggies.\u003C/span>\u003C/p>\u003C/li>\u003C/ul>\u003Cp dir=\"ltr\" style=\"line-height:1.38;margin-top:12pt;margin-bottom:12pt;\">\u003Cspan style=\"font-size:12pt;font-family:Arial,sans-serif;color:#000000;background-color:transparent;font-weight:400;font-style:normal;font-variant:normal;text-decoration:none;vertical-align:baseline;white-space:pre;white-space:pre-wrap;\">This will help you bring highlights and shadows into your control, which is definitely one of the best methods to unblur images in Photoshop.\u003C/span>\u003C/p>\u003Ch3 dir=\"ltr\" style=\"line-height:1.38;margin-top:12pt;margin-bottom:12pt;\">\u003Cspan style=\"font-size:13.999999999999998pt;font-family:Arial,sans-serif;color:#000000;background-color:transparent;font-weight:700;font-style:normal;font-variant:normal;text-decoration:none;vertical-align:baseline;white-space:pre;white-space:pre-wrap;\">Method 3\u003C/span>\u003C/h3>\u003Cp dir=\"ltr\" style=\"line-height:1.38;margin-top:12pt;margin-bottom:12pt;\">\u003Cspan style=\"font-size:12pt;font-family:Arial,sans-serif;color:#000000;background-color:transparent;font-weight:700;font-style:normal;font-variant:normal;text-decoration:none;vertical-align:baseline;white-space:pre;white-space:pre-wrap;\">High Pass Filter for Blurry Images\u003C/span>\u003C/p>\u003Cp dir=\"ltr\" style=\"line-height:1.38;margin-top:12pt;margin-bottom:12pt;\">\u003Cspan style=\"font-size:12pt;font-family:Arial,sans-serif;color:#000000;background-color:transparent;font-weight:400;font-style:normal;font-variant:normal;text-decoration:none;vertical-align:baseline;white-space:pre;white-space:pre-wrap;\">If you want control, go with the High Pass Filter method. It is a professional hack that a lot of editors use to make out-of-focus pictures clear in Photoshop.\u003C/span>\u003C/p>\u003Cul style=\"margin-top:0;margin-bottom:0;padding-inline-start:48px;\">\u003Cli dir=\"ltr\" style=\"list-style-type:disc;font-size:12pt;font-family:Arial,sans-serif;color:#000000;background-color:transparent;font-weight:400;font-style:normal;font-variant:normal;text-decoration:none;vertical-align:baseline;white-space:pre;\" aria-level=\"1\">\u003Cp dir=\"ltr\" style=\"line-height:1.38;margin-top:12pt;margin-bottom:0pt;\" role=\"presentation\">\u003Cspan style=\"font-size:12pt;font-family:Arial,sans-serif;color:#000000;background-color:transparent;font-weight:400;font-style:normal;font-variant:normal;text-decoration:none;vertical-align:baseline;white-space:pre;white-space:pre-wrap;\">Duplicate your photo layer.\u003C/span>\u003C/p>\u003C/li>\u003Cli dir=\"ltr\" style=\"list-style-type:disc;font-size:12pt;font-family:Arial,sans-serif;color:#000000;background-color:transparent;font-weight:400;font-style:normal;font-variant:normal;text-decoration:none;vertical-align:baseline;white-space:pre;\" aria-level=\"1\">\u003Cp dir=\"ltr\" style=\"line-height:1.38;margin-top:0pt;margin-bottom:0pt;\" role=\"presentation\">\u003Cspan style=\"font-size:12pt;font-family:Arial,sans-serif;color:#000000;background-color:transparent;font-weight:400;font-style:normal;font-variant:normal;text-decoration:none;vertical-align:baseline;white-space:pre;white-space:pre-wrap;\">Visit Filter > Other > High Pass.\u003C/span>\u003C/p>\u003C/li>\u003Cli dir=\"ltr\" style=\"list-style-type:disc;font-size:12pt;font-family:Arial,sans-serif;color:#000000;background-color:transparent;font-weight:400;font-style:normal;font-variant:normal;text-decoration:none;vertical-align:baseline;white-space:pre;\" aria-level=\"1\">\u003Cp dir=\"ltr\" style=\"line-height:1.38;margin-top:0pt;margin-bottom:0pt;\" role=\"presentation\">\u003Cspan style=\"font-size:12pt;font-family:Arial,sans-serif;color:#000000;background-color:transparent;font-weight:400;font-style:normal;font-variant:normal;text-decoration:none;vertical-align:baseline;white-space:pre;white-space:pre-wrap;\">Slide the Radius until you begin to see the edges.\u003C/span>\u003C/p>\u003C/li>\u003Cli dir=\"ltr\" style=\"list-style-type:disc;font-size:12pt;font-family:Arial,sans-serif;color:#000000;background-color:transparent;font-weight:400;font-style:normal;font-variant:normal;text-decoration:none;vertical-align:baseline;white-space:pre;\" aria-level=\"1\">\u003Cp dir=\"ltr\" style=\"line-height:1.38;margin-top:0pt;margin-bottom:12pt;\" role=\"presentation\">\u003Cspan style=\"font-size:12pt;font-family:Arial,sans-serif;color:#000000;background-color:transparent;font-weight:400;font-style:normal;font-variant:normal;text-decoration:none;vertical-align:baseline;white-space:pre;white-space:pre-wrap;\">Change the blend mode of the layer to Overlay, but can be used Soft Light as well.\u003C/span>\u003C/p>\u003C/li>\u003C/ul>\u003Cp dir=\"ltr\" style=\"line-height:1.38;margin-top:12pt;margin-bottom:12pt;\">\u003Cspan style=\"font-size:12pt;font-family:Arial,sans-serif;color:#000000;background-color:transparent;font-weight:400;font-style:normal;font-variant:normal;text-decoration:none;vertical-align:baseline;white-space:pre;white-space:pre-wrap;\">This method is used to sharpen the edges and details, does not sharpen the entire photo, and thus it can be applied in any type of portraits.\u003C/span>\u003C/p>\u003Ch3 dir=\"ltr\" style=\"line-height:1.38;margin-top:12pt;margin-bottom:12pt;\">\u003Cspan style=\"font-size:13.999999999999998pt;font-family:Arial,sans-serif;color:#000000;background-color:transparent;font-weight:700;font-style:normal;font-variant:normal;text-decoration:none;vertical-align:baseline;white-space:pre;white-space:pre-wrap;\">Method 4\u003C/span>\u003C/h3>\u003Cp dir=\"ltr\" style=\"line-height:1.38;margin-top:12pt;margin-bottom:12pt;\">\u003Cspan style=\"font-size:12pt;font-family:Arial,sans-serif;color:#000000;background-color:transparent;font-weight:700;font-style:normal;font-variant:normal;text-decoration:none;vertical-align:baseline;white-space:pre;white-space:pre-wrap;\">shake reduction filter\u003C/span>\u003C/p>\u003Cp dir=\"ltr\" style=\"line-height:1.38;margin-top:12pt;margin-bottom:12pt;\">\u003Cspan style=\"font-size:12pt;font-family:Arial,sans-serif;color:#000000;background-color:transparent;font-weight:400;font-style:normal;font-variant:normal;text-decoration:none;vertical-align:baseline;white-space:pre;white-space:pre-wrap;\">Blurriness can, of course, be caused by a shaky hand or by something moving around while it’s being photographed. Try Photoshop's Shake Reduction Filter to help.\u003C/span>\u003C/p>\u003Cul style=\"margin-top:0;margin-bottom:0;padding-inline-start:48px;\">\u003Cli dir=\"ltr\" style=\"list-style-type:disc;font-size:12pt;font-family:Arial,sans-serif;color:#000000;background-color:transparent;font-weight:400;font-style:normal;font-variant:normal;text-decoration:none;vertical-align:baseline;white-space:pre;\" aria-level=\"1\">\u003Cp dir=\"ltr\" style=\"line-height:1.38;margin-top:12pt;margin-bottom:0pt;\" role=\"presentation\">\u003Cspan style=\"font-size:12pt;font-family:Arial,sans-serif;color:#000000;background-color:transparent;font-weight:400;font-style:normal;font-variant:normal;text-decoration:none;vertical-align:baseline;white-space:pre;white-space:pre-wrap;\">Filter > Sharpen > Shake Reduction.\u003C/span>\u003C/p>\u003C/li>\u003Cli dir=\"ltr\" style=\"list-style-type:disc;font-size:12pt;font-family:Arial,sans-serif;color:#000000;background-color:transparent;font-weight:400;font-style:normal;font-variant:normal;text-decoration:none;vertical-align:baseline;white-space:pre;\" aria-level=\"1\">\u003Cp dir=\"ltr\" style=\"line-height:1.38;margin-top:0pt;margin-bottom:0pt;\" role=\"presentation\">\u003Cspan style=\"font-size:12pt;font-family:Arial,sans-serif;color:#000000;background-color:transparent;font-weight:400;font-style:normal;font-variant:normal;text-decoration:none;vertical-align:baseline;white-space:pre;white-space:pre-wrap;\">Photoshop will automatically interpret the image and try to correct it for motion blur.\u003C/span>\u003C/p>\u003C/li>\u003Cli dir=\"ltr\" style=\"list-style-type:disc;font-size:12pt;font-family:Arial,sans-serif;color:#000000;background-color:transparent;font-weight:400;font-style:normal;font-variant:normal;text-decoration:none;vertical-align:baseline;white-space:pre;\" aria-level=\"1\">\u003Cp dir=\"ltr\" style=\"line-height:1.38;margin-top:0pt;margin-bottom:0pt;\" role=\"presentation\">\u003Cspan style=\"font-size:12pt;font-family:Arial,sans-serif;color:#000000;background-color:transparent;font-weight:400;font-style:normal;font-variant:normal;text-decoration:none;vertical-align:baseline;white-space:pre;white-space:pre-wrap;\">You may have to play with the blur trace bounds settings if the effect is out of range.\u003C/span>\u003C/p>\u003C/li>\u003Cli dir=\"ltr\" style=\"list-style-type:disc;font-size:12pt;font-family:Arial,sans-serif;color:#000000;background-color:transparent;font-weight:400;font-style:normal;font-variant:normal;text-decoration:none;vertical-align:baseline;white-space:pre;\" aria-level=\"1\">\u003Cp dir=\"ltr\" style=\"line-height:1.38;margin-top:0pt;margin-bottom:12pt;\" role=\"presentation\">\u003Cspan style=\"font-size:12pt;font-family:Arial,sans-serif;color:#000000;background-color:transparent;font-weight:400;font-style:normal;font-variant:normal;text-decoration:none;vertical-align:baseline;white-space:pre;white-space:pre-wrap;\">This is a godsend for low light, hand shake laden photos such as these.\u003C/span>\u003C/p>\u003C/li>\u003C/ul>\u003Ch2 dir=\"ltr\" style=\"line-height:1.38;margin-top:12pt;margin-bottom:12pt;\" id=\"SsmcMB\">\u003Cspan style=\"font-size:16pt;font-family:Arial,sans-serif;color:#000000;background-color:transparent;font-weight:700;font-style:normal;font-variant:normal;text-decoration:none;vertical-align:baseline;white-space:pre;white-space:pre-wrap;\">How to Unblur an Image in Photoshop\u003C/span>\u003C/h2>\u003Cp dir=\"ltr\" style=\"line-height:1.38;margin-top:12pt;margin-bottom:12pt;\">\u003Cspan style=\"font-size:12pt;font-family:Arial,sans-serif;color:#000000;background-color:transparent;font-weight:400;font-style:normal;font-variant:normal;text-decoration:none;vertical-align:baseline;white-space:pre;white-space:pre-wrap;\">If you want to know how to fix a pixelated image in Photoshop when using this and other additional methods, then these bonus tips can really help to boost your edits.\u003C/span>\u003C/p>\u003Ch3 dir=\"ltr\" style=\"line-height:1.38;margin-top:12pt;margin-bottom:12pt;\">\u003Cspan style=\"font-size:13.999999999999998pt;font-family:Arial,sans-serif;color:#000000;background-color:transparent;font-weight:700;font-style:normal;font-variant:normal;text-decoration:none;vertical-align:baseline;white-space:pre;white-space:pre-wrap;\">Convert to Smart Object\u003C/span>\u003C/h3>\u003Cp dir=\"ltr\" style=\"line-height:1.38;margin-top:12pt;margin-bottom:12pt;\">\u003Cspan style=\"font-size:12pt;font-family:Arial,sans-serif;color:#000000;background-color:transparent;font-weight:400;font-style:normal;font-variant:normal;text-decoration:none;vertical-align:baseline;white-space:pre;white-space:pre-wrap;\">By turning your layer into a Smart Object when making a nondestructive filter adjustment, you are able to undo and remake it easily without altering it forever. This will allow you to re-tighten sharpening if it gets too loose.\u003C/span>\u003C/p>\u003Ch3 dir=\"ltr\" style=\"line-height:1.38;margin-top:12pt;margin-bottom:12pt;\">\u003Cspan style=\"font-size:13.999999999999998pt;font-family:Arial,sans-serif;color:#000000;background-color:transparent;font-weight:700;font-style:normal;font-variant:normal;text-decoration:none;vertical-align:baseline;white-space:pre;white-space:pre-wrap;\">Use the Camera Raw Filter\u003C/span>\u003C/h3>\u003Cp dir=\"ltr\" style=\"line-height:1.38;margin-top:12pt;margin-bottom:12pt;\">\u003Cspan style=\"font-size:12pt;font-family:Arial,sans-serif;color:#000000;background-color:transparent;font-weight:400;font-style:normal;font-variant:normal;text-decoration:none;vertical-align:baseline;white-space:pre;white-space:pre-wrap;\">This technique produces more realistic results than over-sharpening using common filters.\u003C/span>\u003C/p>\u003Ch3 dir=\"ltr\" style=\"line-height:1.38;margin-top:12pt;margin-bottom:12pt;\">\u003Cspan style=\"font-size:13.999999999999998pt;font-family:Arial,sans-serif;color:#000000;background-color:transparent;font-weight:700;font-style:normal;font-variant:normal;text-decoration:none;vertical-align:baseline;white-space:pre;white-space:pre-wrap;\">Combine Multiple Methods\u003C/span>\u003C/h3>\u003Cp dir=\"ltr\" style=\"line-height:1.38;margin-top:12pt;margin-bottom:12pt;\">\u003Cspan style=\"font-size:12pt;font-family:Arial,sans-serif;color:#000000;background-color:transparent;font-weight:400;font-style:normal;font-variant:normal;text-decoration:none;vertical-align:baseline;white-space:pre;white-space:pre-wrap;\">Sometimes one method isn’t enough. You can, for instance, do Smart Sharpen, then a High Pass layer for detail.\u003C/span>\u003C/p>\u003Ch2 dir=\"ltr\" style=\"line-height:1.38;margin-top:12pt;margin-bottom:12pt;\" id=\"C3VUnw\">\u003Cspan style=\"font-size:16pt;font-family:Arial,sans-serif;color:#000000;background-color:transparent;font-weight:700;font-style:normal;font-variant:normal;text-decoration:none;vertical-align:baseline;white-space:pre;white-space:pre-wrap;\">How to fix out of focus photos in photoshop\u003C/span>\u003C/h2>\u003Cp dir=\"ltr\" style=\"line-height:1.38;margin-top:12pt;margin-bottom:12pt;\">\u003Cspan style=\"font-size:12pt;font-family:Arial,sans-serif;color:#000000;background-color:transparent;font-weight:400;font-style:normal;font-variant:normal;text-decoration:none;vertical-align:baseline;white-space:pre;white-space:pre-wrap;\">Restoring badly out-of-focus photos is more difficult than fixing photos that have mild blur, but Photoshop has solutions.\u003C/span>\u003C/p>\u003Cul style=\"margin-top:0;margin-bottom:0;padding-inline-start:48px;\">\u003Cli dir=\"ltr\" style=\"list-style-type:disc;font-size:12pt;font-family:Arial,sans-serif;color:#000000;background-color:transparent;font-weight:400;font-style:normal;font-variant:normal;text-decoration:none;vertical-align:baseline;white-space:pre;\" aria-level=\"1\">\u003Cp dir=\"ltr\" style=\"line-height:1.38;margin-top:12pt;margin-bottom:0pt;\" role=\"presentation\">\u003Cspan style=\"font-size:12pt;font-family:Arial,sans-serif;color:#000000;background-color:transparent;font-weight:400;font-style:normal;font-variant:normal;text-decoration:none;vertical-align:baseline;white-space:pre;white-space:pre-wrap;\">Try some Smart sharpen at a slightly higher radius to bring back more detail.\u003C/span>\u003C/p>\u003C/li>\u003Cli dir=\"ltr\" style=\"list-style-type:disc;font-size:12pt;font-family:Arial,sans-serif;color:#000000;background-color:transparent;font-weight:400;font-style:normal;font-variant:normal;text-decoration:none;vertical-align:baseline;white-space:pre;\" aria-level=\"1\">\u003Cp dir=\"ltr\" style=\"line-height:1.38;margin-top:0pt;margin-bottom:0pt;\" role=\"presentation\">\u003Cspan style=\"font-size:12pt;font-family:Arial,sans-serif;color:#000000;background-color:transparent;font-weight:400;font-style:normal;font-variant:normal;text-decoration:none;vertical-align:baseline;white-space:pre;white-space:pre-wrap;\">For deeper restoration, turn to AI-powered plugins that you can find online.\u003C/span>\u003C/p>\u003C/li>\u003Cli dir=\"ltr\" style=\"list-style-type:disc;font-size:12pt;font-family:Arial,sans-serif;color:#000000;background-color:transparent;font-weight:400;font-style:normal;font-variant:normal;text-decoration:none;vertical-align:baseline;white-space:pre;\" aria-level=\"1\">\u003Cp dir=\"ltr\" style=\"line-height:1.38;margin-top:0pt;margin-bottom:12pt;\" role=\"presentation\">\u003Cspan style=\"font-size:12pt;font-family:Arial,sans-serif;color:#000000;background-color:transparent;font-weight:400;font-style:normal;font-variant:normal;text-decoration:none;vertical-align:baseline;white-space:pre;white-space:pre-wrap;\">You won’t always have perfect sharpness, but you will have a recoverable photo.\u003C/span>\u003C/p>\u003C/li>\u003C/ul>\u003Ch2 dir=\"ltr\" style=\"line-height:1.38;margin-top:12pt;margin-bottom:12pt;\" id=\"p5wuKf\">\u003Cspan style=\"font-size:16pt;font-family:Arial,sans-serif;color:#000000;background-color:transparent;font-weight:700;font-style:normal;font-variant:normal;text-decoration:none;vertical-align:baseline;white-space:pre;white-space:pre-wrap;\">Enthusiasts’ Alternatives to Photoshop to Unblur Pictures\u003C/span>\u003C/h2>\u003Cp dir=\"ltr\" style=\"line-height:1.38;margin-top:12pt;margin-bottom:12pt;\">\u003Cspan style=\"font-size:12pt;font-family:Arial,sans-serif;color:#000000;background-color:transparent;font-weight:400;font-style:normal;font-variant:normal;text-decoration:none;vertical-align:baseline;white-space:pre;white-space:pre-wrap;\">Not everyone has Photoshop, and there are times you just want a faster approach. Tools like pixelfox.ai provide simple, easy and free online options to enhance blurry pictures without the need of using photoshop. Such applications use AI-powered algorithms to improve the images and restore the clarity, all in several seconds.\u003C/span>\u003C/p>\u003Cp dir=\"ltr\" style=\"line-height:1.38;margin-top:12pt;margin-bottom:12pt;\">\u003Cspan style=\"font-size:12pt;font-family:Arial,sans-serif;color:#000000;background-color:transparent;font-weight:400;font-style:normal;font-variant:normal;text-decoration:none;vertical-align:baseline;white-space:pre;white-space:pre-wrap;\">When you are short of time and do not want to devote time to mastering the high level Photoshop skills, you may be interested in an online fix.\u003C/span>\u003C/p>\u003Ch2 dir=\"ltr\" style=\"line-height:1.38;margin-top:12pt;margin-bottom:12pt;\" id=\"LQElnd\">\u003Cspan style=\"font-size:16pt;font-family:Arial,sans-serif;color:#000000;background-color:transparent;font-weight:700;font-style:normal;font-variant:normal;text-decoration:none;vertical-align:baseline;white-space:pre;white-space:pre-wrap;\">Conclusion\u003C/span>\u003C/h2>\u003Cp dir=\"ltr\" style=\"line-height:1.38;margin-top:12pt;margin-bottom:12pt;\">\u003Cspan style=\"font-size:12pt;font-family:Arial,sans-serif;color:#000000;background-color:transparent;font-weight:400;font-style:normal;font-variant:normal;text-decoration:none;vertical-align:baseline;white-space:pre;white-space:pre-wrap;\">The recollections do not necessarily have to be erased by a fuzzy photograph. With photoshop you can convert smoky,\u003C/span>\u003Ca href=\"https://pixelfox.ai\" style=\"text-decoration:none;\">\u003Cspan style=\"font-size:12pt;font-family:Arial,sans-serif;color:#1155cc;background-color:transparent;font-weight:400;font-style:normal;font-variant:normal;text-decoration:underline;-webkit-text-decoration-skip:none;text-decoration-skip-ink:none;vertical-align:baseline;white-space:pre;white-space:pre-wrap;\"> \u003C/span>\u003Cspan style=\"font-size:12pt;font-family:Arial,sans-serif;color:#1155cc;background-color:transparent;font-weight:700;font-style:normal;font-variant:normal;text-decoration:underline;-webkit-text-decoration-skip:none;text-decoration-skip-ink:none;vertical-align:baseline;white-space:pre;white-space:pre-wrap;\">blurry images into sharp\u003C/span>\u003Cspan style=\"font-size:12pt;font-family:Arial,sans-serif;color:#1155cc;background-color:transparent;font-weight:400;font-style:normal;font-variant:normal;text-decoration:underline;-webkit-text-decoration-skip:none;text-decoration-skip-ink:none;vertical-align:baseline;white-space:pre;white-space:pre-wrap;\">,\u003C/span>\u003C/a>\u003Cspan style=\"font-size:12pt;font-family:Arial,sans-serif;color:#000000;background-color:transparent;font-weight:400;font-style:normal;font-variant:normal;text-decoration:none;vertical-align:baseline;white-space:pre;white-space:pre-wrap;\"> clear ones. You may want to sharpen the photo with Sharpen Tool, Smart Sharpen or the High Pass Filter, but in any case, these are the three ways of sharpening the blurry photos using Photoshop.\u003C/span>\u003C/p>\u003Cp dir=\"ltr\" style=\"line-height:1.38;margin-top:12pt;margin-bottom:12pt;\">\u003Cspan style=\"font-size:12pt;font-family:Arial,sans-serif;color:#000000;background-color:transparent;font-weight:400;font-style:normal;font-variant:normal;text-decoration:none;vertical-align:baseline;white-space:pre;white-space:pre-wrap;\">And in case Photoshop feels like a bit too complicated, websites like pixelfox. ai go further with the AI-enhanced clarity restoration. The next time you are asking yourself how to use Photoshop to clear up a blurred photo, hopefully one of these solutions will work with you. You will know what tools to employ.\u003C/span>\u003C/p>\u003Ch2 dir=\"ltr\" style=\"line-height:1.38;margin-top:12pt;margin-bottom:12pt;\" id=\"LmpGBv\">\u003Cspan style=\"font-size:16pt;font-family:Arial,sans-serif;color:#000000;background-color:transparent;font-weight:700;font-style:normal;font-variant:normal;text-decoration:none;vertical-align:baseline;white-space:pre;white-space:pre-wrap;\">FAQs\u003C/span>\u003C/h2>\u003Cp dir=\"ltr\" style=\"line-height:1.38;margin-top:12pt;margin-bottom:12pt;\">\u003Cspan style=\"font-size:12pt;font-family:Arial,sans-serif;color:#000000;background-color:transparent;font-weight:400;font-style:normal;font-variant:normal;text-decoration:none;vertical-align:baseline;white-space:pre;white-space:pre-wrap;\">Q1: How do I unblur a picture in Photoshop for free?\u003C/span>\u003C/p>\u003Cp dir=\"ltr\" style=\"line-height:1.38;margin-top:12pt;margin-bottom:12pt;\">\u003Cspan style=\"font-size:12pt;font-family:Arial,sans-serif;color:#000000;background-color:transparent;font-weight:400;font-style:normal;font-variant:normal;text-decoration:none;vertical-align:baseline;white-space:pre;white-space:pre-wrap;\">You may employ some of the built-in Photoshop tools like Smart Sharpen and High Pass filters. If you don’t already have Photoshop, you can download a free trial or use web tools like pixelfox. ai are alternatives.\u003C/span>\u003C/p>\u003Cp dir=\"ltr\" style=\"line-height:1.38;margin-top:12pt;margin-bottom:12pt;\">\u003Cspan style=\"font-size:12pt;font-family:Arial,sans-serif;color:#000000;background-color:transparent;font-weight:400;font-style:normal;font-variant:normal;text-decoration:none;vertical-align:baseline;white-space:pre;white-space:pre-wrap;\">Q2: What is the best way to unblur a Photoshop photo?\u003C/span>\u003C/p>\u003Cp dir=\"ltr\" style=\"line-height:1.38;margin-top:12pt;margin-bottom:12pt;\">\u003Cspan style=\"font-size:12pt;font-family:Arial,sans-serif;color:#000000;background-color:transparent;font-weight:400;font-style:normal;font-variant:normal;text-decoration:none;vertical-align:baseline;white-space:pre;white-space:pre-wrap;\">For a general blur, the Smart Sharpen Filter is typically most effective, and for sharpness of detail, the High Pass Filter often does the best job.\u003C/span>\u003C/p>\u003Cp dir=\"ltr\" style=\"line-height:1.38;margin-top:12pt;margin-bottom:12pt;\">\u003Cspan style=\"font-size:12pt;font-family:Arial,sans-serif;color:#000000;background-color:transparent;font-weight:400;font-style:normal;font-variant:normal;text-decoration:none;vertical-align:baseline;white-space:pre;white-space:pre-wrap;\">Q3: Can Photoshop completely correct out of focus images?\u003C/span>\u003C/p>\u003Cp dir=\"ltr\" style=\"line-height:1.38;margin-top:12pt;margin-bottom:12pt;\">\u003Cspan style=\"font-size:12pt;font-family:Arial,sans-serif;color:#000000;background-color:transparent;font-weight:400;font-style:normal;font-variant:normal;text-decoration:none;vertical-align:baseline;white-space:pre;white-space:pre-wrap;\">Not always. It can make an excellent improvement in sharpness, but I cannot say that the most extreme blur will be recovered.\u003C/span>\u003C/p>\u003Cp dir=\"ltr\" style=\"line-height:1.38;margin-top:12pt;margin-bottom:12pt;\">\u003Cspan style=\"font-size:12pt;font-family:Arial,sans-serif;color:#000000;background-color:transparent;font-weight:400;font-style:normal;font-variant:normal;text-decoration:none;vertical-align:baseline;white-space:pre;white-space:pre-wrap;\">Q4: Can you blur an image with anything besides Photoshop?\u003C/span>\u003C/p>\u003Cp dir=\"ltr\" style=\"line-height:1.38;margin-top:12pt;margin-bottom:12pt;\">\u003Cspan style=\"font-size:12pt;font-family:Arial,sans-serif;color:#000000;background-color:transparent;font-weight:400;font-style:normal;font-variant:normal;text-decoration:none;vertical-align:baseline;white-space:pre;white-space:pre-wrap;\">There are online editors available like pixelfox. ai that employ AI to keep pictures automatically polished and sharp.\u003C/span>\u003C/p>\u003Cp dir=\"ltr\" style=\"line-height:1.38;margin-top:12pt;margin-bottom:12pt;\">\u003Cspan style=\"font-size:12pt;font-family:Arial,sans-serif;color:#000000;background-color:transparent;font-weight:400;font-style:normal;font-variant:normal;text-decoration:none;vertical-align:baseline;white-space:pre;white-space:pre-wrap;\">Q5: When editing a photo, should I use filters or edit with the tools to try to fix a blurry photo?\u003C/span>\u003C/p>\u003Cp>\u003Cspan id=\"docs-internal-guid-4a595cba-7fff-3ad7-357d-c317938319f7\">\u003C/span>\u003C/p>\u003Cp dir=\"ltr\" style=\"line-height:1.38;margin-top:12pt;margin-bottom:12pt;\">\u003Cspan style=\"font-size:12pt;font-family:Arial,sans-serif;color:#000000;background-color:transparent;font-weight:400;font-style:normal;font-variant:normal;text-decoration:none;vertical-align:baseline;white-space:pre;white-space:pre-wrap;\">Filters such as Smart Sharpen are ideal for simple fixes, as well as manual options such as the Sharpen Brush for more control.\u003C/span>\u003C/p>","how-to-make-a-blurry-photo-clear-in-photoshop-easy-methods-explained",72,1757928683,1757928749,"3 weeks ago",{"id":118,"lang":11,"author_id":12,"image":119,"title":120,"keywords":15,"description":121,"content":122,"url":123,"views":124,"publishtime":125,"updatetime":126,"status":22,"publishtime_text":24,"status_text":25},831,"https://api.pixelfox.ai/uploads/20250813/398cc33f985e98d09f65df67b50485bb.jpg","Chat GPT Picture Generator Free – No More Struggling with Complex Design Apps!","Learn more about Chat GPT Image Generator Free — create beautiful, high-resolution images in seconds without designing skills or expensive software.","\u003Cp dir=\"ltr\">\u003Cspan>In the rapid speed digital world, where everyone has limited time to capture it on their phone, visual content is not just a choice anymore. Frankly speaking, however, not everybody has the time (or cash) to become pros at complex design software. That is what the\u003C/span>\u003Ca href=\"https://pixelfox.ai\">\u003Cspan> Chat GPT Picture Generator Free \u003C/span>\u003C/a>\u003Cspan>offers, the ability to describe an image into a sentence and it would be generated automatically for you. Just a few seconds Imagine telling people in plain English what you are thinking and then in very high quality, the picture you shared with them only Great Am I kidding? against Photoshop headaches (even create these damn layers) not have to pay an expansive subscription Let your creativity go fast(Pure Creativity).\u003C/span>\u003C/p>\u003Cp dir=\"ltr\">\u003Cspan>This article delves into what a Chat GPT picture generator is, how to use it, why it can be quite useful and how it is revolutionizing the way that people are creating digital art and visuals.\u003C/span>\u003C/p>\u003Ch2 dir=\"ltr\">\u003Cspan>Chat GPT Picture Generator Free \u003C/span>\u003C/h2>\u003Cp dir=\"ltr\">\u003Cspan>Chat GPT Image Generator Free utilizes an AI to convert your text prompts into distinct high image quality images. Traditional design apps force you to pick color, shape, style element by element but this technology understands sentences via machine learning and returns visuals.\u003C/span>\u003C/p>\u003Cp dir=\"ltr\">\u003Cspan>It basically gives you an apparent creative assistant who implements your vision, but without the need to script, sketch, or drag/drop. You simply fill in some text, hit “Generate,” and you have your ChatGPT image.\u003C/span>\u003C/p>\u003Cp dir=\"ltr\">\u003Cspan>This AI tool is also referred to as:\u003C/span>\u003C/p>\u003Cul>\u003Cli dir=\"ltr\" aria-level=\"1\">\u003Cp dir=\"ltr\" role=\"presentation\">\u003Cspan>AI picture generator ChatGPT\u003C/span>\u003C/p>\u003C/li>\u003Cli dir=\"ltr\" aria-level=\"1\">\u003Cp dir=\"ltr\" role=\"presentation\">\u003Cspan>ChatGPT image generator free\u003C/span>\u003C/p>\u003C/li>\u003Cli dir=\"ltr\" aria-level=\"1\">\u003Cp dir=\"ltr\" role=\"presentation\">\u003Cspan>ChatGPT photo generator\u003C/span>\u003C/p>\u003C/li>\u003Cli dir=\"ltr\" aria-level=\"1\">\u003Cp dir=\"ltr\" role=\"presentation\">\u003Cspan>ChatGPT AI image generator\u003C/span>\u003C/p>\u003C/li>\u003Cli dir=\"ltr\" aria-level=\"1\">\u003Cp dir=\"ltr\" role=\"presentation\">\u003Cspan>And yes— you can use it for free.\u003C/span>\u003C/p>\u003C/li>\u003C/ul>\u003Ch3 dir=\"ltr\">\u003Cspan>Explanation of Chat GPT AI Image Generator\u003C/span>\u003C/h3>\u003Cp dir=\"ltr\">\u003Cspan>Chat GPT AI text-to-image technology is an astonishingly simple for something that powerful;\u003C/span>\u003C/p>\u003Cp dir=\"ltr\">\u003Cspan>You write a prompt\u003C/span>\u003C/p>\u003Cp dir=\"ltr\">\u003Cspan>Example: “A city skyline at sunset with super high buildings, reflecting neon lights off of glass.\u003C/span>\u003C/p>\u003Cp dir=\"ltr\">\u003Cimg src=\"https://api.pixelfox.ai/uploads/20250813/398cc33f985e98d09f65df67b50485bb.jpg\" style=\"width: 550px;\" data-filename=\"filename\" alt=\"Chat GPT Picture Generator Free – No More Struggling with Complex Design Apps!\" loading=\"lazy\">\u003Cspan>\u003Cbr>\u003C/span>\u003C/p>\u003Ch3 dir=\"ltr\">\u003Cspan>The AI processes your description\u003C/span>\u003C/h3>\u003Cp dir=\"ltr\">\u003Cspan>This is possible because it leverages state-of-the-art, large-scale image models trained on millions of visuals to align your words with visual concepts.\u003C/span>\u003C/p>\u003Ch3 dir=\"ltr\">\u003Cspan>The generator creates your image\u003C/span>\u003C/h3>\u003Cp dir=\"ltr\">\u003Cspan>Our partners at Marketplace Pulse enable a new kind of understanding about the relationships between brands, sellers, and individual products on Amazon. In seconds you are given an image similar to the example below, with a very high-resolution version matching your description.\u003C/span>\u003C/p>\u003Cp dir=\"ltr\">\u003Cspan>This makes it ideal for making:\u003C/span>\u003C/p>\u003Cul>\u003Cli dir=\"ltr\" aria-level=\"1\">\u003Cp dir=\"ltr\" role=\"presentation\">\u003Cspan>Social media graphics\u003C/span>\u003C/p>\u003C/li>\u003Cli dir=\"ltr\" aria-level=\"1\">\u003Cp dir=\"ltr\" role=\"presentation\">\u003Cspan>Book covers\u003C/span>\u003C/p>\u003C/li>\u003Cli dir=\"ltr\" aria-level=\"1\">\u003Cp dir=\"ltr\" role=\"presentation\">\u003Cspan>Marketing ads\u003C/span>\u003C/p>\u003C/li>\u003Cli dir=\"ltr\" aria-level=\"1\">\u003Cp dir=\"ltr\" role=\"presentation\">\u003Cspan>Concept art\u003C/span>\u003C/p>\u003C/li>\u003Cli dir=\"ltr\" aria-level=\"1\">\u003Cp dir=\"ltr\" role=\"presentation\">\u003Cspan>Custom wallpapers\u003C/span>\u003C/p>\u003C/li>\u003C/ul>\u003Ch2 dir=\"ltr\" id=\"IYEzK1\">\u003Cspan>Why The Free Chat GPT Image Generator?\u003C/span>\u003C/h2>\u003Cp dir=\"ltr\">\u003Cspan>If we are to be honest — graphic design software is a scary thing. Most quit their creations simply because programmes like photoshop and illustrator feels like learning a foreign language. Here, the free Chat GPT image generator comes into play.\u003C/span>\u003C/p>\u003Ch3 dir=\"ltr\">\u003Cspan>1. Zero Learning Curve\u003C/span>\u003C/h3>\u003Cp dir=\"ltr\">\u003Cspan>No more hours spent watching tutorials. Writing: If you can type, you can create.\u003C/span>\u003C/p>\u003Ch3 dir=\"ltr\">\u003Cspan>2. Saves Time and Money\u003C/span>\u003C/h3>\u003Cp dir=\"ltr\">\u003Cspan>Design services are costly on a traditional front. You can use the Chat GPT photo AI generator to sound like a pro and create professional results with zero cost.\u003C/span>\u003C/p>\u003Ch3 dir=\"ltr\">\u003Cspan>3. Unlimited Creativity\u003C/span>\u003C/h3>\u003Cp dir=\"ltr\">\u003Cspan>Or perhaps a cyberpunk dragon soaring above New York? Or, a watercolor painting of your dog rocking his own royal headgear? Just ask—the AI delivers.\u003C/span>\u003C/p>\u003Ch3 dir=\"ltr\">\u003Cspan>4. Accessible Anywhere\u003C/span>\u003C/h3>\u003Cp dir=\"ltr\">\u003Cspan>Many generators, like Pixelfox. ai, run entirely online. You don't have to have a powerful computer, or download large files.\u003C/span>\u003C/p>\u003Ch3 dir=\"ltr\">\u003Cspan>How to use Chat GPT (Step-by-Step) — Image Generation\u003C/span>\u003C/h3>\u003Cp dir=\"ltr\">\u003Cspan>Here is a brief guide to help you create images with Chat GPT.\u003C/span>\u003C/p>\u003Cp dir=\"ltr\">\u003Cspan>Go to a free Chat GPT image generator (eg. Pixelfox.ai).\u003C/span>\u003C/p>\u003Cp dir=\"ltr\">\u003Cspan>Write down your request, as detailed as you can.\u003C/span>\u003C/p>\u003Cp dir=\"ltr\">\u003Cspan>Example: A snowy forest cabin by candlelight but with oil paint flavours.\u003C/span>\u003C/p>\u003Cp dir=\"ltr\">\u003Cspan>Choose style or mood (optional).\u003C/span>\u003C/p>\u003Cp dir=\"ltr\">\u003Cspan>Then, click Generate and then wait for several seconds.\u003C/span>\u003C/p>\u003Cp dir=\"ltr\">\u003Cspan>Crop or download your new image.\u003C/span>\u003C/p>\u003Cp dir=\"ltr\">\u003Cspan>The more detailed your prompt, the better your picture.\u003C/span>\u003C/p>\u003Ch2 dir=\"ltr\" id=\"9BR5tc\">\u003Cspan>Innovative Applications of ChatGPT Picture AI\u003C/span>\u003C/h2>\u003Cp dir=\"ltr\">\u003Cspan>Some smart and fun use-cases with chatgpt picture generator tools are given below:\u003C/span>\u003C/p>\u003Cp dir=\"ltr\">\u003Cspan>Brand Marketing For Small Business—————-Get logo and banner with ease.\u003C/span>\u003C/p>\u003Cp dir=\"ltr\">\u003Cspan>Social Posts — Differentiate with custom visuals.\u003C/span>\u003C/p>\u003Cp dir=\"ltr\">\u003Cspan>Digital art projects — Teste de diversos estilos de arte.\u003C/span>\u003C/p>\u003Cp dir=\"ltr\">\u003Cspan>Gifts — Make awesome personalised images for friends and family.\u003C/span>\u003C/p>\u003Cp dir=\"ltr\">\u003Cspan>Story telling – Convert your short stories or blog in interactive demo.\u003C/span>\u003C/p>\u003Ch3 dir=\"ltr\">\u003Cspan>ChatGPT Enables you to Generate Images (Free)?\u003C/span>\u003C/h3>\u003Cp dir=\"ltr\">\u003Cspan>Yes! A few no-cost ChatGPT-using platforms exist where picture making is turned on. Nevertheless, possibly with some kind of free daily generation limits. And best yet because you can still produce an unlimited number of drafts, test ideas and save the top results.\u003C/span>\u003C/p>\u003Ch3 dir=\"ltr\">\u003Cspan>Does Chat GPT Have Inbuilt Image Generator\u003C/span>\u003C/h3>\u003Cp dir=\"ltr\">\u003Cspan>Although today, the basic ChatGPT app is primarily built for text but once it's aligned to AI image tools (like Pixelfox. It can generate images in realtime like below (also see ai). This mashup is a particularly good one as you get the language understanding capabilities of ChatGPT with super high end AI picture generation.\u003C/span>\u003C/p>\u003Ch3 dir=\"ltr\">\u003Cspan>Prompts Writing Best Practices for Chat GPT Photo Generator\u003C/span>\u003C/h3>\u003Cp dir=\"ltr\">\u003Cspan>Follow these tips to make sure you get the most out of your magic AI image generator :\u003C/span>\u003C/p>\u003Cp dir=\"ltr\">\u003Cspan>Description: Fluffy white cat in a wizard hat atop a pile of dusty old books instead of \"cat\".\u003C/span>\u003C/p>\u003Cp dir=\"ltr\">\u003Cspan>Include a taste of style: Real, watercolor, anime or 3D render\u003C/span>\u003C/p>\u003Cp dir=\"ltr\">\u003Cspan>Give The Mood Words: Saying if the song is both mysterious, vibrant or calm can help to set a tone.\u003C/span>\u003C/p>\u003Cp dir=\"ltr\">\u003Cspan>Add Perspective:Specify close-up/aerial view etc if neededintegratesudhanshu-3CommentmastertokenGetName();\u003C/span>\u003C/p>\u003Ch2 dir=\"ltr\" id=\"c39o80\">\u003Cspan>The Future of AI Image Generation\u003C/span>\u003C/h2>\u003Cp dir=\"ltr\">\u003Cspan>The new breed of AI image generators is advanced. It also allows us to zoom a bit into the future — what about real-time editing, films shot for an even larger resolution screen and more detailed personalization? This means that virtually no matter who they are—from a casual creator to an experienced designer—they will have some very powerful creative tools available to them.\u003C/span>\u003C/p>\u003Ch3 dir=\"ltr\">\u003Cspan>Why Pixelfox? Stands Out\u003C/span>\u003C/h3>\u003Cp dir=\"ltr\">\u003Cspan>There is Pixelfox, another free image generator in the platform of Chat GPT. ai offers:\u003C/span>\u003C/p>\u003Cp dir=\"ltr\">\u003Cspan>Realistic, high-quality images in seconds.\u003C/span>\u003C/p>\u003Cul>\u003Cli dir=\"ltr\" aria-level=\"1\">\u003Cp dir=\"ltr\" role=\"presentation\">\u003Cspan>Different styles available : from photorealism to fantasy art.\u003C/span>\u003C/p>\u003C/li>\u003Cli dir=\"ltr\" aria-level=\"1\">\u003Cp dir=\"ltr\" role=\"presentation\">\u003Cspan>Easy sharing and downloading options.\u003C/span>\u003C/p>\u003C/li>\u003Cli dir=\"ltr\" aria-level=\"1\">\u003Cp dir=\"ltr\" role=\"presentation\">\u003Cspan>No convoluted menus or design jargon.\u003C/span>\u003C/p>\u003C/li>\u003Cli dir=\"ltr\" aria-level=\"1\">\u003Cp dir=\"ltr\" role=\"presentation\">\u003Cspan>Great for beginners, and seasoned creators who wish to cut down on time.\u003C/span>\u003C/p>\u003C/li>\u003C/ul>\u003Ch2 dir=\"ltr\" id=\"K6o298\">\u003Cspan>Conclusion – Be Free To Create\u003C/span>\u003C/h2>\u003Cp dir=\"ltr\">\u003Ca href=\"https://pixelfox.ai\">\u003Cspan>Chat GPT picture generator free \u003C/span>\u003C/a>\u003Cspan>is not just a trend but it is a creative revolution. Now you can finally get your ideas out into the world, from reports and presentations to stories and memories.\u003C/span>\u003C/p>\u003Cp dir=\"ltr\">\u003Cspan>With tools like Pixelfox.ai in a few lines, it is all about ideas and a couple of words/hundreds of numbers doing the rest. The AI does the rest; you envision and it abstracts your mind into a beautiful, fast, free thing.\u003C/span>\u003C/p>\u003Ch2 dir=\"ltr\" id=\"QFw7DJ\">\u003Cspan>FAQs\u003C/span>\u003C/h2>\u003Cp dir=\"ltr\">\u003Cspan>Q1: How can I use the Chat GPT AI image generator?\u003C/span>\u003C/p>\u003Cp dir=\"ltr\">\u003Cspan>Enter your description in the generator, go through the style options (if available) and click “Generate”. And in a few seconds your image is ready to be used.\u003C/span>\u003C/p>\u003Cp dir=\"ltr\">\u003Cspan>Q2: Chat GPT Picture Generator uses the source Code.\u003C/span>\u003C/p>\u003Cp dir=\"ltr\">\u003Cspan>Yes, many platforms, including Pixelfox. ai, that allows image generation free of cost but with the option to purchase access to premium features.\u003C/span>\u003C/p>\u003Cp dir=\"ltr\">\u003Cspan>Q3: Realistic Pictures from ChatGPT?\u003C/span>\u003C/p>\u003Cp dir=\"ltr\">\u003Cspan>Absolutely. You can make this photorealistic by defining how the lighting works, setting textures, and configuring perspectives.\u003C/span>\u003C/p>\u003Cp dir=\"ltr\">\u003Cspan>Q4: Does Chat GPT can be used offline by running an image to slate generation script?\u003C/span>\u003C/p>\u003Cp>\u003Cspan id=\"docs-internal-guid-f8a826cc-7fff-33c2-05c5-9fb795c947e7\">\u003C/span>\u003C/p>\u003Cp dir=\"ltr\">\u003Cspan>Plus, since most generators are free and cloud-based, you need the internet.\u003C/span>\u003C/p>","chat-gpt-picture-generator-free-no-more-struggling-with-complex-design-apps",117,1755095218,1755095318,{"id":128,"lang":11,"author_id":53,"image":54,"title":129,"keywords":15,"description":130,"content":131,"url":132,"views":133,"publishtime":134,"updatetime":135,"status":22,"publishtime_text":116,"status_text":25},2241,"Top NSFW Photo Editor Tools for Realistic Image Editing","Explore the finest NSFW photo editor programs that let you get realistic with your images. See how an NSFW AI image editor can manipulate photos with accuracy and creativity. Explore Pixelfox. ai for advanced editing features.","\u003Cp dir=\"ltr\" style=\"line-height:1.38;margin-top:12pt;margin-bottom:12pt;\">\u003Cspan style=\"font-size:12pt;font-family:Arial,sans-serif;color:#000000;background-color:transparent;font-weight:400;font-style:normal;font-variant:normal;text-decoration:none;vertical-align:baseline;white-space:pre;white-space:pre-wrap;\">An \u003C/span>\u003Ca href=\"https://pixelfox.ai\" style=\"text-decoration:none;\">\u003Cspan style=\"font-size:12pt;font-family:Arial,sans-serif;color:#1155cc;background-color:transparent;font-weight:700;font-style:normal;font-variant:normal;text-decoration:underline;-webkit-text-decoration-skip:none;text-decoration-skip-ink:none;vertical-align:baseline;white-space:pre;white-space:pre-wrap;\">NSFW AI image edito\u003C/span>\u003Cspan style=\"font-size:12pt;font-family:Arial,sans-serif;color:#1155cc;background-color:transparent;font-weight:400;font-style:normal;font-variant:normal;text-decoration:underline;-webkit-text-decoration-skip:none;text-decoration-skip-ink:none;vertical-align:baseline;white-space:pre;white-space:pre-wrap;\">r\u003C/span>\u003C/a>\u003Cspan style=\"font-size:12pt;font-family:Arial,sans-serif;color:#000000;background-color:transparent;font-weight:400;font-style:normal;font-variant:normal;text-decoration:none;vertical-align:baseline;white-space:pre;white-space:pre-wrap;\"> is a solution. These are processing tools which combine artificial intelligence with innovation to enhance thinking, ingenuity and creativity for editing. Whether you need a little professional touch to your work, or trying them out on others, the correct NSFW photo editor can make all the difference in the world.\u003C/span>\u003C/p>\u003Cp dir=\"ltr\" style=\"line-height:1.38;margin-top:12pt;margin-bottom:12pt;\">\u003Cspan style=\"font-size:12pt;font-family:Arial,sans-serif;color:#000000;background-color:transparent;font-weight:400;font-style:normal;font-variant:normal;text-decoration:none;vertical-align:baseline;white-space:pre;white-space:pre-wrap;\">But the downside is that not all options are created equal—and nor are they compatible. There are a lot of NSFW image editors out there and not all of them produce stellar results. Some are clunky, others simply don’t provide the features we need and some of them can be difficult to trust. This guide will dissect the most potent instruments, what makes them special and how to use them in order to get a perfect result.\u003C/span>\u003C/p>\u003Ch2 dir=\"ltr\" style=\"line-height:1.38;margin-top:12pt;margin-bottom:12pt;\" id=\"852D6a\">\u003Cspan style=\"font-size:16pt;font-family:Arial,sans-serif;color:#000000;background-color:transparent;font-weight:700;font-style:normal;font-variant:normal;text-decoration:none;vertical-align:baseline;white-space:pre;white-space:pre-wrap;\">What is an NSFW Photo Editor?\u003C/span>\u003C/h2>\u003Cp dir=\"ltr\" style=\"line-height:1.38;margin-top:12pt;margin-bottom:12pt;\">\u003Cspan style=\"font-size:12pt;font-family:Arial,sans-serif;color:#000000;background-color:transparent;font-weight:400;font-style:normal;font-variant:normal;text-decoration:none;vertical-align:baseline;white-space:pre;white-space:pre-wrap;\">An NSFW photo editor is, at its absolute essence, a niche capable graphics programme with more intelligent AI driven features. Unlike the studio editors of old, these platforms can blur away flaws, prettify reality and make tweaks that aren’t necessarily easy to spot but also don’t scream ‘editing’.\u003C/span>\u003C/p>\u003Cp dir=\"ltr\" style=\"line-height:1.38;margin-top:12pt;margin-bottom:12pt;\">\u003Cspan style=\"font-size:12pt;font-family:Arial,sans-serif;color:#000000;background-color:transparent;font-weight:400;font-style:normal;font-variant:normal;text-decoration:none;vertical-align:baseline;white-space:pre;white-space:pre-wrap;\">I mean that you’re going from a base model paintbrush to a set of digital tools packed with smart brushes, erasers and filters that you just know where all, reshape, retouch and social-enhanced your photos.\u003C/span>\u003C/p>\u003Cp dir=\"ltr\" style=\"line-height:1.38;margin-top:12pt;margin-bottom:12pt;\">\u003Cspan style=\"font-size:12pt;font-family:Arial,sans-serif;color:#000000;background-color:transparent;font-weight:400;font-style:normal;font-variant:normal;text-decoration:none;vertical-align:baseline;white-space:pre;white-space:pre-wrap;\">An NSFW AI image editor that cuts through processing clutter to categorize and streamline unwanted noise from an explicit photo or video. So instead of spending hours making manual edits, this is AI doing the heavy lifting while you get your creative hat on.\u003C/span>\u003C/p>\u003Ch3 dir=\"ltr\" style=\"line-height:1.38;margin-top:12pt;margin-bottom:12pt;\">\u003Cspan style=\"font-size:13.999999999999998pt;font-family:Arial,sans-serif;color:#000000;background-color:transparent;font-weight:700;font-style:normal;font-variant:normal;text-decoration:none;vertical-align:baseline;white-space:pre;white-space:pre-wrap;\">Why to Use a NSFW AI Photo Editor?\u003C/span>\u003C/h3>\u003Cp dir=\"ltr\" style=\"line-height:1.38;margin-top:12pt;margin-bottom:12pt;\">\u003Cspan style=\"font-size:12pt;font-family:Arial,sans-serif;color:#000000;background-color:transparent;font-weight:400;font-style:normal;font-variant:normal;text-decoration:none;vertical-align:baseline;white-space:pre;white-space:pre-wrap;\">The appetite for NSFW image editing is growing, as people want real-looking edits without spending hours on complicated software. Here are a few reasons why these tools strike me:\u003C/span>\u003C/p>\u003Cp dir=\"ltr\" style=\"line-height:1.38;margin-top:12pt;margin-bottom:12pt;\">\u003Cspan style=\"font-size:12pt;font-family:Arial,sans-serif;color:#000000;background-color:transparent;font-weight:700;font-style:normal;font-variant:normal;text-decoration:none;vertical-align:baseline;white-space:pre;white-space:pre-wrap;\">Time saving – \u003C/span>\u003Cspan style=\"font-size:12pt;font-family:Arial,sans-serif;color:#000000;background-color:transparent;font-weight:400;font-style:normal;font-variant:normal;text-decoration:none;vertical-align:baseline;white-space:pre;white-space:pre-wrap;\">AI does the work that traditionally takes hours.\u003C/span>\u003C/p>\u003Cp dir=\"ltr\" style=\"line-height:1.38;margin-top:12pt;margin-bottom:12pt;\">\u003Cspan style=\"font-size:12pt;font-family:Arial,sans-serif;color:#000000;background-color:transparent;font-weight:700;font-style:normal;font-variant:normal;text-decoration:none;vertical-align:baseline;white-space:pre;white-space:pre-wrap;\">Natural results – \u003C/span>\u003Cspan style=\"font-size:12pt;font-family:Arial,sans-serif;color:#000000;background-color:transparent;font-weight:400;font-style:normal;font-variant:normal;text-decoration:none;vertical-align:baseline;white-space:pre;white-space:pre-wrap;\">Your skin is better, no overexposed filters and plastic like effects here!\u003C/span>\u003C/p>\u003Cp dir=\"ltr\" style=\"line-height:1.38;margin-top:12pt;margin-bottom:12pt;\">\u003Cspan style=\"font-size:12pt;font-family:Arial,sans-serif;color:#000000;background-color:transparent;font-weight:700;font-style:normal;font-variant:normal;text-decoration:none;vertical-align:baseline;white-space:pre;white-space:pre-wrap;\">Price = Cheap – \u003C/span>\u003Cspan style=\"font-size:12pt;font-family:Arial,sans-serif;color:#000000;background-color:transparent;font-weight:400;font-style:normal;font-variant:normal;text-decoration:none;vertical-align:baseline;white-space:pre;white-space:pre-wrap;\">The vast majority of editors are web-based, so no costly downloads.\u003C/span>\u003C/p>\u003Cp dir=\"ltr\" style=\"line-height:1.38;margin-top:12pt;margin-bottom:12pt;\">\u003Cspan style=\"font-size:12pt;font-family:Arial,sans-serif;color:#000000;background-color:transparent;font-weight:700;font-style:normal;font-variant:normal;text-decoration:none;vertical-align:baseline;white-space:pre;white-space:pre-wrap;\">Creative license — \u003C/span>\u003Cspan style=\"font-size:12pt;font-family:Arial,sans-serif;color:#000000;background-color:transparent;font-weight:400;font-style:normal;font-variant:normal;text-decoration:none;vertical-align:baseline;white-space:pre;white-space:pre-wrap;\">AI recommends edits, but you decide on the final product.\u003C/span>\u003C/p>\u003Cp dir=\"ltr\" style=\"line-height:1.38;margin-top:12pt;margin-bottom:12pt;\">\u003Cspan style=\"font-size:12pt;font-family:Arial,sans-serif;color:#000000;background-color:transparent;font-weight:400;font-style:normal;font-variant:normal;text-decoration:none;vertical-align:baseline;white-space:pre;white-space:pre-wrap;\">Instead of tweaking individual details manually, an NSFW AI photo editor can sharpen edges, adjust colours and restore depth in seconds.\u003C/span>\u003C/p>\u003Ch2 dir=\"ltr\" style=\"line-height:1.38;margin-top:12pt;margin-bottom:12pt;\" id=\"n39PrO\">\u003Cspan style=\"font-size:16pt;font-family:Arial,sans-serif;color:#000000;background-color:transparent;font-weight:700;font-style:normal;font-variant:normal;text-decoration:none;vertical-align:baseline;white-space:pre;white-space:pre-wrap;\">The Best NSFW Image Editor Features\u003C/span>\u003C/h2>\u003Cp dir=\"ltr\" style=\"line-height:1.38;margin-top:12pt;margin-bottom:12pt;\">\u003Cspan style=\"font-size:12pt;font-family:Arial,sans-serif;color:#000000;background-color:transparent;font-weight:400;font-style:normal;font-variant:normal;text-decoration:none;vertical-align:baseline;white-space:pre;white-space:pre-wrap;\">When choosing a platform, concentrate on the features that are the most important to you. What will the best NSFW photo editor look like?\u003C/span>\u003C/p>\u003Ch3 dir=\"ltr\" style=\"line-height:1.38;margin-top:12pt;margin-bottom:12pt;\">\u003Cspan style=\"font-size:13.999999999999998pt;font-family:Arial,sans-serif;color:#000000;background-color:transparent;font-weight:700;font-style:normal;font-variant:normal;text-decoration:none;vertical-align:baseline;white-space:pre;white-space:pre-wrap;\">AI-Powered Retouching\u003C/span>\u003C/h3>\u003Cp dir=\"ltr\" style=\"line-height:1.38;margin-top:12pt;margin-bottom:12pt;\">\u003Cspan style=\"font-size:12pt;font-family:Arial,sans-serif;color:#000000;background-color:transparent;font-weight:400;font-style:normal;font-variant:normal;text-decoration:none;vertical-align:baseline;white-space:pre;white-space:pre-wrap;\">AI will automatically smooth skin, sharpen features and tone on the fly. This keeps edits looking natural — not overdone.\u003C/span>\u003C/p>\u003Ch3 dir=\"ltr\" style=\"line-height:1.38;margin-top:12pt;margin-bottom:12pt;\">\u003Cspan style=\"font-size:13.999999999999998pt;font-family:Arial,sans-serif;color:#000000;background-color:transparent;font-weight:700;font-style:normal;font-variant:normal;text-decoration:none;vertical-align:baseline;white-space:pre;white-space:pre-wrap;\">Realism Enhancement\u003C/span>\u003C/h3>\u003Cp dir=\"ltr\" style=\"line-height:1.38;margin-top:12pt;margin-bottom:12pt;\">\u003Cspan style=\"font-size:12pt;font-family:Arial,sans-serif;color:#000000;background-color:transparent;font-weight:400;font-style:normal;font-variant:normal;text-decoration:none;vertical-align:baseline;white-space:pre;white-space:pre-wrap;\">Powerful NSFW AI picture editors make things more real by keeping textures natural but increasing quality.\u003C/span>\u003C/p>\u003Ch3 dir=\"ltr\" style=\"line-height:1.38;margin-top:12pt;margin-bottom:12pt;\">\u003Cspan style=\"font-size:13.999999999999998pt;font-family:Arial,sans-serif;color:#000000;background-color:transparent;font-weight:700;font-style:normal;font-variant:normal;text-decoration:none;vertical-align:baseline;white-space:pre;white-space:pre-wrap;\">Background Adjustments\u003C/span>\u003C/h3>\u003Cp dir=\"ltr\" style=\"line-height:1.38;margin-top:12pt;margin-bottom:12pt;\">\u003Cspan style=\"font-size:12pt;font-family:Arial,sans-serif;color:#000000;background-color:transparent;font-weight:400;font-style:normal;font-variant:normal;text-decoration:none;vertical-align:baseline;white-space:pre;white-space:pre-wrap;\">The process of erasing or altering backgrounds may be a difficult task, but AI can simplify it.\u003C/span>\u003C/p>\u003Ch3 dir=\"ltr\" style=\"line-height:1.38;margin-top:12pt;margin-bottom:12pt;\">\u003Cspan style=\"font-size:13.999999999999998pt;font-family:Arial,sans-serif;color:#000000;background-color:transparent;font-weight:700;font-style:normal;font-variant:normal;text-decoration:none;vertical-align:baseline;white-space:pre;white-space:pre-wrap;\">Precision Controls\u003C/span>\u003C/h3>\u003Cp dir=\"ltr\" style=\"line-height:1.38;margin-top:12pt;margin-bottom:12pt;\">\u003Cspan style=\"font-size:12pt;font-family:Arial,sans-serif;color:#000000;background-color:transparent;font-weight:400;font-style:normal;font-variant:normal;text-decoration:none;vertical-align:baseline;white-space:pre;white-space:pre-wrap;\">Though AI is used, even the most advanced editors can give you the ability to change every detail to make sure that the end result is exactly what you wanted.\u003C/span>\u003C/p>\u003Ch3 dir=\"ltr\" style=\"line-height:1.38;margin-top:12pt;margin-bottom:12pt;\">\u003Cspan style=\"font-size:13.999999999999998pt;font-family:Arial,sans-serif;color:#000000;background-color:transparent;font-weight:700;font-style:normal;font-variant:normal;text-decoration:none;vertical-align:baseline;white-space:pre;white-space:pre-wrap;\">Privacy & Security\u003C/span>\u003C/h3>\u003Cp dir=\"ltr\" style=\"line-height:1.38;margin-top:12pt;margin-bottom:12pt;\">\u003Cspan style=\"font-size:12pt;font-family:Arial,sans-serif;color:#000000;background-color:transparent;font-weight:400;font-style:normal;font-variant:normal;text-decoration:none;vertical-align:baseline;white-space:pre;white-space:pre-wrap;\">Security is of the utmost importance when working with NSFW photo editors. Reliable platforms like Pixelfox. ai Keep your data and edits safe.\u003C/span>\u003C/p>\u003Ch2 dir=\"ltr\" style=\"line-height:1.38;margin-top:12pt;margin-bottom:12pt;\" id=\"2hY3Bq\">\u003Cspan style=\"font-size:16pt;font-family:Arial,sans-serif;color:#000000;background-color:transparent;font-weight:700;font-style:normal;font-variant:normal;text-decoration:none;vertical-align:baseline;white-space:pre;white-space:pre-wrap;\">How Pixelfox.ai Paves the Way for NSFW Image Editing\u003C/span>\u003C/h2>\u003Cp dir=\"ltr\" style=\"line-height:1.38;margin-top:12pt;margin-bottom:12pt;\">\u003Cspan style=\"font-size:12pt;font-family:Arial,sans-serif;color:#000000;background-color:transparent;font-weight:400;font-style:normal;font-variant:normal;text-decoration:none;vertical-align:baseline;white-space:pre;white-space:pre-wrap;\">If you are looking for a more advanced NSFW AI image editor, Pixelfox.ai sets a high standard. Unlike any other photo editing app, Pixelfox combines AI-precision with a user-friendly design.\u003C/span>\u003C/p>\u003Cp dir=\"ltr\" style=\"line-height:1.38;margin-top:12pt;margin-bottom:12pt;\">\u003Cspan style=\"font-size:12pt;font-family:Arial,sans-serif;color:#000000;background-color:transparent;font-weight:700;font-style:normal;font-variant:normal;text-decoration:none;vertical-align:baseline;white-space:pre;white-space:pre-wrap;\">Here’s why it stands out:\u003C/span>\u003C/p>\u003Cp dir=\"ltr\" style=\"line-height:1.38;margin-top:12pt;margin-bottom:12pt;\">\u003Cspan style=\"font-size:12pt;font-family:Arial,sans-serif;color:#000000;background-color:transparent;font-weight:700;font-style:normal;font-variant:normal;text-decoration:none;vertical-align:baseline;white-space:pre;white-space:pre-wrap;\">Smart Editing Algorithms – \u003C/span>\u003Cspan style=\"font-size:12pt;font-family:Arial,sans-serif;color:#000000;background-color:transparent;font-weight:400;font-style:normal;font-variant:normal;text-decoration:none;vertical-align:baseline;white-space:pre;white-space:pre-wrap;\">Based on millions of samples, so every edit looks sharper and more natural.\u003C/span>\u003C/p>\u003Cp dir=\"ltr\" style=\"line-height:1.38;margin-top:12pt;margin-bottom:12pt;\">\u003Cspan style=\"font-size:12pt;font-family:Arial,sans-serif;color:#000000;background-color:transparent;font-weight:700;font-style:normal;font-variant:normal;text-decoration:none;vertical-align:baseline;white-space:pre;white-space:pre-wrap;\">User-Friendly Interface –\u003C/span>\u003Cspan style=\"font-size:12pt;font-family:Arial,sans-serif;color:#000000;background-color:transparent;font-weight:400;font-style:normal;font-variant:normal;text-decoration:none;vertical-align:baseline;white-space:pre;white-space:pre-wrap;\"> Whether you're a complete newbie to online tech, or a veteran pro, the site pretty much designs itself.\u003C/span>\u003C/p>\u003Cp dir=\"ltr\" style=\"line-height:1.38;margin-top:12pt;margin-bottom:12pt;\">\u003Cspan style=\"font-size:12pt;font-family:Arial,sans-serif;color:#000000;background-color:transparent;font-weight:700;font-style:normal;font-variant:normal;text-decoration:none;vertical-align:baseline;white-space:pre;white-space:pre-wrap;\">Edit in Real-Time — \u003C/span>\u003Cspan style=\"font-size:12pt;font-family:Arial,sans-serif;color:#000000;background-color:transparent;font-weight:400;font-style:normal;font-variant:normal;text-decoration:none;vertical-align:baseline;white-space:pre;white-space:pre-wrap;\">Edits apply to the big photo; users can fine-tune their photos with ease!\u003C/span>\u003C/p>\u003Cp dir=\"ltr\" style=\"line-height:1.38;margin-top:12pt;margin-bottom:12pt;\">\u003Cspan style=\"font-size:12pt;font-family:Arial,sans-serif;color:#000000;background-color:transparent;font-weight:700;font-style:normal;font-variant:normal;text-decoration:none;vertical-align:baseline;white-space:pre;white-space:pre-wrap;\">Lots Of Creative Freedom – \u003C/span>\u003Cspan style=\"font-size:12pt;font-family:Arial,sans-serif;color:#000000;background-color:transparent;font-weight:400;font-style:normal;font-variant:normal;text-decoration:none;vertical-align:baseline;white-space:pre;white-space:pre-wrap;\">From adding the final touches to a portrait, or just retouching new profile images – Pixelfox allows you total freedom.\u003C/span>\u003C/p>\u003Cp dir=\"ltr\" style=\"line-height:1.38;margin-top:12pt;margin-bottom:12pt;\">\u003Cspan style=\"font-size:12pt;font-family:Arial,sans-serif;color:#000000;background-color:transparent;font-weight:400;font-style:normal;font-variant:normal;text-decoration:none;vertical-align:baseline;white-space:pre;white-space:pre-wrap;\">What’s striking, though, is the way it balances AI automation and human creativity. It’s not going to make everything for you — instead, it acts as a strong assistant guiding you in making edits that feel like they came from your hands.\u003C/span>\u003C/p>\u003Ch2 dir=\"ltr\" style=\"line-height:1.38;margin-top:12pt;margin-bottom:12pt;\" id=\"vmn1zl\">\u003Cspan style=\"font-size:16pt;font-family:Arial,sans-serif;color:#000000;background-color:transparent;font-weight:700;font-style:normal;font-variant:normal;text-decoration:none;vertical-align:baseline;white-space:pre;white-space:pre-wrap;\">Using an NSFW \u003Ca href=\"https://pixelfox.ai/image/recolor\" target=\"_blank\">Photo Editor\u003C/a> adequately\u003C/span>\u003C/h2>\u003Cp dir=\"ltr\" style=\"line-height:1.38;margin-top:12pt;margin-bottom:12pt;\">\u003Cspan style=\"font-size:12pt;font-family:Arial,sans-serif;color:#000000;background-color:transparent;font-weight:400;font-style:normal;font-variant:normal;text-decoration:none;vertical-align:baseline;white-space:pre;white-space:pre-wrap;\">You don’t have to go crazy with your NSFW image editor to start off. Here’s a quick workflow:\u003C/span>\u003C/p>\u003Cul style=\"margin-top:0;margin-bottom:0;padding-inline-start:48px;\">\u003Cli dir=\"ltr\" style=\"list-style-type:disc;font-size:12pt;font-family:Arial,sans-serif;color:#000000;background-color:transparent;font-weight:400;font-style:normal;font-variant:normal;text-decoration:none;vertical-align:baseline;white-space:pre;\" aria-level=\"1\">\u003Cp dir=\"ltr\" style=\"line-height:1.38;margin-top:12pt;margin-bottom:0pt;\" role=\"presentation\">\u003Cspan style=\"font-size:12pt;font-family:Arial,sans-serif;color:#000000;background-color:transparent;font-weight:400;font-style:normal;font-variant:normal;text-decoration:none;vertical-align:baseline;white-space:pre;white-space:pre-wrap;\">To Upload Your Photo — That’s easy, too!.Just drag it into the editor.\u003C/span>\u003C/p>\u003C/li>\u003Cli dir=\"ltr\" style=\"list-style-type:disc;font-size:12pt;font-family:Arial,sans-serif;color:#000000;background-color:transparent;font-weight:400;font-style:normal;font-variant:normal;text-decoration:none;vertical-align:baseline;white-space:pre;\" aria-level=\"1\">\u003Cp dir=\"ltr\" style=\"line-height:1.38;margin-top:0pt;margin-bottom:0pt;\" role=\"presentation\">\u003Cspan style=\"font-size:12pt;font-family:Arial,sans-serif;color:#000000;background-color:transparent;font-weight:400;font-style:normal;font-variant:normal;text-decoration:none;vertical-align:baseline;white-space:pre;white-space:pre-wrap;\">Select Editing Tools – Utilize the adjust feature and tools like retouch or background.\u003C/span>\u003C/p>\u003C/li>\u003Cli dir=\"ltr\" style=\"list-style-type:disc;font-size:12pt;font-family:Arial,sans-serif;color:#000000;background-color:transparent;font-weight:400;font-style:normal;font-variant:normal;text-decoration:none;vertical-align:baseline;white-space:pre;\" aria-level=\"1\">\u003Cp dir=\"ltr\" style=\"line-height:1.38;margin-top:0pt;margin-bottom:0pt;\" role=\"presentation\">\u003Cspan style=\"font-size:12pt;font-family:Arial,sans-serif;color:#000000;background-color:transparent;font-weight:400;font-style:normal;font-variant:normal;text-decoration:none;vertical-align:baseline;white-space:pre;white-space:pre-wrap;\">Refine the Details – Allow the AI to do most of it, but tweak where needed.\u003C/span>\u003C/p>\u003C/li>\u003Cli dir=\"ltr\" style=\"list-style-type:disc;font-size:12pt;font-family:Arial,sans-serif;color:#000000;background-color:transparent;font-weight:400;font-style:normal;font-variant:normal;text-decoration:none;vertical-align:baseline;white-space:pre;\" aria-level=\"1\">\u003Cp dir=\"ltr\" style=\"line-height:1.38;margin-top:0pt;margin-bottom:12pt;\" role=\"presentation\">\u003Cspan style=\"font-size:12pt;font-family:Arial,sans-serif;color:#000000;background-color:transparent;font-weight:400;font-style:normal;font-variant:normal;text-decoration:none;vertical-align:baseline;white-space:pre;white-space:pre-wrap;\">Preview & Export – When all is ready, store it in full detail.\u003C/span>\u003C/p>\u003C/li>\u003C/ul>\u003Cp dir=\"ltr\" style=\"line-height:1.38;margin-top:12pt;margin-bottom:12pt;\">\u003Cspan style=\"font-size:12pt;font-family:Arial,sans-serif;color:#000000;background-color:transparent;font-weight:400;font-style:normal;font-variant:normal;text-decoration:none;vertical-align:baseline;white-space:pre;white-space:pre-wrap;\">This is how editing should work, letting you work faster to achieve high quality results without a steep learning curve.\u003C/span>\u003C/p>\u003Cp dir=\"ltr\" style=\"line-height:1.38;margin-top:12pt;margin-bottom:12pt;\">\u003Cspan style=\"font-size:12pt;font-family:Arial,sans-serif;color:#000000;background-color:transparent;font-weight:400;font-style:normal;font-variant:normal;text-decoration:none;vertical-align:baseline;white-space:pre;white-space:pre-wrap;\">Common pitfalls you should avoid when using NSFW AI image editors\u003C/span>\u003C/p>\u003Cp dir=\"ltr\" style=\"line-height:1.38;margin-top:12pt;margin-bottom:12pt;\">\u003Cspan style=\"font-size:12pt;font-family:Arial,sans-serif;color:#000000;background-color:transparent;font-weight:400;font-style:normal;font-variant:normal;text-decoration:none;vertical-align:baseline;white-space:pre;white-space:pre-wrap;\">Even with smart AI, you can make mistakes if you aren’t careful. Here’s what to watch out for:\u003C/span>\u003C/p>\u003Cp dir=\"ltr\" style=\"line-height:1.38;margin-top:12pt;margin-bottom:12pt;\">\u003Cspan style=\"font-size:12pt;font-family:Arial,sans-serif;color:#000000;background-color:transparent;font-weight:700;font-style:normal;font-variant:normal;text-decoration:none;vertical-align:baseline;white-space:pre;white-space:pre-wrap;\">Over-editing –\u003C/span>\u003Cspan style=\"font-size:12pt;font-family:Arial,sans-serif;color:#000000;background-color:transparent;font-weight:400;font-style:normal;font-variant:normal;text-decoration:none;vertical-align:baseline;white-space:pre;white-space:pre-wrap;\"> Photos can appear fake with too many filters or adjustments.\u003C/span>\u003C/p>\u003Cp dir=\"ltr\" style=\"line-height:1.38;margin-top:12pt;margin-bottom:12pt;\">\u003Cspan style=\"font-size:12pt;font-family:Arial,sans-serif;color:#000000;background-color:transparent;font-weight:700;font-style:normal;font-variant:normal;text-decoration:none;vertical-align:baseline;white-space:pre;white-space:pre-wrap;\">Skipping the right resolution –\u003C/span>\u003Cspan style=\"font-size:12pt;font-family:Arial,sans-serif;color:#000000;background-color:transparent;font-weight:400;font-style:normal;font-variant:normal;text-decoration:none;vertical-align:baseline;white-space:pre;white-space:pre-wrap;\"> Make sure your images are saved in a high-quality format/size so they don’t pixelate.\u003C/span>\u003C/p>\u003Cp dir=\"ltr\" style=\"line-height:1.38;margin-top:12pt;margin-bottom:12pt;\">\u003Cspan style=\"font-size:12pt;font-family:Arial,sans-serif;color:#000000;background-color:transparent;font-weight:700;font-style:normal;font-variant:normal;text-decoration:none;vertical-align:baseline;white-space:pre;white-space:pre-wrap;\">Not personalizing AI edits —\u003C/span>\u003Cspan style=\"font-size:12pt;font-family:Arial,sans-serif;color:#000000;background-color:transparent;font-weight:400;font-style:normal;font-variant:normal;text-decoration:none;vertical-align:baseline;white-space:pre;white-space:pre-wrap;\"> AI is intelligent, but you (the human) know what’s best.\u003C/span>\u003C/p>\u003Cp dir=\"ltr\" style=\"line-height:1.38;margin-top:12pt;margin-bottom:12pt;\">\u003Cspan style=\"font-size:12pt;font-family:Arial,sans-serif;color:#000000;background-color:transparent;font-weight:400;font-style:normal;font-variant:normal;text-decoration:none;vertical-align:baseline;white-space:pre;white-space:pre-wrap;\">By not falling for these common mistakes, your edits will appear real and professional.\u003C/span>\u003C/p>\u003Ch2 dir=\"ltr\" style=\"line-height:1.38;margin-top:12pt;margin-bottom:12pt;\" id=\"tK7sau\">\u003Cspan style=\"font-size:16pt;font-family:Arial,sans-serif;color:#000000;background-color:transparent;font-weight:700;font-style:normal;font-variant:normal;text-decoration:none;vertical-align:baseline;white-space:pre;white-space:pre-wrap;\">Conclusion\u003C/span>\u003C/h2>\u003Cp dir=\"ltr\" style=\"line-height:1.38;margin-top:12pt;margin-bottom:12pt;\">\u003Cspan style=\"font-size:12pt;font-family:Arial,sans-serif;color:#000000;background-color:transparent;font-weight:400;font-style:normal;font-variant:normal;text-decoration:none;vertical-align:baseline;white-space:pre;white-space:pre-wrap;\">The proliferation of \u003C/span>\u003Ca href=\"https://pixelfox.ai\" style=\"text-decoration:none;\">\u003Cspan style=\"font-size:12pt;font-family:Arial,sans-serif;color:#1155cc;background-color:transparent;font-weight:700;font-style:normal;font-variant:normal;text-decoration:underline;-webkit-text-decoration-skip:none;text-decoration-skip-ink:none;vertical-align:baseline;white-space:pre;white-space:pre-wrap;\">NSFW AI Image editors\u003C/span>\u003C/a>\u003Cspan style=\"font-size:12pt;font-family:Arial,sans-serif;color:#000000;background-color:transparent;font-weight:700;font-style:normal;font-variant:normal;text-decoration:none;vertical-align:baseline;white-space:pre;white-space:pre-wrap;\"> \u003C/span>\u003Cspan style=\"font-size:12pt;font-family:Arial,sans-serif;color:#000000;background-color:transparent;font-weight:400;font-style:normal;font-variant:normal;text-decoration:none;vertical-align:baseline;white-space:pre;white-space:pre-wrap;\">demonstrates just how much we can now do to photos. Gone are the days of spending hours on complex software – now thanks to AI you have tools that make it easy to look realistic, save time and be creative. Whether you're trying your hand at casual editing or professional projects, services like Pixelfox. ai Keep it simple and sharp.\u003C/span>\u003C/p>\u003Cp dir=\"ltr\" style=\"line-height:1.38;margin-top:12pt;margin-bottom:12pt;\">\u003Cspan style=\"font-size:12pt;font-family:Arial,sans-serif;color:#000000;background-color:transparent;font-weight:400;font-style:normal;font-variant:normal;text-decoration:none;vertical-align:baseline;white-space:pre;white-space:pre-wrap;\">If you’re tired of watching photos that are blurry, unclear and unfiltered, then it’s about time you explore the magic of NSFW photo editor.\u003C/span>\u003C/p>\u003Ch2 dir=\"ltr\" style=\"line-height:1.38;margin-top:12pt;margin-bottom:12pt;\" id=\"BT2d41\">\u003Cspan style=\"font-size:16pt;font-family:Arial,sans-serif;color:#000000;background-color:transparent;font-weight:700;font-style:normal;font-variant:normal;text-decoration:none;vertical-align:baseline;white-space:pre;white-space:pre-wrap;\">FAQs\u003C/span>\u003C/h2>\u003Cp dir=\"ltr\" style=\"line-height:1.38;margin-top:12pt;margin-bottom:12pt;\">\u003Cspan style=\"font-size:12pt;font-family:Arial,sans-serif;color:#000000;background-color:transparent;font-weight:400;font-style:normal;font-variant:normal;text-decoration:none;vertical-align:baseline;white-space:pre;white-space:pre-wrap;\">Q1. What is the most useful NSFW AI image editor? \u003C/span>\u003C/p>\u003Cp dir=\"ltr\" style=\"line-height:1.38;margin-top:12pt;margin-bottom:12pt;\">\u003Cspan style=\"font-size:12pt;font-family:Arial,sans-serif;color:#000000;background-color:transparent;font-weight:400;font-style:normal;font-variant:normal;text-decoration:none;vertical-align:baseline;white-space:pre;white-space:pre-wrap;\">Pixelfox.ai is also a popular option due to its powerful AI and realistic icy-creations.\u003C/span>\u003C/p>\u003Cp dir=\"ltr\" style=\"line-height:1.38;margin-top:12pt;margin-bottom:12pt;\">\u003Cspan style=\"font-size:12pt;font-family:Arial,sans-serif;color:#000000;background-color:transparent;font-weight:400;font-style:normal;font-variant:normal;text-decoration:none;vertical-align:baseline;white-space:pre;white-space:pre-wrap;\">Q2. Is it possible for us to be able to use an NSFW photo editor on mobile? \u003C/span>\u003C/p>\u003Cp dir=\"ltr\" style=\"line-height:1.38;margin-top:12pt;margin-bottom:12pt;\">\u003Cspan style=\"font-size:12pt;font-family:Arial,sans-serif;color:#000000;background-color:transparent;font-weight:400;font-style:normal;font-variant:normal;text-decoration:none;vertical-align:baseline;white-space:pre;white-space:pre-wrap;\">Yes, a lot of AI-driven editors are browser-based so it works on desktop and mobile.\u003C/span>\u003C/p>\u003Cp dir=\"ltr\" style=\"line-height:1.38;margin-top:12pt;margin-bottom:12pt;\">\u003Cspan style=\"font-size:12pt;font-family:Arial,sans-serif;color:#000000;background-color:transparent;font-weight:400;font-style:normal;font-variant:normal;text-decoration:none;vertical-align:baseline;white-space:pre;white-space:pre-wrap;\">Q3. Is NSFW image editor safe to use? \u003C/span>\u003C/p>\u003Cp dir=\"ltr\" style=\"line-height:1.38;margin-top:12pt;margin-bottom:12pt;\">\u003Cspan style=\"font-size:12pt;font-family:Arial,sans-serif;color:#000000;background-color:transparent;font-weight:400;font-style:normal;font-variant:normal;text-decoration:none;vertical-align:baseline;white-space:pre;white-space:pre-wrap;\">As long as the service has a solid reputation like Pixelfox. ai, never leaves your device - Your data and images are always safe.\u003C/span>\u003C/p>\u003Cp dir=\"ltr\" style=\"line-height:1.38;margin-top:12pt;margin-bottom:12pt;\">\u003Cspan style=\"font-size:12pt;font-family:Arial,sans-serif;color:#000000;background-color:transparent;font-weight:400;font-style:normal;font-variant:normal;text-decoration:none;vertical-align:baseline;white-space:pre;white-space:pre-wrap;\">Q4. Are NSFW photo editors free? \u003C/span>\u003C/p>\u003Cp dir=\"ltr\" style=\"line-height:1.38;margin-top:12pt;margin-bottom:12pt;\">\u003Cspan style=\"font-size:12pt;font-family:Arial,sans-serif;color:#000000;background-color:transparent;font-weight:400;font-style:normal;font-variant:normal;text-decoration:none;vertical-align:baseline;white-space:pre;white-space:pre-wrap;\">Some provide free features, and paying for a premium plan grants access to higher resolution exports and more advanced tools.\u003C/span>\u003C/p>\u003Cp dir=\"ltr\" style=\"line-height:1.38;margin-top:12pt;margin-bottom:12pt;\">\u003Cspan style=\"font-size:12pt;font-family:Arial,sans-serif;color:#000000;background-color:transparent;font-weight:400;font-style:normal;font-variant:normal;text-decoration:none;vertical-align:baseline;white-space:pre;white-space:pre-wrap;\">Q5. What app can make changes on a photo naturally? \u003C/span>\u003C/p>\u003Cp>\u003Cspan id=\"docs-internal-guid-6815d1ca-7fff-1e62-9c15-811ca539fee0\">\u003C/span>\u003C/p>\u003Cp dir=\"ltr\" style=\"line-height:1.38;margin-top:12pt;margin-bottom:12pt;\">\u003Cspan style=\"font-size:12pt;font-family:Arial,sans-serif;color:#000000;background-color:transparent;font-weight:400;font-style:normal;font-variant:normal;text-decoration:none;vertical-align:baseline;white-space:pre;white-space:pre-wrap;\">It’s all about the balance – use AI automation mixed with manual slide adjustment to keep images realistic, rather than processed.\u003C/span>\u003C/p>","top-nsfw-photo-editor-tools-for-realistic-image-editing",967,1758215015,1758215097,["Reactive",137],{"$si18n:cached-locale-configs":138,"$si18n:resolved-locale":15},{"en":139,"zh":142,"tw":144,"vi":146,"id":148,"pt":150,"es":152,"fr":154,"de":156,"it":158,"nl":160,"th":162,"tr":164,"ru":166,"ko":168,"ja":170,"ar":172,"pl":174},{"fallbacks":140,"cacheable":141},[],true,{"fallbacks":143,"cacheable":141},[],{"fallbacks":145,"cacheable":141},[],{"fallbacks":147,"cacheable":141},[],{"fallbacks":149,"cacheable":141},[],{"fallbacks":151,"cacheable":141},[],{"fallbacks":153,"cacheable":141},[],{"fallbacks":155,"cacheable":141},[],{"fallbacks":157,"cacheable":141},[],{"fallbacks":159,"cacheable":141},[],{"fallbacks":161,"cacheable":141},[],{"fallbacks":163,"cacheable":141},[],{"fallbacks":165,"cacheable":141},[],{"fallbacks":167,"cacheable":141},[],{"fallbacks":169,"cacheable":141},[],{"fallbacks":171,"cacheable":141},[],{"fallbacks":173,"cacheable":141},[],{"fallbacks":175,"cacheable":141},[],["Set"],["ShallowReactive",178],{"article-detail-best-funny-face-filter-app-endless-comedy-pics":-1},"/blog/best-funny-face-filter-app-endless-comedy-pics",{"userStore":181},{"showLoginModal":182,"showLoginClose":141,"loading":183,"inviteCode":15,"bidIdentification":15,"token":15,"userInfo":185,"showPriceDialog":182,"paidBefore":61,"showTrailEndDialog":182},false,{"show":182,"message":184},"加载中...",{"avatar":186,"nickname":186,"email":186},null]