 Credit

Ever spent ages crafting the perfect shot, only to upload it and watch it transform into a blurry, pixelated mess? Yeah, we’ve all been there. It feels like the internet has a personal vendetta against your photo quality. You’re not alone—a huge chunk of users struggle with this daily. The culprit? Bad pixel management. The solution? A damn good picture pixel editor. But before you fall down a rabbit hole of clunky software and confusing interfaces, let's cut through the noise. This guide will show you how to master the art of the pixel edit, fix your resolution woes for good, and introduce you to the AI-powered secret weapon the pros use.
Let's be real: most articles on this topic are either dry-as-dust technical manuals or glorified ads for mediocre tools. We're not doing that. We're going to break down what actually matters, how to modify photo size without sacrificing quality, and why your old methods are holding you back.
What's the Big Deal with Pixels, Anyway? 🧐
Before we dive into the tools, let's get one thing straight. Pixels are the tiny building blocks of every digital image. Think of them like microscopic Lego bricks. The number of these bricks determines your image's resolution. More pixels = higher resolution = sharper image.
Pixels vs. Resolution: The Quick and Dirty Guide
When you edit image pixels, you're fundamentally changing the DNA of your photo.
- Making an image smaller (Downsizing): Your editor throws away pixels. A good tool does this intelligently, preserving detail. A bad one just randomly chucks them out, leaving you with a jagged mess.
- Making an image larger (Upscaling): This is where the magic (or horror) happens. The editor has to invent new pixels based on the existing ones. This is why simply stretching a small image in MS Paint makes it look like a disaster. It's just guessing, and it's terrible at it.
This is exactly why you need a dedicated image pixel editor. It’s designed for this specific, delicate surgery on your photos. You wouldn't use a hammer to perform heart surgery, right? So why use a generic tool for a precision task like image adjustment?
When Do You Actually Need an Image Pixel Editor?
You'd be surprised how often it comes up. It’s not just for graphic designers.
- Social Media: Instagram, Facebook, and Twitter have strict size requirements. Uploading a massive photo gets it brutally compressed. A
photo size online editorhelps you pre-format it perfectly. - Websites & Blogs: Large images are the #1 cause of slow-loading websites. According to studies from sources like the Nielsen Norman Group, page speed is critical for user experience. A
px photo editoroptimizes images for the web. - Email: Ever tried emailing a folder of vacation photos and gotten that dreaded "file size too large" error? Yep, you need to
pic adjuster. - Online Forms: Applying for a job or a visa online often requires a specific
photo pixeldimension.
The Old Way vs. The Smart Way: Photoshop vs. AI
For years, the default answer to any photo editing question was "Just use Photoshop." But let's be honest, that's like telling someone who needs to hang a picture frame to go build a house first.
The Photoshop Grind: Why Manual Pixel Edit is a Pain
Photoshop is incredibly powerful, but it's also:
- Expensive: That subscription fee adds up.
- Complex: The learning curve is more of a learning cliff. Finding the "Save for Web (Legacy)" option feels like an achievement.
- Overkill: You don't need a thousand tools just to resize a
pixel picture.
The manual process involves navigating menus, understanding resampling algorithms (Bicubic Smoother, anyone?), and a lot of trial and error. It's time-consuming and frustrating for a seemingly simple task.
The AI Revolution: Meet Pixelfox, Your New Best Friend
This is 2025. We have AI that can write poetry and drive cars. Why are we still manually editing pixels? This is where a modern, free AI photo editor like Pixelfox AI changes the game entirely.
Instead of making you do the math, AI-powered tools analyze the content of your image and make intelligent decisions. When you upscale an image, Pixelfox’s AI doesn't just guess; it uses its training on millions of images to generate new pixels that look sharp, clean, and natural. It's the difference between a blurry mess and a stunningly clear photo. This isn't just a pic pixel editor; it's a resolution editor on steroids.
How to Edit Picture Pixels with Pixelfox AI (Step-by-Step)
Enough talk. Let's see it in action. Resizing an image shouldn't take a 10-minute YouTube tutorial. With Pixelfox, it takes seconds.
Tutorial 1: The Classic Resize: Modify Photo Size Without Tears
Let's say you have a high-res photo (4000x3000 pixels) and you need it to be 800 pixels wide for your blog.
- Upload: Drag and drop your image directly onto the Pixelfox AI website. No sign-up, no nonsense.
- Resize: Instead of hunting through menus, you'll see simple input boxes for Width and Height. Type "800" into the width box. The "Maintain Aspect Ratio" lock is on by default (thank god!), so the height adjusts automatically.
- Download: Hit the button. Done. The AI ensures the downscaling process is smooth, preserving maximum detail.
That's it. You just performed a high-quality photo adjustment in less time than it takes to brew a cup of coffee.
Tip: Before making any drastic changes, always work on a copy of your photo. This gives you a safety net if you want to go back to the original. Pixelfox is non-destructive, but it's a great habit to get into for any
photo edit in pixeltask.
Tutorial 2: Beyond Resizing: Using AI for Smart Image Adjustment
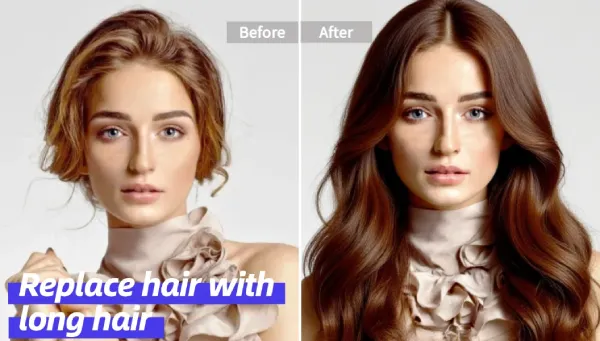
Sometimes the problem isn't just size; it's color, lighting, or unwanted objects. Old-school pixel editors make you manually select and tweak these things. With Pixelfox, you can use simple text prompts.
Imagine you have a product photo that needs a new look.
- Upload Your Image.
- Use the Text Prompt Feature: Type something like, "Change the background to a solid light gray" or "Make the blue dress red."
- Let the AI Work: The AI Image Editor analyzes your image, identifies the "blue dress," and intelligently recolors it, handling all the shadows and highlights.
This is the future of photo editing. You describe what you want, and the AI executes it at the pixel level.
Pro-Level Moves: Advanced Pixel Editing Tricks 🚀
Once you're comfortable with the basics, you can use these skills for some seriously cool applications. These are the kinds of tasks that used to require a professional.
E-commerce Gold: Creating Flawless White Backgrounds
Clean, consistent product photos are non-negotiable for any online store.
- Upload your product shot to Pixelfox AI.
- Use the "Remove Background" tool. The AI will automatically detect the product and create a precise cutout.
- Add a new background layer and fill it with pure white (#FFFFFF).
The result is a professional, Amazon-ready product shot that makes your items pop. No more tedious hours with the Pen Tool.
YouTube Stardom: Swapping Backgrounds for Click-Worthy Thumbnails
A great thumbnail can make or break a video. Want to put yourself in front of a dramatic explosion or a serene landscape?
- Take a photo of yourself against a plain wall.
- Upload it to Pixelfox and remove the background.
- Find your epic background image and place it on a layer behind your cutout.
You've just created a dynamic, eye-catching thumbnail that screams "Click me!"—all without a green screen.
The 3 Deadly Sins of Image Resizing (And How to Atone)
We see these mistakes all the time. They're the fastest way to ruin a perfectly good photo.
- Ignoring Aspect Ratio. This is a cardinal sin. When you resize, if you don't lock the aspect ratio, you'll end up with a stretched or squashed image. Your friends will look weirdly tall and skinny, or your beautiful landscape will look flat. Always, always keep that little chain-link icon locked.
- Upscaling Too Much. As we discussed, making images bigger involves creating pixels from thin air. Even the best AI has its limits. If you try to turn a tiny 100x100 thumbnail into a 4K wallpaper, it's going to look blurry. Start with the highest resolution source image you have.
- Saving in the Wrong Format. For web photos with lots of colors (like photographs), use JPEG. For images with sharp lines, text, or transparent backgrounds (like logos), use PNG. Saving a logo as a JPEG will introduce ugly artifacts around the edges.
Tip: When saving JPEGs, you'll often see a "Quality" slider (from 0-100). For the web, a setting between 70-85 is usually the sweet spot. It dramatically reduces file size with almost no visible loss in quality. This is a key
online image pixeloptimization trick.
Real-World Wins: See Pixel Editing in Action 🏆
Case Study 1: The Startup's Logo Crisis
A new startup had their logo designed but only received one large PNG file. They needed it for their website header (small and wide), social media profile (square), and email signature (tiny). Using a traditional pic pixel editor would mean manually cropping and resizing three different versions, risking quality loss.
Solution: Using Pixelfox AI, they uploaded the logo once. They used the resizer to create the web header version, the cropper to create a perfect square for social media, and finally, resized that down for the email signature. The whole process took less than 5 minutes, and every version was crisp and clean.
Case Study 2: The Social Media Manager's Nightmare
A social media manager had to prep 50 photos for an upcoming campaign across Instagram, Facebook, and Twitter. Each platform needed different dimensions. Doing this one by one would have been a full day of soul-crushing work.
Solution: They used a tool with batch processing capabilities. They created presets for "Instagram Post," "Facebook Story," etc., and then processed all 50 images in one go. What would have taken hours was done in minutes. This is the power of a smart pixel online free tool.
Frequently Asked Questions (FAQ)
1. How do I resize a photo without losing quality?
The key is to start with a high-resolution image and downsize it using a quality picture pixel editor like Pixelfox AI. Its algorithm is optimized to preserve detail. Avoid drastic upscaling whenever possible.
2. Why do my pictures look blurry after I edit image px?
This usually happens for two reasons: you're either upscaling a small image too much, or you're using a poor-quality resizing tool. An AI-powered tool minimizes blur by intelligently creating new pixels that blend seamlessly.
3. Can I use a picture pixel editor on my phone?
Absolutely! Most modern online tools, including Pixelfox AI, are fully mobile-responsive. You can photo adjust directly in your phone's browser without downloading any apps.
4. What’s the difference between resizing and compressing? Resizing changes the dimensions of the image (the number of pixels). Compressing reduces the file size (in KB or MB) without changing the dimensions, usually by removing redundant data. Good editing involves a bit of both.
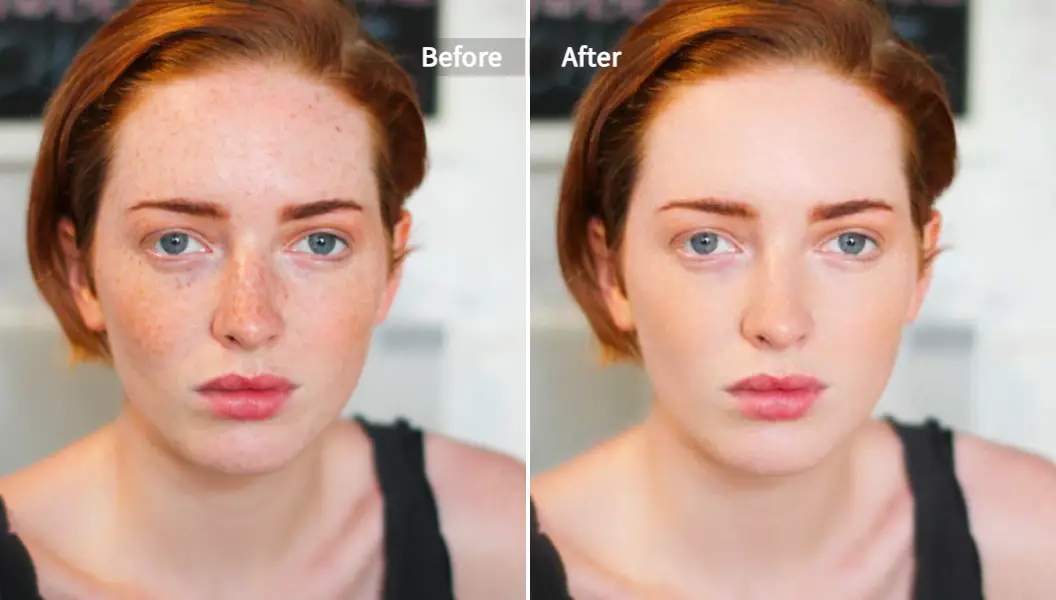
5. How can I make my old, pixelated photos look better? This is where AI truly shines. A feature like an AI Photo Retoucher or an upscaler can analyze old, blurry photos, reduce noise, and sharpen details, effectively breathing new life into them.
Look, mastering the pixel doesn't have to be a chore. The days of fighting with complex, expensive software are over. With the right approach and the right tools, you can ensure your images always look their absolute best, no matter where you post them. Stop letting bad compression and blurry resizing ruin your hard work. It's time to take control.
Ready to stop fighting with pixels and start creating stunning visuals in seconds?
Try Pixelfox AI for free right now and see the difference AI can make. Your photos will thank you. ✨