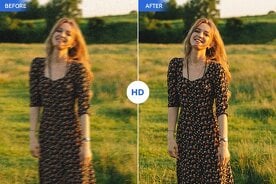
\u003C/p>\n\u003Ch3>The Explosion of Free Video Faceswap Platforms\u003C/h3>\n\u003Cp>Why is everyone suddenly so interested in a \u003Cstrong>free video faceswap\u003C/strong>? A few years ago, this technology was only available to big-budget movie studios. Now, you can find a \u003Cstrong>free video face swapper\u003C/strong> online with a simple search. This is because AI technology has become more accessible and cheaper to develop. Companies can now offer these amazing tools to the public, often for free.\u003C/p>\n\u003Cp>This has led to a wave of creativity online. People are using \u003Cstrong>free video swap\u003C/strong> tools to make funny content for social media, create unique personal videos, and experiment with their digital identity. The demand for an \u003Cstrong>ai face swap video online free no sign up\u003C/strong> tool shows that users want quick and easy access. They don't want to deal with complicated software or subscriptions. They just want to upload a video, swap a face, and share the result. This ease of use is a major reason for the popularity of these platforms.\u003C/p>\n\u003Ch3>Unleash Your Creativity: Fun Ways to Use Face Swapping\u003C/h3>\n\u003Cp>While the term \u003Cstrong>pornswap free\u003C/strong> might be what many people search for, the creative uses for this technology go far beyond that. It is a tool for humor, art, and storytelling.\u003C/p>\n\u003Ch4>Make Hilarious GIFs and Memes\u003C/h4>\n\u003Cp>One of the most popular uses is creating funny GIFs. A \u003Cstrong>free gif face swap\u003C/strong> can turn a classic reaction meme into something personal and hilarious. Imagine putting your friend's face on a dancing cat or a famous movie character. A good \u003Cstrong>gif face swap online free\u003C/strong> tool lets you do this in seconds. With \u003Cstrong>gif face swap ai free\u003C/strong> technology, the movement and expressions are preserved, making the final GIF look smooth and professional. It is a fantastic way to create inside jokes and share a laugh with your friends and followers online.\u003C/p>\n\u003Ch4>Reimagine Group Photos and Videos\u003C/h4>\n\u003Cp>Have you ever wanted to prank your friends with a group photo? With \u003Cstrong>multiple face swap video\u003C/strong> technology, you can. Imagine taking a video from a party and swapping everyone's faces. The results can be hilarious and unforgettable. Many platforms now offer a \u003Cstrong>multiple face swap free\u003C/strong> option, so you can do this without paying anything. You can even do a \u003Cstrong>multiple face swap video online free\u003C/strong> without needing to download any software. It is a great way to add a fun twist to your memories and create content that everyone will be talking about.\u003C/p>\n\u003Ch4>Become a Movie Star or Your Favorite Character\u003C/h4>\n\u003Cp>Ever dream of being the hero in your favorite action movie? With the \u003Cstrong>best ai video face swap\u003C/strong> tools, you can put yourself right in the middle of the action. Swap your face with your favorite actor and see yourself delivering famous lines or performing incredible stunts. This is more than just fun; it's a new way to engage with the movies and characters you love. A high-quality \u003Cstrong>ai video face swapper\u003C/strong> makes the result look so real that you can create your own short films and share them with the world.\u003C/p>\n\u003Ch3>The Best Tools for Free Face Swap Videos\u003C/h3>\n\u003Cp>Finding the right tool is key to getting great results. You need a platform that is easy to use, produces high-quality swaps, and respects your privacy. Here is a look at the best option available today.\u003C/p>\n\u003Ch4>Our Top Pick: Pixelfox AI\u003C/h4>\n\u003Cp>When it comes to a powerful, free, and user-friendly experience, Pixelfox AI stands out from the crowd. It is more than just a \u003Cstrong>free face swap video generator\u003C/strong>; it is a complete creative suite. Pixelfox AI offers a powerful \u003Ca href=\"https://pixelfox.ai/image/face-swap\">\u003Cstrong>Free Online AI Face Swap Tool: Easily Swap Faces in Photos!\u003C/strong>\u003C/a> that is perfect for both beginners and experts.\u003C/p>\n\u003Cp>Here’s why Pixelfox AI is our top choice:\u003C/p>\n\u003Cul>\n\u003Cli>\u003Cstrong>Exceptional Quality:\u003C/strong> Pixelfox AI uses advanced algorithms to create incredibly realistic face swaps. The AI perfectly blends skin tones, lighting, and expressions, so your final video or photo looks completely natural.\u003C/li>\n\u003Cli>\u003Cstrong>Ease of Use:\u003C/strong> You don't need any technical skills to use Pixelfox. The interface is simple. Just upload your source video, upload the face you want to use, and let the AI do the work. It’s the best choice for anyone looking for a \u003Cstrong>face swap video online free without login\u003C/strong>.\u003C/li>\n\u003Cli>\u003Cstrong>Versatility:\u003C/strong> Pixelfox isn't just for single swaps. It supports \u003Cstrong>multiple face swap free\u003C/strong> in both photos and videos. It also has a fantastic \u003Cstrong>free gif face swap\u003C/strong> feature. For video creators, its dedicated \u003Ca href=\"https://pixelfox.ai/video/face-swap\">\u003Cstrong>AI Video Face Swap Online: Naturally Swap Faces in Videos in Seconds\u003C/strong>\u003C/a> tool is one of the best available.\u003C/li>\n\u003Cli>\u003Cstrong>Privacy Focused:\u003C/strong> This is a big one. Pixelfox AI automatically deletes your uploaded files after you're done. Your data is not stored, which gives you peace of mind.\u003C/li>\n\u003Cli>\u003Cstrong>Completely Free:\u003C/strong> You get access to an incredible \u003Cstrong>free face swap video maker\u003C/strong> without any hidden costs or watermarks on your final creations. It delivers on the promise of an \u003Cstrong>ai video face swap free unlimited\u003C/strong> experience for its core features.\u003C/li>\n\u003C/ul>\n\u003Cp>Pixelfox AI is the perfect tool for anyone who wants to explore the creative possibilities of face swapping safely and easily. It is an excellent \u003Cstrong>free face swap video editor\u003C/strong> for all your needs.\u003C/p>\n\u003Ch3>Navigating the Ethics: Consent and Uncensored Content\u003C/h3>\n\u003Cp>It is impossible to talk about \u003Cstrong>pornswap free\u003C/strong> and \u003Cstrong>uncensored face swap\u003C/strong> technology without discussing the ethics. This is a powerful tool, and with great power comes great responsibility. The most important rule is \u003Cstrong>consent\u003C/strong>.\u003C/p>\n\u003Cp>You should never use someone's image or likeness without their explicit permission. Creating face swaps with a person's face without their knowledge is a violation of their privacy and can be deeply harmful. This is especially true for creating adult or sensitive content. While the technology can be used for harmless fun, it can also be misused to create deepfakes that spread misinformation or harass individuals.\u003C/p>\n\u003Cp>Reputable tools like Pixelfox AI are designed for creative and ethical use. They provide the technology for you to have fun with your own photos or with the photos of friends and family who have given you their consent. Always think before you swap. Ask yourself if the person whose face you are using would be okay with it. By using this technology responsibly, we can all enjoy its creative benefits without causing harm. It is important to avoid tools that market themselves for unethical purposes and stick to trusted platforms that prioritize user safety.\u003C/p>\n\u003Ch3>Pro Tips for a Perfect Face Swap\u003C/h3>\n\u003Cp>To get the \u003Cstrong>best free video faceswap\u003C/strong> results, you need to start with the right materials. The quality of your source images and videos makes a huge difference.\u003C/p>\n\u003Cp>Here are a few expert tips:\u003C/p>\n\u003Cul>\n\u003Cli>\u003Cstrong>Use High-Quality Sources:\u003C/strong> Start with clear, high-resolution photos and videos. Blurry or low-quality files will result in a messy, unbelievable swap. The face should be well-lit and clearly visible.\u003C/li>\n\u003Cli>\u003Cstrong>Choose the Right Angle:\u003C/strong> For the best results, use a photo where the person is looking directly at the camera. The AI can work with different angles, but a straight-on shot provides the most data for a clean swap. Avoid photos with heavy shadows or obstructions like sunglasses or hair covering the face.\u003C/li>\n\u003Cli>\u003Cstrong>Consider the Video Length:\u003C/strong> While some tools promise a \u003Cstrong>full video face swap free\u003C/strong>, longer videos take more processing time and can sometimes have small errors. For social media, shorter clips often work best and are quicker to generate.\u003C/li>\n\u003Cli>\u003Cstrong>Check for Compatibility:\u003C/strong> Make sure your video and photo formats are supported by the tool you are using. Most online platforms, including Pixelfox AI, accept common formats like MP4, MOV, JPG, and PNG.\u003C/li>\n\u003C/ul>\n\u003Cp>By following these simple tips, you can ensure that your \u003Cstrong>faceswap mio\u003C/strong> or \u003Cstrong>mio face swap\u003C/strong> creations look professional and realistic. You will be making amazing content that looks like it was made by a pro.\u003C/p>\n\u003Ch3>Conclusion: The Future of Creative Expression\u003C/h3>\n\u003Cp>The technology behind the \u003Cstrong>pornswap free\u003C/strong> search term is changing how we create and interact with digital content. AI face swapping is a powerful, accessible, and incredibly fun tool. It has opened up a world of creative possibilities, allowing anyone to become a \u003Cstrong>free face swap video maker\u003C/strong>. From creating laugh-out-loud GIFs to placing yourself in iconic movie scenes, the only limit is your imagination.\u003C/p>\n\u003Cp>As we move forward, it's crucial to use this technology responsibly. By prioritizing consent and focusing on positive, creative applications, we can ensure that tools like the \u003Cstrong>best free video face swap online\u003C/strong> platforms continue to be a source of joy and innovation.\u003C/p>\n\u003Cp>If you're ready to dive into this exciting world, there's no better place to start than with Pixelfox AI. It offers the perfect blend of power, simplicity, and security, making it the ideal choice for both new users and seasoned creators. Explore the possibilities, have fun, and start creating your own amazing face swap videos today.\u003C/p>","pornswap-free-best-ai-face-swap-video-tools-in-2025",68,1756918833,1756918793,"3 weeks ago",{"id":95,"lang":11,"author_id":43,"image":96,"title":97,"keywords":15,"description":98,"content":99,"url":100,"views":101,"publishtime":102,"updatetime":103,"status":22,"publishtime_text":81,"status_text":25},1270,"https://api.pixelfox.ai/uploads/20250820/b9df41c07563313a8c8b1d17fcdbbb64.jpg","Free artificial intelligence generative fill tool. Fill and layer images online with ease and layering images online.","Find out the free generative fill tool to add, lay, and insert images online via Pixelfox. Place photos on photos using cutting-edge AI technology and make incredible images without downloads or complicated software.","\u003Ch2 dir=\"ltr\" style=\"line-height:1.38;margin-top:18pt;margin-bottom:6pt;\" id=\"0wgrO2\">\u003Cspan style=\"font-size:16pt;font-family:Arial,sans-serif;color:#000000;background-color:transparent;font-weight:700;font-style:normal;font-variant:normal;text-decoration:none;vertical-align:baseline;white-space:pre;white-space:pre-wrap;\">Main Attributes of PixelFox AI Generative Fill\u003C/span>\u003C/h2>\u003Cp dir=\"ltr\" style=\"line-height:1.38;margin-top:0pt;margin-bottom:0pt;\">\u003Cspan style=\"font-size:13.999999999999998pt;font-family:Arial,sans-serif;color:#000000;background-color:transparent;font-weight:400;font-style:normal;font-variant:normal;text-decoration:none;vertical-align:baseline;white-space:pre;white-space:pre-wrap;\">The free AI generative fill tool that is offered by PixelFox is an app that is loaded with robust features that users are committed to quality and speed.\u003C/span>\u003C/p>\u003Cul style=\"margin-top:0;margin-bottom:0;padding-inline-start:48px;\">\u003Cli dir=\"ltr\" style=\"list-style-type:disc;font-size:13.999999999999998pt;font-family:Arial,sans-serif;color:#000000;background-color:transparent;font-weight:400;font-style:normal;font-variant:normal;text-decoration:none;vertical-align:baseline;white-space:pre;\" aria-level=\"1\">\u003Cp dir=\"ltr\" style=\"line-height:1.38;margin-top:0pt;margin-bottom:0pt;\" role=\"presentation\">\u003Cspan style=\"font-size:13.999999999999998pt;font-family:Arial,sans-serif;color:#000000;background-color:transparent;font-weight:700;font-style:normal;font-variant:normal;text-decoration:none;vertical-align:baseline;white-space:pre;white-space:pre-wrap;\">Generative Fill Online:\u003C/span>\u003Cspan style=\"font-size:13.999999999999998pt;font-family:Arial,sans-serif;color:#000000;background-color:transparent;font-weight:400;font-style:normal;font-variant:normal;text-decoration:none;vertical-align:baseline;white-space:pre;white-space:pre-wrap;\"> Use AI-generated fills or image mount enhancements right in your browser.\u003C/span>\u003C/p>\u003C/li>\u003Cli dir=\"ltr\" style=\"list-style-type:disc;font-size:13.999999999999998pt;font-family:Arial,sans-serif;color:#000000;background-color:transparent;font-weight:400;font-style:normal;font-variant:normal;text-decoration:none;vertical-align:baseline;white-space:pre;\" aria-level=\"1\">\u003Cp dir=\"ltr\" style=\"line-height:1.38;margin-top:0pt;margin-bottom:0pt;\" role=\"presentation\">\u003Cspan style=\"font-size:13.999999999999998pt;font-family:Arial,sans-serif;color:#000000;background-color:transparent;font-weight:700;font-style:normal;font-variant:normal;text-decoration:none;vertical-align:baseline;white-space:pre;white-space:pre-wrap;\">Add Image to Image:\u003C/span>\u003Cspan style=\"font-size:13.999999999999998pt;font-family:Arial,sans-serif;color:#000000;background-color:transparent;font-weight:400;font-style:normal;font-variant:normal;text-decoration:none;vertical-align:baseline;white-space:pre;white-space:pre-wrap;\"> Combine one image with another through upload and automatic edge blend between images.\u003C/span>\u003C/p>\u003C/li>\u003Cli dir=\"ltr\" style=\"list-style-type:disc;font-size:13.999999999999998pt;font-family:Arial,sans-serif;color:#000000;background-color:transparent;font-weight:400;font-style:normal;font-variant:normal;text-decoration:none;vertical-align:baseline;white-space:pre;\" aria-level=\"1\">\u003Cp dir=\"ltr\" style=\"line-height:1.38;margin-top:0pt;margin-bottom:0pt;\" role=\"presentation\">\u003Cspan style=\"font-size:13.999999999999998pt;font-family:Arial,sans-serif;color:#000000;background-color:transparent;font-weight:700;font-style:normal;font-variant:normal;text-decoration:none;vertical-align:baseline;white-space:pre;white-space:pre-wrap;\">Photograph Layers:\u003C/span>\u003Cspan style=\"font-size:13.999999999999998pt;font-family:Arial,sans-serif;color:#000000;background-color:transparent;font-weight:400;font-style:normal;font-variant:normal;text-decoration:none;vertical-align:baseline;white-space:pre;white-space:pre-wrap;\"> No stress, get your layered images to work, including mixed-media images.\u003C/span>\u003C/p>\u003C/li>\u003Cli dir=\"ltr\" style=\"list-style-type:disc;font-size:13.999999999999998pt;font-family:Arial,sans-serif;color:#000000;background-color:transparent;font-weight:400;font-style:normal;font-variant:normal;text-decoration:none;vertical-align:baseline;white-space:pre;\" aria-level=\"1\">\u003Cp dir=\"ltr\" style=\"line-height:1.38;margin-top:0pt;margin-bottom:0pt;\" role=\"presentation\">\u003Cspan style=\"font-size:13.999999999999998pt;font-family:Arial,sans-serif;color:#000000;background-color:transparent;font-weight:700;font-style:normal;font-variant:normal;text-decoration:none;vertical-align:baseline;white-space:pre;white-space:pre-wrap;\">AI-powered Image filler:\u003C/span>\u003Cspan style=\"font-size:13.999999999999998pt;font-family:Arial,sans-serif;color:#000000;background-color:transparent;font-weight:400;font-style:normal;font-variant:normal;text-decoration:none;vertical-align:baseline;white-space:pre;white-space:pre-wrap;\"> The AI will cover gaps and texture-match smartly to give a natural outcome.\u003C/span>\u003C/p>\u003C/li>\u003Cli dir=\"ltr\" style=\"list-style-type:disc;font-size:13.999999999999998pt;font-family:Arial,sans-serif;color:#000000;background-color:transparent;font-weight:400;font-style:normal;font-variant:normal;text-decoration:none;vertical-align:baseline;white-space:pre;\" aria-level=\"1\">\u003Cp dir=\"ltr\" style=\"line-height:1.38;margin-top:0pt;margin-bottom:0pt;\" role=\"presentation\">\u003Cspan style=\"font-size:13.999999999999998pt;font-family:Arial,sans-serif;color:#000000;background-color:transparent;font-weight:700;font-style:normal;font-variant:normal;text-decoration:none;vertical-align:baseline;white-space:pre;white-space:pre-wrap;\">Easy-to-use interface:\u003C/span>\u003Cspan style=\"font-size:13.999999999999998pt;font-family:Arial,sans-serif;color:#000000;background-color:transparent;font-weight:400;font-style:normal;font-variant:normal;text-decoration:none;vertical-align:baseline;white-space:pre;white-space:pre-wrap;\"> easy layering of images using a drag-and-drop methodology, which is easy to use by amateurs.\u003C/span>\u003C/p>\u003C/li>\u003C/ul>\u003Cp dir=\"ltr\" style=\"line-height:1.38;margin-top:0pt;margin-bottom:0pt;\">\u003Cspan style=\"font-size:13.999999999999998pt;font-family:Arial,sans-serif;color:#000000;background-color:transparent;font-weight:400;font-style:normal;font-variant:normal;text-decoration:none;vertical-align:baseline;white-space:pre;white-space:pre-wrap;\">The \u003C/span>\u003Cspan style=\"font-size:13.999999999999998pt;font-family:Arial,sans-serif;color:#000000;background-color:transparent;font-weight:700;font-style:normal;font-variant:normal;text-decoration:none;vertical-align:baseline;white-space:pre;white-space:pre-wrap;\">PixelFox\u003C/span>\u003Cspan style=\"font-size:13.999999999999998pt;font-family:Arial,sans-serif;color:#000000;background-color:transparent;font-weight:400;font-style:normal;font-variant:normal;text-decoration:none;vertical-align:baseline;white-space:pre;white-space:pre-wrap;\"> is an elaborate fill tool online that aims at fortifying innovation, accelerating the editing process, and producing quality images that appear professional even when you are new to image manipulation.\u003C/span>\u003C/p>\u003Ch2 dir=\"ltr\" style=\"line-height:1.38;margin-top:18pt;margin-bottom:6pt;\" id=\"PuacWs\">\u003Cspan style=\"font-size:16pt;font-family:Arial,sans-serif;color:#000000;background-color:transparent;font-weight:700;font-style:normal;font-variant:normal;text-decoration:none;vertical-align:baseline;white-space:pre;white-space:pre-wrap;\">Use of AI Generative Fill Tool at PixelFox\u003C/span>\u003C/h2>\u003Cp dir=\"ltr\" style=\"line-height:1.38;margin-top:0pt;margin-bottom:0pt;\">\u003Cspan style=\"font-size:13.999999999999998pt;font-family:Arial,sans-serif;color:#000000;background-color:transparent;font-weight:400;font-style:normal;font-variant:normal;text-decoration:none;vertical-align:baseline;white-space:pre;white-space:pre-wrap;\">Layering and inserting photos to create something using the online generative fill tool in PixelFox is so easy:\u003C/span>\u003C/p>\u003Col style=\"margin-top:0;margin-bottom:0;padding-inline-start:48px;\">\u003Cli dir=\"ltr\" style=\"list-style-type:decimal;font-size:13.999999999999998pt;font-family:Arial,sans-serif;color:#000000;background-color:transparent;font-weight:700;font-style:normal;font-variant:normal;text-decoration:none;vertical-align:baseline;white-space:pre;\" aria-level=\"1\">\u003Cp dir=\"ltr\" style=\"line-height:1.38;margin-top:0pt;margin-bottom:0pt;\" role=\"presentation\">\u003Cspan style=\"font-size:13.999999999999998pt;font-family:Arial,sans-serif;color:#000000;background-color:transparent;font-weight:700;font-style:normal;font-variant:normal;text-decoration:none;vertical-align:baseline;white-space:pre;white-space:pre-wrap;\">Go to www.pixelfox.ai:\u003C/span>\u003Cspan style=\"font-size:13.999999999999998pt;font-family:Arial,sans-serif;color:#000000;background-color:transparent;font-weight:400;font-style:normal;font-variant:normal;text-decoration:none;vertical-align:baseline;white-space:pre;white-space:pre-wrap;\"> No software installation is required; no sign-up is necessary.\u003C/span>\u003C/p>\u003C/li>\u003Cli dir=\"ltr\" style=\"list-style-type:decimal;font-size:13.999999999999998pt;font-family:Arial,sans-serif;color:#000000;background-color:transparent;font-weight:700;font-style:normal;font-variant:normal;text-decoration:none;vertical-align:baseline;white-space:pre;\" aria-level=\"1\">\u003Cp dir=\"ltr\" style=\"line-height:1.38;margin-top:0pt;margin-bottom:0pt;\" role=\"presentation\">\u003Cspan style=\"font-size:13.999999999999998pt;font-family:Arial,sans-serif;color:#000000;background-color:transparent;font-weight:700;font-style:normal;font-variant:normal;text-decoration:none;vertical-align:baseline;white-space:pre;white-space:pre-wrap;\">Upload Your Base Photo:\u003C/span>\u003Cspan style=\"font-size:13.999999999999998pt;font-family:Arial,sans-serif;color:#000000;background-color:transparent;font-weight:400;font-style:normal;font-variant:normal;text-decoration:none;vertical-align:baseline;white-space:pre;white-space:pre-wrap;\"> The first step is uploading your base photo, which is the main photograph you wish to work with.\u003C/span>\u003C/p>\u003C/li>\u003Cli dir=\"ltr\" style=\"list-style-type:decimal;font-size:13.999999999999998pt;font-family:Arial,sans-serif;color:#000000;background-color:transparent;font-weight:700;font-style:normal;font-variant:normal;text-decoration:none;vertical-align:baseline;white-space:pre;\" aria-level=\"1\">\u003Cp dir=\"ltr\" style=\"line-height:1.38;margin-top:0pt;margin-bottom:0pt;\" role=\"presentation\">\u003Cspan style=\"font-size:13.999999999999998pt;font-family:Arial,sans-serif;color:#000000;background-color:transparent;font-weight:700;font-style:normal;font-variant:normal;text-decoration:none;vertical-align:baseline;white-space:pre;white-space:pre-wrap;\">Add Image to Image:\u003C/span>\u003Cspan style=\"font-size:13.999999999999998pt;font-family:Arial,sans-serif;color:#000000;background-color:transparent;font-weight:400;font-style:normal;font-variant:normal;text-decoration:none;vertical-align:baseline;white-space:pre;white-space:pre-wrap;\"> Click on the second image that you wish to add; this will be inserted into the first image.\u003C/span>\u003C/p>\u003C/li>\u003Cli dir=\"ltr\" style=\"list-style-type:decimal;font-size:13.999999999999998pt;font-family:Arial,sans-serif;color:#000000;background-color:transparent;font-weight:700;font-style:normal;font-variant:normal;text-decoration:none;vertical-align:baseline;white-space:pre;\" aria-level=\"1\">\u003Cp dir=\"ltr\" style=\"line-height:1.38;margin-top:0pt;margin-bottom:0pt;\" role=\"presentation\">\u003Cspan style=\"font-size:13.999999999999998pt;font-family:Arial,sans-serif;color:#000000;background-color:transparent;font-weight:700;font-style:normal;font-variant:normal;text-decoration:none;vertical-align:baseline;white-space:pre;white-space:pre-wrap;\">Position Size:\u003C/span>\u003Cspan style=\"font-size:13.999999999999998pt;font-family:Arial,sans-serif;color:#000000;background-color:transparent;font-weight:400;font-style:normal;font-variant:normal;text-decoration:none;vertical-align:baseline;white-space:pre;white-space:pre-wrap;\"> Drag, resize, and position the picture to go where you want it to on the source photo.\u003C/span>\u003C/p>\u003C/li>\u003Cli dir=\"ltr\" style=\"list-style-type:decimal;font-size:13.999999999999998pt;font-family:Arial,sans-serif;color:#000000;background-color:transparent;font-weight:700;font-style:normal;font-variant:normal;text-decoration:none;vertical-align:baseline;white-space:pre;\" aria-level=\"1\">\u003Cp dir=\"ltr\" style=\"line-height:1.38;margin-top:0pt;margin-bottom:0pt;\" role=\"presentation\">\u003Cspan style=\"font-size:13.999999999999998pt;font-family:Arial,sans-serif;color:#000000;background-color:transparent;font-weight:700;font-style:normal;font-variant:normal;text-decoration:none;vertical-align:baseline;white-space:pre;white-space:pre-wrap;\">Use AI Fill:\u003C/span>\u003Cspan style=\"font-size:13.999999999999998pt;font-family:Arial,sans-serif;color:#000000;background-color:transparent;font-weight:400;font-style:normal;font-variant:normal;text-decoration:none;vertical-align:baseline;white-space:pre;white-space:pre-wrap;\"> The AI fill feature in PixelFox will merge the pictures, like they are coming together on the edges with smooth transitions and filling the blank areas.\u003C/span>\u003C/p>\u003C/li>\u003Cli dir=\"ltr\" style=\"list-style-type:decimal;font-size:13.999999999999998pt;font-family:Arial,sans-serif;color:#000000;background-color:transparent;font-weight:700;font-style:normal;font-variant:normal;text-decoration:none;vertical-align:baseline;white-space:pre;\" aria-level=\"1\">\u003Cp dir=\"ltr\" style=\"line-height:1.38;margin-top:0pt;margin-bottom:0pt;\" role=\"presentation\">\u003Cspan style=\"font-size:13.999999999999998pt;font-family:Arial,sans-serif;color:#000000;background-color:transparent;font-weight:700;font-style:normal;font-variant:normal;text-decoration:none;vertical-align:baseline;white-space:pre;white-space:pre-wrap;\">Superimpose Photos\u003C/span>\u003Cspan style=\"font-size:13.999999999999998pt;font-family:Arial,sans-serif;color:#000000;background-color:transparent;font-weight:400;font-style:normal;font-variant:normal;text-decoration:none;vertical-align:baseline;white-space:pre;white-space:pre-wrap;\">: Overlay the photos as many as you like to create more intricate designs.\u003C/span>\u003C/p>\u003C/li>\u003Cli dir=\"ltr\" style=\"list-style-type:decimal;font-size:13.999999999999998pt;font-family:Arial,sans-serif;color:#000000;background-color:transparent;font-weight:700;font-style:normal;font-variant:normal;text-decoration:none;vertical-align:baseline;white-space:pre;\" aria-level=\"1\">\u003Cp dir=\"ltr\" style=\"line-height:1.38;margin-top:0pt;margin-bottom:0pt;\" role=\"presentation\">\u003Cspan style=\"font-size:13.999999999999998pt;font-family:Arial,sans-serif;color:#000000;background-color:transparent;font-weight:700;font-style:normal;font-variant:normal;text-decoration:none;vertical-align:baseline;white-space:pre;white-space:pre-wrap;\">Assign Sections:\u003C/span>\u003Cspan style=\"font-size:13.999999999999998pt;font-family:Arial,sans-serif;color:#000000;background-color:transparent;font-weight:400;font-style:normal;font-variant:normal;text-decoration:none;vertical-align:baseline;white-space:pre;white-space:pre-wrap;\"> Create layers of multiple images to create complicated compositions.\u003C/span>\u003C/p>\u003C/li>\u003Cli dir=\"ltr\" style=\"list-style-type:decimal;font-size:13.999999999999998pt;font-family:Arial,sans-serif;color:#000000;background-color:transparent;font-weight:700;font-style:normal;font-variant:normal;text-decoration:none;vertical-align:baseline;white-space:pre;\" aria-level=\"1\">\u003Cp dir=\"ltr\" style=\"line-height:1.38;margin-top:0pt;margin-bottom:0pt;\" role=\"presentation\">\u003Cspan style=\"font-size:13.999999999999998pt;font-family:Arial,sans-serif;color:#000000;background-color:transparent;font-weight:700;font-style:normal;font-variant:normal;text-decoration:none;vertical-align:baseline;white-space:pre;white-space:pre-wrap;\">Download and Preview:\u003C/span>\u003Cspan style=\"font-size:13.999999999999998pt;font-family:Arial,sans-serif;color:#000000;background-color:transparent;font-weight:400;font-style:normal;font-variant:normal;text-decoration:none;vertical-align:baseline;white-space:pre;white-space:pre-wrap;\"> Check out your result immediately and get your final picture by downloading it in PNG or JPEG.\u003C/span>\u003C/p>\u003C/li>\u003C/ol>\u003Cp dir=\"ltr\" style=\"line-height:1.38;margin-top:0pt;margin-bottom:0pt;\">\u003Cspan style=\"font-size:13.999999999999998pt;font-family:Arial,sans-serif;color:#000000;background-color:transparent;font-weight:400;font-style:normal;font-variant:normal;text-decoration:none;vertical-align:baseline;white-space:pre;white-space:pre-wrap;\">The tool can be applied in multiple scenarios of use, including picture montage and social media, custom promotional, or artistic collage.\u003C/span>\u003C/p>\u003Ch2 dir=\"ltr\" style=\"line-height:1.38;margin-top:18pt;margin-bottom:6pt;\" id=\"eMfTUY\">\u003Cspan style=\"font-size:16pt;font-family:Arial,sans-serif;color:#000000;background-color:transparent;font-weight:700;font-style:normal;font-variant:normal;text-decoration:none;vertical-align:baseline;white-space:pre;white-space:pre-wrap;\">The reason to book Generative Fill Online with \u003Ca href=\"https://pixelfox.ai/\" target=\"_blank\">PixelFox\u003C/a>?\u003C/span>\u003Cspan style=\"font-size:16pt;font-family:Arial,sans-serif;color:#000000;background-color:transparent;font-weight:700;font-style:normal;font-variant:normal;text-decoration:none;vertical-align:baseline;white-space:pre;white-space:pre-wrap;\">\u003Cspan style=\"border:none;display:inline-block;overflow:hidden;width:624px;height:492px;\">\u003Cimg src=\"https://api.pixelfox.ai/uploads/20250820/b9df41c07563313a8c8b1d17fcdbbb64.jpg\" width=\"624\" height=\"492\" style=\"margin-left:0px;margin-top:0px;\" alt=\"Free artificial intelligence generative fill tool. Fill and layer images online with ease and layering images online.\" loading=\"lazy\">\u003C/span>\u003C/span>\u003C/h2>\u003Cp dir=\"ltr\" style=\"line-height:1.38;margin-top:0pt;margin-bottom:0pt;\">\u003Cspan style=\"font-size:13.999999999999998pt;font-family:Arial,sans-serif;color:#000000;background-color:transparent;font-weight:400;font-style:normal;font-variant:normal;text-decoration:none;vertical-align:baseline;white-space:pre;white-space:pre-wrap;\">Although some photo editors on the net provide a layering feature, the AI tool of PixelFox to generate fill is unique in several ways:\u003C/span>\u003C/p>\u003Col style=\"margin-top:0;margin-bottom:0;padding-inline-start:48px;\">\u003Cli dir=\"ltr\" style=\"list-style-type:decimal;font-size:13.999999999999998pt;font-family:Arial,sans-serif;color:#000000;background-color:transparent;font-weight:700;font-style:normal;font-variant:normal;text-decoration:none;vertical-align:baseline;white-space:pre;\" aria-level=\"1\">\u003Cp dir=\"ltr\" style=\"line-height:1.38;margin-top:0pt;margin-bottom:0pt;\" role=\"presentation\">\u003Cspan style=\"font-size:13.999999999999998pt;font-family:Arial,sans-serif;color:#000000;background-color:transparent;font-weight:700;font-style:normal;font-variant:normal;text-decoration:none;vertical-align:baseline;white-space:pre;white-space:pre-wrap;\">AI Intelligence:\u003C/span>\u003Cspan style=\"font-size:13.999999999999998pt;font-family:Arial,sans-serif;color:#000000;background-color:transparent;font-weight:400;font-style:normal;font-variant:normal;text-decoration:none;vertical-align:baseline;white-space:pre;white-space:pre-wrap;\"> The AI intelligence of PixelFox, unlike the manual cut-and-paste-based editors, does not treat images as a collection of layers, but comprehends the content of the image, and as such, the fill looks both seamless and justified.\u003C/span>\u003C/p>\u003C/li>\u003Cli dir=\"ltr\" style=\"list-style-type:decimal;font-size:13.999999999999998pt;font-family:Arial,sans-serif;color:#000000;background-color:transparent;font-weight:700;font-style:normal;font-variant:normal;text-decoration:none;vertical-align:baseline;white-space:pre;\" aria-level=\"1\">\u003Cp dir=\"ltr\" style=\"line-height:1.38;margin-top:0pt;margin-bottom:0pt;\" role=\"presentation\">\u003Cspan style=\"font-size:13.999999999999998pt;font-family:Arial,sans-serif;color:#000000;background-color:transparent;font-weight:700;font-style:normal;font-variant:normal;text-decoration:none;vertical-align:baseline;white-space:pre;white-space:pre-wrap;\">Tech Skills Not Required:\u003C/span>\u003Cspan style=\"font-size:13.999999999999998pt;font-family:Arial,sans-serif;color:#000000;background-color:transparent;font-weight:400;font-style:normal;font-variant:normal;text-decoration:none;vertical-align:baseline;white-space:pre;white-space:pre-wrap;\"> The user-friendly interface does not require any special technical expertise to acquire professional-level outcomes with no lengthy instructions.\u003C/span>\u003C/p>\u003C/li>\u003Cli dir=\"ltr\" style=\"list-style-type:decimal;font-size:13.999999999999998pt;font-family:Arial,sans-serif;color:#000000;background-color:transparent;font-weight:700;font-style:normal;font-variant:normal;text-decoration:none;vertical-align:baseline;white-space:pre;\" aria-level=\"1\">\u003Cp dir=\"ltr\" style=\"line-height:1.38;margin-top:0pt;margin-bottom:0pt;\" role=\"presentation\">\u003Cspan style=\"font-size:13.999999999999998pt;font-family:Arial,sans-serif;color:#000000;background-color:transparent;font-weight:700;font-style:normal;font-variant:normal;text-decoration:none;vertical-align:baseline;white-space:pre;white-space:pre-wrap;\">Free to Use:\u003C/span>\u003Cspan style=\"font-size:13.999999999999998pt;font-family:Arial,sans-serif;color:#000000;background-color:transparent;font-weight:400;font-style:normal;font-variant:normal;text-decoration:none;vertical-align:baseline;white-space:pre;white-space:pre-wrap;\"> The majority of advanced features of image layering are free.\u003C/span>\u003C/p>\u003C/li>\u003C/ol>\u003Cp dir=\"ltr\" style=\"line-height:1.38;margin-top:0pt;margin-bottom:0pt;\">\u003Cspan style=\"font-size:13.999999999999998pt;font-family:Arial,sans-serif;color:#000000;background-color:transparent;font-weight:400;font-style:normal;font-variant:normal;text-decoration:none;vertical-align:baseline;white-space:pre;white-space:pre-wrap;\">Such strengths determine \u003C/span>\u003Cspan style=\"font-size:13.999999999999998pt;font-family:Arial,sans-serif;color:#000000;background-color:transparent;font-weight:700;font-style:normal;font-variant:normal;text-decoration:none;vertical-align:baseline;white-space:pre;white-space:pre-wrap;\">PixelFox \u003C/span>\u003Cspan style=\"font-size:13.999999999999998pt;font-family:Arial,sans-serif;color:#000000;background-color:transparent;font-weight:400;font-style:normal;font-variant:normal;text-decoration:none;vertical-align:baseline;white-space:pre;white-space:pre-wrap;\">as a perfect option to use by casual users, marketers, and creative professionals who want to utilize a fast and intelligent generative fill service online for free.\u003C/span>\u003C/p>\u003Ch2 dir=\"ltr\" style=\"line-height:1.38;margin-top:18pt;margin-bottom:6pt;\" id=\"B7206s\">\u003Cspan style=\"font-size:16pt;font-family:Arial,sans-serif;color:#000000;background-color:transparent;font-weight:700;font-style:normal;font-variant:normal;text-decoration:none;vertical-align:baseline;white-space:pre;white-space:pre-wrap;\">AI Generative Fill tool Use Cases\u003C/span>\u003C/h2>\u003Cp dir=\"ltr\" style=\"line-height:1.38;margin-top:0pt;margin-bottom:0pt;\">\u003Cspan style=\"font-size:13.999999999999998pt;font-family:Arial,sans-serif;color:#000000;background-color:transparent;font-weight:400;font-style:normal;font-variant:normal;text-decoration:none;vertical-align:baseline;white-space:pre;white-space:pre-wrap;\">Online aggregation of\u003C/span>\u003Cspan style=\"font-size:13.999999999999998pt;font-family:Arial,sans-serif;color:#000000;background-color:transparent;font-weight:700;font-style:normal;font-variant:normal;text-decoration:none;vertical-align:baseline;white-space:pre;white-space:pre-wrap;\"> picture to pictures\u003C/span>\u003Cspan style=\"font-size:13.999999999999998pt;font-family:Arial,sans-serif;color:#000000;background-color:transparent;font-weight:400;font-style:normal;font-variant:normal;text-decoration:none;vertical-align:baseline;white-space:pre;white-space:pre-wrap;\"> and layering of images allows myriad possibilities:\u003C/span>\u003C/p>\u003Cul style=\"margin-top:0;margin-bottom:0;padding-inline-start:48px;\">\u003Cli dir=\"ltr\" style=\"list-style-type:disc;font-size:13.999999999999998pt;font-family:Arial,sans-serif;color:#000000;background-color:transparent;font-weight:400;font-style:normal;font-variant:normal;text-decoration:none;vertical-align:baseline;white-space:pre;\" aria-level=\"1\">\u003Cp dir=\"ltr\" style=\"line-height:1.38;margin-top:0pt;margin-bottom:0pt;\" role=\"presentation\">\u003Cspan style=\"font-size:13.999999999999998pt;font-family:Arial,sans-serif;color:#000000;background-color:transparent;font-weight:700;font-style:normal;font-variant:normal;text-decoration:none;vertical-align:baseline;white-space:pre;white-space:pre-wrap;\">Marketing & Advertising:\u003C/span>\u003Cspan style=\"font-size:13.999999999999998pt;font-family:Arial,sans-serif;color:#000000;background-color:transparent;font-weight:400;font-style:normal;font-variant:normal;text-decoration:none;vertical-align:baseline;white-space:pre;white-space:pre-wrap;\"> Design outstanding graphics with the layering of promotional graphics on pictures.\u003C/span>\u003C/p>\u003C/li>\u003Cli dir=\"ltr\" style=\"list-style-type:disc;font-size:13.999999999999998pt;font-family:Arial,sans-serif;color:#000000;background-color:transparent;font-weight:400;font-style:normal;font-variant:normal;text-decoration:none;vertical-align:baseline;white-space:pre;\" aria-level=\"1\">\u003Cp dir=\"ltr\" style=\"line-height:1.38;margin-top:0pt;margin-bottom:0pt;\" role=\"presentation\">\u003Cspan style=\"font-size:13.999999999999998pt;font-family:Arial,sans-serif;color:#000000;background-color:transparent;font-weight:700;font-style:normal;font-variant:normal;text-decoration:none;vertical-align:baseline;white-space:pre;white-space:pre-wrap;\">Photo restoration:\u003C/span>\u003Cspan style=\"font-size:13.999999999999998pt;font-family:Arial,sans-serif;color:#000000;background-color:transparent;font-weight:400;font-style:normal;font-variant:normal;text-decoration:none;vertical-align:baseline;white-space:pre;white-space:pre-wrap;\"> Add complements to damaged or destroyed areas of photos with artificial intelligence textures.\u003C/span>\u003C/p>\u003C/li>\u003Cli dir=\"ltr\" style=\"list-style-type:disc;font-size:13.999999999999998pt;font-family:Arial,sans-serif;color:#000000;background-color:transparent;font-weight:400;font-style:normal;font-variant:normal;text-decoration:none;vertical-align:baseline;white-space:pre;\" aria-level=\"1\">\u003Cp dir=\"ltr\" style=\"line-height:1.38;margin-top:0pt;margin-bottom:0pt;\" role=\"presentation\">\u003Cspan style=\"font-size:13.999999999999998pt;font-family:Arial,sans-serif;color:#000000;background-color:transparent;font-weight:700;font-style:normal;font-variant:normal;text-decoration:none;vertical-align:baseline;white-space:pre;white-space:pre-wrap;\">Artistic Collages:\u003C/span>\u003Cspan style=\"font-size:13.999999999999998pt;font-family:Arial,sans-serif;color:#000000;background-color:transparent;font-weight:400;font-style:normal;font-variant:normal;text-decoration:none;vertical-align:baseline;white-space:pre;white-space:pre-wrap;\"> Create artistic art out of a collage of several photos, blending smoothly than ever.\u003C/span>\u003C/p>\u003C/li>\u003Cli dir=\"ltr\" style=\"list-style-type:disc;font-size:13.999999999999998pt;font-family:Arial,sans-serif;color:#000000;background-color:transparent;font-weight:400;font-style:normal;font-variant:normal;text-decoration:none;vertical-align:baseline;white-space:pre;\" aria-level=\"1\">\u003Cp dir=\"ltr\" style=\"line-height:1.38;margin-top:0pt;margin-bottom:0pt;\" role=\"presentation\">\u003Cspan style=\"font-size:13.999999999999998pt;font-family:Arial,sans-serif;color:#000000;background-color:transparent;font-weight:700;font-style:normal;font-variant:normal;text-decoration:none;vertical-align:baseline;white-space:pre;white-space:pre-wrap;\">Personal Projects:\u003C/span>\u003Cspan style=\"font-size:13.999999999999998pt;font-family:Arial,sans-serif;color:#000000;background-color:transparent;font-weight:400;font-style:normal;font-variant:normal;text-decoration:none;vertical-align:baseline;white-space:pre;white-space:pre-wrap;\"> Make unique invitations, greeting cards, or build a photo montage creation using no complicated design tools.\u003C/span>\u003C/p>\u003C/li>\u003C/ul>\u003Cp dir=\"ltr\" style=\"line-height:1.38;margin-top:0pt;margin-bottom:0pt;\">\u003Cspan style=\"font-size:13.999999999999998pt;font-family:Arial,sans-serif;color:#000000;background-color:transparent;font-weight:400;font-style:normal;font-variant:normal;text-decoration:none;vertical-align:baseline;white-space:pre;white-space:pre-wrap;\">The AI generative fill tool in PixelFox covers all of these, easily and with strength.\u003C/span>\u003C/p>\u003Ch2 dir=\"ltr\" style=\"line-height:1.38;margin-top:18pt;margin-bottom:6pt;\" id=\"nR0zyD\">\u003Cspan style=\"font-size:16pt;font-family:Arial,sans-serif;color:#000000;background-color:transparent;font-weight:700;font-style:normal;font-variant:normal;text-decoration:none;vertical-align:baseline;white-space:pre;white-space:pre-wrap;\">Tricks to have the best of AI Fill\u003C/span>\u003C/h2>\u003Cp dir=\"ltr\" style=\"line-height:1.38;margin-top:0pt;margin-bottom:0pt;\">\u003Cspan style=\"font-size:13.999999999999998pt;font-family:Arial,sans-serif;color:#000000;background-color:transparent;font-weight:400;font-style:normal;font-variant:normal;text-decoration:none;vertical-align:baseline;white-space:pre;white-space:pre-wrap;\">To make use of the full possibilities of the free generative fill tool of PixelFox:\u003C/span>\u003C/p>\u003Col style=\"margin-top:0;margin-bottom:0;padding-inline-start:48px;\">\u003Cli dir=\"ltr\" style=\"list-style-type:decimal;font-size:13.999999999999998pt;font-family:Arial,sans-serif;color:#000000;background-color:transparent;font-weight:700;font-style:normal;font-variant:normal;text-decoration:none;vertical-align:baseline;white-space:pre;\" aria-level=\"1\">\u003Cp dir=\"ltr\" style=\"line-height:1.38;margin-top:0pt;margin-bottom:0pt;\" role=\"presentation\">\u003Cspan style=\"font-size:13.999999999999998pt;font-family:Arial,sans-serif;color:#000000;background-color:transparent;font-weight:400;font-style:normal;font-variant:normal;text-decoration:none;vertical-align:baseline;white-space:pre;white-space:pre-wrap;\">Take photos in high resolution because of the desired sharpness.\u003C/span>\u003C/p>\u003C/li>\u003Cli dir=\"ltr\" style=\"list-style-type:decimal;font-size:13.999999999999998pt;font-family:Arial,sans-serif;color:#000000;background-color:transparent;font-weight:700;font-style:normal;font-variant:normal;text-decoration:none;vertical-align:baseline;white-space:pre;\" aria-level=\"1\">\u003Cp dir=\"ltr\" style=\"line-height:1.38;margin-top:0pt;margin-bottom:0pt;\" role=\"presentation\">\u003Cspan style=\"font-size:13.999999999999998pt;font-family:Arial,sans-serif;color:#000000;background-color:transparent;font-weight:400;font-style:normal;font-variant:normal;text-decoration:none;vertical-align:baseline;white-space:pre;white-space:pre-wrap;\">Make sure to take note of the lighting and contrast of color when overlaying images so that they will blend.\u003C/span>\u003C/p>\u003C/li>\u003Cli dir=\"ltr\" style=\"list-style-type:decimal;font-size:13.999999999999998pt;font-family:Arial,sans-serif;color:#000000;background-color:transparent;font-weight:700;font-style:normal;font-variant:normal;text-decoration:none;vertical-align:baseline;white-space:pre;\" aria-level=\"1\">\u003Cp dir=\"ltr\" style=\"line-height:1.38;margin-top:0pt;margin-bottom:0pt;\" role=\"presentation\">\u003Cspan style=\"font-size:13.999999999999998pt;font-family:Arial,sans-serif;color:#000000;background-color:transparent;font-weight:400;font-style:normal;font-variant:normal;text-decoration:none;vertical-align:baseline;white-space:pre;white-space:pre-wrap;\">Try different sizes and locations of photos inserted to have the most optimal composition.\u003C/span>\u003C/p>\u003C/li>\u003Cli dir=\"ltr\" style=\"list-style-type:decimal;font-size:13.999999999999998pt;font-family:Arial,sans-serif;color:#000000;background-color:transparent;font-weight:700;font-style:normal;font-variant:normal;text-decoration:none;vertical-align:baseline;white-space:pre;\" aria-level=\"1\">\u003Cp dir=\"ltr\" style=\"line-height:1.38;margin-top:0pt;margin-bottom:0pt;\" role=\"presentation\">\u003Cspan style=\"font-size:13.999999999999998pt;font-family:Arial,sans-serif;color:#000000;background-color:transparent;font-weight:400;font-style:normal;font-variant:normal;text-decoration:none;vertical-align:baseline;white-space:pre;white-space:pre-wrap;\">To have a more complicated design, try adding layers.\u003C/span>\u003C/p>\u003C/li>\u003C/ol>\u003Cp dir=\"ltr\" style=\"line-height:1.38;margin-top:0pt;margin-bottom:0pt;\">\u003Cspan style=\"font-size:13.999999999999998pt;font-family:Arial,sans-serif;color:#000000;background-color:transparent;font-weight:400;font-style:normal;font-variant:normal;text-decoration:none;vertical-align:baseline;white-space:pre;white-space:pre-wrap;\">Look at how AI fills are blending frequently to make adjustments, as necessary.\u003C/span>\u003C/p>\u003Ch2 dir=\"ltr\" style=\"line-height:1.38;margin-top:18pt;margin-bottom:6pt;\" id=\"3nhS2b\">\u003Cspan style=\"font-size:16pt;font-family:Arial,sans-serif;color:#000000;background-color:transparent;font-weight:700;font-style:normal;font-variant:normal;text-decoration:none;vertical-align:baseline;white-space:pre;white-space:pre-wrap;\">Final Thoughts\u003C/span>\u003C/h2>\u003Cp dir=\"ltr\" style=\"line-height:1.38;margin-top:0pt;margin-bottom:0pt;\">\u003Cspan style=\"font-size:13.999999999999998pt;font-family:Arial,sans-serif;color:#000000;background-color:transparent;font-weight:400;font-style:normal;font-variant:normal;text-decoration:none;vertical-align:baseline;white-space:pre;white-space:pre-wrap;\">The AI generative free fill tool in \u003C/span>\u003Cspan style=\"font-size:13.999999999999998pt;font-family:Arial,sans-serif;color:#000000;background-color:transparent;font-weight:700;font-style:normal;font-variant:normal;text-decoration:none;vertical-align:baseline;white-space:pre;white-space:pre-wrap;\">\u003Ca href=\"https://pixelfox.ai/\" target=\"_blank\">PixelFox\u003C/a> \u003C/span>\u003Cspan style=\"font-size:13.999999999999998pt;font-family:Arial,sans-serif;color:#000000;background-color:transparent;font-weight:400;font-style:normal;font-variant:normal;text-decoration:none;vertical-align:baseline;white-space:pre;white-space:pre-wrap;\">provides an easy, intuitive method of incorporating and layering images on the web that is capable of producing professional-quality results. Ideally suited to put \u003C/span>\u003Cspan style=\"font-size:13.999999999999998pt;font-family:Arial,sans-serif;color:#000000;background-color:transparent;font-weight:700;font-style:normal;font-variant:normal;text-decoration:none;vertical-align:baseline;white-space:pre;white-space:pre-wrap;\">photo on photo\u003C/span>\u003Cspan style=\"font-size:13.999999999999998pt;font-family:Arial,sans-serif;color:#000000;background-color:transparent;font-weight:400;font-style:normal;font-variant:normal;text-decoration:none;vertical-align:baseline;white-space:pre;white-space:pre-wrap;\">, because you think it would be cool; to make perfect marketing visuals, or repair old pictures with the help of AI fill; or just about anything you want, this tool puts your creativity at the tip of your fingers, without downloads, or any subscriptions, just quick and effective editing.\u003C/span>\u003C/p>\u003Cp>\u003Cspan id=\"docs-internal-guid-fda772ad-7fff-5c6c-79e7-bc2228d9ddcc\">\u003Cspan style=\"font-size: 14pt; font-family: Arial, sans-serif; color: rgb(0, 0, 0); background-color: transparent; font-variant-numeric: normal; font-variant-east-asian: normal; font-variant-alternates: normal; font-variant-position: normal; font-variant-emoji: normal; vertical-align: baseline; white-space-collapse: preserve;\">Give PixelFox a shot and see how easy it can be to layer images and use \u003C/span>\u003Cspan style=\"font-size: 14pt; font-family: Arial, sans-serif; color: rgb(0, 0, 0); background-color: transparent; font-weight: 700; font-variant-numeric: normal; font-variant-east-asian: normal; font-variant-alternates: normal; font-variant-position: normal; font-variant-emoji: normal; vertical-align: baseline; white-space-collapse: preserve;\">AI image fill to cut out the image.\u003C/span>\u003C/span>\u003C/p>","free-artificial-intelligence-generative-fill-tool-fill-and-layer-images-online-with-ease-and-layerin",85,1755703937,1755703978,{"id":105,"lang":11,"author_id":106,"image":55,"title":107,"keywords":108,"description":109,"content":110,"url":111,"views":112,"publishtime":113,"updatetime":114,"status":22,"publishtime_text":81,"status_text":25},527,9635,"Best AI Character Generator Tools for Stunning Character Creation in 2025","AI character generator,best AI character creator 2025,AI character design tool,free AI character generator online,AI character maker for games,stunning AI character creation,AI avatar and character tool, realistic AI character design,anime AI character generator,AI character concept art tool","Explore the best AI character generator tools in 2025 to design stunning, unique characters for games, art, stories, and creative projects—free & online.","\u003Ch2 class=\"\">\u003Cb>\u003Cspan style=\"font-size: 24px;\">Introduction\u003C/span>\u003C/b>\u003C/h2>\u003Cp class=\"MsoNormal\">\u003Ca name=\"heading_0\">\u003C/a>\u003C/p>\u003Cp class=\"MsoNormal\">\u003Cspan>In today’s digital age, AI character creation has revolutionized how artists, game developers, writers, and creators design unique characters. Whether you’re looking for an \u003C/span>AI character generator free\u003Cspan> tool or a professional-grade \u003C/span>\u003Cspan>character art creator\u003C/span>\u003Cspan>, artificial intelligence can help you craft detailed \u003C/span>\u003Cspan>character portraits\u003C/span>\u003Cspan>, imaginative designs, and more—all with just a few clicks.\u003C/span>\u003Cspan>\u003Co:p>\u003C/o:p>\u003C/span>\u003C/p>\u003Cp class=\"MsoNormal\">\u003Cspan>This article will explore the best AI character generators available in 2025, explain how to use them, and discuss tips for creating memorable characters. We will also cover different keywords and tools such as \u003C/span>\u003Cspan>AI character design\u003C/span>\u003Cspan>, \u003C/span>\u003Cspan>AI OC generator\u003C/span>\u003Cspan>, \u003C/span>\u003Cspan>character builder\u003C/span>\u003Cspan>, and \u003C/span>\u003Cspan>character idea generator\u003C/span>\u003Cspan> to help you find the perfect solution.\u003C/span>\u003Cspan>\u003Co:p>\u003C/o:p>\u003C/span>\u003C/p>\u003Ch2 class=\"\">\u003Cb>\u003Cspan style=\"font-size: 24px;\">What is an AI Character Generator?\u003C/span>\u003C/b>\u003C/h2>\u003Cp class=\"MsoNormal\">\u003Ca name=\"heading_1\">\u003C/a>\u003C/p>\u003Cp class=\"MsoNormal\">\u003Cspan>An \u003C/span>AI character generator\u003Cspan> is a software tool powered by artificial intelligence that automatically creates character images, portraits, or full designs based on user input or random generation. These tools use machine learning models trained on thousands or millions of images to synthesize new, unique characters.\u003C/span>\u003Cspan>\u003Co:p>\u003C/o:p>\u003C/span>\u003C/p>\u003Cp class=\"MsoNormal\">\u003Cspan>You can use prompts like text descriptions (i.e., “a fantasy elf with green eyes and silver hair”) or select options in a \u003C/span>character creation\u003Cspan> interface to customize details like hairstyle, clothing, and facial features.\u003C/span>\u003Cspan>\u003Co:p>\u003C/o:p>\u003C/span>\u003C/p>\u003Cp class=\"MsoNormal\">\u003Cspan>Common types include:\u003C/span>\u003Cspan>\u003Co:p>\u003C/o:p>\u003C/span>\u003C/p>\u003Cp class=\"MsoNormal\">\u003Cspan>• \u003C/span>\u003Cb>\u003Cspan>AI character image generator\u003C/span>\u003C/b>\u003Cspan>: Focused on generating visual portraits or full-body images.\u003C/span>\u003Cspan>\u003Co:p>\u003C/o:p>\u003C/span>\u003C/p>\u003Cp class=\"MsoNormal\">\u003Cspan>• \u003C/span>\u003Cb>\u003Cspan>AI character generator from text\u003C/span>\u003C/b>\u003Cspan>: Takes descriptive prompts to create characters.\u003C/span>\u003Cspan>\u003Co:p>\u003C/o:p>\u003C/span>\u003C/p>\u003Cp class=\"MsoNormal\">\u003Cspan>• \u003C/span>\u003Cb>\u003Cspan>Character design generator\u003C/span>\u003C/b>\u003Cspan>: Emphasizes styling and aesthetics, often for concept art.\u003C/span>\u003Cspan>\u003Co:p>\u003C/o:p>\u003C/span>\u003C/p>\u003Cp class=\"MsoNormal\">\u003Cspan>• \u003C/span>\u003Cb>\u003Cspan>Character idea generator\u003C/span>\u003C/b>\u003Cspan>: Suggests concepts for writers or artists needing inspiration.\u003C/span>\u003Cspan>\u003Co:p>\u003C/o:p>\u003C/span>\u003C/p>\u003Ch2 class=\"\">\u003Cb>\u003Cspan style=\"font-size: 24px;\">Best AI Character Generators in 2025\u003C/span>\u003C/b>\u003C/h2>\u003Cp class=\"MsoNormal\">\u003Ca name=\"heading_2\">\u003C/a>\u003C/p>\u003Cp class=\"MsoNormal\">\u003Cspan>Here are some of the top tools you can try right now for \u003C/span>AI character creation\u003Cspan>:\u003C/span>\u003Cspan>\u003Co:p>\u003C/o:p>\u003C/span>\u003C/p>\u003Ch3 class=\"\">\u003Cspan style=\"font-size: 18px;\">1. \u003C/span>\u003Cb>\u003Cu>\u003Cspan style=\"font-size: 18px;\">P\u003C/span>\u003C/u>\u003C/b>\u003Ca href=\"https://pixelfox.ai/\">\u003Cb>\u003Cu>\u003Cspan style=\"font-size: 18px;\">ixelfox.A\u003C/span>\u003C/u>\u003C/b>\u003C/a>\u003Cb>\u003Cu>\u003Cspan style=\"font-size: 18px;\">I\u003C/span>\u003C/u>\u003C/b>\u003C/h3>\u003Cp class=\"MsoNormal\">\u003Ca name=\"heading_3\">\u003C/a>\u003C/p>\u003Cp class=\"MsoNormal\">\u003Cb>\u003Cspan>Pixelfox.ai offers powerful and easy-to-use AI tools to generate and edit stunning visuals in seconds.\u003C/span>\u003C/b>\u003Cspan> The \u003C/span>\u003Ca href=\"https://pixelfox.ai/image/image-generator\">\u003Cspan>Image Generator\u003C/span>\u003C/a>\u003Cspan> turns text prompts into high-quality images in various styles, while the \u003C/span>\u003Ca href=\"https://pixelfox.ai/image/background-generator\">\u003Cspan>Background Generator\u003C/span>\u003C/a>\u003Cspan> lets you replace or enhance photo backgrounds with a single click. For anime lovers and creators, the \u003C/span>\u003Ca href=\"https://pixelfox.ai/image/anime-generator\">\u003Cspan>Anime Generator\u003C/span>\u003C/a>\u003Cspan> creates custom anime characters or scenes from text or image prompts — no design experience needed.\u003C/span>\u003Cspan>\u003Co:p>\u003C/o:p>\u003C/span>\u003C/p>\u003Cp class=\"MsoNormal\">\u003Cb>\u003Cspan>Features:\u003C/span>\u003C/b>\u003Cspan>\u003Co:p>\u003C/o:p>\u003C/span>\u003C/p>\u003Cp class=\"MsoNormal\">\u003Cspan>• \u003C/span>\u003Cspan>Fast, high-resolution output with support for creative prompts, photo backgrounds, and anime styles\u003C/span>\u003Cspan>\u003Co:p>\u003C/o:p>\u003C/span>\u003C/p>\u003Cp class=\"MsoNormal\">\u003Cspan>• \u003C/span>\u003Cspan>Free to use with no sign-up required and optimized for mobile and desktop devices\u003C/span>\u003Cspan>\u003Co:p>\u003C/o:p>\u003C/span>\u003C/p>\u003Cp class=\"MsoNormal\">\u003Cb>\u003Cspan>Best for:\u003C/span>\u003C/b>\u003Cspan>\u003Co:p>\u003C/o:p>\u003C/span>\u003C/p>\u003Cp class=\"MsoNormal\">\u003Cspan>• \u003C/span>\u003Cspan>Content creators, marketers, and small business owners needing pro-quality visuals quickly\u003C/span>\u003Cspan>\u003Co:p>\u003C/o:p>\u003C/span>\u003C/p>\u003Cp class=\"MsoNormal\">\u003Cspan>• \u003C/span>\u003Cspan>Artists, VTubers, or storytellers looking to generate characters or concept art with AI\u003C/span>\u003Cspan>\u003Co:p>\u003C/o:p>\u003C/span>\u003C/p>\u003Ch3 class=\"\">\u003Cspan>2. \u003C/span>\u003Cb>\u003Cspan>Artbreeder (Character Image Generator)\u003C/span>\u003C/b>\u003C/h3>\u003Cp class=\"MsoNormal\">\u003Ca name=\"heading_4\">\u003C/a>\u003C/p>\u003Cp class=\"MsoNormal\">\u003Cspan>Artbreeder lets you blend images and customize character portraits easily. It’s a powerful \u003C/span>\u003Cb>\u003Cspan>character art creator\u003C/span>\u003C/b>\u003Cspan> with options to morph facial features, adjust colors, and more.\u003C/span>\u003Cspan>\u003Co:p>\u003C/o:p>\u003C/span>\u003C/p>\u003Cp class=\"MsoNormal\">\u003Cspan>\u003Cb>• \u003C/b>\u003C/span>\u003Cspan>\u003Cb>Features:\u003C/b> Image mixing, easy UI, high-res downloads\u003C/span>\u003Cspan>\u003Co:p>\u003C/o:p>\u003C/span>\u003C/p>\u003Cp class=\"MsoNormal\">\u003Cspan>\u003Cb>• \u003C/b>\u003C/span>\u003Cspan>\u003Cb>Best for: \u003C/b>Artists, storytellers, and game developers looking for visual inspiration\u003C/span>\u003Cspan>\u003Co:p>\u003C/o:p>\u003C/span>\u003C/p>\u003Ch3 class=\"\">\u003Cspan>3. \u003C/span>\u003Cb>\u003Cspan>Character.AI (Character AI Creator)\u003C/span>\u003C/b>\u003C/h3>\u003Cp class=\"MsoNormal\">\u003Ca name=\"heading_5\">\u003C/a>\u003C/p>\u003Cp class=\"MsoNormal\">\u003Cspan>Character.AI is well-known for creating interactive AI-driven character personalities but also offers visual character generation capabilities.\u003C/span>\u003Cspan>\u003Co:p>\u003C/o:p>\u003C/span>\u003C/p>\u003Cp class=\"MsoNormal\">\u003Cspan>\u003Cb>• \u003C/b>\u003C/span>\u003Cspan>\u003Cb>Features: \u003C/b>Text-based prompts, personality tuning, visual character portraits\u003C/span>\u003Cspan>\u003Co:p>\u003C/o:p>\u003C/span>\u003C/p>\u003Cp class=\"MsoNormal\">\u003Cspan>\u003Cb>• \u003C/b>\u003C/span>\u003Cspan>\u003Cb>Best for: \u003C/b>Writers and creators wanting both visual and behavioral character creation\u003C/span>\u003Cspan>\u003Co:p>\u003C/o:p>\u003C/span>\u003C/p>\u003Ch3 class=\"\">\u003Cb>\u003Cspan>4. \u003C/span>\u003Cspan>Ready Player Me (Online Character Creator)\u003C/span>\u003C/b>\u003C/h3>\u003Cp class=\"MsoNormal\">\u003Cspan>This tool creates full 3D avatars that can be used in games, VR, or social platforms.\u003C/span>\u003Cspan>\u003Co:p>\u003C/o:p>\u003C/span>\u003C/p>\u003Cp class=\"MsoNormal\">\u003Cspan>\u003Cb>• \u003C/b>\u003C/span>\u003Cspan>\u003Cb>Features: \u003C/b>3D model creation, customizable outfits, VR/AR compatibility\u003C/span>\u003Cspan>\u003Co:p>\u003C/o:p>\u003C/span>\u003C/p>\u003Cp class=\"MsoNormal\">\u003Cspan>\u003Cb>• \u003C/b>\u003C/span>\u003Cspan>\u003Cb>Best for: \u003C/b>Developers and streamers needing ready-to-use character models\u003C/span>\u003Cspan>\u003Co:p>\u003C/o:p>\u003C/span>\u003C/p>\u003Ch3 class=\"\">\u003Cspan>5. \u003C/span>\u003Cb>\u003Cspan>This Person Does Not Exist (AI Character Portrait Generator)\u003C/span>\u003C/b>\u003C/h3>\u003Cp class=\"MsoNormal\">\u003Ca name=\"heading_6\">\u003C/a>\u003C/p>\u003Cp class=\"MsoNormal\">\u003Cspan>Generates realistic human faces using GANs, great for hyper-realistic portrait needs.\u003C/span>\u003Cspan>\u003Co:p>\u003C/o:p>\u003C/span>\u003C/p>\u003Cp class=\"MsoNormal\">\u003Cspan>\u003Cb>• \u003C/b>\u003C/span>\u003Cspan>\u003Cb>Features:\u003C/b> Fully AI-generated faces, no input needed\u003C/span>\u003Cspan>\u003Co:p>\u003C/o:p>\u003C/span>\u003C/p>\u003Cp class=\"MsoNormal\">\u003Cspan>\u003Cb>• \u003C/b>\u003C/span>\u003Cspan>\u003Cb>Best for: \u003C/b>Photorealistic character portraits or profile pictures\u003C/span>\u003Cspan>\u003Co:p>\u003C/o:p>\u003C/span>\u003C/p>\u003Ch3 class=\"\">\u003Cspan>6. \u003C/span>\u003Cb>\u003Cspan>Fotor AI Character Maker (AI Character Generator Free)\u003C/span>\u003C/b>\u003C/h3>\u003Cp class=\"MsoNormal\">\u003Ca name=\"heading_7\">\u003C/a>\u003C/p>\u003Cp class=\"MsoNormal\">\u003Cspan>A free tool that creates cartoon or anime-style characters from text prompts or selections.\u003C/span>\u003Cspan>\u003Co:p>\u003C/o:p>\u003C/span>\u003C/p>\u003Cp class=\"MsoNormal\">\u003Cspan>\u003Cb>• \u003C/b>\u003C/span>\u003Cspan>\u003Cb>Features:\u003C/b> Free access, style presets, text-to-image AI\u003C/span>\u003Cspan>\u003Co:p>\u003C/o:p>\u003C/span>\u003C/p>\u003Cp class=\"MsoNormal\">\u003Cspan>\u003Cb>• \u003C/b>\u003C/span>\u003Cspan>\u003Cb>Best for: \u003C/b>Beginners or hobbyists seeking quick character creation\u003C/span>\u003C/p>\u003Ch2 class=\"\">\u003Cb>\u003Cspan style=\"font-size: 24px;\">How to Use an AI Character Generator from Text?\u003C/span>\u003C/b>\u003C/h2>\u003Cp class=\"MsoNormal\">\u003Ca name=\"heading_8\">\u003C/a>\u003C/p>\u003Cp class=\"MsoNormal\">\u003Cspan>Using an \u003C/span>AI character generator from text\u003Cspan> is straightforward and involves these steps:\u003C/span>\u003Cspan>\u003Co:p>\u003C/o:p>\u003C/span>\u003C/p>\u003Cp class=\"MsoNormal\">\u003Cspan>1. \u003C/span>\u003Cb>\u003Cspan>Input your character description\u003C/span>\u003C/b>\u003Cspan>: Use detailed text prompts such as “young wizard with blue robe and glowing staff” or “steampunk robot with brass gears.”\u003C/span>\u003Cspan>\u003Co:p>\u003C/o:p>\u003C/span>\u003C/p>\u003Cp class=\"MsoNormal\">\u003Cspan>2. \u003C/span>\u003Cb>\u003Cspan>Choose a style or preset\u003C/span>\u003C/b>\u003Cspan>: Many generators offer options like anime, realistic, cartoon, or fantasy.\u003C/span>\u003Cspan>\u003Co:p>\u003C/o:p>\u003C/span>\u003C/p>\u003Cp class=\"MsoNormal\">\u003Cspan>3. \u003C/span>\u003Cb>\u003Cspan>Generate the image\u003C/span>\u003C/b>\u003Cspan>: The AI processes the prompt and outputs character images.\u003C/span>\u003Cspan>\u003Co:p>\u003C/o:p>\u003C/span>\u003C/p>\u003Cp class=\"MsoNormal\">\u003Cspan>4. \u003C/span>\u003Cb>\u003Cspan>Customize further if needed\u003C/span>\u003C/b>\u003Cspan>: Some platforms allow you to tweak facial features, clothing, or colors.\u003C/span>\u003Cspan>\u003Co:p>\u003C/o:p>\u003C/span>\u003C/p>\u003Cp class=\"MsoNormal\">\u003Cspan>5. \u003C/span>\u003Cb>\u003Cspan>Download and use\u003C/span>\u003C/b>\u003Cspan>: Save the image for your project, game, or story.\u003C/span>\u003Cspan>\u003Co:p>\u003C/o:p>\u003C/span>\u003C/p>\u003Ch2 class=\"\">\u003Cb>\u003Cspan style=\"font-size: 24px;\">Tips for Creating Characters with AI Character Makers\u003C/span>\u003C/b>\u003C/h2>\u003Cp class=\"MsoNormal\">\u003Ca name=\"heading_9\">\u003C/a>\u003C/p>\u003Cp class=\"MsoNormal\">\u003Cspan>• \u003C/span>\u003Cb>\u003Cspan>Be detailed in your descriptions\u003C/span>\u003C/b>\u003Cspan>: The more specific, the better the AI understands your vision.\u003C/span>\u003Cspan>\u003Co:p>\u003C/o:p>\u003C/span>\u003C/p>\u003Cp class=\"MsoNormal\">\u003Cspan>• \u003C/span>\u003Cb>\u003Cspan>Experiment with styles\u003C/span>\u003C/b>\u003Cspan>: Try multiple styles such as “character design generator” or “character image creator” tools to see different results.\u003C/span>\u003Cspan>\u003Co:p>\u003C/o:p>\u003C/span>\u003C/p>\u003Cp class=\"MsoNormal\">\u003Cspan>• \u003C/span>\u003Cb>\u003Cspan>Use multiple tools\u003C/span>\u003C/b>\u003Cspan>: Combine portrait generators with character builders to create both the look and backstory.\u003C/span>\u003Cspan>\u003Co:p>\u003C/o:p>\u003C/span>\u003C/p>\u003Cp class=\"MsoNormal\">\u003Cspan>• \u003C/span>\u003Cb>\u003Cspan>Respect copyrights\u003C/span>\u003C/b>\u003Cspan>: Ensure your AI-generated images are free to use commercially if needed.\u003C/span>\u003Cspan>\u003Co:p>\u003C/o:p>\u003C/span>\u003C/p>\u003Cp class=\"MsoNormal\">\u003Cspan>• \u003C/span>\u003Cb>\u003Cspan>Iterate and refine\u003C/span>\u003C/b>\u003Cspan>: AI tools are great starting points but sometimes need human tweaking for perfection.\u003C/span>\u003Cspan>\u003Co:p>\u003C/o:p>\u003C/span>\u003C/p>\u003Ch2 class=\"\">\u003Cb>\u003Cspan style=\"font-size: 24px;\">AI OC Generator and Character Idea Generator for Creators\u003C/span>\u003C/b>\u003C/h2>\u003Cp class=\"MsoNormal\">\u003Ca name=\"heading_10\">\u003C/a>\u003C/p>\u003Cp class=\"MsoNormal\">\u003Cspan>For writers, roleplayers, and artists, coming up with fresh ideas can be challenging. AI OC generators and \u003C/span>\u003Cspan>character idea generators\u003C/span>\u003Cspan> can spark inspiration by:\u003C/span>\u003Cspan>\u003Co:p>\u003C/o:p>\u003C/span>\u003C/p>\u003Cp class=\"MsoNormal\">\u003Cspan>• \u003C/span>\u003Cspan>Randomly combining traits like personality, appearance, and background\u003C/span>\u003Cspan>\u003Co:p>\u003C/o:p>\u003C/span>\u003C/p>\u003Cp class=\"MsoNormal\">\u003Cspan>• \u003C/span>\u003Cspan>Suggesting new character archetypes or visual themes\u003C/span>\u003Cspan>\u003Co:p>\u003C/o:p>\u003C/span>\u003C/p>\u003Cp class=\"MsoNormal\">\u003Cspan>• \u003C/span>\u003Cspan>Helping build comprehensive character profiles quickly\u003C/span>\u003Cspan>\u003Co:p>\u003C/o:p>\u003C/span>\u003C/p>\u003Cp class=\"MsoNormal\">\u003Cspan>These tools save time and jumpstart creativity when you’re stuck.\u003C/span>\u003Cspan>\u003Co:p>\u003C/o:p>\u003C/span>\u003C/p>\u003Ch2 class=\"\">\u003Cb>\u003Cspan style=\"font-size: 24px;\">Character Designer Free and Paid Options\u003C/span>\u003C/b>\u003C/h2>\u003Cp class=\"MsoNormal\">\u003Ca name=\"heading_11\">\u003C/a>\u003C/p>\u003Cp class=\"MsoNormal\">\u003Cspan>Many \u003C/span>character designers free\u003Cspan> tools offer solid features, but premium paid versions often unlock:\u003C/span>\u003Cspan>\u003Co:p>\u003C/o:p>\u003C/span>\u003C/p>\u003Cp class=\"MsoNormal\">\u003Cspan>• \u003C/span>\u003Cspan>Higher resolution images\u003C/span>\u003Cspan>\u003Co:p>\u003C/o:p>\u003C/span>\u003C/p>\u003Cp class=\"MsoNormal\">\u003Cspan>• \u003C/span>\u003Cspan>More customization options\u003C/span>\u003Cspan>\u003Co:p>\u003C/o:p>\u003C/span>\u003C/p>\u003Cp class=\"MsoNormal\">\u003Cspan>• \u003C/span>\u003Cspan>Access to exclusive art styles\u003C/span>\u003Cspan>\u003Co:p>\u003C/o:p>\u003C/span>\u003C/p>\u003Cp class=\"MsoNormal\">\u003Cspan>• \u003C/span>\u003Cspan>Commercial use licenses\u003C/span>\u003Cspan>\u003Co:p>\u003C/o:p>\u003C/span>\u003C/p>\u003Cp class=\"MsoNormal\">\u003Cspan>Choosing between free and paid depends on your needs and budget.\u003C/span>\u003Cspan>\u003Co:p>\u003C/o:p>\u003C/span>\u003C/p>\u003Ch2 class=\"\">\u003Cb>\u003Cspan>Frequently Asked Questions (FAQ)\u003C/span>\u003C/b>\u003C/h2>\u003Cp class=\"MsoNormal\">\u003Ca name=\"heading_12\">\u003C/a>\u003C/p>\u003Cp class=\"MsoNormal\">\u003Ch3 class=\"\">\u003Cb>\u003Cspan>Q1: What is the difference between a character maker and a character builder?\u003C/span>\u003C/b>\u003C/h3>\u003Cspan>A: Generally, a \u003C/span>\u003Cspan>character maker\u003C/span>\u003Cspan> focuses on visual design, while a \u003C/span>\u003Cspan>character builder\u003C/span>\u003Cspan> may include story, traits, and personality aspects.\u003C/span>\u003Cspan>\u003Co:p>\u003C/o:p>\u003C/span>\u003C/p>\u003Cp class=\"MsoNormal\">\u003Ch3 class=\"\">\u003Cb>\u003Cspan>Q2: Can I create a character online for free?\u003C/span>\u003C/b>\u003C/h3>\u003Cspan>A: Yes, many \u003C/span>\u003Cspan>online character creators\u003C/span>\u003Cspan> offer free tiers, though with limitations.\u003C/span>\u003Cspan>\u003Co:p>\u003C/o:p>\u003C/span>\u003C/p>\u003Cp class=\"MsoNormal\">\u003Ch3 class=\"\">\u003Cb>\u003Cspan>Q3: How do AI character generators handle copyrights?\u003C/span>\u003C/b>\u003C/h3>\u003Cspan>A: Most AI tools use large datasets and generate unique images, but always check the terms to ensure usage rights.\u003C/span>\u003Cspan>\u003Co:p>\u003C/o:p>\u003C/span>\u003C/p>\u003Ch2 class=\"\">\u003Cb>\u003Cspan style=\"font-size: 24px;\">Conclusion\u003C/span>\u003C/b>\u003C/h2>\u003Cp class=\"MsoNormal\">\u003Ca name=\"heading_13\">\u003C/a>\u003C/p>\u003Cp class=\"MsoNormal\">\u003Cspan>AI character generators have opened up amazing possibilities for creators everywhere. Whether you want a quick \u003C/span>character portrait generator, a deep character creation tool, or an AI OC generator to fuel your imagination, the tools available today are powerful and easy to use.\u003Cspan>\u003Co:p>\u003C/o:p>\u003C/span>\u003C/p>\u003Cp class=\"MsoNormal\">\u003Cspan>Explore these options, experiment with styles, and bring your characters to life with \u003C/span>\u003Ca href=\"https://pixelfox.ai/\">\u003Cu>\u003Cspan>pixelfox.ai\u003C/span>\u003C/u>\u003C/a>\u003Cspan>!\u003C/span>\u003C/p>","best-ai-character-generator-tools-for-stunning-character-creation-in-2025",183,1754629650,1754886322,{"id":116,"lang":11,"author_id":43,"image":117,"title":118,"keywords":15,"description":119,"content":120,"url":121,"views":122,"publishtime":123,"updatetime":124,"status":22,"publishtime_text":125,"status_text":25},2499,"https://api.pixelfox.ai/uploads/20250929/ecfcca287ba0064dc5a9b782828dfc0d.jpg","Sharpen AI: The Best AI Photo Sharpening Service for Crystal-Clear","Sharpen AI offers the best AI photo sharpening service to enhance image clarity and restore details. Improve your blurry photos effortlessly with cutting-edge AI technology.","\u003Cp dir=\"ltr\" style=\"line-height:1.38;margin-top:12pt;margin-bottom:12pt;\">\u003Cspan style=\"font-size:13.999999999999998pt;font-family:Arial,sans-serif;color:#000000;background-color:transparent;font-weight:400;font-style:normal;font-variant:normal;text-decoration:none;vertical-align:baseline;white-space:pre;white-space:pre-wrap;\">Blurry or soft photos can ruin what would otherwise be a perfect shot. Whether you’re a photographer, content creator, or simply someone who enjoys capturing memories, having crystal-clear images is a must. Luckily, \u003C/span>\u003Cspan style=\"font-size:13.999999999999998pt;font-family:Arial,sans-serif;color:#000000;background-color:transparent;font-weight:700;font-style:normal;font-variant:normal;text-decoration:none;vertical-align:baseline;white-space:pre;white-space:pre-wrap;\">Sharpen AI\u003C/span>\u003Cspan style=\"font-size:13.999999999999998pt;font-family:Arial,sans-serif;color:#000000;background-color:transparent;font-weight:400;font-style:normal;font-variant:normal;text-decoration:none;vertical-align:baseline;white-space:pre;white-space:pre-wrap;\"> by\u003C/span>\u003Ca href=\"https://pixelfox.ai/\" style=\"text-decoration:none;\">\u003Cspan style=\"font-size:13.999999999999998pt;font-family:Arial,sans-serif;color:#000000;background-color:transparent;font-weight:400;font-style:normal;font-variant:normal;text-decoration:none;vertical-align:baseline;white-space:pre;white-space:pre-wrap;\"> \u003C/span>\u003Cspan style=\"font-size:13.999999999999998pt;font-family:Arial,sans-serif;color:#1155cc;background-color:transparent;font-weight:700;font-style:normal;font-variant:normal;text-decoration:underline;-webkit-text-decoration-skip:none;text-decoration-skip-ink:none;vertical-align:baseline;white-space:pre;white-space:pre-wrap;\">PixelFox.ai\u003C/span>\u003C/a>\u003Cspan style=\"font-size:13.999999999999998pt;font-family:Arial,sans-serif;color:#000000;background-color:transparent;font-weight:400;font-style:normal;font-variant:normal;text-decoration:none;vertical-align:baseline;white-space:pre;white-space:pre-wrap;\"> offers a revolutionary solution. This AI-driven \u003C/span>\u003Cspan style=\"font-size:13.999999999999998pt;font-family:Arial,sans-serif;color:#000000;background-color:transparent;font-weight:700;font-style:normal;font-variant:normal;text-decoration:none;vertical-align:baseline;white-space:pre;white-space:pre-wrap;\">photo sharpening service\u003C/span>\u003Cspan style=\"font-size:13.999999999999998pt;font-family:Arial,sans-serif;color:#000000;background-color:transparent;font-weight:400;font-style:normal;font-variant:normal;text-decoration:none;vertical-align:baseline;white-space:pre;white-space:pre-wrap;\"> can restore clarity, bring out details, and make your images look sharper than ever. In this article, we’ll walk you through how \u003C/span>\u003Cspan style=\"font-size:13.999999999999998pt;font-family:Arial,sans-serif;color:#000000;background-color:transparent;font-weight:700;font-style:normal;font-variant:normal;text-decoration:none;vertical-align:baseline;white-space:pre;white-space:pre-wrap;\">Sharpen AI\u003C/span>\u003Cspan style=\"font-size:13.999999999999998pt;font-family:Arial,sans-serif;color:#000000;background-color:transparent;font-weight:400;font-style:normal;font-variant:normal;text-decoration:none;vertical-align:baseline;white-space:pre;white-space:pre-wrap;\"> works, why it’s the best solution for photo enhancement, and how it can help you improve your photos in seconds.\u003C/span>\u003C/p>\u003Ch2 dir=\"ltr\" style=\"line-height:1.38;margin-top:18pt;margin-bottom:4pt;\" id=\"jUT4PW\">\u003Cspan style=\"font-size:16pt;font-family:Arial,sans-serif;color:#000000;background-color:transparent;font-weight:700;font-style:normal;font-variant:normal;text-decoration:none;vertical-align:baseline;white-space:pre;white-space:pre-wrap;\">What is Sharpen AI?\u003C/span>\u003C/h2>\u003Cp dir=\"ltr\" style=\"line-height:1.38;margin-top:12pt;margin-bottom:12pt;\">\u003Cspan style=\"font-size:13.999999999999998pt;font-family:Arial,sans-serif;color:#000000;background-color:transparent;font-weight:700;font-style:normal;font-variant:normal;text-decoration:none;vertical-align:baseline;white-space:pre;white-space:pre-wrap;\">Sharpen AI\u003C/span>\u003Cspan style=\"font-size:13.999999999999998pt;font-family:Arial,sans-serif;color:#000000;background-color:transparent;font-weight:400;font-style:normal;font-variant:normal;text-decoration:none;vertical-align:baseline;white-space:pre;white-space:pre-wrap;\"> is an advanced AI-powered tool designed to enhance blurry or soft photos by improving their sharpness and detail. Unlike traditional photo editing tools that rely on basic algorithms, Sharpen AI uses sophisticated deep learning models to intelligently analyze and sharpen specific parts of an image. It distinguishes between noise and detail, ensuring the end result looks natural and professional.\u003C/span>\u003C/p>\u003Ch2 dir=\"ltr\" style=\"line-height:1.38;margin-top:18pt;margin-bottom:4pt;\" id=\"lI1jfw\">\u003Cspan style=\"font-size:16pt;font-family:Arial,sans-serif;color:#000000;background-color:transparent;font-weight:700;font-style:normal;font-variant:normal;text-decoration:none;vertical-align:baseline;white-space:pre;white-space:pre-wrap;\">How Does \u003Ca href=\"https://pixelfox.ai/image/remove-logo\" target=\"_blank\">Sharpen AI \u003C/a>Work?\u003C/span>\u003C/h2>\u003Ch3 dir=\"ltr\" style=\"line-height:1.38;margin-top:14pt;margin-bottom:4pt;\">\u003Cspan style=\"font-size:13pt;font-family:Arial,sans-serif;color:#000000;background-color:transparent;font-weight:700;font-style:normal;font-variant:normal;text-decoration:none;vertical-align:baseline;white-space:pre;white-space:pre-wrap;\">1. Image Analysis\u003C/span>\u003C/h3>\u003Cp dir=\"ltr\" style=\"line-height:1.38;margin-top:12pt;margin-bottom:12pt;\">\u003Cspan style=\"font-size:13.999999999999998pt;font-family:Arial,sans-serif;color:#000000;background-color:transparent;font-weight:400;font-style:normal;font-variant:normal;text-decoration:none;vertical-align:baseline;white-space:pre;white-space:pre-wrap;\">When you upload your photo to \u003C/span>\u003Cspan style=\"font-size:13.999999999999998pt;font-family:Arial,sans-serif;color:#000000;background-color:transparent;font-weight:700;font-style:normal;font-variant:normal;text-decoration:none;vertical-align:baseline;white-space:pre;white-space:pre-wrap;\">Sharpen AI\u003C/span>\u003Cspan style=\"font-size:13.999999999999998pt;font-family:Arial,sans-serif;color:#000000;background-color:transparent;font-weight:400;font-style:normal;font-variant:normal;text-decoration:none;vertical-align:baseline;white-space:pre;white-space:pre-wrap;\"> on \u003C/span>\u003Cspan style=\"font-size:13.999999999999998pt;font-family:Arial,sans-serif;color:#000000;background-color:transparent;font-weight:700;font-style:normal;font-variant:normal;text-decoration:none;vertical-align:baseline;white-space:pre;white-space:pre-wrap;\">PixelFox.ai\u003C/span>\u003Cspan style=\"font-size:13.999999999999998pt;font-family:Arial,sans-serif;color:#000000;background-color:transparent;font-weight:400;font-style:normal;font-variant:normal;text-decoration:none;vertical-align:baseline;white-space:pre;white-space:pre-wrap;\">, the tool begins by analyzing the image to detect areas that are blurry or lacking in detail. The AI model then examines the image’s features, such as edges, textures, and patterns.\u003C/span>\u003C/p>\u003Ch3 dir=\"ltr\" style=\"line-height:1.38;margin-top:14pt;margin-bottom:4pt;\">\u003Cspan style=\"font-size:13pt;font-family:Arial,sans-serif;color:#000000;background-color:transparent;font-weight:700;font-style:normal;font-variant:normal;text-decoration:none;vertical-align:baseline;white-space:pre;white-space:pre-wrap;\">2. Intelligent Enhancement\u003C/span>\u003C/h3>\u003Cp dir=\"ltr\" style=\"line-height:1.38;margin-top:12pt;margin-bottom:12pt;\">\u003Cspan style=\"font-size:13.999999999999998pt;font-family:Arial,sans-serif;color:#000000;background-color:transparent;font-weight:400;font-style:normal;font-variant:normal;text-decoration:none;vertical-align:baseline;white-space:pre;white-space:pre-wrap;\">Once the analysis is complete, the AI applies specific sharpening techniques to improve details without introducing unwanted artifacts or noise. It sharpens the image selectively, focusing on important elements like faces, objects, and textures, while leaving backgrounds intact.\u003C/span>\u003C/p>\u003Ch3 dir=\"ltr\" style=\"line-height:1.38;margin-top:14pt;margin-bottom:4pt;\">\u003Cspan style=\"font-size:13pt;font-family:Arial,sans-serif;color:#000000;background-color:transparent;font-weight:700;font-style:normal;font-variant:normal;text-decoration:none;vertical-align:baseline;white-space:pre;white-space:pre-wrap;\">3. Output in Seconds\u003C/span>\u003C/h3>\u003Cp dir=\"ltr\" style=\"line-height:1.38;margin-top:12pt;margin-bottom:12pt;\">\u003Cspan style=\"font-size:13.999999999999998pt;font-family:Arial,sans-serif;color:#000000;background-color:transparent;font-weight:400;font-style:normal;font-variant:normal;text-decoration:none;vertical-align:baseline;white-space:pre;white-space:pre-wrap;\">The process is fast, typically taking just a few seconds, and the result is a sharper, clearer image that retains its natural look. You can preview the sharpened image, adjust the intensity of the sharpening effect, and download the final result in high resolution.\u003C/span>\u003C/p>\u003Cp dir=\"ltr\" style=\"line-height:1.38;margin-top:12pt;margin-bottom:12pt;\">\u003Cspan style=\"font-size:13.999999999999998pt;font-family:Arial,sans-serif;color:#000000;background-color:transparent;font-weight:700;font-style:normal;font-variant:normal;text-decoration:none;vertical-align:baseline;white-space:pre;white-space:pre-wrap;\">Snippet-friendly:\u003C/span>\u003Cspan style=\"font-size:13.999999999999998pt;font-family:Arial,sans-serif;color:#000000;background-color:transparent;font-weight:700;font-style:normal;font-variant:normal;text-decoration:none;vertical-align:baseline;white-space:pre;white-space:pre-wrap;\">\u003Cbr>\u003C/span>\u003Cspan style=\"font-size:13.999999999999998pt;font-family:Arial,sans-serif;color:#000000;background-color:transparent;font-weight:400;font-style:normal;font-variant:normal;text-decoration:none;vertical-align:baseline;white-space:pre;white-space:pre-wrap;\"> Sharpen AI uses deep learning to intelligently enhance details, restoring clarity and sharpness to blurry photos within seconds.\u003C/span>\u003C/p>\u003Ch2 dir=\"ltr\" style=\"line-height:1.38;margin-top:18pt;margin-bottom:4pt;\" id=\"h3JnZO\">\u003Cspan style=\"font-size:16pt;font-family:Arial,sans-serif;color:#000000;background-color:transparent;font-weight:700;font-style:normal;font-variant:normal;text-decoration:none;vertical-align:baseline;white-space:pre;white-space:pre-wrap;\">Why Sharpen AI is the Best Photo Sharpening Service\u003C/span>\u003C/h2>\u003Ch3 dir=\"ltr\" style=\"line-height:1.38;margin-top:14pt;margin-bottom:4pt;\">\u003Cspan style=\"font-size:13pt;font-family:Arial,sans-serif;color:#000000;background-color:transparent;font-weight:700;font-style:normal;font-variant:normal;text-decoration:none;vertical-align:baseline;white-space:pre;white-space:pre-wrap;\">1. High-Quality Results\u003C/span>\u003C/h3>\u003Cp dir=\"ltr\" style=\"line-height:1.38;margin-top:12pt;margin-bottom:12pt;\">\u003Cspan style=\"font-size:13.999999999999998pt;font-family:Arial,sans-serif;color:#000000;background-color:transparent;font-weight:400;font-style:normal;font-variant:normal;text-decoration:none;vertical-align:baseline;white-space:pre;white-space:pre-wrap;\">Unlike generic sharpening filters, \u003C/span>\u003Cspan style=\"font-size:13.999999999999998pt;font-family:Arial,sans-serif;color:#000000;background-color:transparent;font-weight:700;font-style:normal;font-variant:normal;text-decoration:none;vertical-align:baseline;white-space:pre;white-space:pre-wrap;\">Sharpen AI\u003C/span>\u003Cspan style=\"font-size:13.999999999999998pt;font-family:Arial,sans-serif;color:#000000;background-color:transparent;font-weight:400;font-style:normal;font-variant:normal;text-decoration:none;vertical-align:baseline;white-space:pre;white-space:pre-wrap;\"> produces high-quality, professional-grade results. Whether you’re working with portraits, landscapes, or product photos, the tool restores fine details without making the image look overly processed or artificial.\u003C/span>\u003C/p>\u003Ch3 dir=\"ltr\" style=\"line-height:1.38;margin-top:14pt;margin-bottom:4pt;\">\u003Cspan style=\"font-size:13pt;font-family:Arial,sans-serif;color:#000000;background-color:transparent;font-weight:700;font-style:normal;font-variant:normal;text-decoration:none;vertical-align:baseline;white-space:pre;white-space:pre-wrap;\">2. Precision and Control\u003C/span>\u003C/h3>\u003Cp dir=\"ltr\" style=\"line-height:1.38;margin-top:12pt;margin-bottom:12pt;\">\u003Cspan style=\"font-size:13.999999999999998pt;font-family:Arial,sans-serif;color:#000000;background-color:transparent;font-weight:700;font-style:normal;font-variant:normal;text-decoration:none;vertical-align:baseline;white-space:pre;white-space:pre-wrap;\">Sharpen AI\u003C/span>\u003Cspan style=\"font-size:13.999999999999998pt;font-family:Arial,sans-serif;color:#000000;background-color:transparent;font-weight:400;font-style:normal;font-variant:normal;text-decoration:none;vertical-align:baseline;white-space:pre;white-space:pre-wrap;\"> allows users to control the intensity of the sharpening effect. You can adjust the amount of sharpening based on the photo’s specific needs, ensuring the result is perfect every time. The tool also features various modes, such as ‘Motion Blur’ and ‘Out-of-Focus Blur,’ for more targeted enhancements.\u003C/span>\u003C/p>\u003Cp dir=\"ltr\" style=\"line-height:1.38;margin-top:12pt;margin-bottom:12pt;\">\u003Cspan style=\"font-size:13.999999999999998pt;font-family:Arial,sans-serif;color:#000000;background-color:transparent;font-weight:700;font-style:normal;font-variant:normal;text-decoration:none;vertical-align:baseline;white-space:pre;white-space:pre-wrap;\">Quick Answer:\u003C/span>\u003Cspan style=\"font-size:13.999999999999998pt;font-family:Arial,sans-serif;color:#000000;background-color:transparent;font-weight:700;font-style:normal;font-variant:normal;text-decoration:none;vertical-align:baseline;white-space:pre;white-space:pre-wrap;\">\u003Cbr>\u003C/span>\u003Cspan style=\"font-size:13.999999999999998pt;font-family:Arial,sans-serif;color:#000000;background-color:transparent;font-weight:400;font-style:normal;font-variant:normal;text-decoration:none;vertical-align:baseline;white-space:pre;white-space:pre-wrap;\"> Sharpen AI delivers precise, high-quality sharpening with customizable intensity, making it ideal for photographers and designers who require perfect results.\u003C/span>\u003C/p>\u003Ch2 dir=\"ltr\" style=\"line-height:1.38;margin-top:18pt;margin-bottom:4pt;\" id=\"0sM9GY\">\u003Cspan style=\"font-size:16pt;font-family:Arial,sans-serif;color:#000000;background-color:transparent;font-weight:700;font-style:normal;font-variant:normal;text-decoration:none;vertical-align:baseline;white-space:pre;white-space:pre-wrap;\">Key Features of Sharpen AI\u003C/span>\u003C/h2>\u003Cul style=\"margin-top:0;margin-bottom:0;padding-inline-start:48px;\">\u003Cli dir=\"ltr\" style=\"list-style-type:disc;font-size:13.999999999999998pt;font-family:Arial,sans-serif;color:#000000;background-color:transparent;font-weight:400;font-style:normal;font-variant:normal;text-decoration:none;vertical-align:baseline;white-space:pre;\" aria-level=\"1\">\u003Cp dir=\"ltr\" style=\"line-height:1.38;margin-top:12pt;margin-bottom:0pt;\" role=\"presentation\">\u003Cspan style=\"font-size:13.999999999999998pt;font-family:Arial,sans-serif;color:#000000;background-color:transparent;font-weight:700;font-style:normal;font-variant:normal;text-decoration:none;vertical-align:baseline;white-space:pre;white-space:pre-wrap;\">AI-Powered Enhancement:\u003C/span>\u003Cspan style=\"font-size:13.999999999999998pt;font-family:Arial,sans-serif;color:#000000;background-color:transparent;font-weight:400;font-style:normal;font-variant:normal;text-decoration:none;vertical-align:baseline;white-space:pre;white-space:pre-wrap;\"> Deep learning algorithms designed to understand and enhance your images with natural results.\u003C/span>\u003Cspan style=\"font-size:13.999999999999998pt;font-family:Arial,sans-serif;color:#000000;background-color:transparent;font-weight:400;font-style:normal;font-variant:normal;text-decoration:none;vertical-align:baseline;white-space:pre;white-space:pre-wrap;\">\u003Cbr>\u003Cbr>\u003C/span>\u003C/p>\u003C/li>\u003Cli dir=\"ltr\" style=\"list-style-type:disc;font-size:13.999999999999998pt;font-family:Arial,sans-serif;color:#000000;background-color:transparent;font-weight:400;font-style:normal;font-variant:normal;text-decoration:none;vertical-align:baseline;white-space:pre;\" aria-level=\"1\">\u003Cp dir=\"ltr\" style=\"line-height:1.38;margin-top:0pt;margin-bottom:0pt;\" role=\"presentation\">\u003Cspan style=\"font-size:13.999999999999998pt;font-family:Arial,sans-serif;color:#000000;background-color:transparent;font-weight:700;font-style:normal;font-variant:normal;text-decoration:none;vertical-align:baseline;white-space:pre;white-space:pre-wrap;\">Customizable Intensity:\u003C/span>\u003Cspan style=\"font-size:13.999999999999998pt;font-family:Arial,sans-serif;color:#000000;background-color:transparent;font-weight:400;font-style:normal;font-variant:normal;text-decoration:none;vertical-align:baseline;white-space:pre;white-space:pre-wrap;\"> Adjust the strength of the sharpening effect to suit your image.\u003C/span>\u003Cspan style=\"font-size:13.999999999999998pt;font-family:Arial,sans-serif;color:#000000;background-color:transparent;font-weight:400;font-style:normal;font-variant:normal;text-decoration:none;vertical-align:baseline;white-space:pre;white-space:pre-wrap;\">\u003Cbr>\u003Cbr>\u003C/span>\u003C/p>\u003C/li>\u003Cli dir=\"ltr\" style=\"list-style-type:disc;font-size:13.999999999999998pt;font-family:Arial,sans-serif;color:#000000;background-color:transparent;font-weight:400;font-style:normal;font-variant:normal;text-decoration:none;vertical-align:baseline;white-space:pre;\" aria-level=\"1\">\u003Cp dir=\"ltr\" style=\"line-height:1.38;margin-top:0pt;margin-bottom:0pt;\" role=\"presentation\">\u003Cspan style=\"font-size:13.999999999999998pt;font-family:Arial,sans-serif;color:#000000;background-color:transparent;font-weight:700;font-style:normal;font-variant:normal;text-decoration:none;vertical-align:baseline;white-space:pre;white-space:pre-wrap;\">Multiple Sharpening Modes:\u003C/span>\u003Cspan style=\"font-size:13.999999999999998pt;font-family:Arial,sans-serif;color:#000000;background-color:transparent;font-weight:400;font-style:normal;font-variant:normal;text-decoration:none;vertical-align:baseline;white-space:pre;white-space:pre-wrap;\"> Tailored options to deal with different types of blur, such as motion blur or focus blur.\u003C/span>\u003Cspan style=\"font-size:13.999999999999998pt;font-family:Arial,sans-serif;color:#000000;background-color:transparent;font-weight:400;font-style:normal;font-variant:normal;text-decoration:none;vertical-align:baseline;white-space:pre;white-space:pre-wrap;\">\u003Cbr>\u003Cbr>\u003C/span>\u003C/p>\u003C/li>\u003Cli dir=\"ltr\" style=\"list-style-type:disc;font-size:13.999999999999998pt;font-family:Arial,sans-serif;color:#000000;background-color:transparent;font-weight:400;font-style:normal;font-variant:normal;text-decoration:none;vertical-align:baseline;white-space:pre;\" aria-level=\"1\">\u003Cp dir=\"ltr\" style=\"line-height:1.38;margin-top:0pt;margin-bottom:0pt;\" role=\"presentation\">\u003Cspan style=\"font-size:13.999999999999998pt;font-family:Arial,sans-serif;color:#000000;background-color:transparent;font-weight:700;font-style:normal;font-variant:normal;text-decoration:none;vertical-align:baseline;white-space:pre;white-space:pre-wrap;\">High-Resolution Output:\u003C/span>\u003Cspan style=\"font-size:13.999999999999998pt;font-family:Arial,sans-serif;color:#000000;background-color:transparent;font-weight:400;font-style:normal;font-variant:normal;text-decoration:none;vertical-align:baseline;white-space:pre;white-space:pre-wrap;\"> Download images in full resolution for print or digital use.\u003C/span>\u003Cspan style=\"font-size:13.999999999999998pt;font-family:Arial,sans-serif;color:#000000;background-color:transparent;font-weight:400;font-style:normal;font-variant:normal;text-decoration:none;vertical-align:baseline;white-space:pre;white-space:pre-wrap;\">\u003Cbr>\u003Cbr>\u003C/span>\u003C/p>\u003C/li>\u003Cli dir=\"ltr\" style=\"list-style-type:disc;font-size:13.999999999999998pt;font-family:Arial,sans-serif;color:#000000;background-color:transparent;font-weight:400;font-style:normal;font-variant:normal;text-decoration:none;vertical-align:baseline;white-space:pre;\" aria-level=\"1\">\u003Cp dir=\"ltr\" style=\"line-height:1.38;margin-top:0pt;margin-bottom:12pt;\" role=\"presentation\">\u003Cspan style=\"font-size:13.999999999999998pt;font-family:Arial,sans-serif;color:#000000;background-color:transparent;font-weight:700;font-style:normal;font-variant:normal;text-decoration:none;vertical-align:baseline;white-space:pre;white-space:pre-wrap;\">Fast Processing:\u003C/span>\u003Cspan style=\"font-size:13.999999999999998pt;font-family:Arial,sans-serif;color:#000000;background-color:transparent;font-weight:400;font-style:normal;font-variant:normal;text-decoration:none;vertical-align:baseline;white-space:pre;white-space:pre-wrap;\"> Get your sharpened images in seconds, with no waiting time for high-quality results.\u003C/span>\u003C/p>\u003C/li>\u003C/ul>\u003Ch2 dir=\"ltr\" style=\"line-height:1.38;margin-top:18pt;margin-bottom:4pt;\" id=\"7oAzX5\">\u003Cspan style=\"font-size:16pt;font-family:Arial,sans-serif;color:#000000;background-color:transparent;font-weight:700;font-style:normal;font-variant:normal;text-decoration:none;vertical-align:baseline;white-space:pre;white-space:pre-wrap;\">Who Can Benefit from Sharpen AI?\u003C/span>\u003C/h2>\u003Cp dir=\"ltr\" style=\"line-height:1.38;margin-top:12pt;margin-bottom:12pt;\">\u003Cspan style=\"font-size:13.999999999999998pt;font-family:Arial,sans-serif;color:#000000;background-color:transparent;font-weight:700;font-style:normal;font-variant:normal;text-decoration:none;vertical-align:baseline;white-space:pre;white-space:pre-wrap;\">Sharpen AI\u003C/span>\u003Cspan style=\"font-size:13.999999999999998pt;font-family:Arial,sans-serif;color:#000000;background-color:transparent;font-weight:400;font-style:normal;font-variant:normal;text-decoration:none;vertical-align:baseline;white-space:pre;white-space:pre-wrap;\"> isn’t just for professional photographers. Anyone who works with digital images can benefit from this powerful tool:\u003C/span>\u003C/p>\u003Cul style=\"margin-top:0;margin-bottom:0;padding-inline-start:48px;\">\u003Cli dir=\"ltr\" style=\"list-style-type:disc;font-size:13.999999999999998pt;font-family:Arial,sans-serif;color:#000000;background-color:transparent;font-weight:400;font-style:normal;font-variant:normal;text-decoration:none;vertical-align:baseline;white-space:pre;\" aria-level=\"1\">\u003Cp dir=\"ltr\" style=\"line-height:1.38;margin-top:12pt;margin-bottom:0pt;\" role=\"presentation\">\u003Cspan style=\"font-size:13.999999999999998pt;font-family:Arial,sans-serif;color:#000000;background-color:transparent;font-weight:700;font-style:normal;font-variant:normal;text-decoration:none;vertical-align:baseline;white-space:pre;white-space:pre-wrap;\">Photographers:\u003C/span>\u003Cspan style=\"font-size:13.999999999999998pt;font-family:Arial,sans-serif;color:#000000;background-color:transparent;font-weight:400;font-style:normal;font-variant:normal;text-decoration:none;vertical-align:baseline;white-space:pre;white-space:pre-wrap;\"> Perfect for enhancing portraits, landscapes, or product photography.\u003C/span>\u003Cspan style=\"font-size:13.999999999999998pt;font-family:Arial,sans-serif;color:#000000;background-color:transparent;font-weight:400;font-style:normal;font-variant:normal;text-decoration:none;vertical-align:baseline;white-space:pre;white-space:pre-wrap;\">\u003Cbr>\u003Cbr>\u003C/span>\u003C/p>\u003C/li>\u003Cli dir=\"ltr\" style=\"list-style-type:disc;font-size:13.999999999999998pt;font-family:Arial,sans-serif;color:#000000;background-color:transparent;font-weight:400;font-style:normal;font-variant:normal;text-decoration:none;vertical-align:baseline;white-space:pre;\" aria-level=\"1\">\u003Cp dir=\"ltr\" style=\"line-height:1.38;margin-top:0pt;margin-bottom:0pt;\" role=\"presentation\">\u003Cspan style=\"font-size:13.999999999999998pt;font-family:Arial,sans-serif;color:#000000;background-color:transparent;font-weight:700;font-style:normal;font-variant:normal;text-decoration:none;vertical-align:baseline;white-space:pre;white-space:pre-wrap;\">Content Creators:\u003C/span>\u003Cspan style=\"font-size:13.999999999999998pt;font-family:Arial,sans-serif;color:#000000;background-color:transparent;font-weight:400;font-style:normal;font-variant:normal;text-decoration:none;vertical-align:baseline;white-space:pre;white-space:pre-wrap;\"> Improve the quality of images for social media posts, blog articles, or YouTube thumbnails.\u003C/span>\u003Cspan style=\"font-size:13.999999999999998pt;font-family:Arial,sans-serif;color:#000000;background-color:transparent;font-weight:400;font-style:normal;font-variant:normal;text-decoration:none;vertical-align:baseline;white-space:pre;white-space:pre-wrap;\">\u003Cbr>\u003Cbr>\u003C/span>\u003C/p>\u003C/li>\u003Cli dir=\"ltr\" style=\"list-style-type:disc;font-size:13.999999999999998pt;font-family:Arial,sans-serif;color:#000000;background-color:transparent;font-weight:400;font-style:normal;font-variant:normal;text-decoration:none;vertical-align:baseline;white-space:pre;\" aria-level=\"1\">\u003Cp dir=\"ltr\" style=\"line-height:1.38;margin-top:0pt;margin-bottom:0pt;\" role=\"presentation\">\u003Cspan style=\"font-size:13.999999999999998pt;font-family:Arial,sans-serif;color:#000000;background-color:transparent;font-weight:700;font-style:normal;font-variant:normal;text-decoration:none;vertical-align:baseline;white-space:pre;white-space:pre-wrap;\">E-commerce Businesses:\u003C/span>\u003Cspan style=\"font-size:13.999999999999998pt;font-family:Arial,sans-serif;color:#000000;background-color:transparent;font-weight:400;font-style:normal;font-variant:normal;text-decoration:none;vertical-align:baseline;white-space:pre;white-space:pre-wrap;\"> Enhance product photos to attract more customers with sharper, clearer images.\u003C/span>\u003Cspan style=\"font-size:13.999999999999998pt;font-family:Arial,sans-serif;color:#000000;background-color:transparent;font-weight:400;font-style:normal;font-variant:normal;text-decoration:none;vertical-align:baseline;white-space:pre;white-space:pre-wrap;\">\u003Cbr>\u003Cbr>\u003C/span>\u003C/p>\u003C/li>\u003Cli dir=\"ltr\" style=\"list-style-type:disc;font-size:13.999999999999998pt;font-family:Arial,sans-serif;color:#000000;background-color:transparent;font-weight:400;font-style:normal;font-variant:normal;text-decoration:none;vertical-align:baseline;white-space:pre;\" aria-level=\"1\">\u003Cp dir=\"ltr\" style=\"line-height:1.38;margin-top:0pt;margin-bottom:12pt;\" role=\"presentation\">\u003Cspan style=\"font-size:13.999999999999998pt;font-family:Arial,sans-serif;color:#000000;background-color:transparent;font-weight:700;font-style:normal;font-variant:normal;text-decoration:none;vertical-align:baseline;white-space:pre;white-space:pre-wrap;\">Social Media Managers:\u003C/span>\u003Cspan style=\"font-size:13.999999999999998pt;font-family:Arial,sans-serif;color:#000000;background-color:transparent;font-weight:400;font-style:normal;font-variant:normal;text-decoration:none;vertical-align:baseline;white-space:pre;white-space:pre-wrap;\"> Create visually striking content that stands out in a crowded digital space.\u003C/span>\u003C/p>\u003C/li>\u003C/ul>\u003Ch2 dir=\"ltr\" style=\"line-height:1.38;margin-top:18pt;margin-bottom:4pt;\" id=\"D0RX74\">\u003Cspan style=\"font-size:16pt;font-family:Arial,sans-serif;color:#000000;background-color:transparent;font-weight:700;font-style:normal;font-variant:normal;text-decoration:none;vertical-align:baseline;white-space:pre;white-space:pre-wrap;\">How to Use Sharpen AI by PixelFox.ai\u003C/span>\u003C/h2>\u003Cp dir=\"ltr\" style=\"line-height:1.38;margin-top:12pt;margin-bottom:12pt;\">\u003Cspan style=\"font-size:13.999999999999998pt;font-family:Arial,sans-serif;color:#000000;background-color:transparent;font-weight:400;font-style:normal;font-variant:normal;text-decoration:none;vertical-align:baseline;white-space:pre;white-space:pre-wrap;\">Using \u003C/span>\u003Cspan style=\"font-size:13.999999999999998pt;font-family:Arial,sans-serif;color:#000000;background-color:transparent;font-weight:700;font-style:normal;font-variant:normal;text-decoration:none;vertical-align:baseline;white-space:pre;white-space:pre-wrap;\">Sharpen AI\u003C/span>\u003Cspan style=\"font-size:13.999999999999998pt;font-family:Arial,sans-serif;color:#000000;background-color:transparent;font-weight:400;font-style:normal;font-variant:normal;text-decoration:none;vertical-align:baseline;white-space:pre;white-space:pre-wrap;\"> is easy and intuitive. Here’s how you can get started:\u003C/span>\u003C/p>\u003Ch3 dir=\"ltr\" style=\"line-height:1.38;margin-top:14pt;margin-bottom:4pt;\">\u003Cspan style=\"font-size:13pt;font-family:Arial,sans-serif;color:#000000;background-color:transparent;font-weight:700;font-style:normal;font-variant:normal;text-decoration:none;vertical-align:baseline;white-space:pre;white-space:pre-wrap;\">1. Upload Your Image\u003C/span>\u003C/h3>\u003Cp dir=\"ltr\" style=\"line-height:1.38;margin-top:12pt;margin-bottom:12pt;\">\u003Cspan style=\"font-size:13.999999999999998pt;font-family:Arial,sans-serif;color:#000000;background-color:transparent;font-weight:400;font-style:normal;font-variant:normal;text-decoration:none;vertical-align:baseline;white-space:pre;white-space:pre-wrap;\">Go to\u003C/span>\u003Ca href=\"https://pixelfox.ai/\" style=\"text-decoration:none;\">\u003Cspan style=\"font-size:13.999999999999998pt;font-family:Arial,sans-serif;color:#000000;background-color:transparent;font-weight:400;font-style:normal;font-variant:normal;text-decoration:none;vertical-align:baseline;white-space:pre;white-space:pre-wrap;\"> \u003C/span>\u003Cspan style=\"font-size:13.999999999999998pt;font-family:Arial,sans-serif;color:#1155cc;background-color:transparent;font-weight:400;font-style:normal;font-variant:normal;text-decoration:underline;-webkit-text-decoration-skip:none;text-decoration-skip-ink:none;vertical-align:baseline;white-space:pre;white-space:pre-wrap;\">PixelFox.ai\u003C/span>\u003C/a>\u003Cspan style=\"font-size:13.999999999999998pt;font-family:Arial,sans-serif;color:#000000;background-color:transparent;font-weight:400;font-style:normal;font-variant:normal;text-decoration:none;vertical-align:baseline;white-space:pre;white-space:pre-wrap;\"> and select \u003C/span>\u003Cspan style=\"font-size:13.999999999999998pt;font-family:Arial,sans-serif;color:#000000;background-color:transparent;font-weight:700;font-style:normal;font-variant:normal;text-decoration:none;vertical-align:baseline;white-space:pre;white-space:pre-wrap;\">Sharpen AI\u003C/span>\u003Cspan style=\"font-size:13.999999999999998pt;font-family:Arial,sans-serif;color:#000000;background-color:transparent;font-weight:400;font-style:normal;font-variant:normal;text-decoration:none;vertical-align:baseline;white-space:pre;white-space:pre-wrap;\">. Upload the photo you want to sharpen directly from your computer or mobile device.\u003C/span>\u003C/p>\u003Ch3 dir=\"ltr\" style=\"line-height:1.38;margin-top:14pt;margin-bottom:4pt;\">\u003Cspan style=\"font-size:13pt;font-family:Arial,sans-serif;color:#000000;background-color:transparent;font-weight:700;font-style:normal;font-variant:normal;text-decoration:none;vertical-align:baseline;white-space:pre;white-space:pre-wrap;\">2. Choose the Sharpening Mode\u003C/span>\u003C/h3>\u003Cp dir=\"ltr\" style=\"line-height:1.38;margin-top:12pt;margin-bottom:12pt;\">\u003Cspan style=\"font-size:13.999999999999998pt;font-family:Arial,sans-serif;color:#000000;background-color:transparent;font-weight:400;font-style:normal;font-variant:normal;text-decoration:none;vertical-align:baseline;white-space:pre;white-space:pre-wrap;\">Pick the most suitable sharpening mode for your image. Options include:\u003C/span>\u003C/p>\u003Cul style=\"margin-top:0;margin-bottom:0;padding-inline-start:48px;\">\u003Cli dir=\"ltr\" style=\"list-style-type:disc;font-size:13.999999999999998pt;font-family:Arial,sans-serif;color:#000000;background-color:transparent;font-weight:400;font-style:normal;font-variant:normal;text-decoration:none;vertical-align:baseline;white-space:pre;\" aria-level=\"1\">\u003Cp dir=\"ltr\" style=\"line-height:1.38;margin-top:12pt;margin-bottom:0pt;\" role=\"presentation\">\u003Cspan style=\"font-size:13.999999999999998pt;font-family:Arial,sans-serif;color:#000000;background-color:transparent;font-weight:700;font-style:normal;font-variant:normal;text-decoration:none;vertical-align:baseline;white-space:pre;white-space:pre-wrap;\">Standard Sharpening:\u003C/span>\u003Cspan style=\"font-size:13.999999999999998pt;font-family:Arial,sans-serif;color:#000000;background-color:transparent;font-weight:400;font-style:normal;font-variant:normal;text-decoration:none;vertical-align:baseline;white-space:pre;white-space:pre-wrap;\"> For general image sharpening.\u003C/span>\u003Cspan style=\"font-size:13.999999999999998pt;font-family:Arial,sans-serif;color:#000000;background-color:transparent;font-weight:400;font-style:normal;font-variant:normal;text-decoration:none;vertical-align:baseline;white-space:pre;white-space:pre-wrap;\">\u003Cbr>\u003Cbr>\u003C/span>\u003C/p>\u003C/li>\u003Cli dir=\"ltr\" style=\"list-style-type:disc;font-size:13.999999999999998pt;font-family:Arial,sans-serif;color:#000000;background-color:transparent;font-weight:400;font-style:normal;font-variant:normal;text-decoration:none;vertical-align:baseline;white-space:pre;\" aria-level=\"1\">\u003Cp dir=\"ltr\" style=\"line-height:1.38;margin-top:0pt;margin-bottom:0pt;\" role=\"presentation\">\u003Cspan style=\"font-size:13.999999999999998pt;font-family:Arial,sans-serif;color:#000000;background-color:transparent;font-weight:700;font-style:normal;font-variant:normal;text-decoration:none;vertical-align:baseline;white-space:pre;white-space:pre-wrap;\">Motion Blur:\u003C/span>\u003Cspan style=\"font-size:13.999999999999998pt;font-family:Arial,sans-serif;color:#000000;background-color:transparent;font-weight:400;font-style:normal;font-variant:normal;text-decoration:none;vertical-align:baseline;white-space:pre;white-space:pre-wrap;\"> For images with blur caused by movement.\u003C/span>\u003Cspan style=\"font-size:13.999999999999998pt;font-family:Arial,sans-serif;color:#000000;background-color:transparent;font-weight:400;font-style:normal;font-variant:normal;text-decoration:none;vertical-align:baseline;white-space:pre;white-space:pre-wrap;\">\u003Cbr>\u003Cbr>\u003C/span>\u003C/p>\u003C/li>\u003Cli dir=\"ltr\" style=\"list-style-type:disc;font-size:13.999999999999998pt;font-family:Arial,sans-serif;color:#000000;background-color:transparent;font-weight:400;font-style:normal;font-variant:normal;text-decoration:none;vertical-align:baseline;white-space:pre;\" aria-level=\"1\">\u003Cp dir=\"ltr\" style=\"line-height:1.38;margin-top:0pt;margin-bottom:12pt;\" role=\"presentation\">\u003Cspan style=\"font-size:13.999999999999998pt;font-family:Arial,sans-serif;color:#000000;background-color:transparent;font-weight:700;font-style:normal;font-variant:normal;text-decoration:none;vertical-align:baseline;white-space:pre;white-space:pre-wrap;\">Out-of-Focus Blur:\u003C/span>\u003Cspan style=\"font-size:13.999999999999998pt;font-family:Arial,sans-serif;color:#000000;background-color:transparent;font-weight:400;font-style:normal;font-variant:normal;text-decoration:none;vertical-align:baseline;white-space:pre;white-space:pre-wrap;\"> For images that suffer from focus issues.\u003C/span>\u003Cspan style=\"font-size:13.999999999999998pt;font-family:Arial,sans-serif;color:#000000;background-color:transparent;font-weight:400;font-style:normal;font-variant:normal;text-decoration:none;vertical-align:baseline;white-space:pre;white-space:pre-wrap;\">\u003Cbr>\u003C/span>\u003C/p>\u003C/li>\u003C/ul>\u003Ch3 dir=\"ltr\" style=\"line-height:1.38;margin-top:14pt;margin-bottom:4pt;\">\u003Cspan style=\"font-size:13pt;font-family:Arial,sans-serif;color:#000000;background-color:transparent;font-weight:700;font-style:normal;font-variant:normal;text-decoration:none;vertical-align:baseline;white-space:pre;white-space:pre-wrap;\">3. Adjust the Intensity\u003C/span>\u003C/h3>\u003Cp dir=\"ltr\" style=\"line-height:1.38;margin-top:12pt;margin-bottom:12pt;\">\u003Cspan style=\"font-size:13.999999999999998pt;font-family:Arial,sans-serif;color:#000000;background-color:transparent;font-weight:400;font-style:normal;font-variant:normal;text-decoration:none;vertical-align:baseline;white-space:pre;white-space:pre-wrap;\">Use the slider to fine-tune the sharpening effect. You can preview the results in real-time to find the perfect balance.\u003C/span>\u003C/p>\u003Ch3 dir=\"ltr\" style=\"line-height:1.38;margin-top:14pt;margin-bottom:4pt;\">\u003Cspan style=\"font-size:13pt;font-family:Arial,sans-serif;color:#000000;background-color:transparent;font-weight:700;font-style:normal;font-variant:normal;text-decoration:none;vertical-align:baseline;white-space:pre;white-space:pre-wrap;\">4. Download Your Image\u003C/span>\u003C/h3>\u003Cp dir=\"ltr\" style=\"line-height:1.38;margin-top:12pt;margin-bottom:12pt;\">\u003Cspan style=\"font-size:13.999999999999998pt;font-family:Arial,sans-serif;color:#000000;background-color:transparent;font-weight:400;font-style:normal;font-variant:normal;text-decoration:none;vertical-align:baseline;white-space:pre;white-space:pre-wrap;\">Once you’re satisfied with the sharpening, download the high-resolution image. You can use it for printing, online use, or professional projects.\u003C/span>\u003C/p>\u003Ch2 dir=\"ltr\" style=\"line-height:1.38;margin-top:18pt;margin-bottom:4pt;\" id=\"yWMfE0\">\u003Cspan style=\"font-size:16pt;font-family:Arial,sans-serif;color:#000000;background-color:transparent;font-weight:700;font-style:normal;font-variant:normal;text-decoration:none;vertical-align:baseline;white-space:pre;white-space:pre-wrap;\">Is Sharpen AI Worth It?\u003C/span>\u003C/h2>\u003Cp dir=\"ltr\" style=\"line-height:1.38;margin-top:12pt;margin-bottom:12pt;\">\u003Cspan style=\"font-size:13.999999999999998pt;font-family:Arial,sans-serif;color:#000000;background-color:transparent;font-weight:400;font-style:normal;font-variant:normal;text-decoration:none;vertical-align:baseline;white-space:pre;white-space:pre-wrap;\">Yes. If you work with images regularly and need high-quality results quickly, \u003C/span>\u003Cspan style=\"font-size:13.999999999999998pt;font-family:Arial,sans-serif;color:#000000;background-color:transparent;font-weight:700;font-style:normal;font-variant:normal;text-decoration:none;vertical-align:baseline;white-space:pre;white-space:pre-wrap;\">Sharpen AI\u003C/span>\u003Cspan style=\"font-size:13.999999999999998pt;font-family:Arial,sans-serif;color:#000000;background-color:transparent;font-weight:400;font-style:normal;font-variant:normal;text-decoration:none;vertical-align:baseline;white-space:pre;white-space:pre-wrap;\"> is a must-have tool. Whether you’re fixing blurry photos or enhancing fine details, the service is reliable, fast, and delivers excellent results. The ease of use and powerful AI make it accessible for both beginners and professionals.\u003C/span>\u003C/p>\u003Cp dir=\"ltr\" style=\"line-height:1.38;margin-top:12pt;margin-bottom:12pt;\">\u003Cimg src=\"https://api.pixelfox.ai/uploads/20250929/ecfcca287ba0064dc5a9b782828dfc0d.jpg\" data-filename=\"filename\" style=\"width: 323px;\">\u003Cspan style=\"font-size:13.999999999999998pt;font-family:Arial,sans-serif;color:#000000;background-color:transparent;font-weight:400;font-style:normal;font-variant:normal;text-decoration:none;vertical-align:baseline;white-space:pre;white-space:pre-wrap;\">\u003Cbr>\u003C/span>\u003C/p>\u003Ch2 dir=\"ltr\" style=\"line-height:1.38;margin-top:18pt;margin-bottom:4pt;\" id=\"tTeKdQ\">\u003Cspan style=\"font-size:16pt;font-family:Arial,sans-serif;color:#000000;background-color:transparent;font-weight:700;font-style:normal;font-variant:normal;text-decoration:none;vertical-align:baseline;white-space:pre;white-space:pre-wrap;\">Tips for Getting the Best Results\u003C/span>\u003C/h2>\u003Cul style=\"margin-top:0;margin-bottom:0;padding-inline-start:48px;\">\u003Cli dir=\"ltr\" style=\"list-style-type:disc;font-size:13.999999999999998pt;font-family:Arial,sans-serif;color:#000000;background-color:transparent;font-weight:400;font-style:normal;font-variant:normal;text-decoration:none;vertical-align:baseline;white-space:pre;\" aria-level=\"1\">\u003Cp dir=\"ltr\" style=\"line-height:1.38;margin-top:12pt;margin-bottom:0pt;\" role=\"presentation\">\u003Cspan style=\"font-size:13.999999999999998pt;font-family:Arial,sans-serif;color:#000000;background-color:transparent;font-weight:700;font-style:normal;font-variant:normal;text-decoration:none;vertical-align:baseline;white-space:pre;white-space:pre-wrap;\">Start with high-resolution images\u003C/span>\u003Cspan style=\"font-size:13.999999999999998pt;font-family:Arial,sans-serif;color:#000000;background-color:transparent;font-weight:400;font-style:normal;font-variant:normal;text-decoration:none;vertical-align:baseline;white-space:pre;white-space:pre-wrap;\">: The better the quality of your original photo, the better the sharpening results.\u003C/span>\u003Cspan style=\"font-size:13.999999999999998pt;font-family:Arial,sans-serif;color:#000000;background-color:transparent;font-weight:400;font-style:normal;font-variant:normal;text-decoration:none;vertical-align:baseline;white-space:pre;white-space:pre-wrap;\">\u003Cbr>\u003Cbr>\u003C/span>\u003C/p>\u003C/li>\u003Cli dir=\"ltr\" style=\"list-style-type:disc;font-size:13.999999999999998pt;font-family:Arial,sans-serif;color:#000000;background-color:transparent;font-weight:400;font-style:normal;font-variant:normal;text-decoration:none;vertical-align:baseline;white-space:pre;\" aria-level=\"1\">\u003Cp dir=\"ltr\" style=\"line-height:1.38;margin-top:0pt;margin-bottom:0pt;\" role=\"presentation\">\u003Cspan style=\"font-size:13.999999999999998pt;font-family:Arial,sans-serif;color:#000000;background-color:transparent;font-weight:700;font-style:normal;font-variant:normal;text-decoration:none;vertical-align:baseline;white-space:pre;white-space:pre-wrap;\">Use the preview option\u003C/span>\u003Cspan style=\"font-size:13.999999999999998pt;font-family:Arial,sans-serif;color:#000000;background-color:transparent;font-weight:400;font-style:normal;font-variant:normal;text-decoration:none;vertical-align:baseline;white-space:pre;white-space:pre-wrap;\">: Always preview your sharpened photo before downloading it to make sure it looks just right.\u003C/span>\u003Cspan style=\"font-size:13.999999999999998pt;font-family:Arial,sans-serif;color:#000000;background-color:transparent;font-weight:400;font-style:normal;font-variant:normal;text-decoration:none;vertical-align:baseline;white-space:pre;white-space:pre-wrap;\">\u003Cbr>\u003Cbr>\u003C/span>\u003C/p>\u003C/li>\u003Cli dir=\"ltr\" style=\"list-style-type:disc;font-size:13.999999999999998pt;font-family:Arial,sans-serif;color:#000000;background-color:transparent;font-weight:400;font-style:normal;font-variant:normal;text-decoration:none;vertical-align:baseline;white-space:pre;\" aria-level=\"1\">\u003Cp dir=\"ltr\" style=\"line-height:1.38;margin-top:0pt;margin-bottom:12pt;\" role=\"presentation\">\u003Cspan style=\"font-size:13.999999999999998pt;font-family:Arial,sans-serif;color:#000000;background-color:transparent;font-weight:700;font-style:normal;font-variant:normal;text-decoration:none;vertical-align:baseline;white-space:pre;white-space:pre-wrap;\">Adjust intensity for different images\u003C/span>\u003Cspan style=\"font-size:13.999999999999998pt;font-family:Arial,sans-serif;color:#000000;background-color:transparent;font-weight:400;font-style:normal;font-variant:normal;text-decoration:none;vertical-align:baseline;white-space:pre;white-space:pre-wrap;\">: For portraits, use a more subtle effect. For landscape shots, you can go a bit stronger.\u003C/span>\u003C/p>\u003C/li>\u003C/ul>\u003Ch2 dir=\"ltr\" style=\"line-height:1.38;margin-top:18pt;margin-bottom:4pt;\" id=\"CBzQqv\">\u003Cspan style=\"font-size:16pt;font-family:Arial,sans-serif;color:#000000;background-color:transparent;font-weight:700;font-style:normal;font-variant:normal;text-decoration:none;vertical-align:baseline;white-space:pre;white-space:pre-wrap;\">The Future of AI Photo Sharpening\u003C/span>\u003C/h2>\u003Cp dir=\"ltr\" style=\"line-height:1.38;margin-top:12pt;margin-bottom:12pt;\">\u003Cspan style=\"font-size:13.999999999999998pt;font-family:Arial,sans-serif;color:#000000;background-color:transparent;font-weight:400;font-style:normal;font-variant:normal;text-decoration:none;vertical-align:baseline;white-space:pre;white-space:pre-wrap;\">As AI continues to advance, tools like \u003C/span>\u003Cspan style=\"font-size:13.999999999999998pt;font-family:Arial,sans-serif;color:#000000;background-color:transparent;font-weight:700;font-style:normal;font-variant:normal;text-decoration:none;vertical-align:baseline;white-space:pre;white-space:pre-wrap;\">Sharpen AI\u003C/span>\u003Cspan style=\"font-size:13.999999999999998pt;font-family:Arial,sans-serif;color:#000000;background-color:transparent;font-weight:400;font-style:normal;font-variant:normal;text-decoration:none;vertical-align:baseline;white-space:pre;white-space:pre-wrap;\"> will only get better. Expect:\u003C/span>\u003C/p>\u003Cul style=\"margin-top:0;margin-bottom:0;padding-inline-start:48px;\">\u003Cli dir=\"ltr\" style=\"list-style-type:disc;font-size:13.999999999999998pt;font-family:Arial,sans-serif;color:#000000;background-color:transparent;font-weight:400;font-style:normal;font-variant:normal;text-decoration:none;vertical-align:baseline;white-space:pre;\" aria-level=\"1\">\u003Cp dir=\"ltr\" style=\"line-height:1.38;margin-top:12pt;margin-bottom:0pt;\" role=\"presentation\">\u003Cspan style=\"font-size:13.999999999999998pt;font-family:Arial,sans-serif;color:#000000;background-color:transparent;font-weight:700;font-style:normal;font-variant:normal;text-decoration:none;vertical-align:baseline;white-space:pre;white-space:pre-wrap;\">Smarter AI Models:\u003C/span>\u003Cspan style=\"font-size:13.999999999999998pt;font-family:Arial,sans-serif;color:#000000;background-color:transparent;font-weight:400;font-style:normal;font-variant:normal;text-decoration:none;vertical-align:baseline;white-space:pre;white-space:pre-wrap;\"> Even more accurate sharpening with reduced artifacts.\u003C/span>\u003Cspan style=\"font-size:13.999999999999998pt;font-family:Arial,sans-serif;color:#000000;background-color:transparent;font-weight:400;font-style:normal;font-variant:normal;text-decoration:none;vertical-align:baseline;white-space:pre;white-space:pre-wrap;\">\u003Cbr>\u003Cbr>\u003C/span>\u003C/p>\u003C/li>\u003Cli dir=\"ltr\" style=\"list-style-type:disc;font-size:13.999999999999998pt;font-family:Arial,sans-serif;color:#000000;background-color:transparent;font-weight:400;font-style:normal;font-variant:normal;text-decoration:none;vertical-align:baseline;white-space:pre;\" aria-level=\"1\">\u003Cp dir=\"ltr\" style=\"line-height:1.38;margin-top:0pt;margin-bottom:0pt;\" role=\"presentation\">\u003Cspan style=\"font-size:13.999999999999998pt;font-family:Arial,sans-serif;color:#000000;background-color:transparent;font-weight:700;font-style:normal;font-variant:normal;text-decoration:none;vertical-align:baseline;white-space:pre;white-space:pre-wrap;\">Faster Processing:\u003C/span>\u003Cspan style=\"font-size:13.999999999999998pt;font-family:Arial,sans-serif;color:#000000;background-color:transparent;font-weight:400;font-style:normal;font-variant:normal;text-decoration:none;vertical-align:baseline;white-space:pre;white-space:pre-wrap;\"> Near-instant sharpening for large batches of photos.\u003C/span>\u003Cspan style=\"font-size:13.999999999999998pt;font-family:Arial,sans-serif;color:#000000;background-color:transparent;font-weight:400;font-style:normal;font-variant:normal;text-decoration:none;vertical-align:baseline;white-space:pre;white-space:pre-wrap;\">\u003Cbr>\u003Cbr>\u003C/span>\u003C/p>\u003C/li>\u003Cli dir=\"ltr\" style=\"list-style-type:disc;font-size:13.999999999999998pt;font-family:Arial,sans-serif;color:#000000;background-color:transparent;font-weight:400;font-style:normal;font-variant:normal;text-decoration:none;vertical-align:baseline;white-space:pre;\" aria-level=\"1\">\u003Cp dir=\"ltr\" style=\"line-height:1.38;margin-top:0pt;margin-bottom:12pt;\" role=\"presentation\">\u003Cspan style=\"font-size:13.999999999999998pt;font-family:Arial,sans-serif;color:#000000;background-color:transparent;font-weight:700;font-style:normal;font-variant:normal;text-decoration:none;vertical-align:baseline;white-space:pre;white-space:pre-wrap;\">Automatic Blur Detection:\u003C/span>\u003Cspan style=\"font-size:13.999999999999998pt;font-family:Arial,sans-serif;color:#000000;background-color:transparent;font-weight:400;font-style:normal;font-variant:normal;text-decoration:none;vertical-align:baseline;white-space:pre;white-space:pre-wrap;\"> AI will automatically choose the best sharpening mode based on the image’s specific needs.\u003C/span>\u003C/p>\u003C/li>\u003C/ul>\u003Ch2 dir=\"ltr\" style=\"line-height:1.38;margin-top:18pt;margin-bottom:4pt;\" id=\"wmi0J3\">\u003Cspan style=\"font-size:16pt;font-family:Arial,sans-serif;color:#000000;background-color:transparent;font-weight:700;font-style:normal;font-variant:normal;text-decoration:none;vertical-align:baseline;white-space:pre;white-space:pre-wrap;\">FAQ: Sharpen AI and AI Photo Sharpening Service\u003C/span>\u003Cspan style=\"font-size:17pt;font-family:Arial,sans-serif;color:#000000;background-color:transparent;font-weight:700;font-style:normal;font-variant:normal;text-decoration:none;vertical-align:baseline;white-space:pre;white-space:pre-wrap;\">s\u003C/span>\u003C/h2>\u003Cp dir=\"ltr\" style=\"line-height:1.38;margin-top:12pt;margin-bottom:12pt;\">\u003Cspan style=\"font-size:13.999999999999998pt;font-family:Arial,sans-serif;color:#000000;background-color:transparent;font-weight:700;font-style:normal;font-variant:normal;text-decoration:none;vertical-align:baseline;white-space:pre;white-space:pre-wrap;\">Q1: What types of blur can Sharpen AI fix?\u003C/span>\u003Cspan style=\"font-size:13.999999999999998pt;font-family:Arial,sans-serif;color:#000000;background-color:transparent;font-weight:700;font-style:normal;font-variant:normal;text-decoration:none;vertical-align:baseline;white-space:pre;white-space:pre-wrap;\">\u003Cbr>\u003C/span>\u003Cspan style=\"font-size:13.999999999999998pt;font-family:Arial,sans-serif;color:#000000;background-color:transparent;font-weight:400;font-style:normal;font-variant:normal;text-decoration:none;vertical-align:baseline;white-space:pre;white-space:pre-wrap;\"> Sharpen AI can fix motion blur, out-of-focus blur, and general softness in images.\u003C/span>\u003C/p>\u003Cp dir=\"ltr\" style=\"line-height:1.38;margin-top:12pt;margin-bottom:12pt;\">\u003Cspan style=\"font-size:13.999999999999998pt;font-family:Arial,sans-serif;color:#000000;background-color:transparent;font-weight:700;font-style:normal;font-variant:normal;text-decoration:none;vertical-align:baseline;white-space:pre;white-space:pre-wrap;\">Q2: Is Sharpen AI suitable for beginners?\u003C/span>\u003Cspan style=\"font-size:13.999999999999998pt;font-family:Arial,sans-serif;color:#000000;background-color:transparent;font-weight:700;font-style:normal;font-variant:normal;text-decoration:none;vertical-align:baseline;white-space:pre;white-space:pre-wrap;\">\u003Cbr>\u003C/span>\u003Cspan style=\"font-size:13.999999999999998pt;font-family:Arial,sans-serif;color:#000000;background-color:transparent;font-weight:400;font-style:normal;font-variant:normal;text-decoration:none;vertical-align:baseline;white-space:pre;white-space:pre-wrap;\"> Yes, it’s user-friendly and doesn’t require advanced editing skills.\u003C/span>\u003C/p>\u003Cp dir=\"ltr\" style=\"line-height:1.38;margin-top:12pt;margin-bottom:12pt;\">\u003Cspan style=\"font-size:13.999999999999998pt;font-family:Arial,sans-serif;color:#000000;background-color:transparent;font-weight:700;font-style:normal;font-variant:normal;text-decoration:none;vertical-align:baseline;white-space:pre;white-space:pre-wrap;\">Q3: Does Sharpen AI reduce noise in images?\u003C/span>\u003Cspan style=\"font-size:13.999999999999998pt;font-family:Arial,sans-serif;color:#000000;background-color:transparent;font-weight:700;font-style:normal;font-variant:normal;text-decoration:none;vertical-align:baseline;white-space:pre;white-space:pre-wrap;\">\u003Cbr>\u003C/span>\u003Cspan style=\"font-size:13.999999999999998pt;font-family:Arial,sans-serif;color:#000000;background-color:transparent;font-weight:400;font-style:normal;font-variant:normal;text-decoration:none;vertical-align:baseline;white-space:pre;white-space:pre-wrap;\"> While the focus is on sharpening details, Sharpen AI also minimizes noise in the process.\u003C/span>\u003C/p>\u003Cp dir=\"ltr\" style=\"line-height:1.38;margin-top:12pt;margin-bottom:12pt;\">\u003Cspan style=\"font-size:13.999999999999998pt;font-family:Arial,sans-serif;color:#000000;background-color:transparent;font-weight:700;font-style:normal;font-variant:normal;text-decoration:none;vertical-align:baseline;white-space:pre;white-space:pre-wrap;\">Q4: Can I use Sharpen AI for multiple photos at once?\u003C/span>\u003Cspan style=\"font-size:13.999999999999998pt;font-family:Arial,sans-serif;color:#000000;background-color:transparent;font-weight:700;font-style:normal;font-variant:normal;text-decoration:none;vertical-align:baseline;white-space:pre;white-space:pre-wrap;\">\u003Cbr>\u003C/span>\u003Cspan style=\"font-size:13.999999999999998pt;font-family:Arial,sans-serif;color:#000000;background-color:transparent;font-weight:400;font-style:normal;font-variant:normal;text-decoration:none;vertical-align:baseline;white-space:pre;white-space:pre-wrap;\"> Currently, Sharpen AI is optimized for single-image use, but batch processing may be available in the future.\u003C/span>\u003C/p>\u003Cp dir=\"ltr\" style=\"line-height:1.38;margin-top:12pt;margin-bottom:12pt;\">\u003Cspan style=\"font-size:13.999999999999998pt;font-family:Arial,sans-serif;color:#000000;background-color:transparent;font-weight:700;font-style:normal;font-variant:normal;text-decoration:none;vertical-align:baseline;white-space:pre;white-space:pre-wrap;\">Q5: Does Sharpen AI support RAW image files?\u003C/span>\u003Cspan style=\"font-size:13.999999999999998pt;font-family:Arial,sans-serif;color:#000000;background-color:transparent;font-weight:700;font-style:normal;font-variant:normal;text-decoration:none;vertical-align:baseline;white-space:pre;white-space:pre-wrap;\">\u003Cbr>\u003C/span>\u003Cspan style=\"font-size:13.999999999999998pt;font-family:Arial,sans-serif;color:#000000;background-color:transparent;font-weight:400;font-style:normal;font-variant:normal;text-decoration:none;vertical-align:baseline;white-space:pre;white-space:pre-wrap;\"> Yes, Sharpen AI supports RAW files for enhanced image quality.\u003C/span>\u003C/p>\u003Cp>\u003Cspan id=\"docs-internal-guid-c595f495-7fff-9095-6e78-d351a5925a86\">\u003Cspan style=\"font-size: 14pt; font-family: Arial, sans-serif; color: rgb(0, 0, 0); background-color: transparent; font-weight: 700; font-variant-numeric: normal; font-variant-east-asian: normal; font-variant-alternates: normal; font-variant-position: normal; font-variant-emoji: normal; vertical-align: baseline; white-space-collapse: preserve;\">Q6: How fast is Sharpen AI?\u003C/span>\u003Cspan style=\"font-size: 14pt; font-family: Arial, sans-serif; color: rgb(0, 0, 0); background-color: transparent; font-weight: 700; font-variant-numeric: normal; font-variant-east-asian: normal; font-variant-alternates: normal; font-variant-position: normal; font-variant-emoji: normal; vertical-align: baseline; white-space-collapse: preserve;\">\u003Cbr>\u003C/span>\u003Cspan style=\"font-size: 14pt; font-family: Arial, sans-serif; color: rgb(0, 0, 0); background-color: transparent; font-variant-numeric: normal; font-variant-east-asian: normal; font-variant-alternates: normal; font-variant-position: normal; font-variant-emoji: normal; vertical-align: baseline; white-space-collapse: preserve;\"> Sharpen AI processes images in seconds, allowing for quick results.\u003C/span>\u003C/span>\u003C/p>","sharpen-ai-the-best-ai-photo-sharpening-service-for-crystal-clear",6,1759143231,1759143445,"17 hours ago",{"id":127,"lang":11,"author_id":43,"image":55,"title":128,"keywords":15,"description":129,"content":130,"url":131,"views":132,"publishtime":133,"updatetime":61,"status":22,"publishtime_text":81,"status_text":25},611,"Free AI Face Enhancer – Improve Faces in Blurry Security Camera Images","The Face of Security Camera Picture Enhancer AI is free. The Free AI Face Enhancer from Pixelfox can restore clarity, sharpness, and detail to blurry or pixelated video in no time.","\u003Cp dir=\"ltr\">\u003Cspan>As we have already seen, security camera footage is a common source of informative content, but it does not always provide us with the vision we need. When it comes to \u003C/span>\u003Cspan>identifying faces in security\u003C/span>\u003Cspan> or investigative footage, blurry, pixelated, or low-light conditions can make identification difficult. This is where a\u003C/span>\u003Cspan> Free AI Face Enhancer\u003C/span>\u003Cspan> can help.\u003C/span>\u003C/p>\u003Cp dir=\"ltr\">\u003Cspan>However, it is now doing \u003C/span>\u003Cspan>face enhancement in security camera \u003C/span>\u003Cspan>pictures for free, with tools like \u003C/span>\u003Cspan>Pixelfox \u003C/span>\u003Cspan>becoming advanced enough to enhance and improve our faces, alongside restoring important details that would inevitably be lost. The use of this AI-powered technology can improve photo quality by sharpening images, enhancing facial features, and making them easier to identify without any professional editing skills.\u003C/span>\u003C/p>\u003Ch2 dir=\"ltr\" id=\"rx3Tva\">\u003Cspan>What Is an AI Face Enhancer?\u003C/span>\u003C/h2>\u003Cp dir=\"ltr\">\u003Cspan>An Internet or App-based tool that, through AI, enhances facial details in poor-quality pictures. It breaks down the image at pixel-level, and rebuilds any lost details, focuses blurry spots, and even adjusts lighting so you can see better.\u003C/span>\u003C/p>\u003Cp dir=\"ltr\">\u003Cspan>The difference with traditional ones is that it works automatically and does not require a time-consuming manual \u003C/span>\u003Cspan>image editing process\u003C/span>\u003Cspan>. You simply upload the image, let an AI process it, and download a greatly enhanced version, often within seconds.\u003C/span>\u003C/p>\u003Ch2 dir=\"ltr\" id=\"7JD2id\">\u003Cspan>Why Enable AI for Security Camera Facial Enhancement?\u003C/span>\u003C/h2>\u003Cp dir=\"ltr\">\u003Cspan>Security camera images\u003C/span>\u003Cspan> are a niche of image processing that generally contain difficulties, such as poor lighting, low resolution, motion blur, compression, etc. Manual editing can take us a bit, AI helps by correlating thousands of patterns of the face to bring back the features very closely is why people prefer to enhance washroom security with pictures with AI for face recognition.\u003C/span>\u003C/p>\u003Cul>\u003Cli dir=\"ltr\" aria-level=\"1\">\u003Cp dir=\"ltr\" role=\"presentation\">\u003Cspan>Improved Identification:\u003C/span>\u003Cspan> Be able to see facial features that were more obscured previously.\u003C/span>\u003C/p>\u003C/li>\u003Cli dir=\"ltr\" aria-level=\"1\">\u003Cp dir=\"ltr\" role=\"presentation\">\u003Cspan>Recover Lost Details:\u003C/span>\u003Cspan> Rebuild eyes, nose, mouth, and hair details non destructively.\u003C/span>\u003C/p>\u003C/li>\u003Cli dir=\"ltr\" aria-level=\"1\">\u003Cp dir=\"ltr\" role=\"presentation\">\u003Cspan>Save time: \u003C/span>\u003Cspan>get results within seconds without any manual retouching.\u003C/span>\u003C/p>\u003C/li>\u003Cli dir=\"ltr\" aria-level=\"1\">\u003Cp dir=\"ltr\" role=\"presentation\">\u003Cspan>Free Entry: \u003C/span>\u003Cspan>Various tools like Pixelfox offer free optimization for sporadic use.\u003C/span>\u003C/p>\u003C/li>\u003Cli dir=\"ltr\" aria-level=\"1\">\u003Cp dir=\"ltr\" role=\"presentation\">\u003Cspan>Easy For Beginners:\u003C/span>\u003Cspan> No Editing Background or Advanced Software\u003C/span>\u003C/p>\u003C/li>\u003Cli dir=\"ltr\" aria-level=\"1\">\u003Cp dir=\"ltr\" role=\"presentation\">\u003Cspan>Announcing Pixelfox:\u003C/span>\u003Cspan> AI Face Enhancer For Free\u003C/span>\u003C/p>\u003C/li>\u003C/ul>\u003Ch2 dir=\"ltr\" id=\"w0DErz\">\u003Cspan>The Pixelfox is a Versatile AI Platform\u003C/span>\u003Cspan>\u003Cspan>\u003Cimg src=\"https://api.pixelfox.ai/uploads/20250809/898c47945afcafde584069f60f01b29d.png\" width=\"624\" height=\"400\" alt=\"Free AI Face Enhancer – Improve Faces in Blurry Security Camera Images\" loading=\"lazy\">\u003C/span>\u003C/span>\u003C/h2>\u003Cp dir=\"ltr\">\u003Cspan>It utilizes cutting-edge browser technologies for enhancing and restoring facial details in\u003C/span>\u003Cspan> AI-generated images,\u003C/span>\u003Cspan> even low-grade fuzzy security images. It uses deep learning to identify facial landmarks and recreates them life-like manner as well.\u003C/span>\u003C/p>\u003Cp dir=\"ltr\">\u003Cspan>Why Pixelfox Stands Out:\u003C/span>\u003C/p>\u003Cul>\u003Cli dir=\"ltr\" aria-level=\"1\">\u003Cp dir=\"ltr\" role=\"presentation\">\u003Cspan>Face is the Priority: \u003C/span>\u003Cspan>Unlike those general upscalers, Pixelfox will strictly analyze and adjust faces to keep the highest accuracy.\u003C/span>\u003C/p>\u003C/li>\u003Cli dir=\"ltr\" aria-level=\"1\">\u003Cp dir=\"ltr\" role=\"presentation\">\u003Cspan>Realistic: \u003C/span>\u003Cspan>No plastic or oversmoothed appearance, the facial details are rendered identically to the original person.\u003C/span>\u003C/p>\u003C/li>\u003Cli dir=\"ltr\" aria-level=\"1\">\u003Cp dir=\"ltr\" role=\"presentation\">\u003Cspan>Instant Processing:\u003C/span>\u003Cspan> Upload, enhance, and download results in seconds.\u003C/span>\u003C/p>\u003C/li>\u003Cli dir=\"ltr\" aria-level=\"1\">\u003Cp dir=\"ltr\" role=\"presentation\">\u003Cspan>100% Online:\u003C/span>\u003Cspan> No Software to download, Works in your Web Browser.\u003C/span>\u003C/p>\u003C/li>\u003Cli dir=\"ltr\" aria-level=\"1\">\u003Cp dir=\"ltr\" role=\"presentation\">\u003Cspan>Free Basic Plan: \u003C/span>\u003Cspan>Awesome for promotional one-off boosts.\u003C/span>\u003C/p>\u003C/li>\u003C/ul>\u003Ch2 dir=\"ltr\" id=\"ztNGJH\">\u003Cspan>Features of Pixelfox AI Face Enhancer\u003C/span>\u003C/h2>\u003Col>\u003Cli dir=\"ltr\" aria-level=\"1\">\u003Cp dir=\"ltr\" role=\"presentation\">\u003Cspan>Advanced Facial Recognition\u003C/span>\u003C/p>\u003C/li>\u003C/ol>\u003Cp dir=\"ltr\">\u003Cspan>The AI identifies facial landmarks, such as eyes, nose, mouth, and jawline, to enable a more accurate replacement.\u003C/span>\u003C/p>\u003Col start=\"2\">\u003Cli dir=\"ltr\" aria-level=\"1\">\u003Cp dir=\"ltr\" role=\"presentation\">\u003Cspan>Blur Reduction\u003C/span>\u003C/p>\u003C/li>\u003C/ol>\u003Cp dir=\"ltr\">\u003Cspan>Removes motion blur and softens faces.\u003C/span>\u003C/p>\u003Col start=\"3\">\u003Cli dir=\"ltr\" aria-level=\"1\">\u003Cp dir=\"ltr\" role=\"presentation\">\u003Cspan>Noise Removal\u003C/span>\u003C/p>\u003C/li>\u003C/ol>\u003Cp dir=\"ltr\">\u003Cspan>Brings back missing facial features and makes your picture look less grainy/pixelated if shot poorly or with low resolution.\u003C/span>\u003C/p>\u003Col start=\"4\">\u003Cli dir=\"ltr\" aria-level=\"1\">\u003Cp dir=\"ltr\" role=\"presentation\">\u003Cspan>Lighting Correction\u003C/span>\u003C/p>\u003C/li>\u003C/ol>\u003Cp dir=\"ltr\">\u003Cspan>Darkens colours (face/visibility fix)\u003C/span>\u003C/p>\u003Col start=\"5\">\u003Cli dir=\"ltr\" aria-level=\"1\">\u003Cp dir=\"ltr\" role=\"presentation\">\u003Cspan>High-Resolution Output\u003C/span>\u003C/p>\u003C/li>\u003C/ol>\u003Cp dir=\"ltr\">\u003Cspan>Enhances low-resolution security footage stills.\u003C/span>\u003C/p>\u003Ch2 dir=\"ltr\" id=\"HT2kwm\">\u003Cspan>Best Free AI Face Enhancer — When to use it\u003C/span>\u003C/h2>\u003Cul>\u003Cli dir=\"ltr\" aria-level=\"1\">\u003Cp dir=\"ltr\" role=\"presentation\">\u003Cspan>Ideal for:\u003C/span>\u003Cspan> A free AI face enhancer like Pixelfox.\u003C/span>\u003C/p>\u003C/li>\u003Cli dir=\"ltr\" aria-level=\"1\">\u003Cp dir=\"ltr\" role=\"presentation\">\u003Cspan>Security & Surveillance:\u003C/span>\u003Cspan> Use on CCTV/Home Cameras to find people in the footage.\u003C/span>\u003C/p>\u003C/li>\u003Cli dir=\"ltr\" aria-level=\"1\">\u003Cp dir=\"ltr\" role=\"presentation\">\u003Cspan>Restore Old Footage:\u003C/span>\u003Cspan> Barnes a clarity to the old films.\u003C/span>\u003C/p>\u003C/li>\u003Cli dir=\"ltr\" aria-level=\"1\">\u003Cp dir=\"ltr\" role=\"presentation\">\u003Cspan>Incident Investigation: \u003C/span>\u003Cspan>Photos enhance quality for reporting or law enforcement.\u003C/span>\u003C/p>\u003C/li>\u003Cli dir=\"ltr\" aria-level=\"1\">\u003Cp dir=\"ltr\" role=\"presentation\">\u003Cspan>Personal Use:\u003C/span>\u003Cspan> Restoring an out-of-focus photograph from an important event.\u003C/span>\u003C/p>\u003C/li>\u003C/ul>\u003Ch2 dir=\"ltr\" id=\"lIsACq\">\u003Cspan>How to Improve a Security Camera Face, Step-by-Step Tutorial with Pixelfox\u003C/span>\u003C/h2>\u003Cul>\u003Cli dir=\"ltr\" aria-level=\"1\">\u003Cp dir=\"ltr\" role=\"presentation\">\u003Cspan>Open your browser\u003C/span>\u003Cspan> and visit Pixelfox AI Face Enhancer\u003C/span>\u003C/p>\u003C/li>\u003Cli dir=\"ltr\" aria-level=\"1\">\u003Cp dir=\"ltr\" role=\"presentation\">\u003Cspan>Add the Image\u003C/span>\u003Cspan>: Select a clear still photo (frame) from your security camera recording.\u003C/span>\u003C/p>\u003C/li>\u003Cli dir=\"ltr\" aria-level=\"1\">\u003Cp dir=\"ltr\" role=\"presentation\">\u003Cspan>Just let the AI work:\u003C/span>\u003Cspan> Pixelfox will automatically process the image in seconds.\u003C/span>\u003C/p>\u003C/li>\u003Cli dir=\"ltr\" aria-level=\"1\">\u003Cp dir=\"ltr\" role=\"presentation\">\u003Cspan>Preview Results: \u003C/span>\u003Cspan>Before/After View 5.\u003C/span>\u003C/p>\u003C/li>\u003Cli dir=\"ltr\" aria-level=\"1\">\u003Cp dir=\"ltr\" role=\"presentation\">\u003Cspan>Free download:\u003C/span>\u003Cspan> Save the modified face image.\u003C/span>\u003C/p>\u003C/li>\u003C/ul>\u003Ch2 dir=\"ltr\" id=\"Hdigbm\">\u003Cspan>Tips for Best Results\u003C/span>\u003C/h2>\u003Cp dir=\"ltr\">\u003Cspan>Once fully set up, AI can do a lot for you. However, to get a result, use:\u003C/span>\u003C/p>\u003Cul>\u003Cli dir=\"ltr\" aria-level=\"1\">\u003Cp dir=\"ltr\" role=\"presentation\">\u003Cspan>Picking up the least blurry still frame available\u003C/span>\u003C/p>\u003C/li>\u003Cli dir=\"ltr\" aria-level=\"1\">\u003Cp dir=\"ltr\" role=\"presentation\">\u003Cspan>Cropped only the face part of the image.\u003C/span>\u003C/p>\u003C/li>\u003Cli dir=\"ltr\" aria-level=\"1\">\u003Cp dir=\"ltr\" role=\"presentation\">\u003Cspan>As often as possible, original files over screenshots\u003C/span>\u003C/p>\u003C/li>\u003Cli dir=\"ltr\" aria-level=\"1\">\u003Cp dir=\"ltr\" role=\"presentation\">\u003Cspan>Avoiding over-enhancement to maintain realism.\u003C/span>\u003C/p>\u003C/li>\u003C/ul>\u003Ch2 dir=\"ltr\" id=\"gUp9uR\">\u003Cspan>Final Thoughts\u003C/span>\u003C/h2>\u003Cp dir=\"ltr\">\u003Cspan>Fortunately for us, fuzzy security camera footage is no longer a dead end. \u003C/span>\u003Cspan>Free AI Face Enhancer \u003C/span>\u003Cspan>can help you retouch a security camera image, restore lost details, and possibly increase the odds of an identification in just a several seconds.\u003C/span>\u003C/p>\u003Cp dir=\"ltr\">\u003Cspan>I found\u003C/span>\u003Cspan> Pixelfox \u003C/span>\u003Cspan>to be a great aid; it is quick and accurate. Whether you are working in a case of security, restoring old video stills, or simply trying to clarify an image of yourself, this \u003C/span>\u003Cspan>AI technology\u003C/span>\u003Cspan> will give you results that used to only be possible by professional forensic teams.\u003C/span>\u003C/p>\u003Cp>\u003Cspan id=\"docs-internal-guid-af731b29-7fff-67ad-444b-b4a82fb8ff83\">\u003C/span>\u003C/p>\u003Cp dir=\"ltr\">\u003Cspan>We live in a world of details, with an \u003C/span>\u003Cspan>AI face enhancer,\u003C/span>\u003Cspan> the difference between guessing at some blur and precisely identifying an image can depend on analyzing that one picture.\u003C/span>\u003C/p>","free-ai-face-enhancer-improve-faces-in-blurry-security-camera-images",122,1754749480,{"id":135,"lang":11,"author_id":12,"image":55,"title":136,"keywords":15,"description":137,"content":138,"url":139,"views":140,"publishtime":141,"updatetime":61,"status":22,"publishtime_text":62,"status_text":25},223,"How to Merge and Blend Multiple Faces in Photoshop Like a Pro","Learn how to merge and blend multiple faces in Photoshop like a pro! This thorough introduction teaches how to do alignment, masking, and how to have an ideal color match with fabulous composite portraits.","\u003Cp dir=\"ltr\">\u003Cspan>Blending and mixing of faces in \u003C/span>\u003Cspan>Photoshop\u003C/span>\u003Cspan> is indeed a super tool that can help you to compose realistic compositing, one-of-a-kind, or even fun mashups. Be it either you wish to merge celebrity appearances, create concept optimization, or simply play with editing art pieces, \u003C/span>\u003Cspan>Photoshop\u003C/span>\u003Cspan> provides an endless array of tools that help to perfect the desired faultless outcomes.\u003C/span>\u003C/p>\u003Cp dir=\"ltr\">\u003Cspan>You will find in this manual how to seamlessly combine faces in Photoshop step by step, ideas, professional tips, and what tools to include to complete a professional look.\u003C/span>\u003C/p>\u003Cp dir=\"ltr\">\u003Cspan>\u003Cbr>\u003C/span>\u003Cspan>\u003Cspan>\u003Cimg loading=\"lazy\" alt=\"How to Merge and Blend Multiple Faces in Photoshop Like a Pro\" src=\"https://api.pixelfox.ai/uploads/20250721/ae9b66c9e0429d518abe8f99afa509f5.octet-stream\" width=\"556\" height=\"313\">\u003C/span>\u003C/span>\u003C/p>\u003Ch1 dir=\"ltr\">\u003Cspan>\u003Cb>\u003Cbr>\u003C/b>\u003C/span>\u003C/h1>\u003Ch1 dir=\"ltr\">\u003Cspan>\u003Cb>Why Blend Multiple Faces in Photoshop?\u003C/b>\u003C/span>\u003C/h1>\u003Cp dir=\"ltr\">\u003Cspan>Now, before we get down into the details of the process, it is probably important to know the reason why\u003C/span>\u003Cspan> face blending\u003C/span>\u003Cspan> is so popular with the designer, the photographer, and the digital artist:\u003C/span>\u003C/p>\u003Cul>\u003Cli dir=\"ltr\" aria-level=\"1\">\u003Cp dir=\"ltr\" role=\"presentation\">\u003Cspan>Creative Portraits:\u003C/span>\u003Cspan> Using the interest of other persons, make up a new face.\u003C/span>\u003C/p>\u003C/li>\u003Cli dir=\"ltr\" aria-level=\"1\">\u003Cp dir=\"ltr\" role=\"presentation\">\u003Cspan>Entertainment:\u003C/span>\u003Cspan> Mix faces of friends to edit or social media to produce a funny picture.\u003C/span>\u003C/p>\u003C/li>\u003Cli dir=\"ltr\" aria-level=\"1\">\u003Cp dir=\"ltr\" role=\"presentation\">\u003Cspan>Professional Retouching:\u003C/span>\u003Cspan> Smooth skin, reshape eyes and facial features to create advertising and beauty work, as well as concept art.\u003C/span>\u003C/p>\u003C/li>\u003Cli dir=\"ltr\" aria-level=\"1\">\u003Cp dir=\"ltr\" role=\"presentation\">\u003Cspan>Art Projects:\u003C/span>\u003Cspan> Combine a variety of facial structures to create a fantasy character or surreal portraits.\u003C/span>\u003C/p>\u003C/li>\u003C/ul>\u003Cp dir=\"ltr\">\u003Cspan>Face blending\u003C/span>\u003Cspan> is both an \u003C/span>\u003Cspan>art and a science—\u003C/span>\u003Cspan>precision and creativity are key!\u003C/span>\u003C/p>\u003Ch2 id=\"Qm6Mbi\" dir=\"ltr\">\u003Cspan>\u003Cb>Tools You Need for Face Merging in Photoshop\u003C/b>\u003C/span>\u003C/h2>\u003Cp dir=\"ltr\">\u003Cspan>Before you proceed with the steps of blending faces in Photoshop, ensure that you are conversant with the following tools:\u003C/span>\u003C/p>\u003Cul>\u003Cli dir=\"ltr\" aria-level=\"1\">\u003Cp dir=\"ltr\" role=\"presentation\">\u003Cspan>Move Tool (V):\u003C/span>\u003Cspan> For positioning and aligning images.\u003C/span>\u003C/p>\u003C/li>\u003Cli dir=\"ltr\" aria-level=\"1\">\u003Cp dir=\"ltr\" role=\"presentation\">\u003Cspan>Layer Masks: \u003C/span>\u003Cspan>For non-destructive blending.\u003C/span>\u003C/p>\u003C/li>\u003Cli dir=\"ltr\" aria-level=\"1\">\u003Cp dir=\"ltr\" role=\"presentation\">\u003Cspan>Brush Tool (B): \u003C/span>\u003Cspan>To blend edges smoothly.\u003C/span>\u003C/p>\u003C/li>\u003Cli dir=\"ltr\" aria-level=\"1\">\u003Cp dir=\"ltr\" role=\"presentation\">\u003Cspan>Match Color (Image > Adjustments):\u003C/span>\u003Cspan> For skin tone correction.\u003C/span>\u003C/p>\u003C/li>\u003Cli dir=\"ltr\" aria-level=\"1\">\u003Cp dir=\"ltr\" role=\"presentation\">\u003Cspan>Liquify Tool (Filter > Liquify):\u003C/span>\u003Cspan> For adjusting facial structure.\u003C/span>\u003C/p>\u003C/li>\u003C/ul>\u003Cp>\u003Cb>\u003Cbr>\u003C/b>\u003C/p>\u003Cp dir=\"ltr\">\u003Cspan>\u003Cspan>\u003Cimg loading=\"lazy\" alt=\"How to Merge and Blend Multiple Faces in Photoshop Like a Pro\" src=\"https://api.pixelfox.ai/uploads/20250721/8a841118edc315a8ea3073ca5c18f11a.octet-stream\" width=\"624\" height=\"317\">\u003C/span>\u003C/span>\u003C/p>\u003Ch1 dir=\"ltr\">\u003Cspan>\u003Cb>Step-by-Step Guide: How to Merge Faces in Photoshop\u003C/b>\u003C/span>\u003C/h1>\u003Cp>\u003Cb>\u003Cbr>\u003C/b>\u003C/p>\u003Cp dir=\"ltr\">\u003Cspan>\u003Cb>Step 1: Prepare Your Images\u003C/b>\u003C/span>\u003C/p>\u003Cul>\u003Cli dir=\"ltr\" aria-level=\"1\">\u003Cp dir=\"ltr\" role=\"presentation\">\u003Cspan>Select the images that are related using the \u003C/span>\u003Cspan>same lighting, skin tones, \u003C/span>\u003Cspan>and \u003C/span>\u003Cspan>angles (high-resolution)\u003C/span>\u003Cspan>.\u003C/span>\u003C/p>\u003C/li>\u003Cli dir=\"ltr\" aria-level=\"1\">\u003Cp dir=\"ltr\" role=\"presentation\">\u003Cspan>Open both images\u003C/span>\u003Cspan> in Photoshop.\u003C/span>\u003C/p>\u003C/li>\u003Cli dir=\"ltr\" aria-level=\"1\">\u003Cp dir=\"ltr\" role=\"presentation\">\u003Cspan>Drop one of the images into the other document, leaving the two \u003C/span>\u003Cspan>faces in separate layers.\u003C/span>\u003C/p>\u003C/li>\u003C/ul>\u003Cp dir=\"ltr\">\u003Cspan>Tip:\u003C/span>\u003Cspan> Rename your layers (e.g., “Base Face” and “Overlay Face”) to stay organized.\u003C/span>\u003C/p>\u003Cp dir=\"ltr\">\u003Cspan>\u003Cb>Step 2: Align the Faces\u003C/b>\u003C/span>\u003C/p>\u003Cul>\u003Cli dir=\"ltr\" aria-level=\"1\">\u003Cp dir=\"ltr\" role=\"presentation\">\u003Cspan>Reduce the\u003C/span>\u003Cspan> opacity \u003C/span>\u003Cspan>of the top layer to about 50 per cent so as to see the two sides.\u003C/span>\u003C/p>\u003C/li>\u003Cli dir=\"ltr\" aria-level=\"1\">\u003Cp dir=\"ltr\" role=\"presentation\">\u003Cspan>Select the \u003C/span>\u003Cspan>Move Tool (V)\u003C/span>\u003Cspan> and drag the overlay face into position.\u003C/span>\u003C/p>\u003C/li>\u003Cli dir=\"ltr\" aria-level=\"1\">\u003Cp dir=\"ltr\" role=\"presentation\">\u003Cspan>Use Edit >\u003C/span>\u003Cspan> Free Transform (Ctrl+T) to resize and rotate until the eyes, nose, and mouth align with the base face.\u003C/span>\u003C/p>\u003C/li>\u003Cli dir=\"ltr\" aria-level=\"1\">\u003Cp dir=\"ltr\" role=\"presentation\">\u003Cspan>Press Enter\u003C/span>\u003Cspan> to confirm the transformation.\u003C/span>\u003C/p>\u003C/li>\u003C/ul>\u003Cp dir=\"ltr\">\u003Cspan>\u003Cb>Step 3: Add a Layer Mask\u003C/b>\u003C/span>\u003C/p>\u003Cul>\u003Cli dir=\"ltr\" aria-level=\"1\">\u003Cp dir=\"ltr\" role=\"presentation\">\u003Cspan>Having chosen the top layer, press the \u003C/span>\u003Cspan>Add Layer Mask\u003C/span>\u003Cspan> icon located in the Layers tab.\u003C/span>\u003C/p>\u003C/li>\u003Cli dir=\"ltr\" aria-level=\"1\">\u003Cp dir=\"ltr\" role=\"presentation\">\u003Cspan>This will also enable you to press parts of the \u003C/span>\u003Cspan>overlay away,\u003C/span>\u003Cspan> as well as expose them without removing them.\u003C/span>\u003C/p>\u003C/li>\u003C/ul>\u003Cp dir=\"ltr\">\u003Cspan>\u003Cb>Step 4: Blend the Faces Using a Soft Brush\u003C/b>\u003C/span>\u003C/p>\u003Cul>\u003Cli dir=\"ltr\" aria-level=\"1\">\u003Cp dir=\"ltr\" role=\"presentation\">\u003Cspan>Select the Brush Tool (B)\u003C/span>\u003Cspan> and set it to Soft Round with low hardness.\u003C/span>\u003C/p>\u003C/li>\u003Cli dir=\"ltr\" aria-level=\"1\">\u003Cp dir=\"ltr\" role=\"presentation\">\u003Cspan>Make sure your \u003C/span>\u003Cspan>mask is active\u003C/span>\u003Cspan> (not the image thumbnail).\u003C/span>\u003C/p>\u003C/li>\u003Cli dir=\"ltr\" aria-level=\"1\">\u003Cp dir=\"ltr\" role=\"presentation\">\u003Cspan>Part of the \u003C/span>\u003Cspan>overlay face\u003C/span>\u003Cspan> should be obscured and displayed by using black and white colors, respectively.\u003C/span>\u003C/p>\u003C/li>\u003Cli dir=\"ltr\" aria-level=\"1\">\u003Cp dir=\"ltr\" role=\"presentation\">\u003Cspan>Tint the edges of the overlay face \u003C/span>\u003Cspan>around and make it merge with the bottom face in a natural manner.\u003C/span>\u003C/p>\u003C/li>\u003C/ul>\u003Cp dir=\"ltr\">\u003Cspan>Pro Tip:\u003C/span>\u003Cspan> Adjust the brush opacity (20-50%) for a smoother transition.\u003C/span>\u003C/p>\u003Cp dir=\"ltr\">\u003Cspan>\u003Cb>Step 5: Match Skin Tones\u003C/b>\u003C/span>\u003C/p>\u003Cul>\u003Cli dir=\"ltr\" aria-level=\"1\">\u003Cp dir=\"ltr\" role=\"presentation\">\u003Cspan>Go to Image \u003C/span>\u003Cspan>> Adjustments > Match Color and select the base image as the source.\u003C/span>\u003C/p>\u003C/li>\u003Cli dir=\"ltr\" aria-level=\"1\">\u003Cp dir=\"ltr\" role=\"presentation\">\u003Cspan>Adjust\u003C/span>\u003Cspan> Luminance and Color Intensity\u003C/span>\u003Cspan> to match skin tones.\u003C/span>\u003C/p>\u003C/li>\u003Cli dir=\"ltr\" aria-level=\"1\">\u003Cp dir=\"ltr\" role=\"presentation\">\u003Cspan>Alternatively, use\u003C/span>\u003Cspan> Hue/Saturation (Ctrl+U) \u003C/span>\u003Cspan>or Curves (Ctrl+M) for manual adjustments.\u003C/span>\u003C/p>\u003C/li>\u003C/ul>\u003Cp dir=\"ltr\">\u003Cspan>\u003Cb>Step 6: Retouch and Finalize\u003C/b>\u003C/span>\u003C/p>\u003Cul>\u003Cli dir=\"ltr\" aria-level=\"1\">\u003Cp dir=\"ltr\" role=\"presentation\">\u003Cspan>Use the \u003C/span>\u003Cspan>Clone Stamp Tool \u003C/span>\u003Cspan>(S) or Healing Brush Tool (J) to fix imperfections.\u003C/span>\u003C/p>\u003C/li>\u003Cli dir=\"ltr\" aria-level=\"1\">\u003Cp dir=\"ltr\" role=\"presentation\">\u003Cspan>Use \u003C/span>\u003Cspan>Liquify (Filter > Liquify\u003C/span>\u003Cspan>) to adjust facial symmetry if needed.\u003C/span>\u003C/p>\u003C/li>\u003Cli dir=\"ltr\" aria-level=\"1\">\u003Cp dir=\"ltr\" role=\"presentation\">\u003Cspan>Merge the layers \u003C/span>\u003Cspan>(Ctrl+E) when you’re satisfied.\u003C/span>\u003C/p>\u003C/li>\u003Cli dir=\"ltr\" aria-level=\"1\">\u003Cp dir=\"ltr\" role=\"presentation\">\u003Cspan>Save your work in\u003C/span>\u003Cspan> PSD format\u003C/span>\u003Cspan> (for editing later) and JPEG (for sharing).\u003C/span>\u003C/p>\u003Cp dir=\"ltr\" role=\"presentation\">\u003Cspan>\u003Cbr>\u003C/span>\u003Cspan>\u003Cspan>\u003Cimg loading=\"lazy\" alt=\"How to Merge and Blend Multiple Faces in Photoshop Like a Pro\" src=\"https://api.pixelfox.ai/uploads/20250721/42b08bc3ae04ea1f788fb3875e261d5c.octet-stream\" width=\"624\" height=\"416\">\u003C/span>\u003C/span>\u003C/p>\u003C/li>\u003C/ul>\u003Ch1 dir=\"ltr\">\u003Cspan>\u003Cb>Pro Tips for Multi-Face Blending\u003C/b>\u003C/span>\u003C/h1>\u003Cul>\u003Cli dir=\"ltr\" aria-level=\"1\">\u003Cp dir=\"ltr\" role=\"presentation\">\u003Cspan>Stream: \u003C/span>\u003Cspan>Layer mask, not eraser- it allows you to go back to the edit.\u003C/span>\u003C/p>\u003C/li>\u003Cli dir=\"ltr\" aria-level=\"1\">\u003Cp dir=\"ltr\" role=\"presentation\">\u003Cspan>Monitor the directions \u003C/span>\u003Cspan>of the light and its shadows to make it realistic.\u003C/span>\u003C/p>\u003C/li>\u003Cli dir=\"ltr\" aria-level=\"1\">\u003Cp dir=\"ltr\" role=\"presentation\">\u003Cspan>Wheneve\u003C/span>\u003Cspan>r making close-ups \u003C/span>\u003Cspan>of fine detail, such as around the lips and the eyes, zoom in.\u003C/span>\u003C/p>\u003C/li>\u003Cli dir=\"ltr\" aria-level=\"1\">\u003Cp dir=\"ltr\" role=\"presentation\">\u003Cspan>Use l\u003C/span>\u003Cspan>ow opacity\u003C/span>\u003Cspan> brushes for smooth, seamless blending.\u003C/span>\u003C/p>\u003C/li>\u003C/ul>\u003Ch2 id=\"D39xue\" dir=\"ltr\">\u003Cspan>\u003Cb>Best Photoshop Tools for Face Blending\u003C/b>\u003C/span>\u003C/h2>\u003Col>\u003Cli dir=\"ltr\" aria-level=\"1\">\u003Cp dir=\"ltr\" role=\"presentation\">\u003Cspan>Layer Mask: \u003C/span>\u003Cspan>Essential for non-destructive editing.\u003C/span>\u003C/p>\u003C/li>\u003Cli dir=\"ltr\" aria-level=\"1\">\u003Cp dir=\"ltr\" role=\"presentation\">\u003Cspan>Soft Brush:\u003C/span>\u003Cspan> For smooth blending.\u003C/span>\u003C/p>\u003C/li>\u003Cli dir=\"ltr\" aria-level=\"1\">\u003Cp dir=\"ltr\" role=\"presentation\">\u003Cspan>Match Color: \u003C/span>\u003Cspan>To make skin tones consistent.\u003C/span>\u003C/p>\u003C/li>\u003Cli dir=\"ltr\" aria-level=\"1\">\u003Cp dir=\"ltr\" role=\"presentation\">\u003Cspan>Liquify:\u003C/span>\u003Cspan> For subtle facial structure adjustments.\u003C/span>\u003C/p>\u003C/li>\u003C/ol>\u003Ch2 id=\"21EGp5\" dir=\"ltr\">\u003Cspan>\u003Cb>Common Mistakes to Avoid\u003C/b>\u003C/span>\u003C/h2>\u003Cul>\u003Cli dir=\"ltr\" aria-level=\"1\">\u003Cp dir=\"ltr\" role=\"presentation\">\u003Cspan>Using images with\u003C/span>\u003Cspan> drastically different lighting\u003C/span>\u003Cspan>.\u003C/span>\u003C/p>\u003C/li>\u003Cli dir=\"ltr\" aria-level=\"1\">\u003Cp dir=\"ltr\" role=\"presentation\">\u003Cspan>Too much mixing\u003C/span>\u003Cspan> makes the face appear blurry or unnatural.\u003C/span>\u003C/p>\u003C/li>\u003Cli dir=\"ltr\" aria-level=\"1\">\u003Cp dir=\"ltr\" role=\"presentation\">\u003Cspan>Ignoring skin tone differences\u003C/span>\u003Cspan>—always color-correct!\u003C/span>\u003C/p>\u003Cp dir=\"ltr\" role=\"presentation\">\u003Cspan>\u003Cbr>\u003C/span>\u003C/p>\u003C/li>\u003C/ul>\u003Cp dir=\"ltr\">\u003Cspan style=\"font-size: 24px;\">\u003Cb>Final Thoughts\u003C/b>\u003C/span>\u003C/p>\u003Cp dir=\"ltr\">\u003Cspan>It is the skill that every photo editor or digital artist has to learn a great deal about \u003C/span>\u003Cspan>multi-face blending using Photoshop\u003C/span>\u003Cspan>. Using the correct methods and with a bit of patience, you can produce \u003C/span>\u003Cspan>professional-looking\u003C/span>\u003Cspan> composites that are just breathtaking and look real.\u003C/span>\u003C/p>\u003Cp>Start practicing today—and soon, you’ll be blending faces in Photoshop like a pro!\u003C/p>\u003Cp>\u003Cb>\u003Cbr>\u003C/b>\u003C/p>\u003Ch1 dir=\"ltr\">\u003Cspan>\u003Cb>FAQ:\u003C/b>\u003C/span>\u003C/h1>\u003Ch1 dir=\"ltr\">\u003Cspan style=\"font-size: 14px;\">Q1: Is it possible to join faces in Photoshop and not lose quality?\u003C/span>\u003C/h1>\u003Cp dir=\"ltr\">\u003Cspan>Yes! Use photographs that are of high resolution and do not resize a lot.\u003C/span>\u003C/p>\u003Cp dir=\"ltr\">\u003Cspan>Q2: Is there a shortcut for blending faces?\u003C/span>\u003C/p>\u003Cp dir=\"ltr\">\u003Cspan>Well, no, it does not, because blending the masking and adjustments has to be done manually to give a \u003C/span>\u003Cspan>natural outcome.\u003C/span>\u003C/p>\u003Cp dir=\"ltr\">\u003Cspan>Q3: Can I do this in Photoshop Elements?\u003C/span>\u003C/p>\u003Cp>\u003C/p>\u003Cp dir=\"ltr\">\u003Cspan>Yes, but the tools can be less usable than the whole of Photoshop.\u003C/span>\u003C/p>\u003Cdiv>\u003Cspan>\u003Cbr>\u003C/span>\u003C/div>","how-to-merge-and-blend-multiple-faces-in-photoshop-like-a-pro",285,1753107566,["Reactive",143],{"$si18n:cached-locale-configs":144,"$si18n:resolved-locale":15},{"en":145,"zh":148,"tw":150,"vi":152,"id":154,"pt":156,"es":158,"fr":160,"de":162,"it":164,"nl":166,"th":168,"tr":170,"ru":172,"ko":174,"ja":176,"ar":178,"pl":180},{"fallbacks":146,"cacheable":147},[],true,{"fallbacks":149,"cacheable":147},[],{"fallbacks":151,"cacheable":147},[],{"fallbacks":153,"cacheable":147},[],{"fallbacks":155,"cacheable":147},[],{"fallbacks":157,"cacheable":147},[],{"fallbacks":159,"cacheable":147},[],{"fallbacks":161,"cacheable":147},[],{"fallbacks":163,"cacheable":147},[],{"fallbacks":165,"cacheable":147},[],{"fallbacks":167,"cacheable":147},[],{"fallbacks":169,"cacheable":147},[],{"fallbacks":171,"cacheable":147},[],{"fallbacks":173,"cacheable":147},[],{"fallbacks":175,"cacheable":147},[],{"fallbacks":177,"cacheable":147},[],{"fallbacks":179,"cacheable":147},[],{"fallbacks":181,"cacheable":147},[],["Set"],["ShallowReactive",184],{"article-detail-low-quality-image-converter-turn-photos-into-hd-or-compressed-pics-easily":-1},"/blog/low-quality-image-converter-turn-photos-into-hd-or-compressed-pics-easily",{"userStore":187},{"showLoginModal":188,"showLoginClose":147,"loading":189,"inviteCode":15,"bidIdentification":15,"token":15,"userInfo":191,"showPriceDialog":188,"paidBefore":61,"showTrailEndDialog":188},false,{"show":188,"message":190},"加载中...",{"avatar":192,"nickname":192,"email":192},null]