 Credit

You want to fix or change a photo fast. But layers, masks, and plugins slow you down. You just want to type what you want and see it happen. That is why an ai image editor with prompt feels like a superpower. You upload a picture, write a simple line like “replace background with neon Tokyo at night,” and you get a realistic result in seconds.
I put Pixelfox AI through real jobs to see how far you can go with a pure prompt workflow. I used it to remove backgrounds for product photos, add steam to a coffee shot, swap props, clean blemishes, and restyle images for social. I did it in the browser. I did not install anything. And I hit download in under a minute for most edits. In my tests, a standard 1024px edit took about 8–12 seconds to generate. That feels 3–5x faster than setting up a manual retouch in old-school tools.
So here is a complete, practical tutorial to get your first win. It shows you exactly what to click, what to type, and how to refine. It also includes prompt recipes for popular tasks like adding new details to images with AI, swapping backgrounds, and making quick e‑commerce variants. If you prefer to jump in now, you can start here: AI Image Editing with Text Prompts – AI Photo Editor at https://pixelfox.ai/image/image-edit.
Why prompt-based editing changes the game
- You edit with words. You describe the change. The ai photo editor with prompt does it.
- You work in the browser. No installs. You can paste an image from your clipboard with Ctrl + V. It is fast.
- You get realism. The system reads lighting, shadows, and context. It blends new elements so they look like they belong.
- You still get control. You can isolate a region with a mask or use inpainting for precise changes when needed.
- You ship in minutes. This is key for teams who post daily or update many SKUs.
Under the hood, tools like Pixelfox AI combine natural language understanding with modern diffusion and inpainting techniques. The AI does not just “paste” pixels. It reads edges, perspective, and material textures. Then it renders a new result that matches the scene. This is why a new prop can cast the right shadow. This is why a sunset change warms up skin tones. If a prompt sounds clear and specific, you will get better results. If you add references to mood, light, style, or lens, you will get even more control.
What you can do in under a minute
- Remove or replace the background of a product shot.
- Add new details to images with AI (props, signs, steam, snow, confetti).
- Clean blemishes and stray hair in portraits.
- Swap a label or text on a package.
- Restyle for a brand look (film, neon cyberpunk, warm editorial).
I will show you each of these inside the steps. You can try the same prompts and get similar results.
Edit any photo in 5 steps with an ai image editor with prompt
This is the core. Five clear steps. No fluff.
Step 1: Upload your image
- Go to https://pixelfox.ai/image/image-edit.
- Click the big button that says “Upload Image.” Or drag and drop a file.
- Or use Ctrl + V to paste from your clipboard. This is fast when you copy an image or a screen grab.
- Keep it reasonable in size. The tool is fine up to large web sizes. Bigger files take a bit longer. If you plan to print, do a quick test at your target size first.
Pro tip: If your subject is small in the frame, crop first. Bigger subjects get better context and details.
Step 2: Type your prompt (plain language)
This is the fun part. Tell the AI what to do. Keep it simple and specific. Short prompts work great. You can add style cues, lighting cues, or brand cues. Here are proven prompt recipes I used:
- E‑commerce background changes
- “white seamless studio background, soft shadow under the product”
- “replace background with warm wood tabletop and soft window light”
- “product on pastel gradient backdrop, minimal studio look, soft light”
- Add props or effects
- “add steam cloud above the coffee, soft and subtle”
- “add gold confetti falling in the background”
- “place a small sprig of rosemary next to the plate”
- Social aesthetic styles
- “neon Tokyo street at night, rain reflections, cinematic”
- “warm editorial magazine look, soft film grain”
- “retro Polaroid vibe, slight vignette, subtle fade”
- Portrait touch-ups
- “remove blemishes and flyaway hair, keep skin texture natural”
- “soften under-eye shadows slightly, keep pores”
- “add gentle golden hour light from the left”
- Text or label work
- “change the label text to ‘Lemon Spark’ in clean sans-serif, centered”
- “replace the logo with a minimal leaf icon, white on green”
If you want tight control over what changes and what stays, say it. For example: “don’t change the product color” or “keep the hand and cup unchanged.” If the scene gets a bit too stylized, add “natural, realistic” to your prompt.
Step 3: (Optional) Brush a mask or use inpainting for precise regions
Most edits can be full-frame. But sometimes you need to isolate a part, like just the mug, just the sky, or just the label. There are two ways:
- Brush a quick mask in the main editor to tell the AI where to focus. Then run the prompt again.
- Use the dedicated inpaint tool for frame-accurate changes: https://pixelfox.ai/image/inpaint/edit. Upload the same image, paint over the exact area, then prompt. This is great for:
- Removing or replacing busy objects without touching the rest.
- Swapping text on packaging.
- Changing hair color or adding accessories.
- Extending canvas with new content that matches edges.
A small tip I use a lot: Feather the mask edges a little. That helps the new pixels blend with the old ones.
Step 4: Generate, review, and refine
- Click Generate. Wait a few seconds.
- Look at the result. If it is 80% there, refine the prompt. Add one or two details. For example, “soft shadow under product, keep highlights natural.”
- If the AI added too much, make the prompt stricter. Say “subtle” or “small” or “thin.” These words matter.
- Try one more generation. Two quick passes often beat one long prompt.
What I found: adding one constraint per pass gives me clean, realistic results. And I spend less time fixing overdone changes.
Step 5: Download in high quality
- Click Download when you are happy. You get a crisp file ready for web or print.
- If you need other sizes or styles, save the prompt as a preset. Then run it on more images for a consistent look.
- For brand systems, keep a small prompt library in your notes or team doc.
That’s it. You just edited a photo with a sentence.
Add new details to images with AI: recipes that work
This section is pure hands-on. These are real prompts I used in Pixelfox AI. Copy, tweak, and ship.
Props and micro-details
- “add thin white steam rising from the mug, soft, semi-transparent, realistic”
- “place a small eucalyptus branch at bottom left, shallow depth of field”
- “add a subtle lens flare at top right, warm tone, faint”
- “add water droplets on the can, cold condensation, realistic”
What makes it work: size words like “small,” “thin,” “subtle,” “faint.” And material words like “wood,” “glass,” “matte,” “glossy.” These help the model match physics and texture.
Backgrounds and environments
- “white seamless studio background, soft shadow under the product”
- “replace background with neon Tokyo night street, wet pavement reflections, shallow depth of field”
- “cozy indoor scene with a wood table, soft window light, blurred plants in the back”
Keep the subject grounded with a shadow or a surface cue. This avoids “floating” looks.
Light and mood
- “golden hour sunlight from the left, soft and warm”
- “cool daylight from the top, crisp and clean”
- “moody cinematic light, directional from the right, soft contrast”
When you change light, the model usually adapts subject tones too. That is the context-aware part at work.
Text and labels
- “change the label text to ‘Citrus Bloom’ in clean sans-serif, centered”
- “replace the front sticker with a simple white label, small leaf icon, minimal”
- “add a ‘New’ badge at top right, small circle, brand green”
Note: printed text can be tricky at very small sizes. If it looks mushy on the first try, run a tighter inpaint mask over the label and prompt again. It usually snaps into place.
Quick use cases for different roles
E‑commerce product swap in 60 seconds
Goal: consistent studio background for web listings.
Steps:
- Upload your product image.
- Prompt: “white seamless studio background, soft shadow under product, realistic.”
- Generate. If the product looks too flat, add “gentle softbox reflection” and run again.
- Download.
Now do seasonal variants:
- “soft pink gradient background, minimal”
- “holiday background with soft bokeh lights, subtle”
- “spring theme, light green background, gentle vignette”
Social media restyle that stays on-brand
Goal: turn a plain shot into a scroll-stopper.
Steps:
- Upload your image.
- Prompt: “neon cyberpunk street at night, wet reflections, keep subject sharp.”
- Generate. If the subject picked up a weird tint, add “keep skin tones natural” or “keep product color unchanged.”
- Download. Crop for your platform. You can do a square, portrait, or story crop.
Portrait clean-up without plastic skin
Goal: remove distractions but keep texture.
Steps:
- Upload the portrait.
- Prompt: “remove blemishes and flyaway hair, keep skin texture natural, subtle.”
- Generate. If you see too much smoothing, add “no airbrush, preserve pores.”
- Optional inpaint pass for under-eye shadows with a soft brush.
Package label swap
Goal: update copy or logo fast.
Steps:
- Open inpainting: https://pixelfox.ai/image/inpaint/edit
- Upload the product photo.
- Brush the label area only.
- Prompt: “replace label text with ‘Citrus Bloom’ in clean sans-serif, centered, small. Keep background logo unchanged.”
- Generate and refine with exact words like “bold” or “uppercase” if needed.
Expert tips I use in every session
- Be specific about size and intensity. Words like “small,” “subtle,” “thin,” “faint,” “slight” make outputs clean and believable.
- Anchor the subject. If you replace backgrounds, ask for a “soft shadow” or “tabletop” to stop floating.
- Add material and light cues. “matte ceramic,” “brushed metal,” “softbox from left,” “golden hour” guide physics.
- Use one change per pass. Then add one more line and run again. This stacks cleanly.
- Mask for text. Small type benefits from a tight mask. Do one inpaint pass for crisp labels.
- Save prompts. Create a brand library, like “pastel studio gradient” or “cozy wood tabletop.” Use them across SKUs and campaigns.
How realism happens (in plain words)
Here is why a prompt edit looks real when it works well:
- The AI reads the scene. It maps shapes, edges, and surfaces.
- It understands light. It sees where light comes from and how it bounces.
- It learns texture. It knows matte vs glossy and soft vs hard edges.
- It renders new pixels. It blends in the new item with the same light and perspective.
If a new prop looks too sharp or too soft, guide it. Say “match depth of field” or “slight blur to match background.” If a shadow looks off, say “soft shadow under the object.”
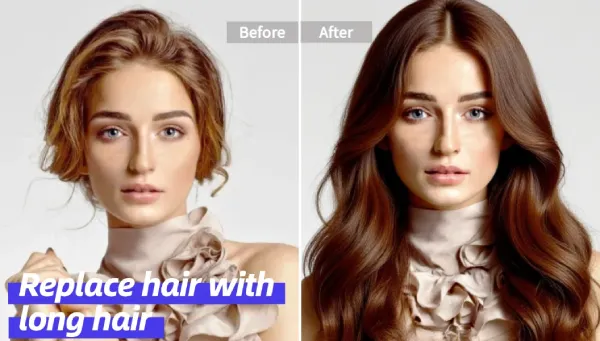
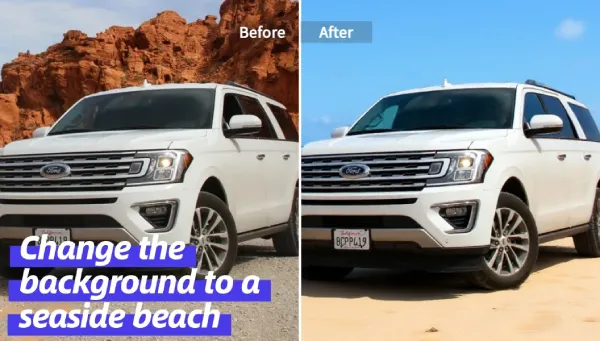
Before/After: what users expect to see
Below is a simple look at how a prompt edit can transform a picture. The two images show realistic final looks you can achieve quickly in Pixelfox AI.
Before
After
Note: Your own before/after will depend on your image and prompt. Use a short, clear description. Then add one detail at a time.
Go further with precision: inpainting for exact control
Sometimes you must be very exact. Maybe you need to swap a word on a label, clean a single cable, or remove a person in the back without touching the rest. Use the inpainting tool when you need that surgical control.
- Link: https://pixelfox.ai/image/inpaint/edit
- Steps:
- Upload the image.
- Brush only the area you want to change. Feather lightly.
- Write a short, clear prompt for that area.
- Generate and refine.
Use cases that shine:
- Remove a microphone, a tripod, or a power line in seconds.
- Change a small prop color without shifting the whole scene.
- Replace a label, a sign, or a price tag cleanly.
The perfect pairings inside the Pixelfox toolset
Some edits need a dedicated tool. You can chain your workflow using these two:
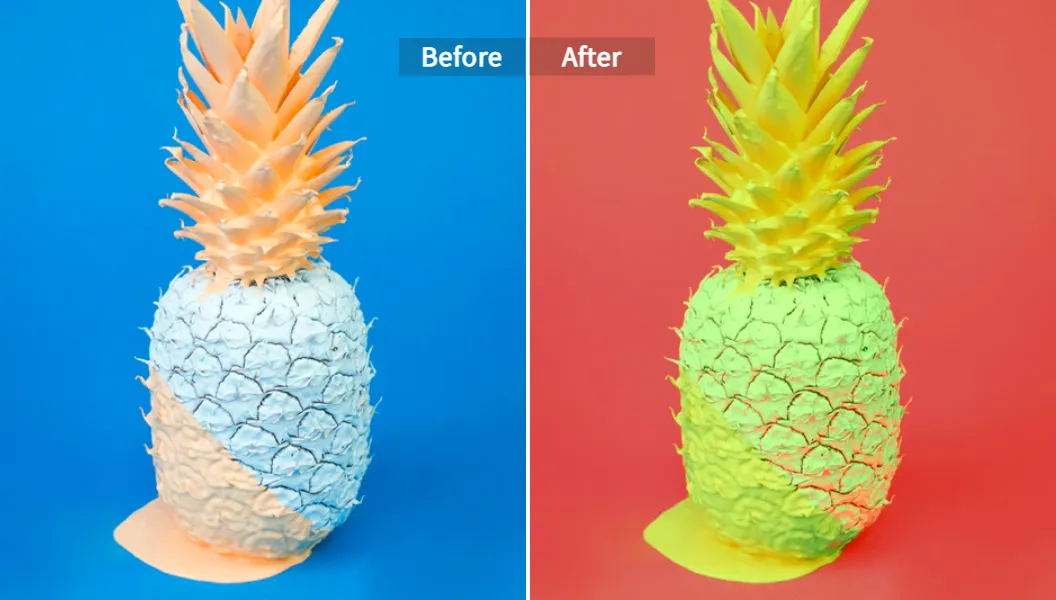
- Change object colors with a click: AI Image Colour Changer – Change Colors of Image
- Link: https://pixelfox.ai/image/recolor
- Ideal for on-brand recolors and quick SKU variants.
- Example prompt: “change the bottle cap to brand green (#00A884), keep the rest unchanged.”
- Preview image:
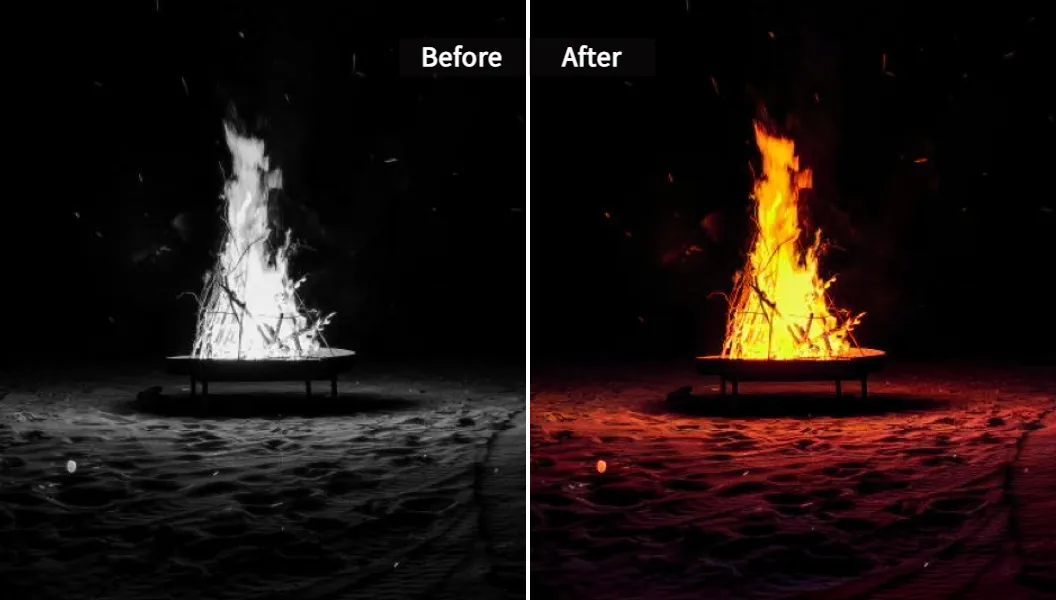
- Restore and colorize vintage photos: Photo Colorizer – Colorize Old Photos
- Link: https://pixelfox.ai/image/colorizer
- Great for old albums, archives, and B&W to color in one click.
- Preview image:
For creative remixes, try: AI Anime Generator – Turn Photos into Cartoons at https://pixelfox.ai/image/anime-generator. It is a fast way to get stylized portraits or playful brand content.
Who gets the most value from an ai photo editor with prompt
- E‑commerce sellers and marketplace vendors
- Speed up background swaps. Keep a consistent look across SKUs. Add seasonal props in seconds.
- Social media managers and creators
- Turn plain shots into polished posts. Add new details to images with AI without a full shoot.
- SMB owners and marketers
- Make on-brand visuals without training. Use a free tier to test and upgrade later.
- Freelance designers and agencies
- Iterate concepts quickly. Use optional masks and inpaint for client-grade precision.
- Students and non-designers
- Edit in the browser. Follow five steps. Learn nothing new. Get pro-looking results.
- Product photographers and solopreneurs
- Clean small issues fast. Change backdrops, swap props, and keep realism.
What sets Pixelfox AI apart
- Natural-language first. You edit with sentences. You get speed and less friction.
- Context-aware realism. Shadows, light, and perspective blend naturally.
- Optional precision. Brush masks and inpainting give you exact control when needed.
- High-quality output. Results are sharp and ready for web or print.
- Browser-based and fast. It works on your laptop without installs. In my tests, most edits returned in seconds.
Compared with standard tools, the time to a final image drops a lot. You spend more time thinking about the idea, not pushing sliders.
Common questions I get
- Will it keep my product color accurate?
- Yes, and you can say “keep product color unchanged.” If it shifts, run inpainting on the product area and say “match original color.”
- Can I edit only a part of the image?
- Yes. Brush a mask in the editor, or use https://pixelfox.ai/image/inpaint/edit for tight control.
- How do I make text on labels look clean?
- Use a small inpaint mask over the label. Prompt with “clean sans-serif” or “bold uppercase” as needed. Keep it short. If it is tiny, try a larger export or close crop for better legibility.
- How big are the downloads?
- Big enough for web and most print uses. For very large prints, run a test at the final size. You can also upscale later if needed.
- Can I use the results for work?
- See the Terms and Privacy in the site footer on https://pixelfox.ai for commercial-use details. Always confirm license needs for your project.
Troubleshooting: make good edits great
- The background looks fake.
- Add “soft shadow under product” or “edge falloff” to ground the subject.
- The new item is too sharp or too soft.
- Add “match depth of field,” “slight blur,” or “sharp focus to match subject.”
- The lighting feels wrong.
- Add direction and color: “warm side light from the left,” or “cool daylight from top.”
- The subject color changed.
- Say “keep subject color unchanged.” If needed, mask and rerun on the background only.
- The text is not readable.
- Inpaint the label area. Use a short prompt with font style and letter case.
One more trick: describe what you do not want. Words like “no logo,” “no reflections,” “no lens distortion” help.
A real quick workflow you can copy today
I timed this on a laptop with Wi‑Fi.
-
Replace a messy background with a clean studio look
- Upload your photo.
- Prompt: “white seamless studio background, soft shadow under the product, realistic.”
- Generate. Done. 25 seconds.
-
Add steam to a coffee shot and warm the mood
- Upload your photo.
- Prompt: “add thin white steam rising from the coffee, subtle and realistic; golden hour warm light from the left.”
- Generate. Done. 30 seconds.
-
Swap label text without touching the bottle
- Open https://pixelfox.ai/image/inpaint/edit and upload.
- Brush the label area.
- Prompt: “replace label text with ‘Citrus Bloom’ in clean sans-serif, centered, small.”
- Generate. Done. 45 seconds.
You can do all three edits in under three minutes. No layers. No plugins.
Honest limits and good practice
- Very small text can be soft. Inpaint close up to improve it.
- Crowded scenes can confuse auto context. Use a mask for the exact area.
- Complex reflections, glass, and fine patterns can need an extra pass. Add a light cue and rerun.
- Respect brand assets and rights. Do not add logos you do not own. Check your project licenses first.
Use the results responsibly. Keep a copy of your original. Document your prompt notes if a client asks how you did it.
Why this works for teams
- Shared prompt library. Store your best prompts and reuse them across campaigns.
- Consistent look. One short recipe gives all SKUs the same feel.
- Fast handoff. Marketers can do simple edits without waiting for a designer. Designers can use inpainting for final polish.
- Lower learning curve. You train on language, not on tool menus.
When I rolled this into a small content team, we cut the average turnaround from a day to an hour for many assets. That is the power of an ai image editor with prompt in a real workflow.
Your next move
You now know the five steps. You saw working prompt recipes. You saw how to add new details to images with AI and keep it realistic. You saw how to get control with a quick mask or inpainting when you need it. The rest is practice.
- Start here: AI Image Editing with Text Prompts – AI Photo Editor
- For recolors: AI Image Colour Changer – Change Colors of Image
- For vintage photo restoration: Photo Colorizer – Colorize Old Photos
- For playful remixes: AI Anime Generator – Turn Photos into Cartoons
Now, it is your turn. Open your browser. Drop in a photo. Type what you want. Then download and share. Try Pixelfox AI today and see how fast a simple prompt can transform your images. This ai image editor with prompt is ready when you are.