 Credit

Why Color Grading Matters
Color grading can not be considered as a checklist item, its main principle should be a pulse of your visual presentation. When working with a short film, a YouTube video, a casual video on social media, the use of color grade influences the emotional trajectory that the viewer will experience. Think of it as the judicious sprinkle of what goes into a pot. Each ingredient has a perfect balance keeping in mind that less or more than needed will spoil the whole dish.
What is color grading?
Color grading means refinement of colors, contrast, saturation, and brightness in general to give a specific emotion or aesthetics. Grading, unlike color correction which is used to fix exposure-slips and white-balancing problems, places a creative cover over it. It is the job of bringing your footage alive with cinematic drama and gritty atmosphere, nostalgic glow or any mood your story duly needs.
Color Grading and Color Correction
We can de-mystify the names, shall we?
Color: Correction corrects technical errors such as the harsher lighting, the imbalance of colors to a neuter, plausible tone.
Color: Grading injects character and feeling.
It’s the imaginative sheet on which your picture is painted.
Picture a sunset, washed out and gray. Correction will recover its soft oranges and deep violets, making it natural. Grading can nudge closer to dreamy pastels, harsh blue, or burnt silver and these same clips can become a romantic or chilly foreboding or sweeping epic, all depending upon your color choices.
Simple Color Grading Made Easy
Step 1 – Begin with the Basics
Before diving into grading, tidy up the fundamentals:
Tweaked overall brightness
Set the true white balance
Step 2 – Decide on the Feeling
Pause and ask:
What emotion should the piece have?
Which colors deliver that emotion?
Scan through reference stills or scrape a LUT to lock in the vibe. Chasing faded nostalgia? Pull down the blacks and warm the midtones. Chasing tension? Crank the contrast and dial down the color.
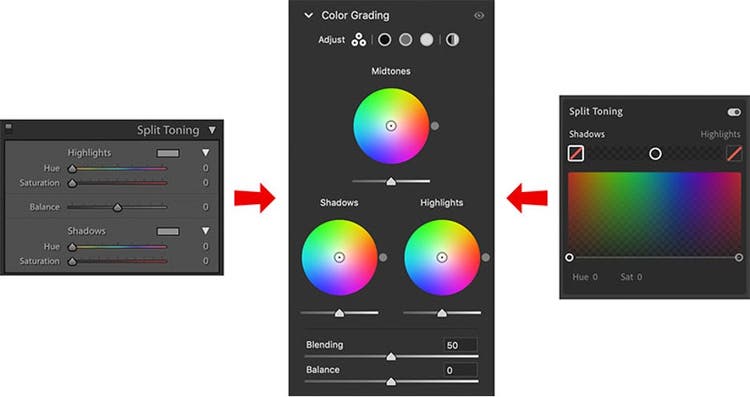
Step 3 – Work the Color Wheels
Most editing suites give you three circles to spin:
Lift for the darks
Gamma for the midtones
Gain for the bright parts
A small push—ice into the darks, fire into the highlights—hooks that cinematic feel.
Step 4 – Polish Saturation and Hue
Keep the slider easy. Lift skin slightly, quiet loud colors, and hold the overall color scheme steady.
AI Tools for Instant Color Magic
Smart tools are closing the gap between rookies and pros in seconds.
Pixelfox.ai Perks
Drag in a reference frame and the app will translate the style straight to your footage—no guesswork, no burned years, just polished vibe.
Face-aware grading makes faces pop while keeping the background sharp but not distracting. Your subjects look real, not plastic.
Batch grading means one tweak can tidy the whole timeline. Isolate the hero clip, nail the look, then spill the same magic over the rest.
Watch Out for These Traps
Crushing shadows for drama can smash detail. Bright colors that burn the eyes take people out of the story.
Skin tones matter. Make the hero look human, not like a cartoon.
Flipping styles between shots is jarring. Lock your grade and stick with it.
If the room is lit like a cave, don’t slap a pretty grade on top. Fix the light then dress it up.
Fast Tips for Smart Grading
Respect the LUT
LUTs drop killer taste in one click, but don’t let them decide for you. Bend, stretch, and clip them till they fit the vid.
Lock in your magic
When you nail a look, save it as a preset. Future edits move faster, and the same vibe hangs together.
Lean on the scopes
Waveforms and vectorscopes are your quiet friends. They see clipping and bias that your eyes can’t. Look, correct, then look again.
Color Grading in the Wild
Forget only the big-budget releases; grading is everywhere. From no-budget shorts to the latest TikTok bangers, color is the invisible glue holding us. Let’s look at two bite-sized moments.
Moment 1: Mini Epic
Picture a ten-minute film set in a crumbling future. The filmmaker craves chill, unwelcoming emptiness. The colorist applies:
Muted greens and icy blues
Deep, choked shadows
A whisper of grain, like old 16mm
The screen turns ghostly, and you feel the chill in your bones before a line even lands.
Moment 2: Wanderlust 90s
Fast-forward to a Bali vlog. The uploader dreams of sun-soaked paradise. They hook the audience with:
Peachy sunlit highlights
Ramped-up blues and greens, almost candy
Delicate contrast, like a soft lens filter
The footage jumps, scent of ocean and hibiscus wafting through your feed.
Next-Level Grading for Gearheads
When the basic wheels feel too tame, wheel these:
Trick 1: Split Spectrum
Juxtapose color in shadows and highlights. Pick a winning combo, like:
Shadows: teal bottomless pit
Highlights: sun-kissed orange flare
You get that “I just bought a ticket to a blockbuster” feeling, bucket of popcorn optional.
Trick 2: Bridge the Scenes
When your shoot leaps from a desert to a snow-mountain, let AI tools like PixelFox.ai keep your look stitched tight. Match the hue from shot one to shot ten in a single click, and your audience won’t blink.
Technique 3 Face Tracking
DaVinci Resolve features a cool face tracking that allows you to isolate the face in the shot and adjust the tone of the skin, the eyes and even the lips without balancing the lights in the whole scene. An ideal feature to use when needed to shoot interviews and close ups, this gives the talent a nice look and the setting is well balanced.
How to Build Your Color Grading Workflow
An effective grading workflow lets you move faster and stay consistent. Here’s a straightforward sequence to follow:
Import and sort footage
Make primary corrections: exposure and white balance
Select a grading approach
Monitor balance with scopes
Apply a LUT or hand-grade
Carefully adjust saturation, contrast, and hues
Export with unified settings
Finally, turn frequently used settings into presets. These act like a personal signature, giving each project a familiar, polished feel.
Free Color Grading Resources
Want to sharpen your grading skills without opening your wallet? Check these out:
3-Day Color Grading Challenge: Study the core concepts with DaVinci Resolve and Colourlab AI.
Neil Chase Film’s Software Guide: Side-by-side comparisons of popular grading tools, with their strengths and weaknesses.
WriteCream AI Grading Tool: Drop footage in and get cinematic styles instantly—no account needed.
These guides are beginner-friendly and deliver real-world know-how.
Color Grading :FAQs
Q: Can I color grade my phone?
Absolutely. Apps like Zoomerang and Lightroom Mobile have practical grading features that do the job on the go.
Q: What’s the difference between color grading and color correction? Correction fixes the technical stuff. Grading brings the mood.
Q: Is DaVinci Resolve really free? Absolutely. The free version packs professional-grade tools.
Q: How do I learn color grading quickly? Jump into the 3-Day Color Grading Challenge. It’s designed for beginners and uses smart AI tools like Colourlab AI.
Conclusion: Make Your Visuals Jump Off the Screen with Clever Color Grading
Color grading can feel heavy, but it’s really just smart artistry. A boring clip with the right tools, a clear objective and two or three good plays can be transformed into eye candy. You are looking to have the Netflix-ready looks, or you desire a travel vlog that shines, grading is your solution. And with AI buddies like PixelFox.ai, the stunning finish arrives quicker than ever.