 Credit

Ever sent a photo to print and it came back looking like it was taken with a potato? Or you uploaded a “great pic” to Instagram and it turned into a blurry mess after compression?
Yeah. That.
A lot of people type “how to increase a resolution of an image” into Google when this happens, and most guides either say “you can’t, sorry” or push you straight into Photoshop hell. This guide will actually walk you through what works now in 2025, with AI tools, real workflows, and some “don’t do this or your image will die” warnings.
You’ll learn:
- How photo resolution really works (in plain English)
- How to make a low quality image high quality with AI
- How to make a picture higher resolution for print, social, or e‑commerce
- When Photoshop still makes sense, and when AI like Pixelfox AI just runs circles around it
- How to create HD images, even 4K, without turning faces into plastic mannequins
And yes, we’ll use Pixelfox AI a lot, because it actually does the job as a free image enhancer and AI image upscaler, not just as hype.
Why resolution even matters for “good pictures” 🖼️
You don’t need a degree for this part.
When people say high resolution, they mostly care about three things:
- Does it look sharp on my phone and laptop?
- Does it look clean when I zoom in?
- Does it print without turning into Minecraft?
That sharpness comes from:
- Pixel dimensions – width × height in pixels (like 1920×1080)
- PPI/DPI – pixels (or dots) per inch for printing
- How much detail is actually in the image
If you start with a tiny, noisy picture and stretch it, you don’t magically get more detail. You just get a bigger blur.
Old tools only stretched pixels. New AI picture enhancer tools actually try to predict missing detail from patterns they learned on millions of images.
According to several UX and e‑commerce studies (think Nielsen Norman Group and similar), users leave pages with blurry product photos fast. That is lost money and trust. So how to increase photo quality is not a “nice to have” anymore. It’s basic hygiene.
If you want good pictures, you need:
- Enough pixels
- Clean edges
- Controlled noise
- Correct size for where you use it (social, print, website, etc.)
We’ll fix that.
Basics: what is photo resolution, really?
Let’s clear the mess before we fix it.
Photo resolution is mainly:
- Pixels – 3000×2000, 6000×4000, etc.
- PPI/DPI – how many of those pixels you pack into one inch on paper
A few simple rules:
- For screens: HD images or HD photos can be as low as 1920×1080, but more is better
- For Instagram: 1080px on the short edge works well
- For print: you usually want 300 DPI at the final print size
So if you ask how can I make an image high resolution, you are really asking:
Can I have more pixels and keep the image clean?
With old tools, the answer was “sort of, but not really.”
With AI image upscalers like Pixelfox AI, the answer is closer to “yes, if you don’t expect miracles from a 20 KB meme screenshot.”
How to Increase a Resolution of an Image: quick overview
Let’s hit the main question right away: how to increase a resolution of an image without wrecking it?
You have four main paths:
- AI upscaling / picture enhancer tools (easy, fast, great quality)
- Traditional software like Photoshop (more control, more pain)
- Mobile apps (good enough for casual use)
- Start with better source images (free stock, better camera settings)
AI is the big upgrade here. New tools can:
- Upscale 2×, 4×, sometimes more
- Clean noise
- Sharpen edges
- Increase clarity of a photo without turning things into plastic
That is what a real quality enhancer should do.
Method 1: Use AI to make a low quality image high quality (easy mode) 🚀
If you want the fastest answer to how to make a picture more high resolution, this is it:
Use an AI image upscaler + photo enhancer.
And yes, here comes the pitch, but also the actual workflow.
Why Pixelfox AI works so well
Pixelfox AI Image Upscaler and Image Enhancer use advanced AI models (GANs, CNNs, all the nerdy stuff) to:
- Enlarge your image up to 4×
- Remove noise and compression junk
- Sharpen important details (eyes, text, edges, products)
- Keep colors natural
You can try it here:
- AI Image Upscaler – Pixelfox AI Image Upscaler
- AI Image Enhancer – Pixelfox AI Image Enhancer
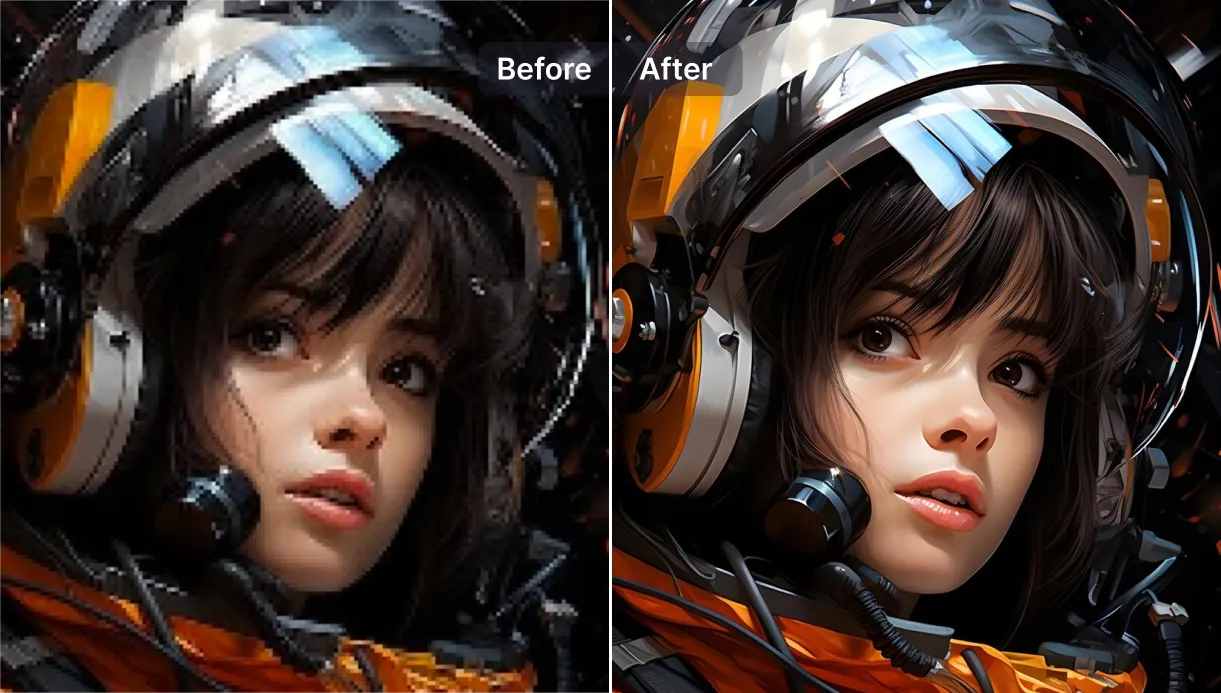
Alt: AI Image Upscaler making a low quality image high quality and high resolution
Step‑by‑step: how to make a photo higher resolution with Pixelfox AI
Here is the actual workflow you can repeat every day.
-
Upload your image
Go to the Pixelfox AI Image Upscaler page.
Click Upload Image, or just drag the file.
It supports JPG, PNG, WEBP, HEIC and more. -
Pick your upscale level
Choose 2× or 4×.
If you want to create HD image from a small one, 2× is often enough.
If you want to create HD photo for print or big screens, 4× can be great. -
Let AI upscale and clean it
The AI will act as a picture enhancer and also a photo HD photo generator.
It will reduce blur, fix edges, and act like a built‑in quality enhancer. -
Export your new high resolution version
Download the image.
You now have a higher pixel count and cleaner detail.
This is how you make a picture high definition without needing to know what “bicubic interpolation” means.
Tip: For faces or products, try 2× upscaling first. Then check details.
If it still looks soft, go to 4×. Too much upscale in one go can sometimes create tiny artifacts.
Use the Image Enhancer for clarity and color
Sometimes you already have enough pixels. The image just looks dull or noisy.
In that case, use the Pixelfox AI Image Enhancer as a photo enhancer and free image enhancer:
- It boosts contrast and color
- It sharpens edges
- It reduces noise and compression blocks
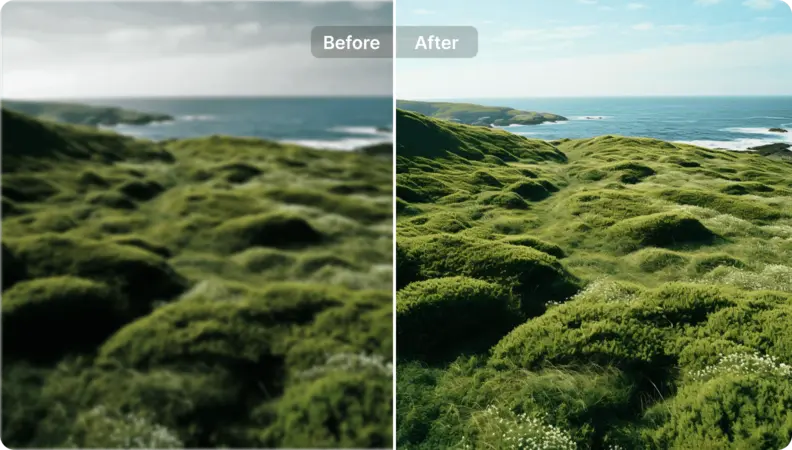
Alt: AI Image Enhancer used as a free image enhancer to increase clarity of an HD image
This is great when you ask how to increase clarity of a photo without changing the size much.
Method 2: Photoshop and other “old school” tools 🧰
If you are comfortable with pro software and you already pay for it, Photoshop and Lightroom can still help you make a photo high res.
Photoshop Super Resolution
Adobe added something called Super Resolution.
It is basically their version of AI upscaling.
The simple workflow:
- Open your image in Adobe Camera Raw
- Right‑click on the image
- Choose Enhance…
- Check Super Resolution
- Click Enhance
This can double the linear resolution (so 4× pixels total).
So if you ask how can I make the resolution of a picture higher inside Photoshop, this is the cleanest way.
But there are issues:
- You need a paid subscription
- It is slower on weak machines
- The interface is not friendly for beginners
Pixelfox AI runs in the browser.
No install.
No subscription needed to get started.
For most people, that is a better answer to how to make higher resolution images.
Simple resize in other tools
If you only use built‑in tools like Preview, Paint, or basic editors, you can increase pixel dimensions, but you don’t get extra detail.
You just stretch what you already have.
That is why people used to say “you can’t actually increase resolution”.
Now AI tools changed that game.
Method 3: Mobile apps for quick HD photos 📱
Maybe you just want a great pic for social, and you are on your phone.
There are apps like:
- Remini
- Snapseed (more about edits than upscaling)
- Some camera apps with built‑in “HD” or “enhance” modes
These apps can work when you ask how to make a picture more high resolution on the go.
But they have trade‑offs:
- Many add strong filters
- Some over‑smooth skin and destroy texture
- Free versions often add watermarks or limits
You can still use Pixelfox AI on mobile in the browser.
Upload, upscale, download. Done.
Advanced: how to create high resolution images that don’t look fake 🧠
You now know how to make a photo higher resolution.
Let’s talk about going further, without blowing things up.
1. How to make photos 4K (without breaking them)
4K for still images usually means something around or above 3840×2160 pixels.
To how to make photos 4K with AI:
- Load your original image into Pixelfox AI Image Upscaler
- Choose 2× or 4× upscaling
- Check the final pixel size
- If you need a very specific size (for a TV screen, YouTube thumbnail, etc.) you can then resize down slightly in any editor
Big rule:
If your source is tiny (like 400×300), do not jump straight to 4K and expect magic.
Upscale in steps and watch for weird artifacts.
2. How to create high resolution images for print
If you want HD images for print:
- Decide your print size in inches (say 8×10)
- Multiply by 300 (for DPI) – that gives 2400×3000 pixels
- Use Pixelfox AI to upscale your original photo to at least that size
- Check sharpness at 100% zoom
This is the practical answer to how to create high resolution images that a print shop will not laugh at.
3. Where to get free images that are already high res
Sometimes the best way to “enhance” is to start with better material.
If you wonder where to get free stock images or where to get free images that are large and clean:
- Look at big stock sites that offer free tiers (Unsplash, Pexels, Pixabay, etc.)
- Many offer non copyrighted images or free‑to‑use under permissive licenses
- Always check the license page before using in commercial work
You can download a large, sharp image from there and then use Pixelfox AI to:
- Create HD photo versions in different sizes
- Crop for social
- Enhance contrast and colors
So now you mix good source material + AI. That gives you real HD photos, not just enlarged junk.
Tip: Start with the best file you can find.
AI tools like Pixelfox can make a low quality image high quality, but if you give them a Facebook screenshot from 2012, you still get a “repaired” screenshot, not a DSLR shot.
Real‑world case studies (actual use, not theory)
Let’s make this less abstract.
Case 1: Small business owner with ugly product photos
Anna runs a small e‑commerce shop.
Her product images looked fine on her phone, but on the website they looked soft and dull.
Bounce rate was high. Conversion was low.
She needed to know how to increase photo quality fast for dozens of images.
What she did:
- Exported original photos from her phone in the highest quality
- Used Pixelfox AI Image Upscaler to 2× upscale each product shot
- Then ran them through Pixelfox AI Image Enhancer as a photo enhancer
- Result: clean, crisp products with good contrast
After she fixed the images, her product pages looked like a real brand.
Her CTR and conversions went up.
No studio photographer. Just decent shots + AI.
Case 2: Old family picture turned into a big wall print
Tom had an old scanned wedding photo of his parents.
He wanted a large print as a gift.
The scan was small and full of noise.
The question was how to make a photo high res enough for a big frame.
His workflow:
- Took the best scan he could find
- Upscaled 4× with Pixelfox AI Image Upscaler
- Used the Image Enhancer to kill noise and sharpen faces
- Exported a high res file and sent it to a print lab
The print came out clean and sharp enough to hang.
The AI did what an average “manual” retoucher would need hours to do.
Common mistakes when trying to make a picture more high resolution ⚠️
New users make the same errors again and again when they try to solve how can I make the resolution of a picture higher on their own.
Let’s call them out.
Mistake 1: Over‑upscaling a tiny file
If your original is 200×200 and you try to get a perfect A3 print, you will get weird results.
Even AI has limits.
Fix:
Use the smallest upscale that gives you your target size.
For tiny images, accept that you may only get a decent small print or screen usage.
Mistake 2: Ignoring noise and artifacts
Some people just resize and stop.
The result is a large, noisy image.
Fix:
Use a quality enhancer like Pixelfox AI Image Enhancer after upscaling.
This removes noise, fixes banding, and cleans blocky compression.
Mistake 3: Forgetting the final use
You don’t need the same size for:
- Website hero
- 30×40 inch print
If you try to make everything “as big as possible”, you waste time and storage, and some platforms compress your image again.
Fix:
Start from the end.
Ask: “Where will I use this?”
Then choose the right pixel size and tweak in Pixelfox for that one goal.
Mistake 4: Over‑sharpening and plastic skin
Some people crank the sharpen slider until the subject looks like a video game character.
Fix:
When you make a picture high definition, zoom to 100% and check skin, hair, text.
If edges start to glow or skin looks like plastic, scale back.
Tip: Use enhancement in layers.
Upscale first. Then sharpen or denoise a bit.
It is easier to add a little more later than to undo a heavy, baked‑in effect.
Pixelfox AI vs Photoshop vs other online tools 🥊
You probably wonder why use Pixelfox AI instead of the big names or other “free online image upscalers”.
Here is the short, honest breakdown.
| Tool / Method | Best For | Pros | Cons |
|---|---|---|---|
| Pixelfox AI Image Upscaler | Fast HD images, web, print, social | Browser‑based, AI 4× upscaling, no install, free tier | Needs internet, very old images still limited |
| Pixelfox AI Image Enhancer | Noise removal, clarity, color, photo quality enhancer | Easy, automatic, great for beginners and pros | Less manual micro‑control than full Photoshop |
| Photoshop (Super Resolution) | Pro workflows, deep manual edits | Powerful, fits pro pipelines | Expensive, learning curve |
| Random free upscaler sites | One‑off, emergency fixes | No login sometimes, quick | Ads, watermarks, weak models, privacy doubts |
If you want:
- A free image enhancer to clean and sharpen
- A way to make a picture higher resolution up to 4× in seconds
- Simple UI with strong results
Then Pixelfox AI is the sweet spot.
You can use:
for 90% of daily work.
Pro‑level tricks: little “plays” that go beyond basics 🎯
You already know how can I make an image high resolution.
Now a few tricks that make you feel like you unlocked a cheat code.
Trick 1: E‑commerce white background with sharp products
If you run a shop, you want:
- Clean white background
- Sharp product edges
- Consistent sizes
A simple flow:
- Shoot products in decent light with your phone
- Use any background removal tool you like (or your designer)
- Drop the result into Pixelfox AI Image Upscaler to fix small sizes
- Run through Image Enhancer to pop color and contrast
Now your “meh” shots look like real catalog images.
You solved how to make a low quality image high quality in a way that impacts revenue.
Trick 2: YouTube thumbnails and social banners
YouTube and social platforms love HD photos and strong contrast.
Workflow:
- Design your thumbnail at a large size (like 1920×1080 or more)
- After export, run it once through Pixelfox AI Image Enhancer
- It will clean compression, sharpen text, and help you create HD photo level thumbnails
This way you always have a crisp HD image, even after YouTube compresses it.
FAQ: real questions people type into Google ❓
How can I make the resolution of a picture higher without losing quality?
Use an AI image upscaler instead of simple resize.
Tools like Pixelfox AI Image Upscaler analyze your image and add smart detail as they enlarge it.
This is the best modern answer to how to make a picture more high resolution and still look natural.
Why not just stretch the image in any editor?
Basic resize only increases pixel count.
It does not add true detail.
That is why stretched images look blurry and cheap.
AI tools act as a picture enhancer that rebuilds edges and textures.
Can I make every photo 4K?
You can make photos 4K by upscaling them, but quality still depends on the original.
A decent smartphone photo upscaled with AI can look great at 4K.
A tiny meme or WhatsApp screenshot will still look like a cleaned‑up screenshot, just bigger.
What is the difference between HD images and high resolution images?
Most people use them the same way, but:
- HD images / HD photos often refer to 1920×1080 or similar screen sizes
- High resolution images usually means enough pixels for your use case, especially print
Either way, you can use AI like Pixelfox to make a picture high definition for your target medium.
Can I use free stock images and still enhance them?
Yes.
Find non copyrighted images or ones with free‑to‑use licenses from trusted stock sites.
Check the license text.
Then use Pixelfox AI to upscale and enhance them.
This is a great way to create HD image content for blogs, websites, and social posts fast.
Your next move: stop fighting blurry images and let AI do the boring work
You came here asking how to increase a resolution of an image.
You now know:
- What photo resolution really is
- Why old‑school resizing is not enough
- How AI can make a low quality image high quality
- How to how to make a photo high res for print, web, or social
- How to avoid the classic traps that wreck your images
If you want good pictures, not just “less bad” ones, the fastest move is simple:
- Use Pixelfox AI Image Upscaler when you need more pixels and detail
- Use Pixelfox AI Image Enhancer when you need cleaner, sharper, more vivid images
Let AI handle the heavy lifting, so you can focus on the story, the design, or the business behind your images.
Your prints, your social posts, and your clients will all look at the result and think: “Okay, that’s a great pic.” 😎
Author note: This guide is based on real workflows used by creators, marketers, and businesses working with AI tools every day. Always respect copyrights when you work with images and check licenses when you use third‑party or “free” photos.