 Credit

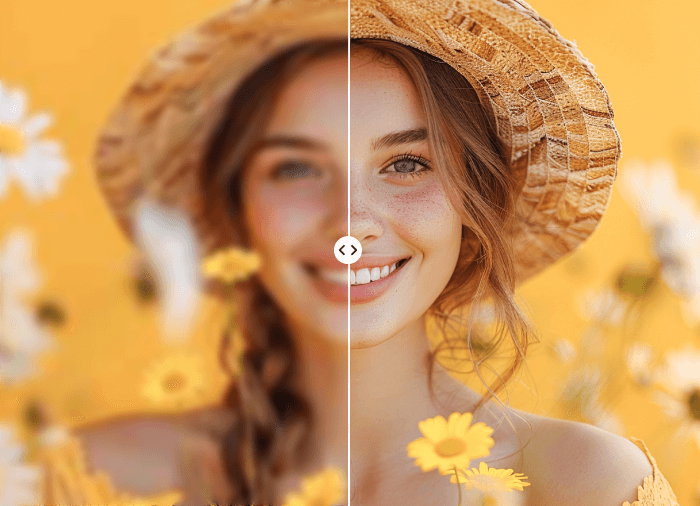
Face Swap Live – Real-Time Face Swap Filters for Fun & Creativity
You would like to imagine yourself in the image of your friend or even an Idol? Now it is possible to do live face swapping online, and you have Pixelfox Face Swap Live on your face! Enjoy the instant and the mobile-friendly user experience without the need to download the complex app. In a couple of clicks, this FaceSwap Live tool, made by AI, enables you to switch faces on your fun, creative work and viral social media content.
Pixelfox is the easiest way to make a meme, funny video, or reality-defying transformations: All you need is your browser, and the world of amazing AI-powered face mapping is literally at your fingertips. No downloads, no hassle, just instant and accurate face swaps!
The conventional face-swapping apps need to be downloaded, registered, and they tend to generate unrealistic results. Pixelfox transforms the game with real-looking AI face swap filters that manipulate skin tone, light, and facial geometry to produce a natural effect.
Key Benefits:
Real-Time Face Swapping – See changes instantly
AI-Powered Accuracy – Smooth and realistic blending
No Software Needed – 100% browser-based
Best to have Fun and be Creative- Memes, stories, and videos
Free and Easy - It takes seconds to use for anyone
Real-Time Face Swapping – See changes instantly
AI-Powered Accuracy – Smooth and realistic blending
No Software Needed – 100% browser-based
Best to have Fun and be Creative- Memes, stories, and videos
Introducing Pixelfox Face Swap Live Tool
Pixelfox Maps faces with artificial intelligence, facial recognition, and deep-learning algorithms. This guarantees all face swaps to be full of proportions, and never blurred or distorted.
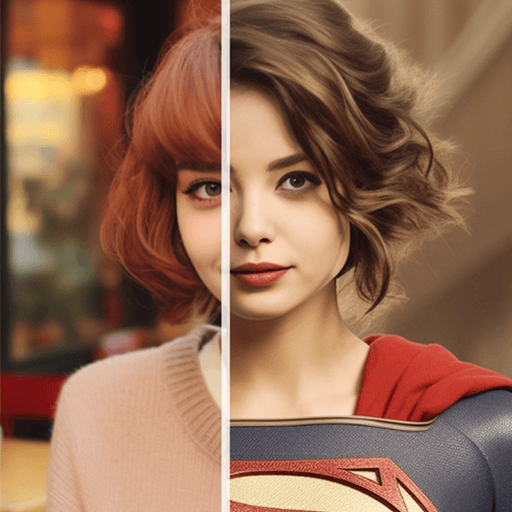
What Can You Do with Pixelfox Face Swap?
Swap faces with friends or family for laughs
Try yourself as a celebrity or a fictional character
Create viral memes for social media
Edit creative content for entertainment
Swap faces with friends or family for laughs
Try yourself as a celebrity or a fictional character
Create viral memes for social media
Edit creative content for entertainment
Top Features of Pixelfox Face Swap Filter
Real-Time Swaps- immediate preview of your new image
AI Precision – Perfect alignment and color correction
Several choices- Swap with pictures or live camera. No Downloads Required – Works in your browser
Safe and Secure – Your photos stay private
Three Easy Steps to Using Face Swap Live
Real-Time Swaps- immediate preview of your new image
AI Precision – Perfect alignment and color correction
Several choices- Swap with pictures or live camera. No Downloads Required – Works in your browser
Safe and Secure – Your photos stay private
Camera or Photo Upload Photo Select Your Source Picture
Face to Swap selection, choose a preset, or upload yours.
Save & Share it all here - Save your face-swapped video or photo at a touch.
No registration. No waiting. Just fun and creativity in real time!
Camera or Photo Upload Photo Select Your Source Picture
Face to Swap selection, choose a preset, or upload yours.
Save & Share it all here - Save your face-swapped video or photo at a touch.
Why Pixelfox FaceSwap Live Stands Out
Pixelfox guarantees contrast to generic filters that appear unreal or improper.
Natural and realistic blending
AI-powered facial feature matching
High-resolution results
Fun without complexity
Natural and realistic blending
AI-powered facial feature matching
High-resolution results
Fun without complexity
Perfect Use Cases for Face Swap Live
Social media content creation
Funny videos and memes
Creative marketing campaigns
Entertainment and personal fun
Social media content creation
Funny videos and memes
Creative marketing campaigns
Entertainment and personal fun