 Credit

You have a great photo. It looks perfect on your computer screen. But when you print it, the result is blurry and pixelated. This common problem often comes from a misunderstanding of high resolution images and DPI. Many people mix up these terms. They think DPI is a measure of a digital photo's quality, but that is not the whole story. The real key to quality is understanding pixels, resolution, and how they relate to the final print.
This guide will clear up the confusion. We will explain the difference between DPI, PPI, and resolution. You will learn what makes a photo high resolution and why 300 DPI is the magic number for printing. We will also show you how to check your image's quality and what to do if it is not good enough for your project. Let's dive in and make sure your images always look their best, both on screen and in print.
Demystifying the Jargon: DPI vs Resolution (and PPI)
To truly understand high resolution images, you first need to know the basic terms. Words like pixels, resolution, DPI, and PPI are used a lot. They are often used incorrectly. Let's define them clearly so you can feel confident when preparing your files.
What are Pixels? The Building Blocks of Digital Images
Every digital image you see on a screen is a raster image. This means it is made of a grid of tiny squares. Each tiny square is called a pixel. Think of it like a mosaic. Thousands or millions of these little colored tiles come together to form a complete picture. The total number of pixels in an image determines its level of detail.
When you zoom in very close on a photo, you can see the individual pixels. An image with more pixels can hold more detail. This means it will look sharper and clearer. An image with fewer pixels will have less detail. It might look blocky or "pixelated" when you make it larger. The total number of pixels is often described by its dimensions, like 1920 pixels wide by 1080 pixels tall.
DPI vs Resolution: What's the Real Difference?
This is the most common point of confusion. Many people use "resolution" and "DPI" to mean the same thing, but they are different.
Resolution refers to the total number of pixels in a digital image. As we just discussed, it is usually written as width x height (e.g., 4000 x 3000 pixels). This number is fixed. It tells you how much data or detail the image file contains. A high-resolution image has a large number of pixels. A low-resolution image has a small number of pixels. This is the most important factor for image quality.
DPI, on the other hand, stands for Dots Per Inch. DPI is a printing term. It has nothing to do with a digital file on your computer. It describes how many physical dots of ink a printer will place in one linear inch of paper. A printer creates an image by laying down tiny dots of different colored inks. The more dots it can pack into an inch, the finer the detail and the smoother the color transitions in the printed output. A higher DPI value means a sharper, higher-quality print.
So, the key difference is this: Resolution (pixel dimensions) is about the digital file. DPI is about the physical printed output. An image file itself does not have a DPI until you tell a printer how big to make it.
Don't Forget PPI: The Screen Equivalent of DPI
To add one more piece to the puzzle, there is also PPI, which means Pixels Per Inch. This is the screen equivalent of DPI. It measures the density of pixels on a digital display, like your computer monitor, tablet, or smartphone. Just like with DPI in printing, a higher PPI on a screen means a sharper and clearer image.
For example, Apple's "Retina" displays became famous for having a very high PPI. The pixel density is so high that the human eye cannot distinguish individual pixels from a normal viewing distance. This makes text and images look incredibly sharp, almost like a printed page.
In everyday conversation, people often say "DPI" when they actually mean "PPI." Even software like Adobe Photoshop uses the terms together. For digital work, what really matters is the pixel dimensions of your image. The PPI value stored in a file is just a piece of metadata. It suggests a print size but does not change the actual quality of the digital image.
What is a High Resolution Photo DPI for Printing?
Now that we know the terms, we can answer the big question: what is a high resolution photo DPI? The answer depends entirely on where the image will be used. The standard for print is very different from the standard for the web.
The 300 DPI Gold Standard: Why It Matters
For high-quality printing, 300 DPI is the industry standard. You will see this number mentioned by almost every professional printing service. This applies to things like brochures, flyers, business cards, magazines, and photo prints.
Why 300? At this density, the printed dots are so small and close together that they blend seamlessly. The human eye perceives a continuous tone image with sharp details and smooth colors. If you print the same image at a lower DPI, like 150 DPI, you might start to see some fuzziness or slight pixelation, especially if you look closely.
When a printer asks for a 300 DPI file, they are really asking for an image with enough pixels to be printed at the desired size at a density of 300 dots per inch. For example, to print a 4x6 inch photo at 300 DPI, your image file needs to have the right number of pixels.
Here is the simple math:
- Width: 4 inches x 300 DPI = 1200 pixels
- Height: 6 inches x 300 DPI = 1800 pixels
So, for a high-quality 4x6 print, you need a digital image that is at least 1200 x 1800 pixels. The total number of pixels is what determines the final print quality at a given size.
The Myth of 72 DPI for the Web
You may have heard that images for the web should be 72 DPI. This is an old piece of advice that is now mostly a myth. This standard dates back to the very first Apple Macintosh computers in the 1980s. Their screens had a pixel density of 72 PPI. This made it easy to match the size of what was on the screen to what would be printed, since one point in typography is about 1/72 of an inch.
But screen technology has advanced a lot since then. Today's high-resolution monitors and phone screens have PPIs of 300, 400, or even higher. For web design in 2025, the DPI or PPI setting inside the image file is irrelevant. Web browsers completely ignore it.
What matters for web images are two things:
- Pixel Dimensions: The image should be large enough in pixels to look sharp on various screen sizes. For example, a full-width banner image on a website might need to be 1920 pixels wide or more.
- File Size: The image file should be optimized to be as small as possible (in kilobytes or megabytes) so that it loads quickly. Slow-loading websites lead to a poor user experience. This is why web designers use formats like WebP or AVIF and compression tools.
So, you should forget about the 72 DPI rule for web work. Focus on getting the right pixel dimensions and a small file size.
Does Print Size Change the DPI Needed?
Yes, the intended print size and viewing distance have a big impact on the required DPI. The 300 DPI rule is for materials that will be viewed up close, like a book or a brochure.
For large format printing, like a billboard or a large banner for a trade show, you can use a much lower DPI. This is because people will be viewing it from far away. From a distance, the human eye cannot see the individual dots, so the image still looks sharp.
- Posters (viewed from a few feet): 150 DPI is often acceptable.
- Banners (viewed from across a room): 100-120 DPI might be enough.
- Billboards (viewed from a long distance): The DPI can be as low as 20 or 30.
There is an inverse relationship between the print size and DPI for an image with a fixed number of pixels. If you have an image that is 3000 pixels wide, you can print it:
- At 10 inches wide with a crisp 300 DPI (3000 pixels / 300 DPI = 10 inches).
- At 20 inches wide with a softer 150 DPI (3000 pixels / 150 DPI = 20 inches).
- At 30 inches wide with a low-res 100 DPI (3000 pixels / 100 DPI = 30 inches).
The image file is the same. The only thing that changes is how large you spread out those pixels on paper.
How to Check Your Image's Resolution
It is very important to check your image's resolution before sending it to print. Just because a photo looks good on your screen does not mean it has enough pixels for a quality print. Here are a few simple ways to check.
Simple Ways to Check Image Resolution on Your Computer
You do not need special software to find an image's pixel dimensions. Both Windows and macOS have built-in tools to show you this information.
On Windows:
- Find the image file in File Explorer.
- Right-click on the image and select "Properties."
- Go to the "Details" tab.
- Scroll down to the "Image" section. You will see the "Dimensions," which shows the pixel width and height.
On macOS:
- Find the image file in Finder.
- Right-click (or Control-click) on the file and select "Get Info."
- In the "More Info" section, you will see the "Dimensions," which shows the pixel dimensions.
- Alternatively, you can open the image in the Preview app, go to the "Tools" menu, and select "Show Inspector." The pixel dimensions will be listed there.
Using Professional Tools: A Look at Adobe Photoshop
If you use professional design software like Adobe Photoshop, checking image resolution is very easy. Photoshop gives you full control over the size and resolution.
- Open your image in Photoshop.
- Go to the "Image" menu at the top of the screen.
- Select "Image Size."
A dialog box will open. It will show you the "Dimensions" in pixels. It will also show you the current print size (in inches or centimeters) and the "Resolution" in Pixels/Inch (PPI). Remember, this PPI value is just metadata. The most important numbers are the pixel dimensions at the top.
My Image is Low Resolution. What Now?
So you have checked your image and discovered its pixel dimensions are too small for your printing project. This is a common problem. Do not worry, you have a few options.
The Best Solution: Start with a High-Quality Source
The best and most professional solution is to find a higher-resolution version of the image. You cannot magically create detail that is not there. Trying to enlarge a small, low-resolution image will almost always result in a blurry, poor-quality final product.
If a client or colleague sent you the image, ask them for the original file. Often, images sent through email or messaging apps are automatically compressed and reduced in size. Ask for the photo to be sent through a file-sharing service like Dropbox or Google Drive to ensure you get the full-quality version.
If you found the image online, try to find a larger version or license a high-resolution version from a stock photo website. Always start with the biggest, highest-quality image you can get. It is easy to make an image smaller, but it is very difficult to make it bigger without losing quality.
Make It Smaller: A Simple Trick to Increase Effective DPI
If you absolutely cannot find a better version of the image, you can still use it if you print it at a smaller size. As we discussed before, reducing the physical print size packs the existing pixels into a smaller area. This increases the effective DPI.
For example, an image that is only 600 x 900 pixels is too small for a 4x6 inch print at 300 DPI. But it would be perfect for a 2x3 inch print (600 pixels / 300 DPI = 2 inches; 900 pixels / 300 DPI = 3 inches). This might not be your ideal size, but it is a way to use the image without it looking pixelated.
Using AI to Enhance and Upscale Your Images
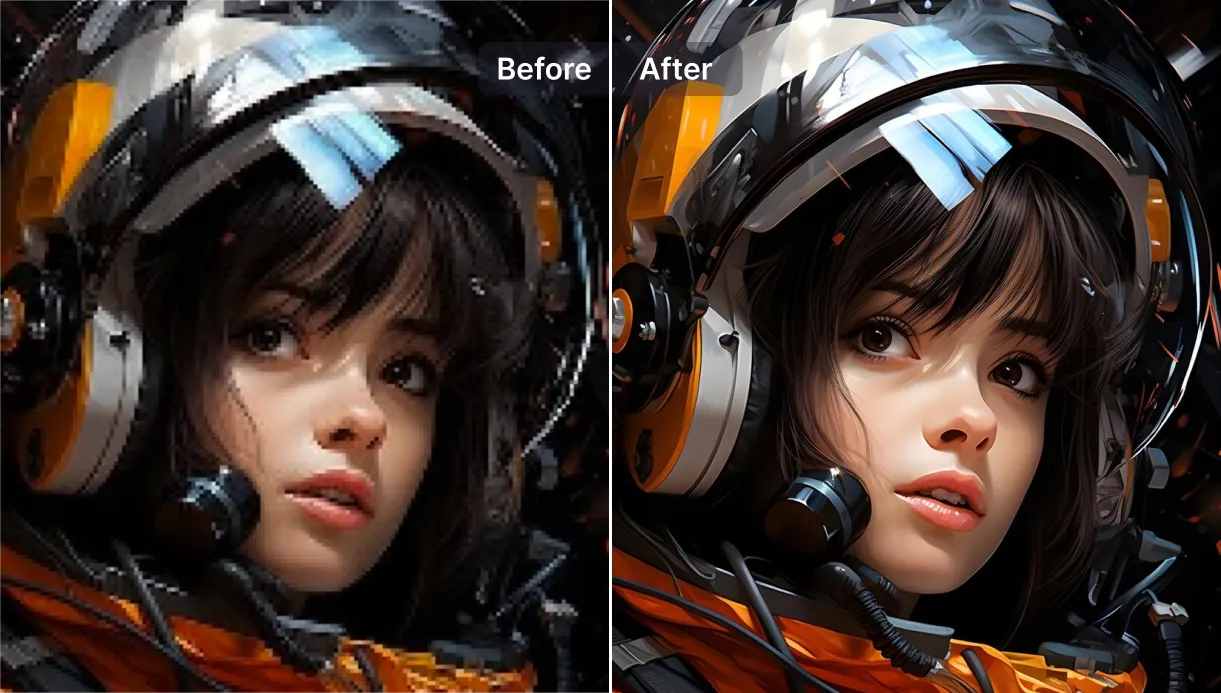
In recent years, a powerful new option has emerged: artificial intelligence. AI-powered tools can now enlarge images in a way that was not possible before. Old resizing methods just stretched the pixels, which created blurriness. New AI tools intelligently analyze the image and add new pixels that look realistic.
Tools like the AI Image Upscaler from Pixelfox AI can increase your image's pixel dimensions by 2x or 4x while preserving and even creating new detail. These tools are trained on millions of images. They learn what things like textures, edges, and faces should look like. When they upscale your photo, they use this knowledge to fill in the gaps in a believable way.
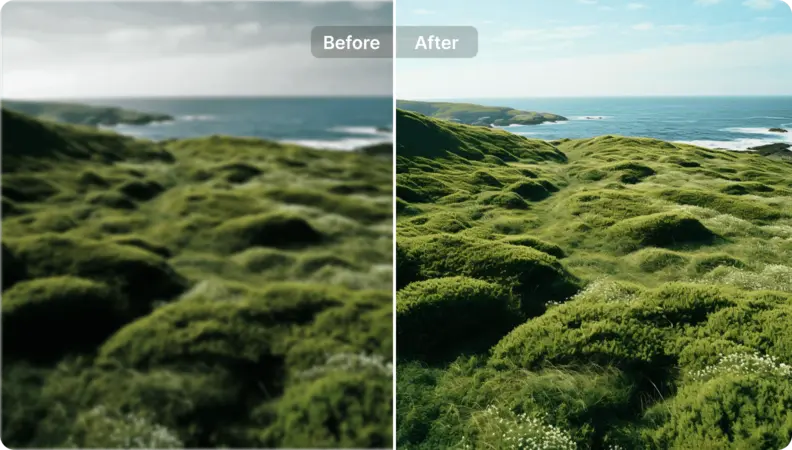
If you need to Enhance Image Quality overall, an AI Image Enhancer can also help. It can automatically reduce noise, sharpen details, and improve color and contrast. This can make a low-quality photo much more usable. Some tools can even colorize old photos, bringing black and white memories to life. While starting with a high-quality source is always best, AI tools provide an amazing second chance for images that would otherwise be unusable.
Conclusion: Pixels Are Key for High Resolution Images
Understanding high resolution images dpi is crucial for anyone who works with digital media. The most important thing to remember is that an image's true resolution comes from its pixel dimensions. That is the amount of data you have to work with.
DPI, or Dots Per Inch, is a term for printing. It only becomes relevant when you are ready to turn your digital file into a physical object. For high-quality prints that are viewed up close, 300 DPI is the standard you should aim for. This means you need to ensure your image has enough pixels to support your desired print size at that density.
When you face a low-resolution image, your first step should always be to find a better source file. If that is not an option, consider printing it smaller or turning to modern technology. The new generation of AI tools can work wonders, giving you a powerful way to upscale and enhance your images for any purpose.
If you're ready to fix your low-resolution photos, try the powerful tools at Pixelfox AI. You can upscale, enhance, and bring new life to your images in just a few clicks.