 Credit

Make your Photos come to life: Musical Stories.
In the modern content-oriented world, you can completely change the way you share communications by adding music to your photos. Regardless of whether you are making a memory slideshow, a story on social media, or just exploring your creativity, combining visuals with sound will give that extra touch of emotion and energy. How do I put music in my pictures? -- You are not alone.
The upside? Adding sound to a picture (Android phone) is so simple through the free Android tools, such as PixelFox.
What Does the Addition of Music to a Picture Mean?
Enough about how, it is time to discuss why:
Sound makes a picture emotive.
Greater interaction: Compositions with music/photos attract more views on such platforms as Instagram and TikTok.
Short videos: Ideal as a memory reel, product shot, or digital portfolio.
Send artistic messages: Couple pictures and sounds so that you can convey special messages to your loved ones.
Add Music to a Picture on Android: Step-by-Step Guide
Should you find yourself on an Android device and in the mood to pair your favorite photo to music, then here is a walkthrough using a browser-based content creation tool that works wonders on Android phones to be used with PixelFox, which is free and helpful.
Go to PixelFox.ai
Start your browser and visit the web address www.PixelFox.ai. No app is needed; simply open PixelFox in Chrome or any browser on your Android device.
Select Video/Animation Template
After getting to the homepage.
Hit Create New Project.
Choose a short video, animated story share, or social post.
There is an option for either a fixed image-to-video or animated background design.
Add a Picture of yours
Touch the image blank to load your image from the phone gallery.
Edit in size, background, and framing when required.
This is where you will have to start converting your still image into an interesting video.
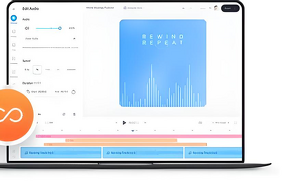
Insert a Musical Notation into Your Photo
On the PixelFox editor, you will find the Audio tab.
Select one of the free music libraries of PixelFox or use your audio file (MP3/M4A on your Android device.
Preview and Export
Test out the produced video before the final production to ensure that it has the desired appearance and sound effects.
Other alternate apps to add music to pictures that can ube usedAndroid are:
Though PixelFox is a perfect online tool, here are some mobile apps in case you need some additional offline control:
VivaVideo video editor is an easy-to-use, overlay music editor.
Canva (Mobile App) -It is beneficial to include background music in the slide shows.
InShot is a popular app for merging music and images into short videos.
FAQs
1. How to play music with pictures without getting an app?
Take advantage of one of the web-based tools (such as Pixel Fox). Simply go to the site, upload your picture, and add some music via your browser.
2. What is the best way of adding sound to a picture in Android, free of cost?
PixelFox is free of charge, and you can match the audio with pics with ease. The basic features do not require a sign-up.
3. How to share my photo with music on Instagram or WhatsApp?
Yes! After you export the video (add your picture and music), you can share it as any video on social media.
Advantages of PixelFox to Add Music to Photos
No installs and downloads- fully web-based and designed to work best on Android browsers.
Creative Control Danish - Select the audio, time, and text or synchronization.
Template Variety- Edit your photo by using the motion graphics templates.
High-Quality Exports - High-quality exports that support HD video without a watermark on the free version.
Easy to Use Interface – Ideal for beginners, hobbyists, and marketers.
PixelFox is not only valuable for motion graphics, but also a good photo-to-video music editor where the user aims to achieve a decent balance between simplicity and high professional quality output.
Final Thoughts
You could only add music to a picture with complex editing applications. Still, nowadays, you can do it in a few seconds and entirely free by utilizing simple applications such as PixelFox via your Android phone. Be it your intention to produce a mini-movie, to impress a person with a personalised greeting, or to get spices into your social content, you can achieve all of that with a few taps.