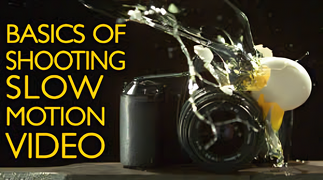
\u003C/p>\n\u003Cp>Many users ask the same thing first. How do I avoid plastic skin? The answer is simple. Use light settings. Work on one feature at a time. Check details at 100% zoom. Keep texture. Keep tone. Keep shape. The goal is not to hide the person. The goal is to show the best version of the person. That is where an airbrush application shines.\u003C/p>\n\u003Cp>I write this with hands‑on practice and with research in mind. For technique basics, Adobe’s portrait retouching guide is a reliable reference for non‑destructive edits and natural results: \u003Ca href=\"https://helpx.adobe.com/photoshop/how-to/portrait-retouching.html\" rel=\"nofollow\" target=\"_blank\" >https://helpx.adobe.com/photoshop/how-to/portrait-retouching.html\u003C/a>. For fairness and skin tone accuracy, Google’s Real Tone project gives helpful insight and data: \u003Ca href=\"https://ai.googleblog.com/2021/10/real-tone-making-camera-phones-work-more.html\" rel=\"nofollow\" target=\"_blank\" >https://ai.googleblog.com/2021/10/real-tone-making-camera-phones-work-more.html\u003C/a>. For AI building blocks, see the original GAN paper by Goodfellow et al.: \u003Ca href=\"https://arxiv.org/abs/1406.2661\" rel=\"nofollow\" target=\"_blank\" >https://arxiv.org/abs/1406.2661\u003C/a> and the MTCNN face detection paper: \u003Ca href=\"https://arxiv.org/abs/1604.02878\" rel=\"nofollow\" target=\"_blank\" >https://arxiv.org/abs/1604.02878\u003C/a>. For an overview of denoising, the BM3D method remains a strong baseline: \u003Ca href=\"https://en.wikipedia.org/wiki/Block-matching_and_3D_filtering\" rel=\"nofollow\" target=\"_blank\" >https://en.wikipedia.org/wiki/Block-matching_and_3D_filtering\u003C/a>. For ethics in imaging, the NPPA code offers a clear standard: \u003Ca href=\"https://nppa.org/code-ethics\" rel=\"nofollow\" target=\"_blank\" >https://nppa.org/code-ethics\u003C/a>. I will point to these ideas where they help.\u003C/p>\n\u003Ch2 id=\"KhA2sO\">What “airbrush pro” means in a modern workflow\u003C/h2>\n\u003Cp>Airbrush pro now means more than blur. Old tools often smeared skin and lost detail. New tools detect faces, edges, and hair. They keep pores and tiny strands. They blend changes into light and color. So the edit looks real.\u003C/p>\n\u003Cp>Most users meet “airbrush pro” in two forms:\u003C/p>\n\u003Cul>\n\u003Cli>A paid tier inside a mobile airbrush app that unlocks extra tools.\u003C/li>\n\u003Cli>A desktop or web airbrush application that focuses on high‑resolution edits and export.\u003C/li>\n\u003C/ul>\n\u003Cp>Core ideas stay the same:\u003C/p>\n\u003Cul>\n\u003Cli>Quick tools for acne, dark circles, stray hairs, and shine.\u003C/li>\n\u003Cli>Smoothing with texture protection.\u003C/li>\n\u003Cli>Teeth and eye brightening.\u003C/li>\n\u003Cli>Color and exposure control tuned for skin.\u003C/li>\n\u003Cli>Background cleanup and depth blur.\u003C/li>\n\u003Cli>Shape tools with limits to avoid warping.\u003C/li>\n\u003C/ul>\n\u003Cp>The best tools respect the original face. They add light where needed. They lower distractions. They hold detail. They avoid the “plastic” look.\u003C/p>\n\u003Ch2 id=\"S9lnwC\">Who needs an airbrush app and why\u003C/h2>\n\u003Cul>\n\u003Cli>Content creators need speed. They post daily. They want a clean face in minutes.\u003C/li>\n\u003Cli>E‑commerce sellers need consistency. They want skin tone to match across a set of product shots.\u003C/li>\n\u003Cli>Portrait photographers need control. They care about texture, tone, and shape.\u003C/li>\n\u003Cli>Social media managers need safe defaults. They need edits that meet brand rules and do not mislead.\u003C/li>\n\u003C/ul>\n\u003Cp>In each case, airbrush pro tools help because they standardize the job. They give a simple set of steps you can repeat. They save time. They let you scale.\u003C/p>\n\u003Ch2 id=\"yc2jWD\">Key features to look for in any airbrush application\u003C/h2>\n\u003Cp>You do not need every feature. You need the right features that map to your work. Look for the following.\u003C/p>\n\u003Cul>\n\u003Cli>Skin smoothing that preserves pores\n\u003Cul>\n\u003Cli>The tool should keep micro‑detail. It should soften only mid‑frequency texture. It should avoid flat areas on cheeks and forehead.\u003C/li>\n\u003C/ul>\u003C/li>\n\u003Cli>Blemish and spot removal with edge awareness\n\u003Cul>\n\u003Cli>A healing or inpainting tool should match nearby skin tone and grain. It should not smear edges of lips, eyes, or brows.\u003C/li>\n\u003C/ul>\u003C/li>\n\u003Cli>Color control made for skin\n\u003Cul>\n\u003Cli>White balance should be easy. Tint and temperature should not shift skin to gray or orange. HSL tools should respect natural tone.\u003C/li>\n\u003C/ul>\u003C/li>\n\u003Cli>Eye, teeth, and lip tools\n\u003Cul>\n\u003Cli>Brighten eyes a bit. Whiten teeth a bit. Enhance lips with restraint. Avoid high contrast halos.\u003C/li>\n\u003C/ul>\u003C/li>\n\u003Cli>Shape tools with limits\n\u003Cul>\n\u003Cli>Small changes are fine. Big changes often look fake. The tool should prevent extreme warps and should keep symmetry.\u003C/li>\n\u003C/ul>\u003C/li>\n\u003Cli>Background cleanup\n\u003Cul>\n\u003Cli>You should be able to blur or replace a busy scene. If you need pro‑level swaps, try an \u003Ca href=\"https://pixelfox.ai/image/background-generator\">AI Background Generator\u003C/a> to build clean, studio‑style scenes in seconds.\u003C/li>\n\u003C/ul>\u003C/li>\n\u003Cli>Compositing and creative blends\n\u003Cul>\n\u003Cli>Merging two frames or overlaying light effects can add style. If you need this often, an \u003Ca href=\"https://pixelfox.ai/image/image-blender\">AI Image Blender\u003C/a> can speed the job and keep edges smooth.\u003C/li>\n\u003C/ul>\u003C/li>\n\u003Cli>Restoration for old portraits\n\u003Cul>\n\u003Cli>When you handle family archives or heritage portraits, a fast \u003Ca href=\"https://pixelfox.ai/image/colorizer\">Photo Colorizer\u003C/a> can add color and fix age damage without deep manual work.\u003C/li>\n\u003C/ul>\u003C/li>\n\u003Cli>Batch and export\n\u003Cul>\n\u003Cli>You need high‑resolution export, clear file naming, and color‑accurate output. Batch tools help when you deliver sets at once.\u003C/li>\n\u003C/ul>\u003C/li>\n\u003Cli>Privacy and device support\n\u003Cul>\n\u003Cli>A good airbrush app should work on major phones and browsers. It should handle images locally or on secure servers. It should allow you to remove data if needed.\u003C/li>\n\u003C/ul>\u003C/li>\n\u003C/ul>\n\u003Cp>\u003Cimg loading=\"lazy\" src=\"https://api.pixelfox.ai/template/background-generator/feature-1.webp\" alt=\"AI background generator example product scene\" />\u003C/p>\n\u003Ch2 id=\"tP70Ev\">A step‑by‑step retouching workflow (airbrush pro or similar)\u003C/h2>\n\u003Cp>The steps below work with most tools. They help you keep a clean look and a quick pace.\u003C/p>\n\u003Cp>1) Start with a solid source\u003Cbr />\nShoot with soft light. Use a large window or a softbox. Turn the subject slightly. Keep ISO low for clean files. Good input lowers the need for heavy edits. For color accuracy, stick with standard color spaces like sRGB when you publish to the web (see W3C overview: \u003Ca href=\"https://www.w3.org/Graphics/Color/sRGB\" rel=\"nofollow\" target=\"_blank\" >https://www.w3.org/Graphics/Color/sRGB\u003C/a>).\u003C/p>\n\u003Cp>2) Duplicate your layer or save a version\u003Cbr />\nWork non‑destructively if your airbrush application supports layers. If not, save a copy first. This lets you roll back.\u003C/p>\n\u003Cp>3) Normalize exposure and white balance\u003Cbr />\nSet exposure so skin midtones sit in a healthy range. Fix white balance. Remove color cast from mixed light. You want a neutral base before you fix skin.\u003C/p>\n\u003Cp>4) Remove small distractions\u003Cbr />\nUse a spot heal or inpaint tool at low strength. Tap or brush over pimples, small scars, lint, or stray hairs. Do not remove natural marks that define the person unless requested. A little restraint builds trust (see NPPA ethics: \u003Ca href=\"https://nppa.org/code-ethics\" rel=\"nofollow\" target=\"_blank\" >https://nppa.org/code-ethics\u003C/a>).\u003C/p>\n\u003Cp>5) Smooth skin while keeping texture\u003Cbr />\nUse your airbrush pro smoothing tool with light settings. Work on cheeks, forehead, and neck. Avoid lips, eyes, brows, and hair. Zoom to 100%. Make quick strokes. Stop early. If your tool supports masks, paint on a mask and refine edges. This mirrors pro techniques like frequency separation in desktop tools (see Adobe guide: \u003Ca href=\"https://helpx.adobe.com/photoshop/how-to/portrait-retouching.html\" rel=\"nofollow\" target=\"_blank\" >https://helpx.adobe.com/photoshop/how-to/portrait-retouching.html\u003C/a>).\u003C/p>\n\u003Cp>6) Dodge and burn for shape\u003Cbr />\nAdd light to shadowed areas under eyes and beside the nose. Lower light where hot spots blow out. Small moves add depth. They keep the face real. Aim for balance, not drama.\u003C/p>\n\u003Cp>7) Enhance eyes, teeth, and lips with care\u003Cbr />\nLift iris clarity a bit. Reduce red veins if your tool allows. Whiten teeth slightly. Add a touch of color to lips. Keep changes subtle. The goal is “well‑rested,” not “retouched.”\u003C/p>\n\u003Cp>8) Even skin tone\u003Cbr />\nUse HSL sliders or a targeted hue tool to tame redness or blotchy patches. Make small moves. Watch for halos along edges.\u003C/p>\n\u003Cp>9) Clean the background\u003Cbr />\nUse a blur or cleanup tool to remove clutter. If the scene hurts the subject, replace it with a simple set. When you need speed, build a new set with an AI scene tool before or after retouching, as shown by the \u003Ca href=\"https://pixelfox.ai/image/background-generator\">AI Background Generator\u003C/a>.\u003C/p>\n\u003Cp>10) Final color and contrast\u003Cbr />\nApply a gentle S‑curve. Protect highlights. Watch saturation. Skin should not look gray or over‑orange. Keep tone inclusive. Google’s Real Tone research offers helpful framing here: \u003Ca href=\"https://ai.googleblog.com/2021/10/real-tone-making-camera-phones-work-more.html\" rel=\"nofollow\" target=\"_blank\" >https://ai.googleblog.com/2021/10/real-tone-making-camera-phones-work-more.html\u003C/a>.\u003C/p>\n\u003Cp>11) Sharpen last and export\u003Cbr />\nSharpen only once, after you resize for the final output. Export sRGB JPEG for web or a higher‑bit format if the client needs print. Keep metadata when clients require it.\u003C/p>\n\u003Cp>This workflow is simple on purpose. You can run it fast on a phone. You can expand it on desktop. The order keeps your edits clean and light.\u003C/p>\n\u003Ch2 id=\"Ikmsvy\">How “airbrush pro” tools use AI under the hood\u003C/h2>\n\u003Cp>You do not need to code to use these tools. Yet it helps to know what happens in the background. It helps you pick the right settings and read the result.\u003C/p>\n\u003Cul>\n\u003Cli>\n\u003Cp>Face detection and landmarks\u003Cbr />\nModern airbrush apps detect faces and eyes in a frame. A common approach is to predict facial landmarks and then fit tools around them. A well‑known method is MTCNN (Zhang et al., 2016): \u003Ca href=\"https://arxiv.org/abs/1604.02878\" rel=\"nofollow\" target=\"_blank\" >https://arxiv.org/abs/1604.02878\u003C/a>. This is why eye brightening does not spill onto brows or hair.\u003C/p>\n\u003C/li>\n\u003Cli>\n\u003Cp>Denoising and texture preservation\u003Cbr />\nGood skin smoothing does not just blur. It separates noise from texture. BM3D is a classic denoising method that shows how to keep structure while cutting noise: \u003Ca href=\"https://en.wikipedia.org/wiki/Block-matching_and_3D_filtering\" rel=\"nofollow\" target=\"_blank\" >https://en.wikipedia.org/wiki/Block-matching_and_3D_filtering\u003C/a>. Newer neural models can push detail further but should be tuned to avoid waxy skin.\u003C/p>\n\u003C/li>\n\u003Cli>\n\u003Cp>Inpainting for spot removal\u003Cbr />\nWhen you tap a blemish, the tool fills the area with nearby content. Generative methods like GANs (Goodfellow et al., 2014: \u003Ca href=\"https://arxiv.org/abs/1406.2661\" rel=\"nofollow\" target=\"_blank\" >https://arxiv.org/abs/1406.2661\u003C/a>) help synthesize missing pixels. They try to match grain and color so the patch blends.\u003C/p>\n\u003C/li>\n\u003Cli>\n\u003Cp>Segmentation for background work\u003Cbr />\nApps segment the subject from the scene. This lets you blur the background or swap it. A clean mask is key. Edge awareness stops halos around hair.\u003C/p>\n\u003C/li>\n\u003C/ul>\n\u003Cp>When you understand these pieces, you can trust the tool. You also know when to dial back. If the mask looks off, fix the edge. If denoise looks too strong, reduce the strength.\u003C/p>\n\u003Ch2 id=\"Zowhpe\">Practical settings and guardrails for natural results\u003C/h2>\n\u003Cul>\n\u003Cli>\n\u003Cp>Work at low strength\u003Cbr />\nStart at 10–25% for smoothing. Add a second pass only if needed. Two light passes beat one heavy pass.\u003C/p>\n\u003C/li>\n\u003Cli>\n\u003Cp>Protect edges\u003Cbr />\nDo not smooth eyes, lashes, brows, lips, or hair. Mask them out. Texture matters there.\u003C/p>\n\u003C/li>\n\u003Cli>\n\u003Cp>Keep shape real\u003Cbr />\nUse reshape tools only for tiny fixes. Fix lens distortion first. Stop if you see warps in the background.\u003C/p>\n\u003C/li>\n\u003Cli>\n\u003Cp>Respect diversity in skin tones\u003Cbr />\nUse white balance and tint carefully. Calibrate your screen when possible. Test on different devices. Real Tone research highlights the need for inclusive processing: \u003Ca href=\"https://ai.googleblog.com/2021/10/real-tone-making-camera-phones-work-more.html\" rel=\"nofollow\" target=\"_blank\" >https://ai.googleblog.com/2021/10/real-tone-making-camera-phones-work-more.html\u003C/a>.\u003C/p>\n\u003C/li>\n\u003Cli>\n\u003Cp>Match output to use\u003Cbr />\nFor Instagram feeds, sharpen after resizing to 1080 or 1350 pixels on the short edge. For print, export at higher resolution and avoid heavy compression. Stay in sRGB for web unless you control the full display pipeline (W3C sRGB: \u003Ca href=\"https://www.w3.org/Graphics/Color/sRGB\" rel=\"nofollow\" target=\"_blank\" >https://www.w3.org/Graphics/Color/sRGB\u003C/a>).\u003C/p>\n\u003C/li>\n\u003C/ul>\n\u003Ch2 id=\"Mw3hNj\">Where Pixelfox AI fits with your airbrush pro stack\u003C/h2>\n\u003Cp>Many creators mix tools. They retouch in an airbrush app, then handle background, composites, or restoration with a web tool. Pixelfox AI was built for that second step. It keeps the workflow light and clear.\u003C/p>\n\u003Cul>\n\u003Cli>\n\u003Cp>Batch processing\u003Cbr />\nWhen you need to update a set of portraits, batch saves time. You can run the same changes on many images in one session.\u003C/p>\n\u003C/li>\n\u003Cli>\n\u003Cp>High‑resolution output\u003Cbr />\nYou can export clean, high‑res images for web and print. The output keeps sharpness and color.\u003C/p>\n\u003C/li>\n\u003Cli>\n\u003Cp>Simple interface\u003Cbr />\nYou can pick a tool and get to work fast. The UI stays clear even if you are new to editing.\u003C/p>\n\u003C/li>\n\u003Cli>\n\u003Cp>Customizable brush\u003Cbr />\nWhen you fine‑tune edges, you can set brush size and softness. This gives you pixel‑level control.\u003C/p>\n\u003C/li>\n\u003Cli>\n\u003Cp>Creative extras\u003Cbr />\nYou can build scenes with the \u003Ca href=\"https://pixelfox.ai/image/background-generator\">AI Background Generator\u003C/a>. You can merge frames with the \u003Ca href=\"https://pixelfox.ai/image/image-blender\">AI Image Blender\u003C/a>. You can revive heritage images with the \u003Ca href=\"https://pixelfox.ai/image/colorizer\">Photo Colorizer\u003C/a>. These tools help you keep a clean look without heavy manual work.\u003C/p>\n\u003C/li>\n\u003C/ul>\n\u003Cp>\u003Cimg loading=\"lazy\" src=\"https://api.pixelfox.ai/template/image-blender/feature-1.webp\" alt=\"AI Image Blender example composite\" />\u003C/p>\n\u003Ch2 id=\"0M7lxm\">Airbrush app vs. airbrush application on desktop or web\u003C/h2>\n\u003Cul>\n\u003Cli>\n\u003Cp>Mobile airbrush app\u003Cbr />\nYou tap, you swipe, you export. This is fast and handy. It is great for same‑day posts and stories. It is fine for simple client previews.\u003C/p>\n\u003C/li>\n\u003Cli>\n\u003Cp>Desktop or web airbrush application\u003Cbr />\nYou get larger previews, finer masks, and better color control. You can manage a folder of images, not just one shot. This is better for delivery and print.\u003C/p>\n\u003C/li>\n\u003C/ul>\n\u003Cp>Most teams use both. They do a first pass on the phone. They finish sets on the web or desktop. This split balances speed with control.\u003C/p>\n\u003Ch2 id=\"9B0QSX\">A field‑tested checklist for portrait retouching\u003C/h2>\n\u003Cp>Use this checklist for each image. It keeps you honest and fast.\u003C/p>\n\u003Cul>\n\u003Cli>Exposure balanced? Highlights safe? Shadows not crushed?\u003C/li>\n\u003Cli>White balance neutral? Skin not too green or magenta?\u003C/li>\n\u003Cli>Major distractions removed? No obvious cloning repeats?\u003C/li>\n\u003Cli>Skin smooth but textured? Pores still visible?\u003C/li>\n\u003Cli>Eyes clean but not glowing? Teeth white but not blue?\u003C/li>\n\u003Cli>Lips even but not oversaturated?\u003C/li>\n\u003Cli>Background quiet? Subject separated?\u003C/li>\n\u003Cli>Color consistent across the set?\u003C/li>\n\u003Cli>Sharpened after resize? No halos?\u003C/li>\n\u003Cli>Exported in the right format and color space?\u003C/li>\n\u003C/ul>\n\u003Cp>Run this list in one minute. You will catch most mistakes.\u003C/p>\n\u003Ch2 id=\"UQHYTP\">Ethical and realistic retouching\u003C/h2>\n\u003Cp>People trust images when edits feel honest. Small, careful changes work best. The NPPA code reminds us to avoid misleading edits: \u003Ca href=\"https://nppa.org/code-ethics\" rel=\"nofollow\" target=\"_blank\" >https://nppa.org/code-ethics\u003C/a>. In portraits that means:\u003C/p>\n\u003Cul>\n\u003Cli>Do not alter a person’s identity.\u003C/li>\n\u003Cli>Do not invent or remove key features.\u003C/li>\n\u003Cli>Do not change skin tone in ways that erase identity.\u003C/li>\n\u003Cli>Do not bend shapes beyond what the lens might do.\u003C/li>\n\u003C/ul>\n\u003Cp>These points also align with Google’s focus on fair skin rendering in Real Tone: \u003Ca href=\"https://ai.googleblog.com/2021/10/real-tone-making-camera-phones-work-more.html\" rel=\"nofollow\" target=\"_blank\" >https://ai.googleblog.com/2021/10/real-tone-making-camera-phones-work-more.html\u003C/a>. You can enhance without masking who someone is.\u003C/p>\n\u003Ch2 id=\"ldcQJM\">Troubleshooting common problems in airbrush pro workflows\u003C/h2>\n\u003Cul>\n\u003Cli>\n\u003Cp>The skin looks plastic\u003Cbr />\nDial down smoothing. Add grain to the skin layer. Bring back micro‑texture with a gentle clarity or texture tool.\u003C/p>\n\u003C/li>\n\u003Cli>\n\u003Cp>The patch looks obvious\u003Cbr />\nSample a larger area when you heal. Work along the direction of natural skin lines. Lower the opacity of the patch.\u003C/p>\n\u003C/li>\n\u003Cli>\n\u003Cp>The background mask shows halos\u003Cbr />\nFeather the mask edge slightly. Nudge the edge inward by a pixel or two. Check hair areas at 200% zoom.\u003C/p>\n\u003C/li>\n\u003Cli>\n\u003Cp>Teeth look blue\u003Cbr />\nReduce saturation after whitening. Warm the highlights a bit to match real enamel.\u003C/p>\n\u003C/li>\n\u003Cli>\n\u003Cp>Eyes look too sharp\u003Cbr />\nLower clarity around the iris. Keep a small catchlight, not a laser glow.\u003C/p>\n\u003C/li>\n\u003Cli>\n\u003Cp>Color shifts when you export\u003Cbr />\nConfirm sRGB export for web. Do a test upload. Compare on two devices.\u003C/p>\n\u003C/li>\n\u003C/ul>\n\u003Ch2 id=\"gWLYJP\">Performance and device notes\u003C/h2>\n\u003Cp>Airbrush pro tools must feel fast. If you work on a phone:\u003C/p>\n\u003Cul>\n\u003Cli>Close other heavy apps before editing.\u003C/li>\n\u003Cli>Use original files, not screenshots.\u003C/li>\n\u003Cli>Work with stable light to avoid fluctuating exposure in auto previews.\u003C/li>\n\u003C/ul>\n\u003Cp>If you work on web:\u003C/p>\n\u003Cul>\n\u003Cli>Use a modern browser.\u003C/li>\n\u003Cli>Check GPU acceleration in settings.\u003C/li>\n\u003Cli>Keep uploads under size limits or use batch processing to split the job.\u003C/li>\n\u003C/ul>\n\u003Cp>These small steps keep the session smooth.\u003C/p>\n\u003Ch2 id=\"v0J3LS\">FAQs about airbrush pro, airbrush app, and airbrush application\u003C/h2>\n\u003Cul>\n\u003Cli>\n\u003Cp>Is an airbrush app enough for client work?\u003Cbr />\nYes for social and quick turnarounds. For print or large campaigns, pair it with a web or desktop airbrush application for color checks and high‑res output.\u003C/p>\n\u003C/li>\n\u003Cli>\n\u003Cp>How strong should skin smoothing be?\u003Cbr />\nStart very low. Stop as soon as the main distractions are gone. Keep pores. If you need more, add a second light pass.\u003C/p>\n\u003C/li>\n\u003Cli>\n\u003Cp>Can I use these tools on male portraits or mature skin?\u003Cbr />\nYes. Use lighter smoothing. Focus on color balance and small light moves. Avoid heavy eye or lip effects unless the brief asks for them.\u003C/p>\n\u003C/li>\n\u003Cli>\n\u003Cp>What file format should I export?\u003Cbr />\nJPEG (sRGB) for web. PNG when you need transparency. TIFF or high‑quality JPEG for print, depending on the lab or client.\u003C/p>\n\u003C/li>\n\u003Cli>\n\u003Cp>How do I keep edits consistent across a set?\u003Cbr />\nSave presets or note your settings. Use batch tools when possible. Match white balance and exposure first, then retouch.\u003C/p>\n\u003C/li>\n\u003Cli>\n\u003Cp>Are AI edits safe for privacy?\u003Cbr />\nUse tools with clear privacy policies. Avoid uploading sensitive images to unknown servers. Delete files from online tools when you finish.\u003C/p>\n\u003C/li>\n\u003Cli>\n\u003Cp>Can AI fix very low‑light, noisy portraits?\u003Cbr />\nIt can help. Use denoise first, then retouch. Keep an eye on texture so faces do not look waxy. See ideas like BM3D for the trade‑off between noise and detail: \u003Ca href=\"https://en.wikipedia.org/wiki/Block-matching_and_3D_filtering\" rel=\"nofollow\" target=\"_blank\" >https://en.wikipedia.org/wiki/Block-matching_and_3D_filtering\u003C/a>.\u003C/p>\n\u003C/li>\n\u003C/ul>\n\u003Ch2 id=\"MOU09x\">Final thoughts and next steps\u003C/h2>\n\u003Cp>Airbrush pro tools are at their best when you keep things simple. Fix small distractions. Keep texture. Balance light. Respect tone. Use an airbrush app for speed and a web airbrush application for control. Mix them where it helps. If you need scenes, blends, or restoration to round out a project, Pixelfox AI gives you those pieces with fast, clean results and high‑resolution output. Try a few edits this week. Save a preset. Time your workflow. See how much faster your delivery gets. And keep the person in the photo at the center of every choice. That is how you get honest, polished work with airbrush pro.\u003C/p>","airbrush-pro-guide-app-features-workflow-and-alternatives",90,1757178697,1757178653,{"id":132,"lang":11,"author_id":43,"image":54,"title":133,"keywords":15,"description":134,"content":135,"url":136,"views":137,"publishtime":138,"updatetime":61,"status":22,"publishtime_text":62,"status_text":25},333,"Mastering Modern Photo Design: Tools, Tips & Techniques with Best Graphic Editors","Discover some of the expert strategies in photo design, picture design, and image editing. Learn to use a graphic editor for amazing visual creations and enhanced image and design strategy.","\u003Cp dir=\"ltr\">\u003Cspan>You no longer have to learn complex skills to master the art of photo design in 2025. The advanced tools and platforms in the digital-paced world have made picture design easy, and you can create eye-catching visuals, polished brand brochures, or engaging social media graphics within minutes. Now you can do any task like picture design as a hobby or concentrate on image and design approach for business with the help of tools, tips, and tricks mentioned below in the article. Understanding the right tool and technique is important for everyone, so let's have a look at the power of a graphic editor to create stunning images and leave a long-lasting impact on the audience.\u003C/span>\u003C/p>\u003Ch2 id=\"Cy3eDS\" dir=\"ltr\">\u003Cspan>The Evolution of Photo Design\u003C/span>\u003C/h2>\u003Cp dir=\"ltr\">\u003Cspan>Photo design has gradually evolved from the early times of steady print layouts. But today, photo design has special importance in the world of editing as it surrounds lively, interactive, and diverse visuals composed for web, social, print, and mobile platforms. You can achieve the best democratic and dynamic designs using web-based browsers instead of expensive software and formal training, as in the past. So this means that photo design has evolved in 2025 with more powerful tools powered by AI to make our lives easier and efficient. \u003C/span>\u003C/p>\u003Ch2 id=\"JvZIcR\" dir=\"ltr\">\u003Cspan>Why Picture Design Matters in Digital Strategy?\u003C/span>\u003C/h2>\u003Cp dir=\"ltr\">\u003Cspan>Picture design is an important component in content marketing, branding, and engaging the audience. If your engagement or reach is lower than expected, photo designs can boost your attention span, and with no effort, you can communicate your message visually to your audience. Moreover, it increases conversion rates and drives clicks. \u003C/span>\u003C/p>\u003Cul>\u003Cli dir=\"ltr\" aria-level=\"1\">\u003Cp dir=\"ltr\" role=\"presentation\">\u003Cspan>Increase Engagement:\u003C/span>\u003Cspan> Social media posts that have stunning visuals usually help to increase engagement.\u003C/span>\u003C/p>\u003C/li>\u003Cli dir=\"ltr\" aria-level=\"1\">\u003Cp dir=\"ltr\" role=\"presentation\">\u003Cspan>Brand Recognition:\u003C/span>\u003Cspan> eye-catching photo design builds the brand identity\u003C/span>\u003C/p>\u003C/li>\u003Cli dir=\"ltr\" aria-level=\"1\">\u003Cp dir=\"ltr\" role=\"presentation\">\u003Cspan>Enhanced Communication:\u003C/span>\u003Cspan> a picture that is visually best designed conveys a message instantly than the text itself.\u003C/span>\u003C/p>\u003C/li>\u003C/ul>\u003Ch2 id=\"p0iru9\" dir=\"ltr\">\u003Cspan>Key Elements of Image and Design\u003C/span>\u003C/h2>\u003Cp dir=\"ltr\">\u003Cspan>To make your visuals not only attractive but also effective, you have to master various image and design editing tricks. Here are some key elements to note down:\u003C/span>\u003C/p>\u003Cul>\u003Cli dir=\"ltr\" aria-level=\"1\">\u003Cp dir=\"ltr\" role=\"presentation\">\u003Cspan>Composition:\u003C/span>\u003Cspan> Always remember that you have to keep the focus points and balance at perfect composition, as it guides the viewer's eye\u003C/span>\u003C/p>\u003C/li>\u003Cli dir=\"ltr\" aria-level=\"1\">\u003Cp dir=\"ltr\" role=\"presentation\">\u003Cspan>Color Theory:\u003C/span>\u003Cspan> Always use interrelated colors to increase the aesthetic appeal of design, as colors can evoke and provoke emotions. \u003C/span>\u003C/p>\u003C/li>\u003Cli dir=\"ltr\" aria-level=\"1\">\u003Cp dir=\"ltr\" role=\"presentation\">\u003Cspan>Typography:\u003C/span>\u003Cspan> The message is elaborated when image tone is aligned with the best, clear, and legible fonts\u003C/span>\u003C/p>\u003C/li>\u003Cli dir=\"ltr\" aria-level=\"1\">\u003Cp dir=\"ltr\" role=\"presentation\">\u003Cspan>Hierarchy:\u003C/span>\u003Cspan> To gain the attention of viewers, highlight the key elements \u003C/span>\u003C/p>\u003C/li>\u003Cli dir=\"ltr\" aria-level=\"1\">\u003Cp dir=\"ltr\" role=\"presentation\">\u003Cspan>Consistency:\u003C/span>\u003Cspan> Maintain your consistent style so you can strengthen your brand and credibility among your audience.\u003C/span>\u003C/p>\u003C/li>\u003C/ul>\u003Ch2 id=\"qjm6in\" dir=\"ltr\">\u003Cspan>Top Tools and Graphic Editors for Stunning Designs\u003C/span>\u003C/h2>\u003Cp dir=\"ltr\">\u003Cspan>Always use a high-quality graphic editor to make the best designs. Some of the best tools are:\u003C/span>\u003C/p>\u003Cul>\u003Cli dir=\"ltr\" aria-level=\"1\">\u003Cp dir=\"ltr\" role=\"presentation\">\u003Cspan>Canva: \u003C/span>\u003Cspan>This is beginner-friendly tool that provides different templates for social media posts, business cards, and products\u003C/span>\u003C/p>\u003C/li>\u003Cli dir=\"ltr\" aria-level=\"1\">\u003Cp dir=\"ltr\" role=\"presentation\">\u003Cspan>Adobe Photoshop:\u003C/span>\u003Cspan> Offers gold-standard tools with detailed photo control features\u003C/span>\u003C/p>\u003C/li>\u003Cli dir=\"ltr\" aria-level=\"1\">\u003Cp dir=\"ltr\" role=\"presentation\">\u003Cspan>Fotor:\u003C/span>\u003Cspan> Best for instant edits and batch processing \u003C/span>\u003C/p>\u003C/li>\u003Cli dir=\"ltr\" aria-level=\"1\">\u003Cp dir=\"ltr\" role=\"presentation\">\u003Cspan>Pixlr:\u003C/span>\u003Cspan> Online graphic editor with functions like Photoshop \u003C/span>\u003C/p>\u003C/li>\u003Cli dir=\"ltr\" aria-level=\"1\">\u003Cp dir=\"ltr\" role=\"presentation\">\u003Cspan>GIMP:\u003C/span>\u003Cspan> This is an open-source platform for those who are looking for advanced tools without any sign-up.\u003C/span>\u003C/p>\u003C/li>\u003C/ul>\u003Ch2 id=\"PZlGbW\" dir=\"ltr\">\u003Cspan>How to Use a Graphic Editor Efficiently?\u003C/span>\u003C/h2>\u003Cp dir=\"ltr\">\u003Cspan>Follow a simple process to use a graphic editor effectively:\u003C/span>\u003C/p>\u003Cul>\u003Cli dir=\"ltr\" aria-level=\"1\">\u003Cp dir=\"ltr\" role=\"presentation\">\u003Cspan>Define your purpose and target audience for your design before you start \u003C/span>\u003C/p>\u003C/li>\u003Cli dir=\"ltr\" aria-level=\"1\">\u003Cp dir=\"ltr\" role=\"presentation\">\u003Cspan>Choose the right canvas and set your dimensions\u003C/span>\u003C/p>\u003C/li>\u003Cli dir=\"ltr\" aria-level=\"1\">\u003Cp dir=\"ltr\" role=\"presentation\">\u003Cspan>Always use high quality photos to reduce the pixelation issue\u003C/span>\u003C/p>\u003C/li>\u003Cli dir=\"ltr\" aria-level=\"1\">\u003Cp dir=\"ltr\" role=\"presentation\">\u003Cspan>Apply filters and effects to enhance the quality and tone of your design\u003C/span>\u003C/p>\u003C/li>\u003Cli dir=\"ltr\" aria-level=\"1\">\u003Cp dir=\"ltr\" role=\"presentation\">\u003Cspan>Use the layering process to organize elements and allow adjustable editing\u003C/span>\u003C/p>\u003C/li>\u003Cli dir=\"ltr\" aria-level=\"1\">\u003Cp dir=\"ltr\" role=\"presentation\">\u003Cspan>Download the image in formats appropriate for upload.\u003C/span>\u003C/p>\u003C/li>\u003C/ul>\u003Ch2 id=\"CXWknj\" dir=\"ltr\">\u003Cspan>Photo Design Tips for Beginners\u003C/span>\u003C/h2>\u003Cul>\u003Cli dir=\"ltr\" aria-level=\"1\">\u003Cp dir=\"ltr\" role=\"presentation\">\u003Cspan>Less is always more, so don't overcrowd your design if you are new\u003C/span>\u003C/p>\u003C/li>\u003Cli dir=\"ltr\" aria-level=\"1\">\u003Cp dir=\"ltr\" role=\"presentation\">\u003Cspan>Use a grid and guidelines, as they help to align the elements neatly\u003C/span>\u003C/p>\u003C/li>\u003Cli dir=\"ltr\" aria-level=\"1\">\u003Cp dir=\"ltr\" role=\"presentation\">\u003Cspan>Modify the existing templates and edit them to make new ones\u003C/span>\u003C/p>\u003C/li>\u003Cli dir=\"ltr\" aria-level=\"1\">\u003Cp dir=\"ltr\" role=\"presentation\">\u003Cspan>Do some experiments with fonts and combine contrasting fonts to see the magic\u003C/span>\u003C/p>\u003C/li>\u003C/ul>\u003Ch2 id=\"H0DBc6\" dir=\"ltr\">\u003Cspan>Trends in \u003Ca href=\"https://pixelfox.ai/\" target=\"_blank\">Image\u003C/a> and Design for 2025\u003C/span>\u003C/h2>\u003Cp dir=\"ltr\">\u003Cspan>Some rising image and design trends are: \u003C/span>\u003C/p>\u003Cul>\u003Cli dir=\"ltr\" aria-level=\"1\">\u003Cp dir=\"ltr\" role=\"presentation\">\u003Cspan>Add dimensions and realism for 3D visuals \u003C/span>\u003C/p>\u003C/li>\u003Cli dir=\"ltr\" aria-level=\"1\">\u003Cp dir=\"ltr\" role=\"presentation\">\u003Cspan>Bring the combination of modern and calming aesthetic for earthy palettes\u003C/span>\u003C/p>\u003C/li>\u003Cli dir=\"ltr\" aria-level=\"1\">\u003Cp dir=\"ltr\" role=\"presentation\">\u003Cspan>Make your statements loud and clear \u003C/span>\u003C/p>\u003C/li>\u003Cli dir=\"ltr\" aria-level=\"1\">\u003Cp dir=\"ltr\" role=\"presentation\">\u003Cspan>Reflect diverse cultures and communities for some inclusive visuals\u003C/span>\u003C/p>\u003C/li>\u003Cli dir=\"ltr\" aria-level=\"1\">\u003Cp dir=\"ltr\" role=\"presentation\">\u003Cspan>Do some AI editing like background removal, object separation, and color correction\u003C/span>\u003C/p>\u003C/li>\u003C/ul>\u003Ch2 id=\"GVQW3y\" dir=\"ltr\">\u003Cspan>Conclusion\u003C/span>\u003C/h2>\u003Cp>\u003C/p>\u003Cp dir=\"ltr\">\u003Cspan>Photo design is a crucial skill that helps in the digital era of\u003Ca href=\"https://pixelfox.ai/\" target=\"_blank\"> 2025\u003C/a>. You can design eye-catching social media posts and business products and brochures in a few clicks. The best graphic editor will help you to create appealing visuals that not only tell a story but also boost your brand image and raise your audience. Mastering the fundamentals of picture design or image and design strategy, choosing the right tool, and trend will help you excel with your design. \u003C/span>\u003C/p>\u003Cdiv>\u003Cspan>\u003Cbr>\u003C/span>\u003C/div>","mastering-modern-photo-design-tools-tips-amp-techniques-with-best-graphic-editors",110,1753711301,["Reactive",140],{"$si18n:cached-locale-configs":141,"$si18n:resolved-locale":15},{"en":142,"zh":145,"tw":147,"vi":149,"id":151,"pt":153,"es":155,"fr":157,"de":159,"it":161,"nl":163,"th":165,"tr":167,"ru":169,"ko":171,"ja":173,"ar":175,"pl":177},{"fallbacks":143,"cacheable":144},[],true,{"fallbacks":146,"cacheable":144},[],{"fallbacks":148,"cacheable":144},[],{"fallbacks":150,"cacheable":144},[],{"fallbacks":152,"cacheable":144},[],{"fallbacks":154,"cacheable":144},[],{"fallbacks":156,"cacheable":144},[],{"fallbacks":158,"cacheable":144},[],{"fallbacks":160,"cacheable":144},[],{"fallbacks":162,"cacheable":144},[],{"fallbacks":164,"cacheable":144},[],{"fallbacks":166,"cacheable":144},[],{"fallbacks":168,"cacheable":144},[],{"fallbacks":170,"cacheable":144},[],{"fallbacks":172,"cacheable":144},[],{"fallbacks":174,"cacheable":144},[],{"fallbacks":176,"cacheable":144},[],{"fallbacks":178,"cacheable":144},[],["Set"],["ShallowReactive",181],{"article-detail-how-to-capture-stunning-slow-motion-shots-amp-pictures":-1},"/blog/how-to-capture-stunning-slow-motion-shots-amp-pictures",{"userStore":184},{"showLoginModal":185,"showLoginClose":144,"loading":186,"inviteCode":15,"bidIdentification":15,"token":15,"userInfo":188,"showPriceDialog":185,"paidBefore":61,"showTrailEndDialog":185},false,{"show":185,"message":187},"加载中...",{"avatar":189,"nickname":189,"email":189},null]