 Credit

Struggling with how your nose shows up in photos? You’re not alone. Wide angles lie. Shadows lie. And yeah, that one selfie camera loves to bully noses. A modern fix? A nose editor AI that reshapes or refines your nose digitally in seconds—without a steep Photoshop learning curve or, you know, surgery. In this guide, I’ll break down how this works, why it’s effective, how to get natural results, and the exact steps to use Pixelfox AI (my go-to) to get clean, believable edits.
Suggested URL: /blog/nose-editor-ai
According to multiple industry reports (Statista, Hootsuite), a large portion of social media users tweak photos before posting. And Gartner notes that consumer-facing generative AI is moving fast into everyday tools. Translation: smart, subtle edits are normal now—if they look real. This is where a good nose editor AI shines.
You’ll learn how a nose editor AI detects facial landmarks, how to avoid over-editing, the best tools in 2025, and what pros do to keep things natural. Stick around for real case studies, pro tips, and a quick tutorial you can follow today.
What a nose editor AI actually does (and why it looks natural)
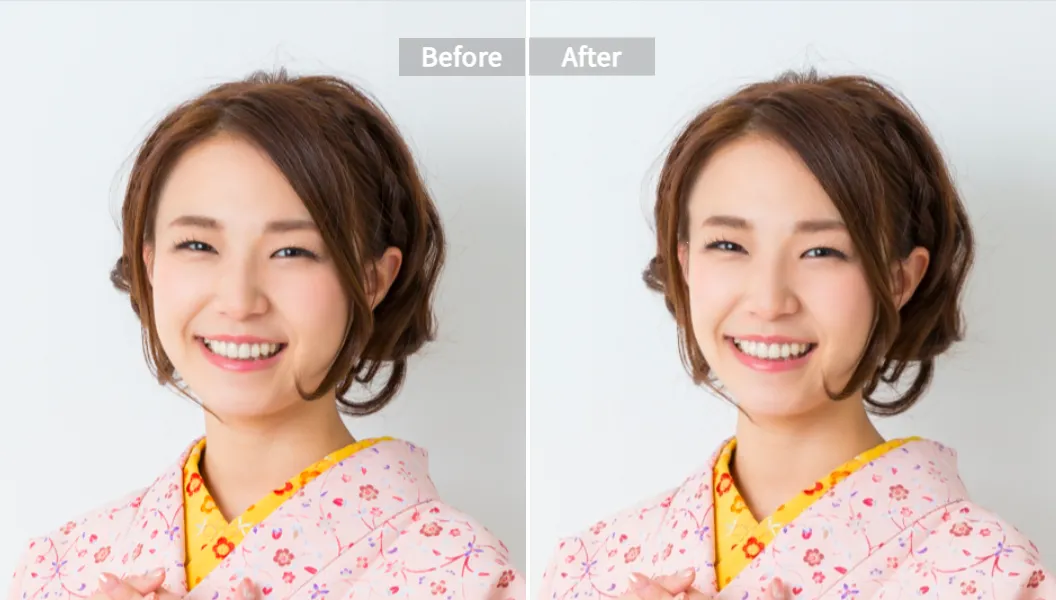
A nose editor AI uses face detection and facial landmarks to map your structure: bridge, tip, wings, nostrils, symmetry lines, and proportions relative to eyes, lips, and chin. Then it lets you adjust width, tip sharpness, bridge straightness, and even nostril shape. It’s not just “push pixels around.” It models your features so the change follows bone and soft tissue lines. That’s why it doesn’t produce weird warps like old-school liquify when done right.
- It keeps skin texture intact.
- It preserves lighting and shadow logic.
- It respects facial proportions.
- It adjusts neighboring features slightly so the face still looks… like your face.
Why do photos exaggerate noses in the first place? Wide-angle lenses on phones add distortion up close. Front cameras crank it up because you hold them too near your face. Bad lighting adds harsh shadows around the bridge and nostrils. AI can’t change physics, but it can fix the visual output.
According to Nielsen Norman Group, trust drops when visuals feel uncanny or “off.” The lesson: aim for subtle edits. If people notice the edit, it’s probably too much.
Problem, meet fix: who benefits most from a nose editor ai
If you’ve felt any of these, you’re in the right place:
- Your nose looks wider in selfies than IRL.
- You have a small bump on the bridge that looks bigger on camera.
- Your studio shots look good, but your headshots need quick, consistent tweaks at scale.
- You want a preview before a rhinoplasty consult.
- You want a better dating profile photo without looking airbrushed to oblivion.
A solid nose editor AI helps with:
- Bump smoothing and bridge straightening
- Tip refinement (sharper or softer)
- Narrowing or widening for balance
- Nostril adjustments (wings/flare)
- Lifting or lowering the tip a touch
- Maintaining identity while improving proportions
Why I recommend Pixelfox AI as your daily driver
You want speed, control, and natural output. And you want it in the browser. That’s why I keep pointing people to Pixelfox AI.
- It’s online and fast. No heavy software. No steep learning curve.
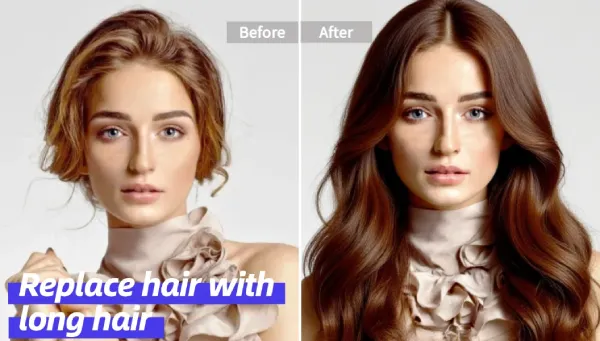
- It’s built as an AI face reshape tool with nose controls plus eyes, lips, jawline, and overall contour.
- It exports high-quality images without crushing your detail.
- It takes privacy seriously and handles files securely.
- It’s designed to reduce the time you spend on manual cleanup.
Try the Pixelfox AI Face Reshape tool here: AI Face Reshape - Edit Facial Features
And if you like working with natural language? You can also combine nose edits with prompt-based tweaks using AI Image Editing with Text Prompts.
According to Forrester, human-in-the-loop AI consistently delivers better outcomes than pure automation. That’s exactly the sweet spot here: AI does the heavy lifting, and you use your eye to dial in realism.
Step-by-step: how to edit your nose with Pixelfox (in minutes)
This is the workflow I use when I need clean, subtle edits that don’t scream “filter.”
1) Pick a good photo
Use a clear, well-lit image. Face forward or a slight angle works. Avoid heavy shadows across the nose. High resolution helps.
2) Open the Pixelfox AI Face Reshape tool
Go to AI Face Reshape - Edit Facial Features and upload your photo.
3) Select Nose controls
Look for the nose options: width, bridge, tip, and lift. You’ll see sliders that let you adjust intensity. Start small.
4) Make micro-adjustments
- Bridge: reduce or smooth a bump.
- Tip: sharpen or soften by 5–15%.
- Width: narrow slightly to match your eyes and lips.
- Lift: a few points can open the face in photos.
5) Zoom out every few seconds
Check if the edit still matches your vibe from a normal viewing distance. If it looks edited from far away, it’s too much.
6) Balance with other features if needed
If you tweak the nose, the jawline, lips, or eye size might need a 1–3% nudge so the overall face still feels balanced.
7) Download in high quality
Export as PNG or JPG. Keep a copy of the original for A/B testing.
Tip: Use a soft light source next time you shoot. A simple window or a diffused lamp will reduce harsh nose shadows. The less the camera bullies your face, the less you need to edit. ✨
Tip: Do an A/B test. Upload both the original and the edited image to your portfolio or social profile as a Story, not a Post. Watch which one gets more replies or taps. Human feedback beats guesswork.
Why a nose editor ai beats manual retouching in Photoshop
I love Photoshop. It’s a beast. But for quick, natural nose fixes?
- Speed: AI detects landmarks in seconds. Manual lasso/liquify can be slow and finicky.
- Realism: AI respects anatomy. Manual edits can bend texture, distort pores, or break lighting.
- Consistency: AI helps you apply similar changes across a set. Manual edits often drift photo to photo.
- Accessibility: Browser-based AI is easier for non-pros. Photoshop is powerful but has a learning curve.
Still love your full stack? Use the AI first. Then do final polish in your editor of choice if you need advanced composite work.
Comparison with other online tools (what makes each stand out)
There are many good tools in 2025. Some specialize in nose edits. Some cover full-face reshaping or batch work. Here’s the short take you came for:
- Pixelfox AI — Best overall for subtle, realistic face reshaping with an easy UI and strong nose control. Also pairs well with prompt-based edits. Try it here: Pixelfox AI
- LightX — Great dedicated nose toolbox with separate sliders for tip, wing, width, lift, and bridge. Strong for quick virtual rhinoplasty previews.
- Evoto AI — Strong face slimming suite for pros and photographers. Good control over jawline, cheekbones, and symmetry. Helpful when balancing nose edits with broader reshaping.
- Pixelcut Nose Reshaping Editor — Smart text-prompt nose edits. Type “smooth the bridge” or “reduce tip slightly,” and it generates a result fast.
- Picsart Face Editor — Solid general face editor with automatic face recognition and easy sliders. Good for casual edits and social media workflows.
Other notable mentions: CyberLink PhotoDirector (good mobile suite), YouCam/Perfect Corp (strong AR/try-on tech for beauty brands), and HeyPhoto (fun gaze direction and expression tools). Each has a place, but for nose-specific edits that still look like you, I reach for Pixelfox first.
Advanced techniques that make your edit look pro
You wanted more than “drag the slider.” Here you go.
-
Match lighting to your edit
If you use prompt-based tweaks with AI Image Editing with Text Prompts, add cues like “adjust lighting to soft daylight” so shadows and highlights match the refined nose. -
Keep identity with proportional checks
Use the eyeball test: look at pupil distance, nose width at the nostril line, and lip width. If the nose feels too narrow relative to lips, roll back. -
Unify face edits across platforms
If you post video too, keep consistency with your photos. Use the Instant AI Portrait Enhancer for Videos & Selfies so your vibe matches across reels and shorts. -
Batch your edits for a cohesive portfolio
If you’re editing 20+ headshots, do one “golden” edit first, then apply similar settings across the set. Keep deviations small to avoid the uncanny valley. -
Prep for real consultations
If you’re considering rhinoplasty, bring a few AI previews to your consult. Surgeons will tell you what’s realistic. According to many clinics and medspa best practices, using simulated images helps set expectations and improves consult quality.
Real-world case studies (what actually happened)
1) Creator headshots for LinkedIn and speaking gigs
A marketing consultant hated how her nose looked in event photos. She used Pixelfox AI to do a subtle bridge smooth and a tiny tip lift. She kept it under 15% intensity. She posted three new headshots. Recruiters commented on the clarity and polish. She said the edit took five minutes per photo, not 30.
2) Medspa pre-visualization for consults
A medspa used AI previews to show clients small, realistic nose refinements before any treatment talk. Clients came in less anxious and more informed. Staff reported fewer “can we go more extreme” requests because the previews set a natural baseline.
3) Wedding photographer workflow
A photographer offered light beauty edits in the premium package. He used AI to standardize subtle nose and jawline edits across large galleries, then did manual touch-ups only on close-ups. Turnaround got faster, and the look stayed consistent.
Common mistakes with nose editor ai (and how to fix them)
-
Over-editing the tip
Problem: The tip looks pinched.
Fix: Roll back to 5–10%. View from normal zoom, not 300%. -
Smoothing the bridge too much
Problem: You wiped out natural contour.
Fix: Keep micro bumps. They make the nose real. -
Ignoring symmetry
Problem: The nose looks right, but the face feels off.
Fix: Nudge eyes or jawline 1–2% with the face reshape tool for balance. -
Editing low-res images
Problem: Artifacts and muddy texture.
Fix: Start with better input. If you must, use a light AI enhance pass first. -
Forgetting the impact of lighting
Problem: Shadows around the nostrils look weird after edits.
Fix: Re-shoot in soft light when you can. Or use prompt-based edits to gently shift lighting. -
Using the same “intensity” for every face
Problem: One-size-fits-all edits fail on unique features.
Fix: Adjust per face. Do not copy/paste percentages blindly. -
Editing ID photos
Problem: Over-editing official photos causes rejections.
Fix: Keep ID photos natural. Many standards don’t allow alterations to facial features.
Tip: Always keep an unedited copy. You’ll want it for A/B tests, or in case you go too far and need to reset. Your future self will thank you.
How to avoid negative effects when using an ai face reshape tool
- Start with tiny moves. 5–10% is the sweet spot for most noses.
- Work in passes. Bridge first. Tip second. Width last.
- Zoom out often. If it looks edited at a glance, it’s too much.
- Check from multiple angles if you have them. One angle can lie.
- Keep pores and texture. If skin turns plasticky, undo.
- Document your settings per project. You’ll copy the winning recipe later.
Best practices from pros who use a nose editor ai daily
-
Use the rule of thirds for alignment
Place the nose line slightly off center if you want a more dynamic look. Small changes in crop can make the nose feel smaller without any edit. -
Mix AI with light manual touches
AI for structure, manual for micro texture. Light dodge and burn can add realism after an AI tweak. -
Bake it into a repeatable workflow
Create a repeatable run: import → Pixelfox AI for face reshape → optional prompt-based lighting harmonization → export → final polish. Keep it simple and you’ll actually do it. -
Log your “don’ts”
If a technique ever made an image look fake, write it down. Build your own “no-go” list. Future you, again, will be happy.
The part competitors skip: ethics, trust, and privacy
Let’s be straight. Editing a face is personal. It can help confidence. It can also feed insecurity. Keep it healthy.
- Show restraint. If your friend can’t tell what changed, you nailed it.
- Use AI to correct camera distortions, not to erase identity.
- Store files securely. Delete uploads you don’t need.
- Mark heavily edited images in client work when appropriate.
- If you’re sharing medical-style previews, make that clear. It’s a simulation, not a promise.
According to industry guidance from Nielsen Norman Group, trust depends on authenticity cues. And Forrester has long emphasized transparent, human-centered design in AI-driven experiences. Keep your edits aligned with that. People notice.
Quick-play “pro” ideas you can use today
-
Dating profile refresh that stays real
Narrow nostril flare slightly and lift the tip 6–8%. Then tweak overall lighting using prompts. Use AI Image Editing with Text Prompts to add “soft daylight glow” so the edit blends. -
Video-brand consistency
Do a light nose and face balance edit on your thumbnail photo. Then use the Instant AI Portrait Enhancer for Videos & Selfies to match tonality in your Shorts or Reels. Your brand looks cohesive across mediums. -
Portfolio audit
Pick 12 headshots. Apply one subtle nose-bridge correction across all. Export. Lay them side by side. You’ll see how consistency elevates the set.
FAQs
How does a nose editor AI differ from a normal photo editor?
It understands facial structure. It uses facial landmarks to reshape the nose in a way that respects anatomy, lighting, and proportions. A traditional editor lets you push pixels. AI knows where to push and when to stop.
Can I get natural results without looking “filtered”?
Yes. Start small. Keep intensity low. Match lighting. Compare from a normal zoom. According to usability research from NN/g, users trust images that feel authentic. Subtlety wins.
Why does my nose look bigger in selfies?
Wide-angle lenses stretch features near the camera. If you hold your phone close, the nose is closest. So it looks larger. Move the camera farther or use a higher focal length if possible.
Should I use a nose editor AI before a rhinoplasty consult?
It helps. It gives you a visual language to discuss with your surgeon. Just remember it’s a simulation. Surgeons will tell you what is anatomically realistic.
What’s the difference between a nose editor AI and a full ai face reshape tool?
A nose editor AI focuses on the nose. An ai face reshape tool handles eyes, lips, jawline, cheekbones, and symmetry too. For balance and identity, I prefer the full tool so the face looks cohesive.
Can I do this on mobile?
Yes. Many tools are browser-based and mobile-friendly, including Pixelfox AI. Just use a good input photo and a stable connection.
Is my data safe?
Reputable platforms handle uploads securely and let you delete files. Pixelfox AI is built with privacy in mind and keeps your edits confidential.
Your next move
You came here for a fix that works fast and still looks real. A nose editor AI gives you that. It detects structure. It makes subtle changes. It respects your identity. If you want the best balance of control and simplicity, open the AI Face Reshape - Edit Facial Features tool and try a gentle bridge smooth or tip refinement right now. Keep it subtle. Keep it you.
And if you want to combine structure edits with lighting tweaks or background cleanup, add AI Image Editing with Text Prompts to your stack. Two tools. One consistent look. Clean, believable, and fast.
—
Author note: I’ve spent a decade helping creators, brands, and clinics build content that’s both high-performing and human-first. I test tools weekly and I default to subtle edits that boost confidence without breaking trust. As always, use AI responsibly. Your face is not a template. It’s you.