 Credit

With the digital and print first world, resolution is increasingly becoming important. Regardless of whether you need high-res images to post online as a product photograph, print out as print materials, or take high-quality portfolio shots, DPI and image resolution are essential measures of how sharp and professional your images are. When your desire is to resize and alter the DPI of an image online on a browser in a very convenient manner, then PixelFox comes in handy.
In an expansion of already well-established AI-boosted photo editing software, PixelFox recently released its online, free-of-charge, and easy to use online DPI converter and resolution editor.
What do we mean by DPI, and why does it matter?
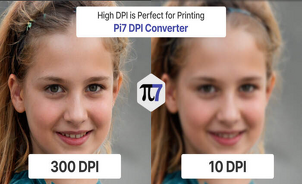
DPI is an acronym of dots per inch; it simply means the number of dots that the image encompasses on one inch of the output. An increased DPI tends to give a superior print. For example:
The common DPI of Web images is 72 DPI.
The Print-ready images can be gauged at 300 DPI.
600 DPI+ is perfect for printing professionally (e,.g. magazines, brochures)
Altering the DPI is of paramount importance as the medium of usage changes, i.e, when it is moved out of digital space (screens) into real-life printing. That is why such tools as online photo editors, DPI tools, or photo DPI converters are necessary for creators, marketers, and designers.
Introducing PixelFox: The Simplest DPI Web-Based Converter
The browser-based pack of image editing tools at PixelFox now has an individual DPI editor and resolution converter set, which makes the task of changing DPI fast and efficient, and most importantly, error-free. There was no need to use Photoshop or any other heavy software; it all happens right within your browser.
So why is PixelFox so special?
Alternate DPI and Image Size on the fly
All you have to do is simply upload your image and set the DPI you want (e.g., 300), and PixelFox will do the rest, automatically recalculating your image and resizing it. It can also change the pixel dimension where necessary, which is why it can be called a full-resolution converter.
Easy-to-Use Interface
As a designer or just an everyday user, you will not get lost in more sophisticated menus because of PixelFox's minimalist interface. Just upload, prepare your values, preview, and download.
Retains Image Quality
By applying AI-powered resampling, PixelFox guarantees that sharpness will be maintained despite the increase in resolution. PixelFox retains clarity and proportion, unlike some bare-bones online DPI converters that are known to induce blur or artifacts.
Supports All Great Types of Files
You can upload and convert any image to JPG, PNG, BMP, and TIFF. Your downloads are export-ready for web and print.
No Software, No sign-up
PixelFox is browser-based and fully landed. There is no requirement to install software to create an account, which allows mePrint Design: Create high-res images to place in flyers, business cards, or posters.
The process of altering the DPI and the size of an image online through PixelFox
The following is how you can use PixelFox as your picture DPI converter:
Post Your Photo
Some of the supported formats are JPG, PNG, BMP, and TIFF.
Enter New DPI
Enter the DPI you want (e.g., 300, to print). The new dimensions (in inches or pixels) will also be auto calculated.
Optional: Set Width/Height
Resolution can also be altered by manually changing it when you desire to change the size of either the screen or print.
Download and Preview
Behold the finished image and download in high resolution for publication, print, or share.
What is an Online Photo Editor DPI Tool Use Instead of Photoshop?
Photoshop is efficient, though the learning curve is very steep, expensive, and the system requirements are enormous. You get with PixelFox:
There is no software to download.
No subscription or licensing
Faster workflow
Accessible via any medium
PixelFox is a free, simple-to-use option for anyone who requires DPI conversion without the frills.
Learning the terms also allows you to make editing choices that better suit you, particularly when it comes to picking the right photos to use in multiple formats.
Final Thoughts
Whether you are getting your Amazon product shots ready, preparing print-ready marketing material, or trying to enhance your portfolio of photography, PixelFox is the tool you need to make that simple but professional image size or DPI alteration and resizing.
Give PixelFox a spin today and have your photographs print-ready or web-optimized with a few mouse clicks in no time, fast, free, simple, correct, and easy to use by beginners as well.