 Credit

Have you ever tried to put one picture on top of another, only to get lost in a maze of confusing software? You just want to add a logo to a photo or create a cool double-exposure effect. But you're suddenly facing terms like "layers," "blend modes," and "opacity masks." It feels like you need a graphic design degree just to do one simple task. Or worse, you find a simple online tool, but the moment you try to use its main feature, you hit a paywall asking for a hefty subscription. It’s frustrating.
What if you could achieve a perfect image overlay in seconds, without any of that complexity? Imagine a tool that doesn't just paste one image on another but intelligently blends them. A tool that understands light, shadow, and texture to create a single, seamless new image. This is where AI changes the game. Meet the Pixelfox AI Image Blender, a powerful and completely free online tool designed to make image overlays simple, fast, and professional. No more complex software, no more surprise costs—just your creativity, powered by AI.
What is an Image Overlay, Exactly?
An image overlay is a technique where you combine two or more images by placing one on top of another. In its simplest form, you might put a logo (a secondary image) on a product photo (the base image). But a truly effective overlay goes beyond simple pasting. It’s about creating a single, cohesive image where both elements look like they belong together.
Traditional tools require you to manually adjust transparency, erase edges, and play with complicated settings to get it right. AI-powered tools like Pixelfox handle this differently. The AI analyzes both images and automatically adjusts for lighting inconsistencies, color differences, and perspective, creating a natural and believable composite. It’s the difference between a clumsy cut-and-paste job and a professional-grade photo overlay.
Why You Might Need to Overlay Images Online
The need to superimpose pics online isn't just for professional designers. It’s a practical skill for many everyday tasks. Here are some common scenarios where a good image overlay tool becomes your best friend:
For Social Media Magic
Content creators and social media managers constantly need fresh visuals. With an image overlay, you can quickly:
- Place a quote on a scenic background for an inspirational post.
- Add promotional text or a "New Arrival" badge on top of a product image.
- Create eye-catching thumbnails for YouTube by combining your portrait with a graphic background.
- Generate unique Instagram stories by blending textures and photos.
For E-commerce and Small Business
If you run an online store, professional-looking product photos are non-negotiable. Here's how to put a photo on top of another photo to boost your sales:
- Watermarking: Add your brand's logo as a semi-transparent overlay to protect your images.
- Promotional Badges: Overlay a "50% OFF" or "Free Shipping" graphic onto your product images during a sale.
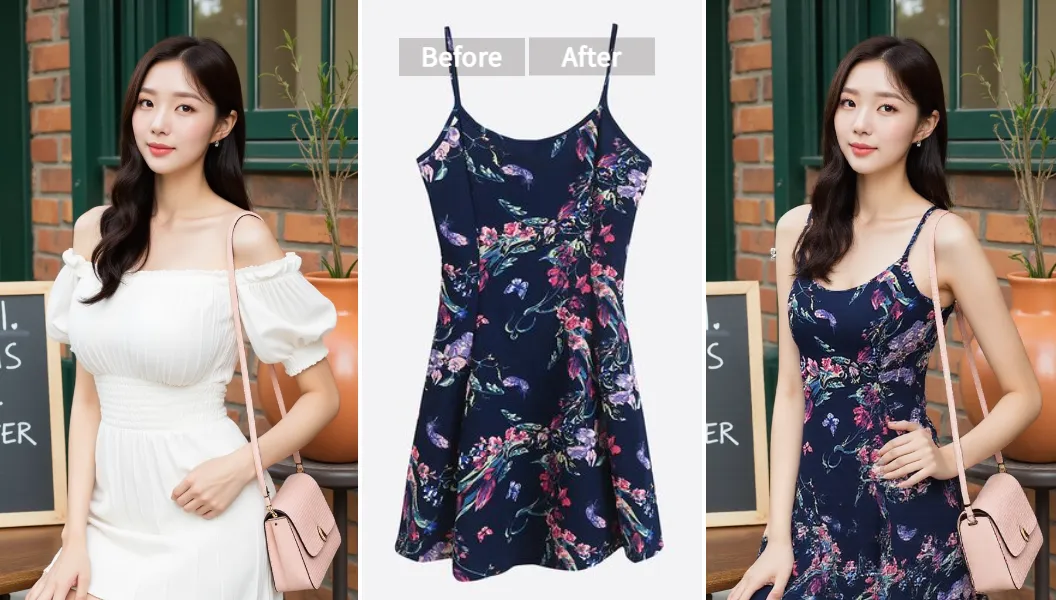
- Before-and-After Shots: Superimpose two images to showcase the effectiveness of a product or service.
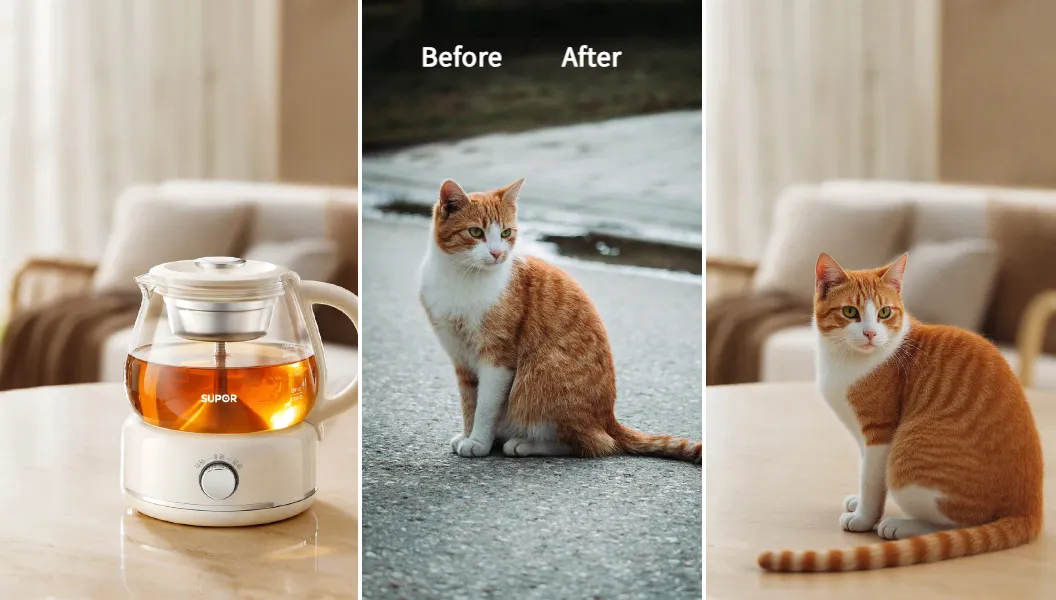
- Contextual Mockups: Place a picture of your product (like a coffee mug design) onto a lifestyle photo (someone holding a plain mug).
For Personal Creative Projects
You don't need to be a pro to have fun with photo editing. Casual users often need to overlay two images for:
- Creating Memes: Put text or a cutout image onto a popular meme template.
- Tattoo Design: As one Reddit user mentioned, you can overlay different designs onto a photo of your arm to see how a tattoo might look before committing.
- Photo Collages: Combine pictures of friends and family into a single, beautifully blended image for a digital greeting card or memory keepsake.
- Artistic Expression: Create surreal or dreamy double-exposure portraits by blending a face with a nature scene.
For Students and Educators
Clear visual aids can make a huge difference in learning. Here's how to put image on another image for academic purposes:
- Add labels or diagrams on top of scientific images.
- Overlay graphs and charts onto presentation slides with background imagery.
- Create visual timelines by superimposing historical photos onto a map or background.
How to Put One Picture on Top of Another: The Old, Hard Way
Before AI, creating a good picture overlay in software like Photoshop involved a multi-step, manual process. You would have to:
- Open both images in the program.
- Manually copy and paste one image onto the other, which creates a new "layer."
- Struggle with the image editor layers panel to get the order right.
- Experiment with dozens of "Blending Modes" (like Multiply, Screen, or Overlay) to see which one looked least-bad.
- Adjust the "Opacity" slider back and forth to get the transparency right.
- Use an "Eraser" or a complex "Layer Mask" to manually remove parts of the top image so it blended better with the bottom one.
This process is powerful but time-consuming and has a steep learning curve. It's overkill if you just need a quick, clean result.
The New, AI-Powered Way: A 3-Step Image Overlay Tutorial
Forget layers and masks. With the Pixelfox AI Image Blender, the process is incredibly straightforward. You tell the AI what you want to combine, and it does the complex work for you. Here’s how you can put one picture on top of another in just a few clicks.
Step 1: Upload Your Base and Overlay Images
First, head over to the Pixelfox AI Image Blender tool. You'll see simple upload boxes.
- Upload the Base Image: This is your background or main picture. It could be a landscape, a product shot, or a portrait. Click "Upload Image" and select the file from your computer.
- Upload the Overlay Image: This is the image you want to place on top. It could be a logo, a texture, another person, or an object. You can even upload an image with a background; our AI is smart enough to handle it. If the background is complex, I find it sometimes helps to first remove the background using another free Pixelfox tool for the cleanest result.
Step 2: Control the Blend with a Simple Slider
This is where the magic happens. Once your images are uploaded, you don't have to guess which "blend mode" to use. Pixelfox gives you intuitive controls.
- Adjust the Blend Strength: You'll see a simple slider. This single control tells the AI how prominently to feature the overlay image. Dragging it to the left makes the overlay more subtle and transparent, while dragging it to the right makes it more opaque and dominant.
- Let the AI Analyze: As you adjust the slider, the AI engine works in the background. It's not just changing transparency; it's calculating how the light from the base image should affect the overlay image. It adjusts shadows and highlights to make the composite look realistic. There's no need for manual editing.
Step 3: Generate and Download Your Masterpiece
Once you're happy with the preview:
- Click the "Generate" button. The AI will process the final image in a few seconds, applying all the smart blending adjustments.
- Download Your Image: Your new, perfectly blended image will appear. Click the "Download" button to save it to your device in high resolution.
That's it! You've successfully created a professional-looking pic overlay without touching a single complex tool.
Pro Tips for a Perfect Picture Overlay Online
While our AI makes the process easy, here are a few expert tips I've learned from experience to take your image overlays from good to great.
- Tip 1: Mind the Lighting Direction: For the most realistic blends, try to use two images where the light is coming from the same general direction. If the light in your base photo is from the left, an overlay image lit from the right might look slightly off. Our AI is great at compensating, but starting with well-matched photos gives it a head start.
- Tip 2: High Resolution is Key: Always start with the highest quality images you have. A low-resolution overlay on a high-resolution background will look blurry and unprofessional. Garbage in, garbage out!
- Tip 3: Experiment with Blend Strength: Don't just settle for the default. I find that the most interesting effects often happen at unexpected blend strengths. For watermarks, a low strength (10-20%) is ideal. For artistic double exposures, a mid-range strength (40-60%) often works wonders. Play around with it!
- Tip 4: Combine AI Tools for a Flawless Workflow: Sometimes, your overlay image isn't quite perfect. Before blending, you can use other Pixelfox tools to prep it. For example, you can remove any distracting objects from your background image first, or try perfecting the colors and lighting to match another photo's style before you even begin the overlay process.
Pixelfox AI vs. Other Tools: Why Simpler is Smarter
You might be wondering, "How is this different from Canva or Photoshop?" It comes down to philosophy and technology.
- Pixelfox vs. Photoshop: Photoshop is a powerhouse, but it's a manual one. It gives you all the tools, but you are the artist and the technician. Pixelfox acts as your AI technician, handling the complex blending so you can focus purely on the artistic vision.
- Pixelfox vs. Canva/Pixlr: Tools like Canva are great for layering pre-made elements and text. But when it comes to blending two photographs, they still rely on a basic transparency slider. They don't have an intelligent AI engine that analyzes and matches lighting and texture. This is why blends from Pixelfox look more natural and integrated. Plus, we keep our core tools free, unlike others who have moved essential features behind a paywall.
Frequently Asked Questions (FAQ)
How can I overlay two images for free?
You can use the Pixelfox AI Image Blender. It's a completely free online tool that lets you upload two pictures, adjust the blend strength with a simple slider, and download the final high-resolution image without any watermarks or sign-up requirements.
How do I superimpose a picture on another picture with transparency?
Our tool handles transparency automatically and intelligently. When you upload your two images, you can use the "Blend Strength" slider. Moving it towards a lower percentage will make your top image more transparent, allowing the background to show through in a natural, blended way.
Can I put a picture over a picture on my phone?
Yes! Pixelfox AI is a web-based tool, which means it works directly in your browser. You can access it on any device with an internet connection, including iPhones, Android phones, tablets, and of course, desktop computers. No app installation is needed.
What's the difference between "overlay" and "blend"?
In design, "overlay" often refers to the general act of placing one thing on top of another. "Blend" refers to how those two things interact. A simple overlay might just sit on top, while a blend creates a mix of the two. Pixelfox specializes in intelligent blending to make your overlays look seamless.
Your Turn to Create Stunning Overlays
You no longer need to be a design expert or pay for expensive software to bring your creative ideas to life. The power to add a picture on top of a picture and create beautiful, professional-looking composites is now just a few clicks away. Whether you're growing a business, creating content, or just having fun, a great image overlay can make your visuals stand out.
Ready to stop struggling with complicated tools and start creating effortlessly?