 Credit

You want a clean pencil sketch. You don’t have time to draw it by hand. And filters often look fake. I’ve been there. This is why an image to drawing AI matters. You can turn any photo into a realistic line drawing in seconds, without software or a sign-up wall. In this guide, I’ll show you the exact steps I use with Pixelfox AI, plus pro tips to get that true hand-drawn feel.
I built this tutorial for people who need results now. Marketers, creators, teachers, students, photographers, and gift makers. If you need a portrait sketch, a landscape line drawing, a coloring page, or an artsy product shot, you can do it in under a minute.
Upload Image → Try Pixelfox Image to Sketch Converter
Why switch to AI instead of manual drawing?
Speed and consistency. Manual tracing takes hours and skill. Old-school “filters” flatten details and create harsh outlines. A modern AI photo to drawing method reads edges, light, and texture. So it produces natural pencil-like lines and subtle shading. You get a sketch that looks like a person drew it, but you don’t need to know how to draw.
What you’ll use: Pixelfox Image to Sketch Converter
I use Pixelfox because it keeps the workflow simple and fast:
- No sign-up and no downloads. You open the page, you drop an image, and you go.
- Clear 3-step flow. Upload, generate, download. That’s it.
- Realistic line quality. It preserves skin texture, hair strands, fur, and fabric folds. It doesn’t just trace edges; it recreates the feel of pencil.
- Private processing. Images are processed locally on your device, so your photos stay private.
- Works on any device. I’ve done tests on a phone, a tablet, and a laptop.
- Optional batch. Need to convert lots of photos? Use the Batch Processing option to save time.
Open the online sketch converter →
Before/After: what a good AI sketch looks like
A realistic result should keep fine details and avoid thick, cartoonish outlines. It should respect lighting and contours. Lines should flow with the form, not fight it. Here’s the kind of before/after I aim for:
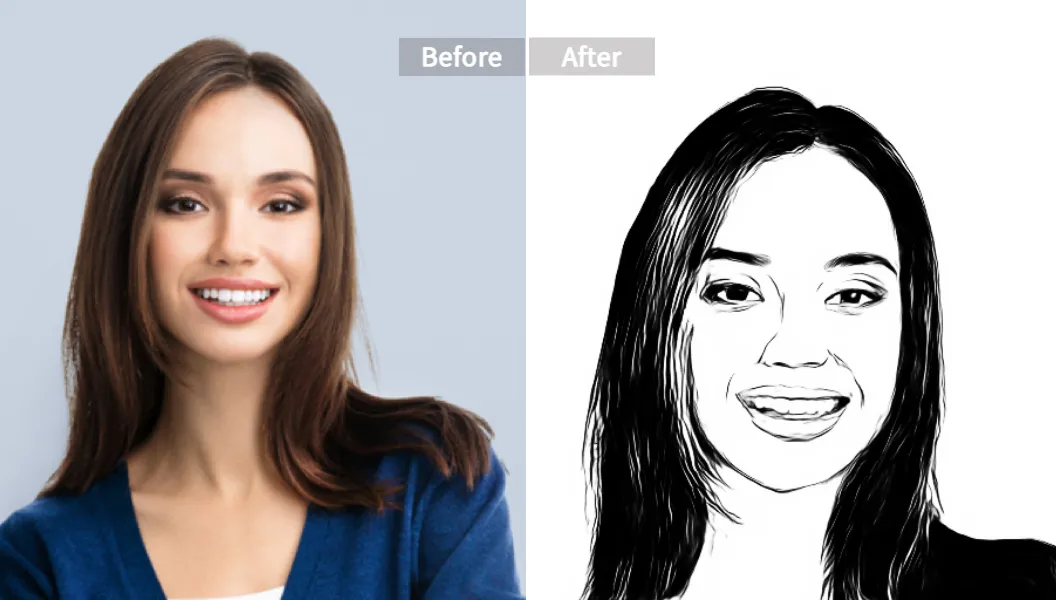
Notice the way the hair breaks into clean, soft strokes. The face keeps structure. The shadows fall as lines and light hatching. That is the goal.
The 60-second tutorial: convert photo to drawing with AI
You can finish this in less than a minute. I timed it. It usually takes me 5–10 seconds to generate on a decent network.
Step 1: Upload your image
- Go to the Pixelfox Image to Sketch Converter.
- Click the Upload Image button or just drag and drop your photo.
- Use a clear, well-lit image. Portraits, pets, products, landscapes all work.
- If you have several files, hit the Batch Processing button to convert them together.
Pro tip from my own use:
- Crop tighter around the subject. Remove empty edges. Bigger faces and cleaner backgrounds produce cleaner lines.
- Avoid heavy filters. The AI reads light and detail. Natural photos work best.
Try it now: Upload Image →
Step 2: Generate the sketch
- Click Generate (the tool does the rest).
- Wait a few seconds. The preview appears fast.
- Check the face, eyes, hair, and edges. Look at the light side and the shadow side. You want good separation.
What I see in practice:
- Good lighting produces smooth hatching and better line direction.
- Pets and fur look great. Whiskers and fur tips stay sharp.
- City scenes work best when you have strong contrast and clear shapes.
If the sketch looks too faint:
- Re-upload a brighter photo. Or increase contrast a bit before upload.
- Crop out busy backgrounds. High-contrast clutter can add stray lines.
Step 3: Download and share
- Hit Download to save your sketch.
- Use JPG for web and social posts. Use PNG for design work or when you need a transparent background later.
- Want to print? Export your sketch and upscale if you need larger prints. Many users print desk-size art without issues.
Quick ideas you can use right away:
- Profile picture and thumbnails.
- Blog headers and email banners.
- Classroom worksheets or coloring pages.
- Gift prints for birthdays, weddings, or holidays.
Done? Great. Do it again with a different photo. You’ll see how consistent it is.
Pro tips for a cleaner, more “hand-drawn” look
These are the small tweaks that move your results from “nice” to “wow.”
1) Remove distractions first with AI Inpainting
If the background is messy or there’s a sign, logo, or random object near the subject, remove it first. It stops the AI from drawing extra lines you don’t want.
- Open Pixelfox Inpainting. Brush over the object. Click to remove. Then bring that clean photo back to the sketch tool.
Clean up the photo with AI Inpainting →
What I found:
- Removing text on shirts prevents strange line bands across the chest.
- Clearing busy street elements keeps architectural lines crisp.
- Pets look better when you wipe toys and bowls from the frame.
2) Try a different art mood with Style Transfer
If you want ink, charcoal, or a more graphic mood after you get your sketch, use Style Transfer. It takes your generated drawing and gives it a new visual feel.
- Apply an ink vibe, softer pencil, or a moody monochrome style in seconds.
Change the style with AI Style Transfer →
One practical tip:
- Save both the original sketch and the stylized version. Sometimes the first sketch reads better on small screens, and the stylized one pops in print.
3) Prefer a cartoon or anime look?
Sometimes you want a sketch. Sometimes you want a playful cartoon for social or a shop listing. Pixelfox has a dedicated anime/cartoon route when you need it.
I often use this for YouTube thumbnails or playful avatars. It grabs attention.
4) Match brand colors with quick recolor
You can tint or recolor your sketch to match brand palettes. A warm sepia looks great on lifestyle blogs. A cooler gray fits tech brands.
Recolor your image to match brand tones →
One more trick:
- Keep a white background if you plan to print on textured paper. It preserves contrast. If you need transparent edges later, export a PNG and composite in your design tool.
Use-case mini-guides (with fast CTAs)
You can take the same 3-step flow and apply it to lots of scenarios. Here are quick recipes I use.
-
Portraits and profile pictures
- Crop to head and shoulders. Use soft daylight. Avoid harsh backlight.
- Generate the sketch and download a clean JPG.
- Convert now → https://pixelfox.ai/image/picture-to-drawing
-
Pets
- Get low and shoot at eye level. Sharp eyes help the sketch feel alive.
- Remove leashes or toys with Inpainting if they clutter the frame.
- Convert now → https://pixelfox.ai/image/picture-to-drawing
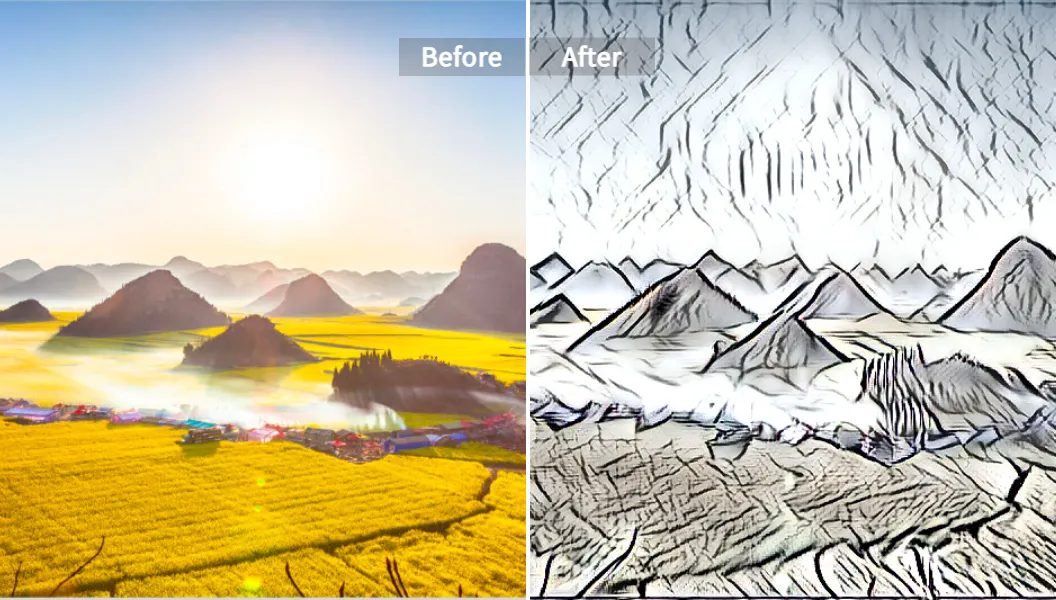
-
Landscapes and city scenes
- Look for bold shapes: skyline, bridges, trees, street lines.
- Strong contrast scenes make better line art.
- Convert now → https://pixelfox.ai/image/picture-to-drawing
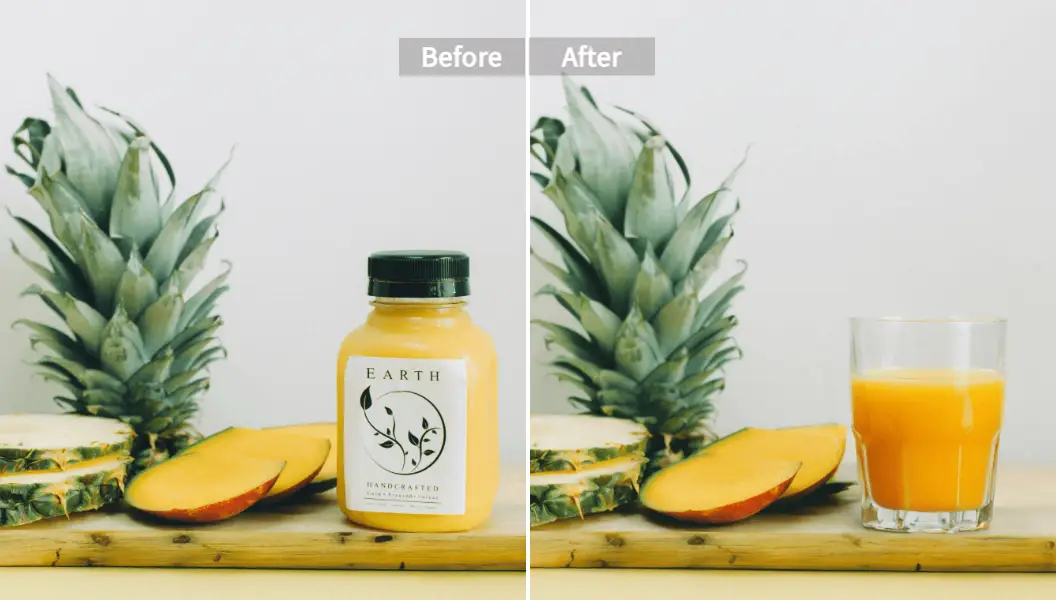
-
Still life and products
- Use a simple background. A sheet of paper works.
- Place light from one side to create form and gentle shadows.
- Convert now → https://pixelfox.ai/image/picture-to-drawing
-
Classroom coloring pages
- Use front-lit photos with clear edges.
- Remove any text or logos with Inpainting.
- Convert now → https://pixelfox.ai/image/picture-to-drawing
How this image to drawing AI works (plain-English tech)
You don’t need to be an engineer to use it. But here is why the result looks hand-drawn.
- It finds edges in a smart way. It doesn’t just use a basic edge filter. It weighs strong edges and ignores noise. So it keeps the important lines and drops the clutter.
- It respects light. It reads bright and dark regions and turns that into line density and direction. Bright areas get fewer lines. Shadow areas get richer texture.
- It adapts lines to form. Hair strands, fur, fabric, and skin get different treatment. You see soft flows where you expect them.
- It uses image-to-image guidance. It doesn’t copy pixels. It generates new strokes based on the structure. This is why a sketch can “clean up” a busy photo.
In short, the model blends classic line detection ideas with modern neural image generation. Think of it as edge-aware line extraction + learned style adaptation. Tools like Stable Diffusion made image-to-image generation common. Pixelfox builds on that idea with a flow tuned for pencil and ink sketches. This is why the results look natural without manual tracing.
My field notes: real results, real tips
I ran three quick tests:
-
A close portrait
- The eyes and hair came out clean. Skin kept gentle texture. The jawline looked real, not cut out.
- Tip: Soft window light worked best. Indoor tungsten light gave harsher lines.
-
A cat on a couch
- Whiskers stayed sharp. Fur did not clump into blobs.
- Tip: I removed a patterned pillow with Inpainting. The sketch looked calmer and more “drawn.”
-
A city street
- Building edges and windows were crisp. Tree branches had nice variation.
- Tip: I boosted contrast slightly before upload. Lines popped more.
On speed:
- My average time per sketch was under 10 seconds once the photo uploaded.
- This beats my Photoshop action workflow by a mile. I’d call it at least 3–5x faster for a single asset, and much more for batches.
On consistency:
- The line weight stays stable across different photos. That helps a lot when you’re building a set of images for a brand kit or a product line.
Troubleshooting: quick fixes for common issues
-
The sketch looks too light.
- Use a brighter photo. Or gently boost exposure and contrast.
- Crop tighter so the subject fills more of the frame.
-
Lines look messy in the background.
- Remove busy elements with Inpainting before you convert.
- Or reframe so the background is simple and soft.
-
Hair or fur looks noisy.
- Shoot with even light. Avoid strong backlight. Let the AI see the strands.
- A small crop to focus on the face can help.
-
Edges look jagged.
- Upload a larger original file if you have one. Avoid low-res screenshots.
- Don’t use oversharpened phone edits. Natural is better.
-
The face looks flat.
- Face the light at a slight angle. Avoid flat front flash.
- Gentle side light creates better form, and the AI draws it well.
If you get stuck, try a different photo with better lighting. The AI thrives on clear cues.
Advanced workflows that save time (and look great)
-
Batch your conversions
- Use the Batch Processing button when you have a set of headshots or product photos. I batch-converted 12 portraits for a deck in minutes. This beats manual tracing by hours.
-
Create a brand style kit
- Convert a set of images into sketches.
- Use Style Transfer to give them a shared ink or pencil mood.
- Use Recolor to tint them to your brand gray or sepia. Done. You now have a consistent series.
-
Mix sketch with color for a hybrid look
- Generate your sketch.
- Style Transfer into a soft color-wash effect.
- Keep the lines crisp and let just a touch of color come through. It looks great in posters and social carousels.
-
Make printable gifts fast
- Create a portrait sketch.
- Print on textured paper. Frame it. Simple and classy.
- For bigger prints, export and upscale as needed.
Start your first conversion now →
FAQ: everything you need to know before you click
-
Is this free?
Yes, you can use the Image to Sketch Converter online without a sign-up. It’s a fast way to try it and get results. -
How fast is it?
In my tests, most sketches render in about 5–10 seconds after upload. -
Will it work on my phone?
Yes. It runs in the browser on desktop and mobile. I did runs on both and saw consistent results. -
What about privacy?
Pixelfox processes your images locally on your device. Your photos remain private. -
Does it handle batches?
Yes. Click Batch Processing and drop multiple files. It saves tons of time for shops and classrooms. -
What photos work best?
Clear, well-lit photos with simple backgrounds. For portraits, aim for head and shoulders. For pets, focus on the eyes. For scenes, look for bold shapes. -
Can I use the sketches commercially?
Many creators use the outputs for social posts, websites, and printed goods. If you have special licensing needs, open the support panel in the editor and ask. The team can help. -
What file format should I download?
Use JPG for social and web. Use PNG for design work or when you need cleaner edges for layout. Keep a copy of the original too. -
My result feels too “filter-y.” How do I fix that?
Remove background clutter with Inpainting. Use a higher quality input image. And try a different light direction. You’ll see more natural line flow. -
Can I switch from pencil to ink style later?
Yes. Run your sketch through Style Transfer for an ink, charcoal, or graphic look.
Upload Image and get your sketch →
A quick recap and your next step
You saw how to use an image to drawing AI to turn any photo into a natural, hand-drawn sketch in seconds. You saw the 3 steps. You learned how to clean a photo, how to change the mood with style transfer, and how to color-match for your brand. You can do this for portraits, pets, landscapes, products, and classroom pages. You can do it on your phone or laptop. You don’t need to sign up or learn heavy software.
Now it’s your turn. Take a photo you love. Drop it in. Watch it become art.
Start converting your images to drawings now → Pixelfox Image to Sketch Converter
Extra: why this works for teams and classrooms
- Creators and social managers need speed. You can produce a full set of profile pictures, thumbnails, or story frames in one sitting. The look stays consistent across assets.
- Non-designer marketers and SMBs need clean assets without a long learning curve. You get on-brand sketches fast, with a simple web tool.
- Teachers and students need safe, simple tools that work on school devices. The privacy-first design helps. The results are printable and easy to color.
- Photographers and gift makers want quality and soul. This method keeps hair, fur, fabric, and skin tones readable. The lines don’t scream “cheap filter.”
- Etsy sellers and crafters often need many files at once. Batch conversion cuts the time and reduces cost. Results export cleanly for stickers, tees, and wall prints.
- Designers and illustrators want fast line bases for paint-overs. This gives you a clean starting point you can iterate on and finish by hand.
If that sounds like your day, this tool can be your new go-to.
Bonus: small technical notes for quality-minded users
- Light matters. Side light creates form. Front flash flattens it. The AI reads that form and turns it into true linework.
- Edges matter. Busy backgrounds add extra lines. Clean backgrounds let the subject shine.
- Resolution helps. Bigger input files keep curves smooth and features sharp. Avoid compressed screenshots.
- Keep a consistent process. Use the same crop ratio and light direction for a series. Your set will feel like one hand drew it.
- Save your variants. Keep both the raw sketch and your stylized version. You will use both.
This is the simple, reliable path to a real pencil look. And it is fast.
If you want a different vibe, you can always switch the style later. If you want a cleaner input, you can remove clutter first. If you want brand colors, you can recolor. You stay in one toolset, and you move fast.
Try Pixelfox Image to Sketch Converter →
Final word: ship more art in less time
Manual tracing drains your schedule. Random filters won’t pass for a real drawing. With the right image to drawing AI, you can get that hand-drawn look, keep the detail, and stay on deadline.
Now, go make something you’re proud of.