 Credit

Airbrush pro tools turn everyday portraits into clean, natural images. They remove small flaws, smooth skin, and polish color. They work on phones and desktops. They run fast. They feel simple. Yet they can still give pro results when you use them with care. In this guide, I break down how an airbrush app works, what “airbrush pro” features matter, and how you can build a clean, repeatable workflow. I also show how Pixelfox AI fits in as a flexible online companion. If you retouch portraits for social posts, e‑commerce, or client work, this will save you time and make your edits look more real.
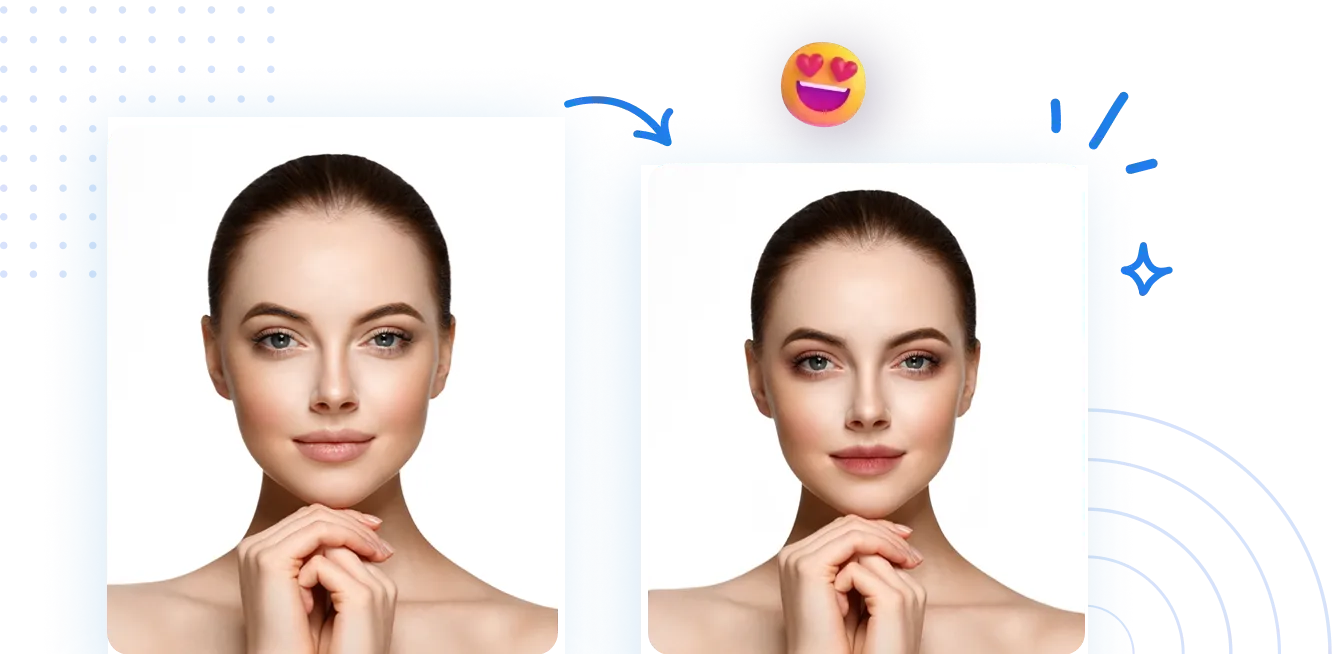
Many users ask the same thing first. How do I avoid plastic skin? The answer is simple. Use light settings. Work on one feature at a time. Check details at 100% zoom. Keep texture. Keep tone. Keep shape. The goal is not to hide the person. The goal is to show the best version of the person. That is where an airbrush application shines.
I write this with hands‑on practice and with research in mind. For technique basics, Adobe’s portrait retouching guide is a reliable reference for non‑destructive edits and natural results: https://helpx.adobe.com/photoshop/how-to/portrait-retouching.html. For fairness and skin tone accuracy, Google’s Real Tone project gives helpful insight and data: https://ai.googleblog.com/2021/10/real-tone-making-camera-phones-work-more.html. For AI building blocks, see the original GAN paper by Goodfellow et al.: https://arxiv.org/abs/1406.2661 and the MTCNN face detection paper: https://arxiv.org/abs/1604.02878. For an overview of denoising, the BM3D method remains a strong baseline: https://en.wikipedia.org/wiki/Block-matching_and_3D_filtering. For ethics in imaging, the NPPA code offers a clear standard: https://nppa.org/code-ethics. I will point to these ideas where they help.
What “airbrush pro” means in a modern workflow
Airbrush pro now means more than blur. Old tools often smeared skin and lost detail. New tools detect faces, edges, and hair. They keep pores and tiny strands. They blend changes into light and color. So the edit looks real.
Most users meet “airbrush pro” in two forms:
- A paid tier inside a mobile airbrush app that unlocks extra tools.
- A desktop or web airbrush application that focuses on high‑resolution edits and export.
Core ideas stay the same:
- Quick tools for acne, dark circles, stray hairs, and shine.
- Smoothing with texture protection.
- Teeth and eye brightening.
- Color and exposure control tuned for skin.
- Background cleanup and depth blur.
- Shape tools with limits to avoid warping.
The best tools respect the original face. They add light where needed. They lower distractions. They hold detail. They avoid the “plastic” look.
Who needs an airbrush app and why
- Content creators need speed. They post daily. They want a clean face in minutes.
- E‑commerce sellers need consistency. They want skin tone to match across a set of product shots.
- Portrait photographers need control. They care about texture, tone, and shape.
- Social media managers need safe defaults. They need edits that meet brand rules and do not mislead.
In each case, airbrush pro tools help because they standardize the job. They give a simple set of steps you can repeat. They save time. They let you scale.
Key features to look for in any airbrush application
You do not need every feature. You need the right features that map to your work. Look for the following.
- Skin smoothing that preserves pores
- The tool should keep micro‑detail. It should soften only mid‑frequency texture. It should avoid flat areas on cheeks and forehead.
- Blemish and spot removal with edge awareness
- A healing or inpainting tool should match nearby skin tone and grain. It should not smear edges of lips, eyes, or brows.
- Color control made for skin
- White balance should be easy. Tint and temperature should not shift skin to gray or orange. HSL tools should respect natural tone.
- Eye, teeth, and lip tools
- Brighten eyes a bit. Whiten teeth a bit. Enhance lips with restraint. Avoid high contrast halos.
- Shape tools with limits
- Small changes are fine. Big changes often look fake. The tool should prevent extreme warps and should keep symmetry.
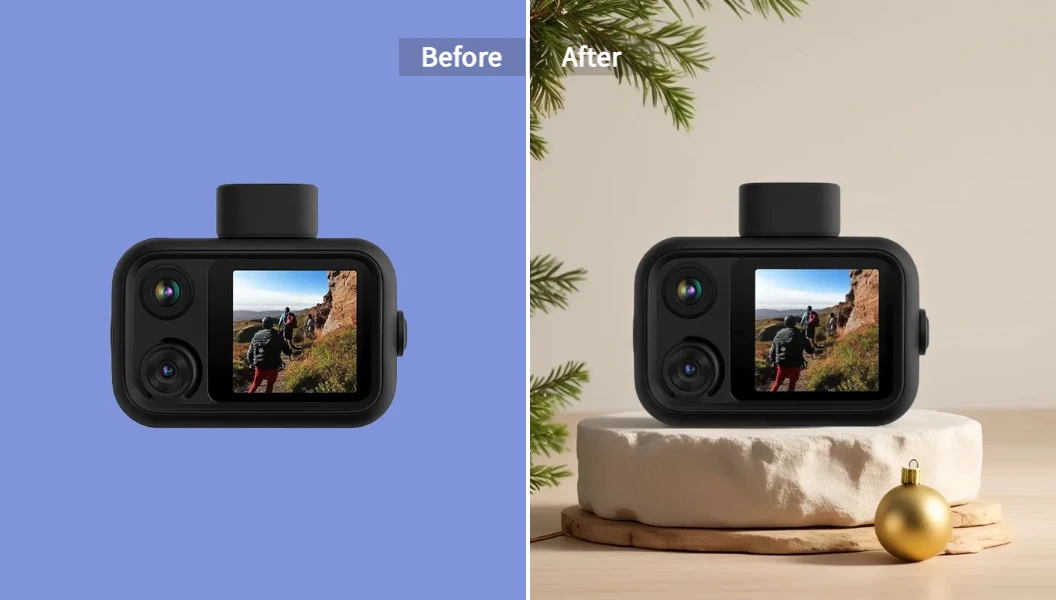
- Background cleanup
- You should be able to blur or replace a busy scene. If you need pro‑level swaps, try an AI Background Generator to build clean, studio‑style scenes in seconds.
- Compositing and creative blends
- Merging two frames or overlaying light effects can add style. If you need this often, an AI Image Blender can speed the job and keep edges smooth.
- Restoration for old portraits
- When you handle family archives or heritage portraits, a fast Photo Colorizer can add color and fix age damage without deep manual work.
- Batch and export
- You need high‑resolution export, clear file naming, and color‑accurate output. Batch tools help when you deliver sets at once.
- Privacy and device support
- A good airbrush app should work on major phones and browsers. It should handle images locally or on secure servers. It should allow you to remove data if needed.
A step‑by‑step retouching workflow (airbrush pro or similar)
The steps below work with most tools. They help you keep a clean look and a quick pace.
1) Start with a solid source
Shoot with soft light. Use a large window or a softbox. Turn the subject slightly. Keep ISO low for clean files. Good input lowers the need for heavy edits. For color accuracy, stick with standard color spaces like sRGB when you publish to the web (see W3C overview: https://www.w3.org/Graphics/Color/sRGB).
2) Duplicate your layer or save a version
Work non‑destructively if your airbrush application supports layers. If not, save a copy first. This lets you roll back.
3) Normalize exposure and white balance
Set exposure so skin midtones sit in a healthy range. Fix white balance. Remove color cast from mixed light. You want a neutral base before you fix skin.
4) Remove small distractions
Use a spot heal or inpaint tool at low strength. Tap or brush over pimples, small scars, lint, or stray hairs. Do not remove natural marks that define the person unless requested. A little restraint builds trust (see NPPA ethics: https://nppa.org/code-ethics).
5) Smooth skin while keeping texture
Use your airbrush pro smoothing tool with light settings. Work on cheeks, forehead, and neck. Avoid lips, eyes, brows, and hair. Zoom to 100%. Make quick strokes. Stop early. If your tool supports masks, paint on a mask and refine edges. This mirrors pro techniques like frequency separation in desktop tools (see Adobe guide: https://helpx.adobe.com/photoshop/how-to/portrait-retouching.html).
6) Dodge and burn for shape
Add light to shadowed areas under eyes and beside the nose. Lower light where hot spots blow out. Small moves add depth. They keep the face real. Aim for balance, not drama.
7) Enhance eyes, teeth, and lips with care
Lift iris clarity a bit. Reduce red veins if your tool allows. Whiten teeth slightly. Add a touch of color to lips. Keep changes subtle. The goal is “well‑rested,” not “retouched.”
8) Even skin tone
Use HSL sliders or a targeted hue tool to tame redness or blotchy patches. Make small moves. Watch for halos along edges.
9) Clean the background
Use a blur or cleanup tool to remove clutter. If the scene hurts the subject, replace it with a simple set. When you need speed, build a new set with an AI scene tool before or after retouching, as shown by the AI Background Generator.
10) Final color and contrast
Apply a gentle S‑curve. Protect highlights. Watch saturation. Skin should not look gray or over‑orange. Keep tone inclusive. Google’s Real Tone research offers helpful framing here: https://ai.googleblog.com/2021/10/real-tone-making-camera-phones-work-more.html.
11) Sharpen last and export
Sharpen only once, after you resize for the final output. Export sRGB JPEG for web or a higher‑bit format if the client needs print. Keep metadata when clients require it.
This workflow is simple on purpose. You can run it fast on a phone. You can expand it on desktop. The order keeps your edits clean and light.
How “airbrush pro” tools use AI under the hood
You do not need to code to use these tools. Yet it helps to know what happens in the background. It helps you pick the right settings and read the result.
-
Face detection and landmarks
Modern airbrush apps detect faces and eyes in a frame. A common approach is to predict facial landmarks and then fit tools around them. A well‑known method is MTCNN (Zhang et al., 2016): https://arxiv.org/abs/1604.02878. This is why eye brightening does not spill onto brows or hair. -
Denoising and texture preservation
Good skin smoothing does not just blur. It separates noise from texture. BM3D is a classic denoising method that shows how to keep structure while cutting noise: https://en.wikipedia.org/wiki/Block-matching_and_3D_filtering. Newer neural models can push detail further but should be tuned to avoid waxy skin. -
Inpainting for spot removal
When you tap a blemish, the tool fills the area with nearby content. Generative methods like GANs (Goodfellow et al., 2014: https://arxiv.org/abs/1406.2661) help synthesize missing pixels. They try to match grain and color so the patch blends. -
Segmentation for background work
Apps segment the subject from the scene. This lets you blur the background or swap it. A clean mask is key. Edge awareness stops halos around hair.
When you understand these pieces, you can trust the tool. You also know when to dial back. If the mask looks off, fix the edge. If denoise looks too strong, reduce the strength.
Practical settings and guardrails for natural results
-
Work at low strength
Start at 10–25% for smoothing. Add a second pass only if needed. Two light passes beat one heavy pass. -
Protect edges
Do not smooth eyes, lashes, brows, lips, or hair. Mask them out. Texture matters there. -
Keep shape real
Use reshape tools only for tiny fixes. Fix lens distortion first. Stop if you see warps in the background. -
Respect diversity in skin tones
Use white balance and tint carefully. Calibrate your screen when possible. Test on different devices. Real Tone research highlights the need for inclusive processing: https://ai.googleblog.com/2021/10/real-tone-making-camera-phones-work-more.html. -
Match output to use
For Instagram feeds, sharpen after resizing to 1080 or 1350 pixels on the short edge. For print, export at higher resolution and avoid heavy compression. Stay in sRGB for web unless you control the full display pipeline (W3C sRGB: https://www.w3.org/Graphics/Color/sRGB).
Where Pixelfox AI fits with your airbrush pro stack
Many creators mix tools. They retouch in an airbrush app, then handle background, composites, or restoration with a web tool. Pixelfox AI was built for that second step. It keeps the workflow light and clear.
-
Batch processing
When you need to update a set of portraits, batch saves time. You can run the same changes on many images in one session. -
High‑resolution output
You can export clean, high‑res images for web and print. The output keeps sharpness and color. -
Simple interface
You can pick a tool and get to work fast. The UI stays clear even if you are new to editing. -
Customizable brush
When you fine‑tune edges, you can set brush size and softness. This gives you pixel‑level control. -
Creative extras
You can build scenes with the AI Background Generator. You can merge frames with the AI Image Blender. You can revive heritage images with the Photo Colorizer. These tools help you keep a clean look without heavy manual work.

Airbrush app vs. airbrush application on desktop or web
-
Mobile airbrush app
You tap, you swipe, you export. This is fast and handy. It is great for same‑day posts and stories. It is fine for simple client previews. -
Desktop or web airbrush application
You get larger previews, finer masks, and better color control. You can manage a folder of images, not just one shot. This is better for delivery and print.
Most teams use both. They do a first pass on the phone. They finish sets on the web or desktop. This split balances speed with control.
A field‑tested checklist for portrait retouching
Use this checklist for each image. It keeps you honest and fast.
- Exposure balanced? Highlights safe? Shadows not crushed?
- White balance neutral? Skin not too green or magenta?
- Major distractions removed? No obvious cloning repeats?
- Skin smooth but textured? Pores still visible?
- Eyes clean but not glowing? Teeth white but not blue?
- Lips even but not oversaturated?
- Background quiet? Subject separated?
- Color consistent across the set?
- Sharpened after resize? No halos?
- Exported in the right format and color space?
Run this list in one minute. You will catch most mistakes.
Ethical and realistic retouching
People trust images when edits feel honest. Small, careful changes work best. The NPPA code reminds us to avoid misleading edits: https://nppa.org/code-ethics. In portraits that means:
- Do not alter a person’s identity.
- Do not invent or remove key features.
- Do not change skin tone in ways that erase identity.
- Do not bend shapes beyond what the lens might do.
These points also align with Google’s focus on fair skin rendering in Real Tone: https://ai.googleblog.com/2021/10/real-tone-making-camera-phones-work-more.html. You can enhance without masking who someone is.
Troubleshooting common problems in airbrush pro workflows
-
The skin looks plastic
Dial down smoothing. Add grain to the skin layer. Bring back micro‑texture with a gentle clarity or texture tool. -
The patch looks obvious
Sample a larger area when you heal. Work along the direction of natural skin lines. Lower the opacity of the patch. -
The background mask shows halos
Feather the mask edge slightly. Nudge the edge inward by a pixel or two. Check hair areas at 200% zoom. -
Teeth look blue
Reduce saturation after whitening. Warm the highlights a bit to match real enamel. -
Eyes look too sharp
Lower clarity around the iris. Keep a small catchlight, not a laser glow. -
Color shifts when you export
Confirm sRGB export for web. Do a test upload. Compare on two devices.
Performance and device notes
Airbrush pro tools must feel fast. If you work on a phone:
- Close other heavy apps before editing.
- Use original files, not screenshots.
- Work with stable light to avoid fluctuating exposure in auto previews.
If you work on web:
- Use a modern browser.
- Check GPU acceleration in settings.
- Keep uploads under size limits or use batch processing to split the job.
These small steps keep the session smooth.
FAQs about airbrush pro, airbrush app, and airbrush application
-
Is an airbrush app enough for client work?
Yes for social and quick turnarounds. For print or large campaigns, pair it with a web or desktop airbrush application for color checks and high‑res output. -
How strong should skin smoothing be?
Start very low. Stop as soon as the main distractions are gone. Keep pores. If you need more, add a second light pass. -
Can I use these tools on male portraits or mature skin?
Yes. Use lighter smoothing. Focus on color balance and small light moves. Avoid heavy eye or lip effects unless the brief asks for them. -
What file format should I export?
JPEG (sRGB) for web. PNG when you need transparency. TIFF or high‑quality JPEG for print, depending on the lab or client. -
How do I keep edits consistent across a set?
Save presets or note your settings. Use batch tools when possible. Match white balance and exposure first, then retouch. -
Are AI edits safe for privacy?
Use tools with clear privacy policies. Avoid uploading sensitive images to unknown servers. Delete files from online tools when you finish. -
Can AI fix very low‑light, noisy portraits?
It can help. Use denoise first, then retouch. Keep an eye on texture so faces do not look waxy. See ideas like BM3D for the trade‑off between noise and detail: https://en.wikipedia.org/wiki/Block-matching_and_3D_filtering.
Final thoughts and next steps
Airbrush pro tools are at their best when you keep things simple. Fix small distractions. Keep texture. Balance light. Respect tone. Use an airbrush app for speed and a web airbrush application for control. Mix them where it helps. If you need scenes, blends, or restoration to round out a project, Pixelfox AI gives you those pieces with fast, clean results and high‑resolution output. Try a few edits this week. Save a preset. Time your workflow. See how much faster your delivery gets. And keep the person in the photo at the center of every choice. That is how you get honest, polished work with airbrush pro.