 Credit

A double chin is one of the most common issues people have when they look at their portraits. Whether it’s the result of bad lighting, the wrong angle, or a slouch, it can ruin a picture-perfect photo. You don’t need to worry, though, as there are now tools and apps designed specifically to take away the double chin from your photos in no time and in a natural way.
If you’re looking to remove a double chin from photos for a professional headshot, online dating profile, personal brand, or the likes, the best double chin eliminator could prove to be a lifesaver. As far as dependability, velocity, and simplicity of usage go, PixelFox is the star.
There are many reasons why you would want to use an app for removing a double chin.
Why Use an App That Removes Double Chin?
Who doesn’t want to look their best in pictures? But occasionally, certain angles or lighting will highlight areas we’re not exactly pleased with, like a soft jawline or slight neck bulge. That’s where a double chin removal app can be useful.
These are AI-driven tools that make it possible to soften and reshape the jaw and chin in seconds, at the same time that natural details remain on the face. No manual editing, no long photo imports, no complex Photoshop. That’s how easy it is to use this app.
Advantages of Using the Double Chin Remover App:
Instant jawline enhancement
Understated chin augmentation for a natural result
No professional photo editing skills required
Browser-based, no downloads required
Best for selfies, group shots, and head shots
Whether you’re just prepping a new profile pic or running social for a small business, the ability to get rid of a double chin in photos can elevate your image.
How does a double chin picture remover work?
Popular apps to remove a double chin function through artificial intelligence and facial recognition, which recognize the jaw and chin region. The tool then makes targeted adjustments to smooth, tighten, and contour the area without the photo appearing over-edited.
Common features include:
Facial landmark detection: detects key points like looking round, the chin, the jaw, and the neck
Sculpt tools: Light re-shaping to shorten the fat and decrease puffiness or sagging
Skin smooth: Removes shadows and softens the skin to make the skin look cleaner
Angle correction: Elevates or straightens the chin line just a little to make it even
The best part? You can do all of this in seconds, from your phone or browser.
PixelFox – The Best Double Chin Removal App
Among these tools, PixelFox is one of the top instant apps you can use to get rid of a double chin from photos online. This smart, AI-powered tool enables fast and easy facial editing, with no design skills necessary.
Why Choose PixelFox:
AI-powered chin reshaping and contouring
Natural results without over-editing
Works in your browser, no downloads necessary
Simply upload any picture and evaluate the first results in less than a second
Great for portraits, selfies, corporate parties, and more portraits
If you are looking for the best app to remove a double chin, PixelFox doesn’t compromise the authenticity of the face, and the result is quite realistic.
When You Should Use a Double Chin Picture Remover
Learning how to get rid of a double chin in a photo can be a game-changer for many situations. There’s no shortage of reasons you might want clean, confident portraits; you don’t have to be a celebrity or influencer.
Ideal situations include:
LinkedIn and resume headshots
Online dating profile photos
Social media posts
Family and vacation albums
Business and branding content
Little angles shouldn’t make you lose your shape. It’s these tools that allow you to be your best self, without much effort.
Natural Ways to Get Rid of a Double Chin
Removing a double chin by app is simple, but to create a result that looks as real as possible, we need several best practices:
Use high-resolution images
Steer clear of drastic changes, less is more
Select front-facing, well-lit photos for optimal recognition
Preview before saving to keep the original facial curve
Pair with skin tone correction or lighting tools for ideal results
There is a delicate approach, and less is always more when it comes to photo retouching.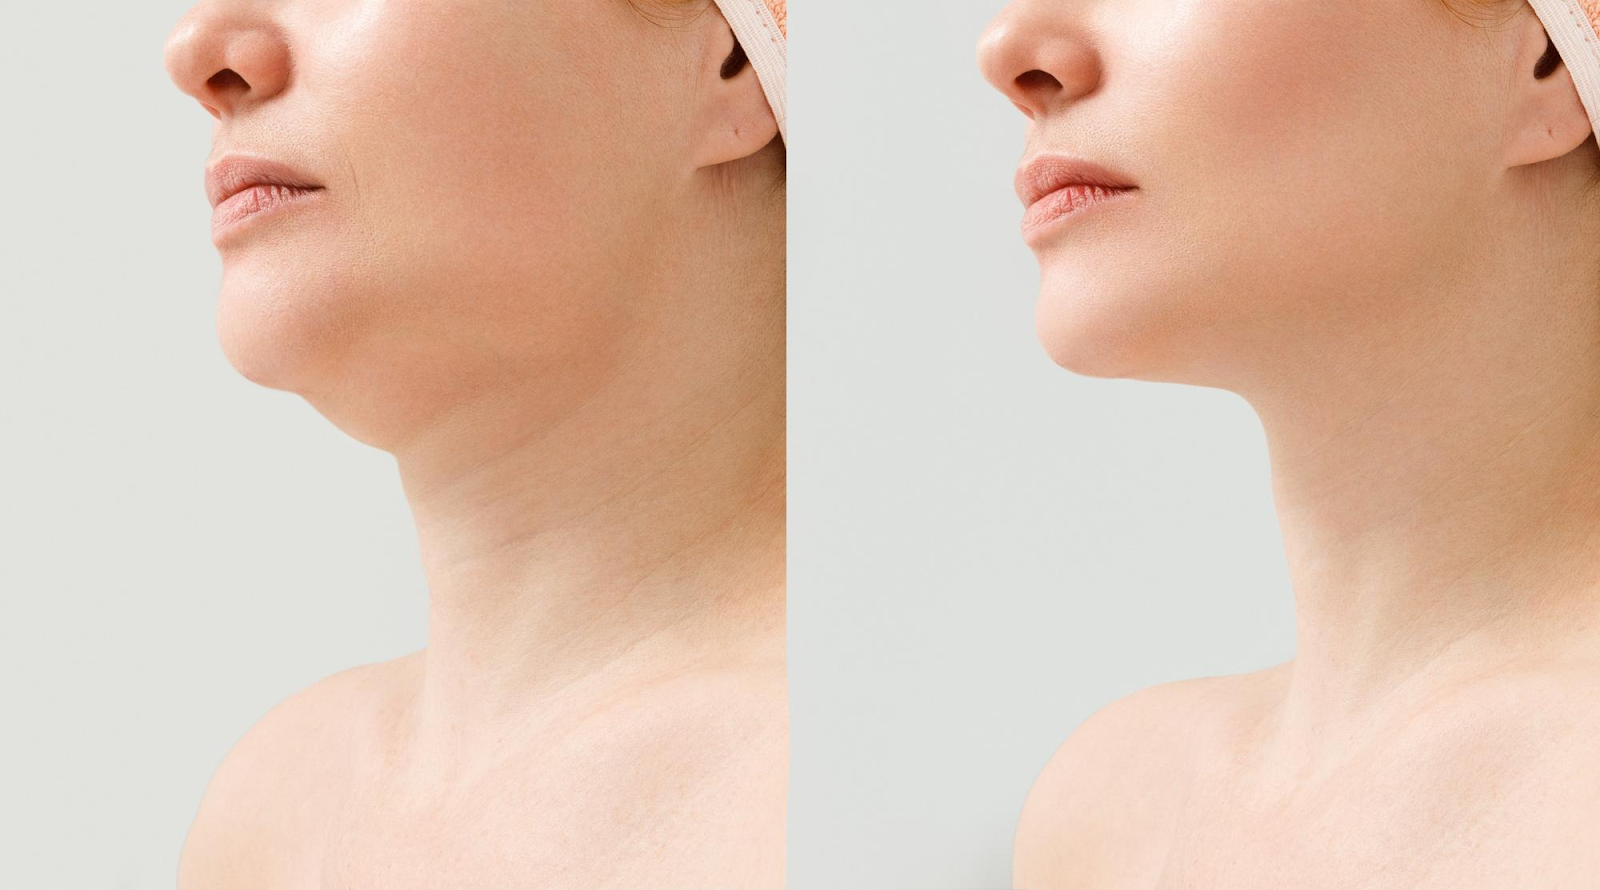
Complementing Tools to Chin Editing
Although double chin apps are great in their own right, combining them with other editing tools gives a polished, professional finish. Find apps that also have:
Skin smoothing
Eye brightening
Teeth whitening
Background blurring
Lighting and contrast correction
PixelFox gives you all of this and more in one place, streamlining your workflow and delivering studio-quality results from your browser.
Final Thoughts
Whether you are taking your next headshot or finally updating your dating profile, a double chin can occasionally detract from your best features. The good news? And to fix it, you don’t need fancy editing software or professional photographers.
PixelFox helps you emphasize your own natural beauty with an AI-powered double chin removal app so you can make intelligent, subtle corrections without looking like you have computer-generated work done, all in a snap! Here’s how to lose a double chin in photos and become your own master of online image with tools that serve you.