 Credit

Suggested URL: /photo-enhancer-app-2026
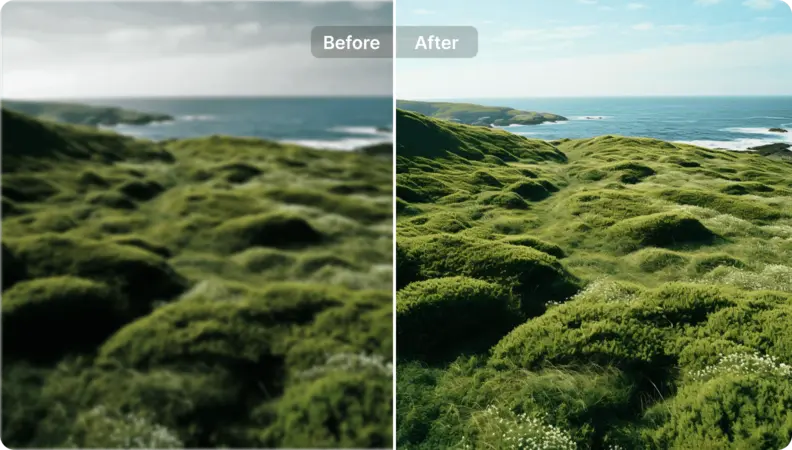
Blurry selfie. Old family photo that looks like it was shot through a potato. Product pic that screams “I took this in my basement at 2 a.m.” A solid photo enhancer app can fix most of that in minutes—without you learning Photoshop shortcuts like it’s a part-time job. This guide breaks down what actually works in 2026, what “free” really means, and why I keep coming back to Pixelfox AI when I just want clean, natural results (and not a surprise subscription charge 😅).
What a photo enhancer app really does (and what it can’t)
A modern AI photo enhancer is usually doing some combo of these:
- Denoise: removes grain from low-light shots and old scans.
- Sharpen / deblur: tries to rebuild edges that got smeared by motion or focus issues.
- Upscale: increases resolution by “inventing” pixels that weren’t there.
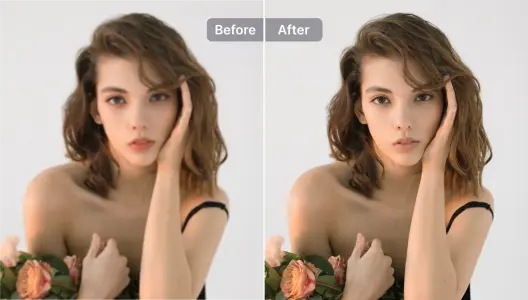
- Face restoration: focuses detail on eyes, skin texture, hair, beards.
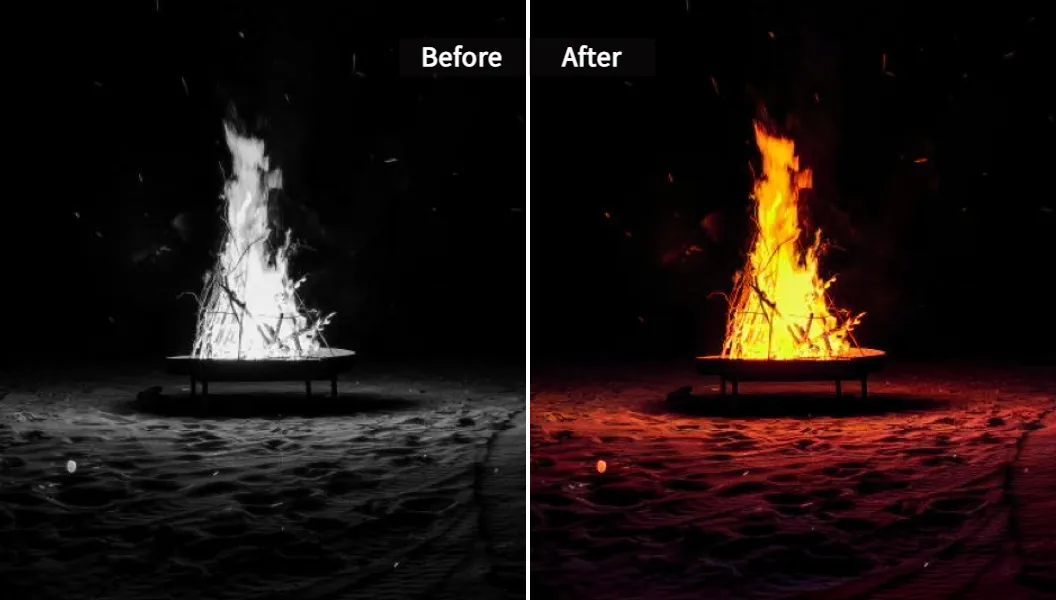
- Color correction: fixes weird lighting, contrast, and washed-out tones.
- Colorize (optional): adds color to black-and-white photos.
Now the part most listicles conveniently skip: AI enhancement is still a guessing game. If the input is super low-res, AI will “hallucinate” details. Sometimes it’s a good guess. Sometimes it gives your grandpa brand-new eyes that he never owned. That’s why tool choice matters, and why you need a quick way to sanity-check results.
According to Nielsen Norman Group’s UX research, people judge credibility fast and visuals play a big role in that split-second trust decision. Translation: blurry, messy images don’t just look bad—they can make people doubt you (your post, your listing, your brand, your whole vibe).
Why your photos look bad in the first place (it’s not just “low quality”)
Most “bad photos” fall into a few boring (but fixable) buckets:
- Motion blur: hands shake, subject moves, shutter is slow.
- Digital zoom: phones crop hard, then smear details.
- Compression: screenshots, WhatsApp, old social uploads = pixel soup.
- Low light: noise goes up, detail goes down.
- Old scans: dust, scratches, faded tones, low DPI scans.
A good app needs to handle your bucket. A portrait-focused enhancer can crush face detail but destroy text on packaging. Some tools brighten everything and call it “enhanced.” Congrats, you now have a clearer photo… that’s also weirdly whitewashed. 🙃
What to look for in a photo enhancer app in 2026
Here’s the buying checklist I use (and yes, it’s the stuff people complain about in reviews):
1) Natural results (no “AI beauty filter face” unless you want it)
Some apps over-smooth skin or “beautify” by default. Great for influencer aesthetics. Terrible for restoring family photos where accuracy matters.
2) Strong denoise + upscale that doesn’t turn detail into paint
If your result looks like plastic, the model is overdoing it.
3) Control that matches your skill level
One-tap is fine. But you still want basic choices like:
- do I enhance the whole image or mainly faces?
- do I keep original colors or boost them?
4) Free plan limits: ads, watermarks, daily caps
A free photo enhancer app is often “free” the way airport Wi‑Fi is free. You pay with your time, your patience, and your sanity.
5) Privacy and data handling (seriously)
If you’re enhancing family photos or client work, you should care about where images go. App store “privacy labels” are a good starting point, but still read the fine print.
Tip: If a tool is cloud-based, treat it like uploading to the internet (because you are). If you wouldn’t email that photo to a stranger, don’t casually upload it to a random enhancer with sketchy policies.
My testing checklist (so you can judge apps like a pro)
When I compare a photo enhancer app, I use the same set of “stress photos”:
- Portrait close-up: checks eyes, skin texture, hair edges
- Group photo: checks if faces become inconsistent or “same-y”
- Text + product label: checks if letters turn into gibberish
- Low-light image: checks noise removal without muddy shadows
- Old scan: checks dust/scratch handling and tone recovery
Then I score these:
- Detail realism (does it look believable?)
- Artifact control (haloing, crunchy edges, weird teeth)
- Color accuracy (skin tones stay human)
- Speed + usability (no one wants to wait forever)
- Free experience (ads, locks, watermarks, export limits)
My top picks: best photo enhancer app options for 2026
Quick note: “best” depends on what you’re fixing. So I’m ranking by real-life usefulness, not hype.
| App / Tool | Best for | Platforms | Free tier vibe | My take |
|---|---|---|---|---|
| Pixelfox AI | Clean, natural enhancement + watermark-free exports | Web | Actually usable | Best balance of quality + simplicity |
| Remini | Face detail pop (portraits) | iOS/Android/Web | Ad-heavy + paywalls | Powerful, but can overdo faces |
| YouCam Enhance | One-tap enhancement + creator features | iOS/Android/Web | Freemium | Strong all-in-one, some limits |
| PhotoGrid Image Enhancer | Quick online “free” enhancement | Web/App | Marketed as free | Good for basics, check consistency |
| Canva Image Enhancer | Design workflow + light enhancing | Web/App | Freemium | Best if you’re already designing |
| Pixelcut | Product/social content pipelines | iOS/Android/Web | Freemium | Handy for ecommerce creators |
| Lightroom (mobile) | More manual control | iOS/Android | Freemium | Great editor, less “magic restore” |
| Snapseed | Manual sharpening/structure | iOS/Android | Free | Not AI restore, but solid tuning |
| Topaz Photo AI | High-end desktop enhancement | Desktop | Paid | Best quality control, costs $$ |
| Upscayl (offline) | Local upscaling | Desktop | Free | Good privacy, needs tinkering |
Why Pixelfox AI is my “default” pick
If you want the short version: it hits the sweet spot. It’s fast, it’s online, it doesn’t bury exports behind a million popups, and it aims for natural HD instead of turning every face into a wax statue.
The core tool is the Pixelfox AI Image Enhancer. It’s built for the stuff people actually need:
- boost clarity and resolution
- reduce noise and compression artifacts
- improve contrast and colors
- export clean results without a watermark
- run batch enhancement when you have a stack of images
Privacy-wise, Pixelfox AI states your images are processed in real time and deleted from servers within 60 minutes, and it does not use uploads for model training. That’s the kind of direct policy language I like, because vague privacy promises are basically marketing confetti.
Remini (powerful, popular, and… a bit chaotic)
Remini is the big name for face enhancement. And yeah, it can make portraits look sharp in a way that feels like magic.
But you should know the trade-offs:
- Ads are intense on the free tier (users complain about multiple ads just to open, enhance, and save).
- Subscriptions can be pricey, and it’s often weekly pricing.
- Results can be hit-or-miss on older photos, and faces may change.
- App Store privacy labels note identifiers may be used for tracking (worth considering).
Still, it’s popular for a reason. As of the latest public listings, Remini sits around 4.6/5 on iOS (hundreds of thousands of ratings) and about 4.2/5 on Google Play (millions of reviews)—so lots of people use it, and lots of people also complain loudly when it annoys them. Fair.
Best free photo enhancer app picks (and what “free” really costs)
Let’s be blunt. “Free” usually means one of these:
1) You watch ads like it’s your second job
2) You get 3–5 exports per day
3) You get a watermark
4) You get the “meh” model unless you pay
If you want free + usable, prioritize:
- watermark-free downloads
- no forced “beauty” changes
- clear privacy policy
- predictable limits (or none)
Pixelfox AI leans into that “usable free” lane, which is why it keeps showing up in my workflow when I’m moving fast.
If you want more of a design suite, Canva is nice. If you want a simple online enhancer, PhotoGrid can work. Just remember: “free” tools often change rules fast, and ads tend to multiply like gremlins.
Step-by-step: enhance photos with Pixelfox AI (fast, clean, no drama)
You can do this in a couple minutes. No install. No steep learning curve.
1) Open Pixelfox AI in your browser
2) Upload your image to the enhancer
3) Run AI Enhance
4) Preview the result
5) Download the enhanced version (watermark-free)
That’s it. If you have a folder of product images or real estate photos, use batch processing so you don’t repeat the same clicks 40 times.
If you’re also working with old black-and-white images, pair enhancement with Pixelfox AI Photo Colorizer to bring back realistic color while keeping the restored detail.
Tip: Don’t enhance a screenshot of a screenshot if you can avoid it. Export the best original you can find, then enhance. AI can’t recover detail that got deleted three compressions ago (it will try, though).
Pro-level “plays” (stuff that makes you feel like you cheated 😎)
These are practical workflows I use when I need results that look professional, not just “less blurry.”
Play #1: E-commerce product photos that look studio-ready
Goal: make product detail crisp so buyers can zoom without seeing noise soup.
Workflow:
- Shoot near a window (soft light). Use 1x lens, no digital zoom.
- Enhance clarity and color using Pixelfox AI Image Enhancer.
- If you need a pure white background, drop the enhanced image into a design tool that supports background removal (Canva Pro, Photoshop, etc.), then place it on #FFFFFF white.
- Export at platform specs (Amazon, Shopify, Etsy all have different sweet spots).
Why it works: a cleaner base image makes every later edit easier. You’re not fighting blur while trying to design.
Play #2: YouTube thumbnails that don’t look “cheap”
Goal: sharp face + readable details on mobile.
Workflow:
- Enhance the portrait or key subject with Pixelfox AI first.
- Keep contrast realistic. Over-boosted contrast makes skin look rough.
- Design your thumbnail after enhancement so text edges stay crisp.
Little trick: if your thumbnail has a face, enhance the face photo before you add text. If you enhance after, some apps will warp text like it’s abstract art.
Play #3: Restore old family photos without changing the person
Goal: restore clarity while keeping identity.
Workflow:
- Use enhancement to lift detail and reduce noise.
- If the face starts looking “different,” dial back and run a softer pass.
- Colorize only if it helps the story (and the family agrees). Some people want original B&W forever, and they’re not wrong.
Real-world case studies (2 examples you can copy)
Case Study 1: A faded family photo turned into a gift print
A friend scanned a small, slightly blurry family photo from the late 90s. The scan had noise, flat contrast, and that classic “dusty gray” look.
What we did:
- Enhanced the scan to restore clarity and contrast in Pixelfox AI
- Checked faces at 100% zoom to make sure eyes and smiles stayed real
- Exported a higher-res file for printing
Result: it looked like a clean, well-lit photo instead of a sad scan. The key win was keeping faces natural, because “surprise new nose” is not a great gift.
Case Study 2: Small shop owner cleaning up product photos in batches
A small Etsy-style shop had product images that were inconsistent: some dark, some noisy, some slightly blurred. They didn’t need cinematic art. They needed “buyers can see what they’re getting.”
What we did:
- Ran batch enhancement to standardize clarity and color
- Picked one “reference” image style and matched the rest to it
- Used the enhanced set as the base for listings and promos
Result: the shop looked more consistent, and the listings felt more trustworthy. Forrester and Baymard Institute both regularly emphasize how much product presentation and imagery affect buyer confidence. You don’t need a stats PhD to feel that truth in your bones.
Common mistakes (and fixes) when using a photo enhancer app
New users make the same mistakes over and over. It’s almost comforting. Almost.
Mistake #1: Using the most aggressive setting and calling it “HD”
Fix: enhance for realism. If pores look like gravel, you went too far.
Mistake #2: Enhancing tiny faces from group photos
Fix: crop around the face first, enhance, then compare. AI needs pixels to work with.
Mistake #3: Expecting miracles from extreme blur
Fix: if the eyes are 6 pixels wide, AI is basically guessing. Use a softer enhancement and accept “better,” not “perfect.”
Mistake #4: Letting “beauty mode” change identity
Fix: pick tools that aim for restoration, not “glow-up.” Old photos are about memory, not trends.
Mistake #5: Ignoring privacy settings and upload policies
Fix: read the policy. Check app store privacy labels. If it feels vague, treat it as risky.
Mistake #6: Falling for “free” but paying with time (ads, locks)
Fix: if you need more than a couple images, skip the ad hamster wheel and use a tool with a clean free experience.
Mistake #7: Enhancing after adding text/logos
Fix: enhance the base photo first, then design.
How to avoid a free photo enhancer app backfiring
A “free” tool can cost you:
- time (ads that won’t close)
- quality (watermarks, low-tier models)
- privacy (unclear data handling)
Your best move is to pick a tool where the free tier still respects your time and your images.
Pixelfox AI vs Photoshop (old school vs modern speed)
Photoshop is powerful. It is also the gym membership of photo editing: amazing if you show up, useless if you don’t.
Photoshop wins when you need:
- precise manual control
- layered edits and compositing
- pro retouching at pixel level
A photo enhancer app wins when you need:
- speed
- simple workflow
- consistent enhancement for lots of photos
- “I just want this to look good” energy
Pixelfox AI sits in that sweet spot where you can get clean enhancement fast, then move into Photoshop only if you need heavy edits.
Pixelfox AI vs other online tools (Remini, Canva, PhotoGrid)
Here’s the honest vibe check:
- Remini: great face pop, but ads/paywalls can be brutal and faces can drift into “AI makeover.”
- Canva: great if you’re already designing, but enhancement is not always the star of the show.
- PhotoGrid: fast online enhancement, but “free” claims across the internet tend to change, so judge by today’s experience.
- Pixelfox AI: straightforward enhancement focus, watermark-free downloads, and a clear privacy stance.
Pixelfox AI also has a bigger toolkit if you’re working beyond still images:
- Pixelfox AI Video Enhancer for improving video quality
- AI Portrait Enhancer for videos & selfies if your content is face-heavy (creators, influencers, professionals)
And if you want the full suite in one place, start at Pixelfox AI and pick the tool that matches your job.
FAQ
How can I make a blurry photo clear with a photo enhancer app?
Use a tool that does denoise + deblur + upscale together. Upload the best original file you can find, enhance, then inspect eyes, hair edges, and text at 100% zoom before you export.
Why do some enhancers change faces?
Face restoration models sometimes “guess” missing detail. If the input face is too small or too blurry, the model fills gaps with patterns that may not match the real person.
Can I enhance photo quality for free without a watermark?
Yes, but a lot of apps hide that behind limits. Pixelfox AI is built around watermark-free downloads, so you don’t finish the job and then get slapped with a giant logo like a prank.
What’s the difference between a photo enhancer app and Photoshop?
Enhancer apps automate restoration and upscaling with AI. Photoshop gives deep manual control but takes time and skill. Many people use an enhancer first, then Photoshop only for detailed edits.
Can AI really restore old photos accurately?
It can restore a lot, but it’s not time travel. If parts are missing or super blurry, AI has to guess. The goal is usually “cleaner and clearer,” not “perfect historical reconstruction.”
The part where you stop reading and actually fix your photos 😄
If you want one tool to start with, use Pixelfox AI. It’s the most painless way I’ve found to get sharper, cleaner, more natural results without drowning in ads, settings, or subscription popups. Try the Pixelfox AI Image Enhancer on a photo you care about, zoom in, and judge it like a skeptic. That’s the right energy. When you’re done, you’ll have a photo enhancer app workflow you can trust—and you won’t need to sacrifice your weekend to it.