 Credit

Knowing how to edit a picture to look professional is what separates a quick snap from a stunning photograph. You can have a great camera, but the real magic often happens during the editing process. Many photographers find themselves struggling with editing photos from camera, unsure of how to turn a good-but-flat image into something that truly pops. It’s not about creating something fake. It’s about enhancing the reality you captured and guiding the viewer’s eye. This guide breaks down the professional photo editing workflow into seven clear steps, showing you the best way to edit photos and elevate your work.
Before You Edit: The Foundation of a Professional Photo
Great editing starts long before you open your software. A professional look is built on a solid foundation. If you get these first few steps right, the rest of the process becomes much easier and more effective.
Start with a High-Quality File (RAW vs. JPG)
The very first step to editing like a pro is to shoot in RAW format. Think of a JPG as a printed cake—it’s finished, and you can’t change the ingredients. A RAW file is like having all the raw ingredients for the cake. You have complete control.
A RAW file captures all the image data recorded by the camera's sensor. A JPG, on the other hand, is a compressed file. The camera makes permanent decisions about white balance, sharpening, and color for you. This severely limits your editing potential. As the experts at REI point out in their photography guides, shooting in RAW gives you the greatest editing control, especially for adjusting exposure and recovering details in shadows and highlights. For anyone serious about how to edit photography photos, shooting in RAW is non-negotiable.
Organize and Cull Your Photos
A professional workflow is an organized one. After a shoot, you might have hundreds or even thousands of images. It’s a huge mistake to try and edit all of them. Professional wedding photographer Paul Waring emphasizes that culling—the process of selecting only the very best photos—is a critical step that saves hours of time.
Go through your images and be ruthless. Look for shots that are technically sound (in focus, well-composed) and emotionally impactful. You can use software like Adobe Lightroom to flag or rate your favorites. For a faster process, dedicated culling programs like Photo Mechanic are popular among pros because they handle large numbers of files without lagging. This curation process ensures you only spend your valuable time polishing your absolute best work.
Set Up Your Workspace
Your editing environment matters. Before you start, make sure your monitor is calibrated. A poorly calibrated screen can show colors and brightness levels that aren't accurate, leading you to make poor editing decisions. You don't need expensive gear to start, but ensuring your screen shows true-to-life color is a big step. Also, keep your digital workspace tidy. A logical folder structure (e.g., by date or client) will save you headaches later and help you find images quickly.
The 7-Step Professional Editing Workflow
Once your foundation is set, it's time to begin editing. The key to consistency is to follow a structured workflow. Do these steps in order for the best results. This is how do you edit pictures in a methodical, repeatable way.
Step 1: Crop and Straighten for Stronger Composition
The first adjustment should always be to the composition. A great edit can't save a poorly composed photo.
- Straighten the Horizon: A crooked horizon is one of the most common and distracting mistakes in photography. Almost every editing program has a straighten tool. Use it to make sure your horizontal and vertical lines are straight. It's a small fix that instantly makes an image look more professional.
- Crop for Impact: Cropping helps you refine your composition. You can use it to remove distracting elements from the edges of the frame or to bring the focus closer to your subject. Apply compositional rules like the rule of thirds to guide your crop. This is a simple trick for how to make your pictures look better without any complex adjustments.
Step 2: Correct White Balance for Accurate Colors
White balance controls the overall color tone of your image. Photos taken in different lighting conditions can have a color cast—daylight can be blue, indoor light can be yellow. Correcting this ensures that the whites in your photo are actually white, which makes all the other colors look natural and accurate.
Most editing software has a temperature slider (blue to yellow) and a tint slider (green to magenta). You can use an eyedropper tool to click on a neutral gray or white area in your photo to set the white balance automatically. Or, you can adjust the sliders manually until the colors look right to your eye. Getting this right is a fundamental step in how to edit pictures professionally.

Step 3: Adjust Exposure and Contrast (The Histogram is Your Friend)
This is where you control the brightness and darkness of your image. Instead of just relying on your eyes, learn to use the histogram. A histogram is a graph that shows the tonal range of your photo, from pure black on the left to pure white on theright.
- Exposure: This slider makes the entire image brighter or darker.
- Contrast: This increases the difference between the light and dark areas. A little contrast can make an image "pop."
- Highlights & Shadows: These sliders allow you to recover detail. If your sky is too bright, pull down the highlights. If your subject is in a dark shadow, lift the shadows.
- Whites & Blacks: These sliders set the true white point and true black point in your image. This helps to create a full tonal range and adds depth.
A histogram with a spike on the far left means you have "clipped" blacks (areas with no detail), and a spike on the far right means you have "clipped" whites (blown-out areas with no detail). A pro edit avoids clipping whenever possible, so use the histogram to make sure you’re preserving detail across the entire image.
Step 4: Refine Colors with HSL, Vibrance, and Saturation
After setting the overall tone, it's time to fine-tune the colors. This is where you can really start to develop your unique style.
- Vibrance vs. Saturation: These tools both increase color intensity, but they work differently. Saturation boosts every color equally, which can easily look unnatural and oversaturated. Vibrance is smarter; it primarily boosts the more muted colors and avoids over-saturating colors that are already strong, like skin tones. For a natural look, it’s often better to use Vibrance.
- The HSL Panel: HSL stands for Hue, Saturation, and Luminance. This panel is a powerhouse for professional color editing. It lets you adjust individual colors. For example, you can target just the blues and make the sky a deeper, richer blue without affecting the rest of the image. You can change the hue of the greens to give foliage a different feel, or adjust the luminance of the oranges to brighten skin tones. Mastering the HSL panel is a game-changer.
Step 5: Sharpen and Reduce Noise with Care
Sharpening adds crispness and definition to an image, while noise reduction cleans up distracting grain, especially in photos taken in low light. The key here is subtlety.
- Sharpening: Too much sharpening creates an unnatural "halo" effect around edges and makes the image look crunchy. A good technique is to use a masking slider while sharpening. This allows you to apply sharpening only to the edges and detailed areas of your photo, leaving smooth areas like skin or sky untouched.
- Noise Reduction: Digital noise looks like fine grain or colored speckles. Noise reduction tools smooth this out. Be careful not to apply too much, as it can soften the image and destroy fine details, giving it a plastic look. Apply just enough to reduce the most distracting noise.
Step 6: Make Local Adjustments and Retouch Minor Flaws
So far, all our edits have been "global"—they affect the entire image. The next step is to make "local" adjustments to specific parts of the photo. This is how you guide the viewer's eye and add a final layer of polish.
Tools like the Adjustment Brush, Radial Filter, and Graduated Filter in programs like Lightroom allow you to "paint" adjustments onto your image. You can use them to brighten a subject's face, darken the corners of the photo to create a natural vignette, or add warmth to a sunset.
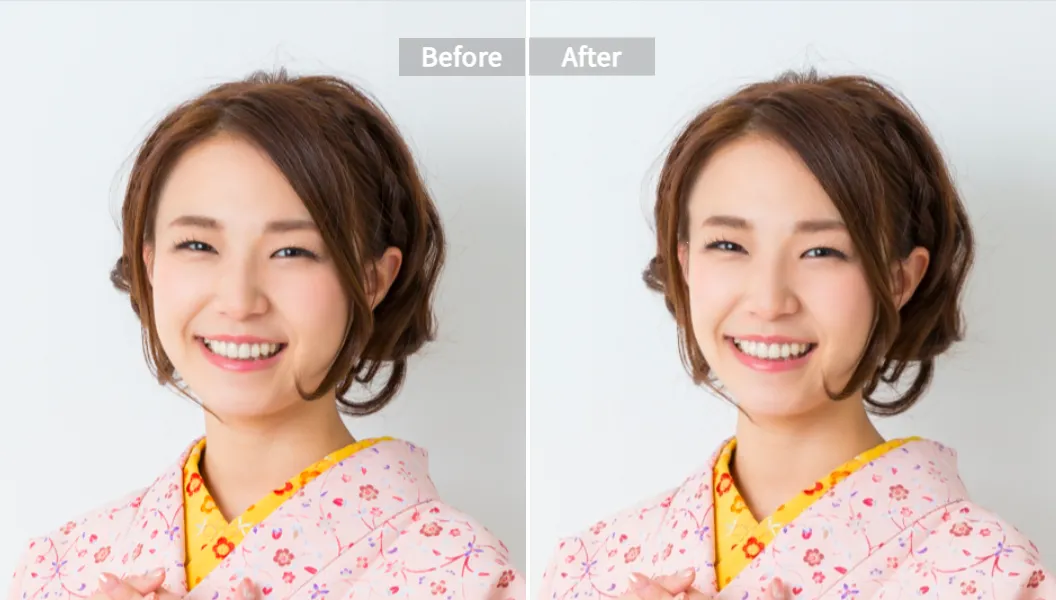
This is also the time to clean up minor distractions. Use a spot healing or clone tool to remove things like dust spots on your camera sensor, a stray piece of trash on the ground, or a small skin blemish. For portraits, more advanced skin work can be done. If you want to smooth skin or remove acne without spending hours, an AI Photo Retoucher can do this automatically while keeping a natural texture. Similarly, if you need to remove larger unwanted items or even people from a scene, modern tools make this easy.
Step 7: Apply Final Touches and Develop Your Style
The final step is about consistency and developing a signature look. This is what makes your work instantly recognizable.
- Presets and Styles: Many photographers use presets. However, a preset is not a one-click solution. As photographer Christina Greve says, a preset is "the cherry on top," not the whole cake. It should be a starting point that you fine-tune to fit each image. Over time, you can create your own presets based on your edits to maintain a consistent look across your portfolio.
- Study Other Photographers: A great way to learn is to analyze the work of photographers you admire. As photographer Sean Dalton suggests, break down their style. Look at their use of light (is it bright and airy or dark and moody?), color (is it warm or cool, saturated or desaturated?), and detail (is it sharp or soft?). Don't copy them, but use their work as a reference to understand what's possible and to train your eye.
The Modern Way: How to Edit Pictures Professionally with AI
The traditional editing workflow is powerful, but it can be time-consuming. Today, Artificial Intelligence (AI) is changing how to edit a picture to look professional by dramatically speeding up the process without sacrificing quality.
Streamline Your Workflow with AI-Powered Tools
AI tools can handle many of the repetitive and technical tasks involved in photo editing. This frees you up to focus on the creative decisions. Modern editors like Pixelfox AI can automate complex processes, turning hours of work into seconds.
One of the most exciting developments is text-based editing. Instead of fiddling with dozens of sliders and tools, you can simply tell the AI what you want to do. With AI Image Editing with Text Prompts, you can type commands like "make the sky a dramatic sunset," "add a vintage film look," or "remove the people in the background." The AI understands the context of your image—the lighting, shadows, and objects—and makes changes that look natural and seamless. This is truly the future of an efficient and creative workflow.
Balancing AI with Your Creative Vision
It’s important to remember that AI is an assistant, not a replacement for your artistic eye. As professional photographers who use AI will tell you, the final creative decisions should always be yours. Use AI to do the heavy lifting—the initial color corrections, the tedious masking, the complex object removal. Then, you can step in and make the final tweaks that reflect your personal style. This combination of AI efficiency and human creativity is the new best way to edit photos for the modern photographer.
Learning how to edit a picture to look professional is a journey, not a destination. It's a blend of technical skill and artistic vision. By following a structured workflow—starting with a quality RAW file, nailing the basics of composition and exposure, mastering color, and applying careful final touches—you build the skills needed to create consistently impressive images. And by embracing modern tools like Pixelfox AI, you can make that process faster and more creative than ever before. The key is to practice, experiment, and develop an eye for what makes a photo not just good, but great. Now, go open your editing software and start creating.