 Credit

Upscaling a low-resolution photo until it looks sharp on a 4K screen used to be a job for trained retouchers like me. Today, thanks to deep-learning models, anyone can lift the clarity of an image with a few clicks. In this guide I will share, step by step, what actually happens under the hood, which settings matter, and how to get reliable, print-ready results without introducing halos or fake textures. I will also point out common traps that waste time or damage files.
Why 4K matters in 2025
Most phones already shoot at 12-50 MP, but screenshots, old JPEGs, and AI art from text-to-image tools still come out small. When you try to print those files at A3 size or zoom them on a 32-inch 4K monitor, edges break apart. A 4K frame counts about 8.3 million pixels (3840 × 2160). Upscaling bridges the gap by creating extra pixels in a way the human eye accepts as real detail.
Authoritative data from the Consumer Technology Association (CTA) says 4K panels will reach 70 % household penetration in North America this year. E-commerce studies from Baymard Institute also show that product photos sharper than 200 PPI lift conversion by up to 17 %. Both numbers explain why design teams ask for 4K source files even if the final image will be down-sampled later.
How an AI Image Upscaler works
Classic bicubic interpolation just stretched pixels. AI models do more. They learn patterns from millions of high-low-res pairs, then predict missing data in novel files. The best known research line is ESRGAN (Enhanced Super-Resolution GAN) introduced at ECCV 2018, and improved by the SwinIR paper published under IEEE in 2021. You can read the technical report here: https://arxiv.org/abs/1909.07647.
In plain words, an AI Image Upscaler goes through three stages:
- Feature extraction – finds edges, color blocks, and noise fields.
- Prediction – fills in new pixels through a trained neural network.
- Refinement – uses a discriminator to compare the upscaled patch with ground-truth texture; bad spots get recycled until they pass a visual score.
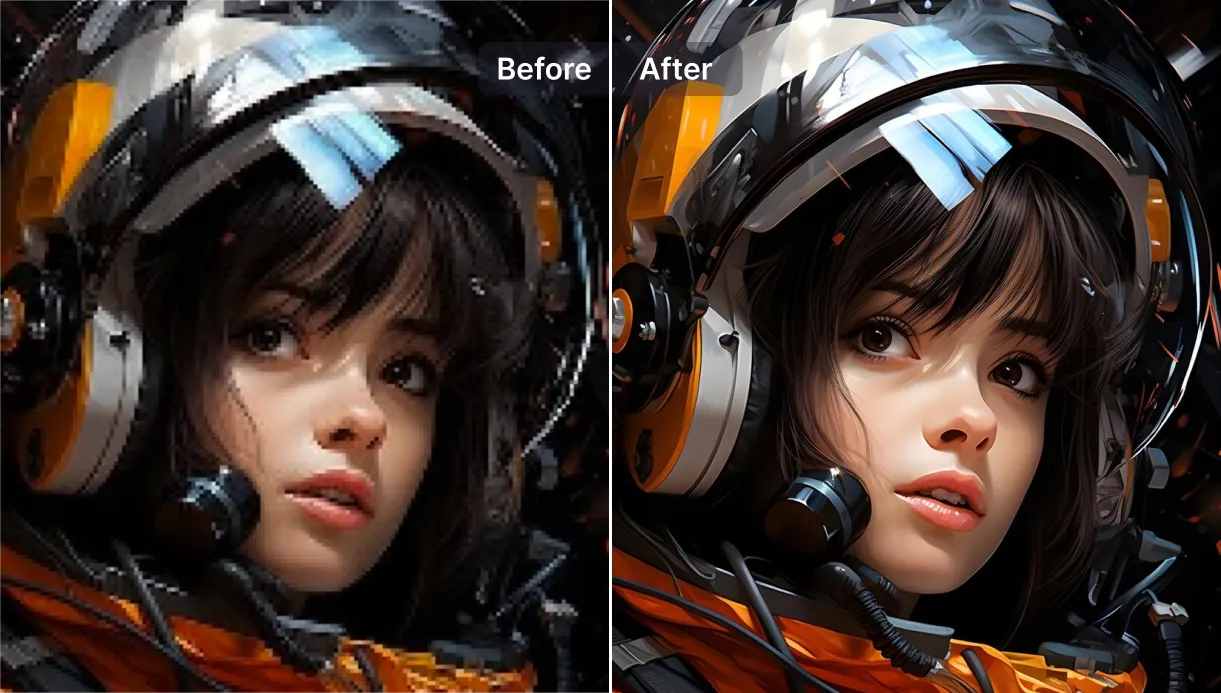
Because of that loop, AI upscaling often restores skin pores, textile weave, or printed letters that were not clearly visible before.
Pre-check: read the file before you upscale
I still open every job in a viewer and note four facts:
| Item | Why it matters |
|---|---|
| Initial resolution | Tells you if 4× is enough to hit 4K (example: 1200 × 800 needs 4× to reach 4800 × 3200). |
| Compression artifacts | Heavy blocks or ringing get amplified; run a denoise pass first. |
| Color space | Convert CMYK or Display-P3 files to sRGB if the upscaler only supports sRGB. |
| Subject type | Portrait, product, anime, and illustration each benefit from a specific model. |
Spend one minute here and you avoid reprocessing later.
Exact workflow: upscale to 4K in 5 steps
Below is my everyday pipeline using Pixelfox AI Image Upscaler – feel free to map the logic to any tool that offers similar toggles.
1. Upload the source
Drag the file into the web panel. Supported formats include JPG, PNG, and WEBP. For RAW photos, export a 16-bit TIFF and then feed that TIFF.
2. Choose the scale
Select 4×. The tool shows the output size preview so you know it clears 3840 × 2160.
3. Pick the right model
- General – good for street scenes, landscapes.
- Face Detail – keeps skin natural, avoids waxy look.
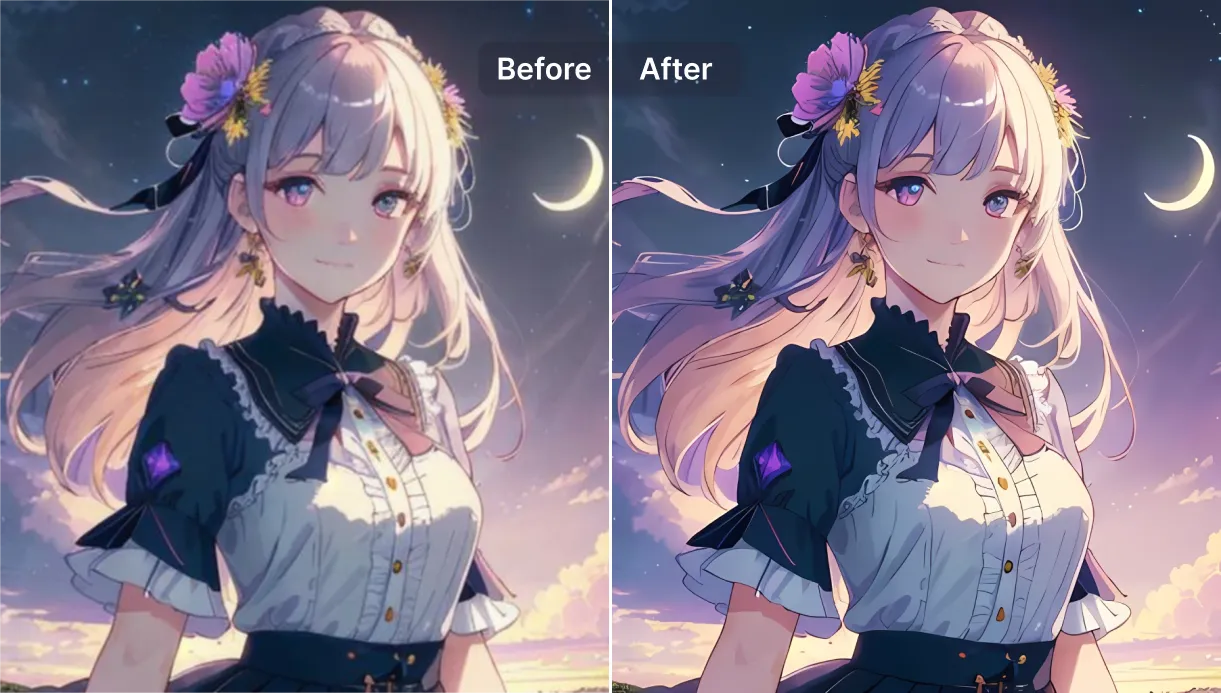
- Art – protects crisp line art in comics or UI mockups.
4. Toggle noise reduction
If the image is a low-quality JPEG, turn Denoise: Medium on. If it is a DSLR RAW, leave noise reduction off to keep micro-contrast.
5. Start and wait
Processing time depends on GPU load but rarely exceeds 15 s for a 2 MP file. Always preview the 100 % crop before you hit Download so you can roll back if hair edges look fake.
Try Pixelfox AI Image Upscaler »
Advanced settings that make or break quality
Sharpness slider
A small boost (+5 %) adds punch for web banners. Yet pushing it over 15 % may cause halos on high-contrast borders. I dial it down for portraits.
Texture blend
Some tools let you mix AI detail with original pixels. A 70 : 30 blend keeps the soul of film scans while reducing grain.
Color fix
Upscaling can push saturation. Tick Color Fidelity if your brand uses strict HEX values.
Output format
For print, save as 16-bit PNG. For web, an 85 % quality JPEG is plenty once the resolution is high.
Fixing side effects after upscaling
Even the smartest network stumbles on unusual patterns. Here is how I correct them.
| Problem | Quick Fix |
|---|---|
| Over-smooth skin | Run a separate high-pass filter at Radius 1 px, blend Soft Light 30 %. |
| Halo on text | Shrink the layer 0.5 px with a mask, then feather 0.3 px. |
| Rainbow moiré on fabrics | Apply a selective hue desaturate on the moiré range. |
| Missed focus in eyes | Paint-in local sharpening with a 20 % opacity brush. |
The goal is subtlety; a viewer should not detect any retouching.
Batch upscaling without losing control
Marketing teams often hand me 200 thumbnails and ask for overnight miracles. I rely on the Batch Queue built into Pixelfox:
- Load all images.
- Tag them with Portrait, Product, Art.
- Apply preset per tag.
- Let the cloud GPU run the lot while I sleep.
- Next morning, spot-check 5 % of the set to assure consistency.
If you need mixed sizes—4K, 6K, 8K—create separate queues instead of letting the software auto-stretch; you avoid uneven grain.
Frequently asked questions
Can I upscale a 100 × 100 icon straight to 4K?
Technically yes, but the result will look synthetic. Start with at least 512 px on the short side for credible texture.
Is upscaling legal for stock photos?
Most agencies, like Shutterstock, allow non-destructive edits. Still, read the license because some editorial shots restrict modifications.
Will AI upscaling ruin EXIF data?
Good tools keep metadata intact. I verified this by reading the EXIF with ExifTool 12.80 after download; camera and lens tags remained.
How large can I print a 4K image?
At 300 DPI you reach 13 × 7 inch. For posters seen at 3 feet, 150 DPI is fine, so you can go up to 26 × 14 inch before you notice pixels.
Key takeaways
Upscaling to 4K is no longer a black art. An AI Image Upscaler studies texture and invents realistic pixels in seconds, provided you guide it with the right model and noise settings. Always preview, keep an eye on halos, and fix subtle flaws before you ship the file.
Need a safe place to practice? Start with the free tier of Pixelfox and test one photo. Then move on to bulk jobs like product catalogues. If you also need to extend a backdrop for social media, jump over to the AI Image Extender page. Or, should you work with motion assets, check out the AI Video Upscaler to bring legacy clips up to 4K as well.
Upscale smarter, not harder—your pixels, and your clients, will thank you.