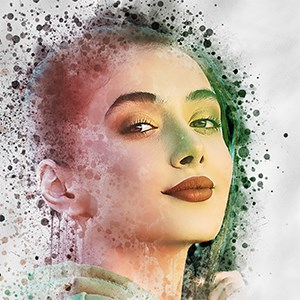
\u003C/p>\n\u003Ch2 id=\"7fxwdn\">Why Circular Crop Matters in 2025\u003C/h2>\n\u003Cp>The round profile image has become a design standard. LinkedIn, Google, Microsoft 365, and hundreds of CMS themes display photos in circles by default. When a rectangular picture is forced into that frame, faces may look off-center or edges can get sliced. Doing a precise \u003Cstrong>photo crop round\u003C/strong> in advance avoids these issues and makes your brand look polished.\u003C/p>\n\u003Cp>Analysts at the Nielsen Norman Group note that a clean avatar increases click-through rates on author bio sections by up to 23%. A neat circle is also vital for ID badges, QR code menus, Zoom accounts, and AI face cropper models, which prefer symmetric input.\u003C/p>\n\u003Chr />\n\u003Ch2 id=\"NbrJKi\">Key Terms You Will Meet\u003C/h2>\n\u003Cul>\n\u003Cli>\u003Cstrong>Circle image cropper / circular image cropper\u003C/strong> – software that outputs a round PNG. \u003C/li>\n\u003Cli>\u003Cstrong>Face cropper\u003C/strong> – AI that auto-detects faces before cropping. \u003C/li>\n\u003Cli>\u003Cstrong>Picture shaper\u003C/strong> – any tool that converts rectangles into geometric shapes. \u003C/li>\n\u003Cli>\u003Cstrong>Make photo circle / make image round\u003C/strong> – common user queries; all mean the same action. \u003C/li>\n\u003C/ul>\n\u003Chr />\n\u003Ch2 id=\"pevjRr\">Quick Comparison of Common Tools\u003C/h2>\n\u003Ctable>\n\u003Cthead>\n\u003Ctr>\n\u003Cth>Tool\u003C/th>\n\u003Cth>Platform\u003C/th>\n\u003Cth>Good for\u003C/th>\n\u003Cth>Round Crop Steps\u003C/th>\n\u003C/tr>\n\u003C/thead>\n\u003Ctbody>\n\u003Ctr>\n\u003Ctd>Microsoft 365 (PowerPoint, Word)\u003C/td>\n\u003Ctd>Windows, macOS\u003C/td>\n\u003Ctd>Office users\u003C/td>\n\u003Ctd>Insert > Picture > Picture Format > Crop > Crop to Shape\u003C/td>\n\u003C/tr>\n\u003Ctr>\n\u003Ctd>Canva\u003C/td>\n\u003Ctd>Web, iOS, Android\u003C/td>\n\u003Ctd>Social media graphics\u003C/td>\n\u003Ctd>Elements > Frames > Circle > Drag photo\u003C/td>\n\u003C/tr>\n\u003Ctr>\n\u003Ctd>Adobe Express\u003C/td>\n\u003Ctd>Web, iOS, Android\u003C/td>\n\u003Ctd>Marketing assets\u003C/td>\n\u003Ctd>Upload > Crop & Shape > Circle\u003C/td>\n\u003C/tr>\n\u003Ctr>\n\u003Ctd>Pixelfox AI\u003C/td>\n\u003Ctd>Web\u003C/td>\n\u003Ctd>High-quality one-click output\u003C/td>\n\u003Ctd>Upload > AI circle crop > Download\u003C/td>\n\u003C/tr>\n\u003Ctr>\n\u003Ctd>Preview (macOS)\u003C/td>\n\u003Ctd>macOS\u003C/td>\n\u003Ctd>Offline quick edit\u003C/td>\n\u003Ctd>Elliptical selection > Crop\u003C/td>\n\u003C/tr>\n\u003C/tbody>\n\u003C/table>\n\u003Cblockquote>\n\u003Cp>Source: Microsoft Support; Adobe Express Help Center; independent testing, 2025.\u003C/p>\n\u003C/blockquote>\n\u003Chr />\n\u003Ch2 id=\"OKEsM2\">Step-by-Step: How to Crop a Picture into a Circle in Any Tool\u003C/h2>\n\u003Ch3>1. Circle Crop with Built-In Software (Windows & macOS)\u003C/h3>\n\u003Ch4>Microsoft 365 Picture Crop\u003C/h4>\n\u003Col>\n\u003Cli>Open PowerPoint or Word and insert your image. \u003C/li>\n\u003Cli>Click the picture. Select \u003Cstrong>Picture Format\u003C/strong> → small arrow under \u003Cstrong>Crop\u003C/strong>. \u003C/li>\n\u003Cli>Choose \u003Cstrong>Crop to Shape\u003C/strong> → \u003Cstrong>Oval\u003C/strong>. \u003C/li>\n\u003Cli>To get a perfect circle, click \u003Cstrong>Aspect Ratio\u003C/strong> and pick \u003Cstrong>1:1\u003C/strong>. \u003C/li>\n\u003Cli>Drag black handles to adjust, then hit \u003Cstrong>Crop\u003C/strong>.\u003C/li>\n\u003C/ol>\n\u003Cp>This method keeps text and graphics on one canvas. It is perfect for reports or class handouts.\u003C/p>\n\u003Ch4>Preview on macOS\u003C/h4>\n\u003Col>\n\u003Cli>Double-click the picture; it opens in Preview. \u003C/li>\n\u003Cli>View → \u003Cstrong>Show Markup Toolbar\u003C/strong>. \u003C/li>\n\u003Cli>Choose \u003Cstrong>Elliptical Selection\u003C/strong>. Hold \u003Cstrong>Shift\u003C/strong> while dragging to lock a circle. \u003C/li>\n\u003Cli>Move the selection to center the subject. \u003C/li>\n\u003Cli>Tools → \u003Cstrong>Crop\u003C/strong>. When asked, convert to PNG to save transparency.\u003C/li>\n\u003C/ol>\n\u003Cp>Apple’s native approach is fast but missing guides for exact alignment. Zoom in at 100% for best accuracy.\u003C/p>\n\u003Ch3>2. Online Circle Image Cropper (Pixelfox AI)\u003C/h3>\n\u003Cp>If you need professional quality without manual work, an AI circle crop is ideal.\u003C/p>\n\u003Col>\n\u003Cli>Go to Pixelfox AI and upload your file (JPG, PNG, or WEBP). \u003C/li>\n\u003Cli>The \u003Cstrong>circle image cropper\u003C/strong> detects faces, centers them, and outputs a round PNG with a transparent backdrop. \u003C/li>\n\u003Cli>Download in original resolution—no watermark, no sign-up. \u003C/li>\n\u003C/ol>\n\u003Cp>Because processing runs in the browser, photos never leave your device, which supports privacy guidelines by the Electronic Frontier Foundation.\u003C/p>\n\u003Cp>\u003Cem>Internal link example:\u003C/em> You can further enhance skin tone before cropping by using the free \u003Ca href=\"https://pixelfox.ai/en/image/retouch-skin\">AI Photo Retoucher\u003C/a> from Pixelfox.\u003C/p>\n\u003Ch3>3. Canva Mobile and Desktop\u003C/h3>\n\u003Col>\n\u003Cli>Start a blank design. \u003C/li>\n\u003Cli>Elements → search “Frames.” Pick the circle frame. \u003C/li>\n\u003Cli>Drag your image into the frame. Double-click to reposition. \u003C/li>\n\u003Cli>Click \u003Cstrong>Download\u003C/strong> → PNG → \u003Cstrong>Transparent background\u003C/strong> (Pro plan). \u003C/li>\n\u003C/ol>\n\u003Cp>For free users, export with a white background, then remove it in the Canva eraser or a tool like remove.bg.\u003C/p>\n\u003Ch3>4. Adobe Express Crop & Shape\u003C/h3>\n\u003Cp>Adobe’s web editor (formerly Spark) adds extra controls:\u003C/p>\n\u003Col>\n\u003Cli>Upload the photo. \u003C/li>\n\u003Cli>In the right panel, choose \u003Cstrong>Crop & Shape\u003C/strong>, then \u003Cstrong>Circle\u003C/strong>. \u003C/li>\n\u003Cli>Use the slider to zoom or rotate. \u003C/li>\n\u003Cli>Click \u003Cstrong>Download\u003C/strong> as PNG or share directly to Creative Cloud.\u003C/li>\n\u003C/ol>\n\u003Cp>Adobe uses the same imaging engine behind Photoshop, so color data stays intact.\u003C/p>\n\u003Chr />\n\u003Ch2 id=\"H5RT4i\">Expert Tips for a Perfect Circular Crop\u003C/h2>\n\u003Ch3>Use a Square Source When Possible\u003C/h3>\n\u003Cp>A 1:1 image crops into a circle with minimal data loss. If your file is wide (16:9), consider padding the sides first.\u003C/p>\n\u003Ch3>Keep Important Elements Away from Edges\u003C/h3>\n\u003Cp>During a circular crop, each corner vanishes. Ensure logos or text layers sit safely inside the center 70%.\u003C/p>\n\u003Ch3>Aim for At Least 800 × 800 px\u003C/h3>\n\u003Cp>Modern screens, including 4K laptops, can expose jagged edges on small circles. Export at 800 px or larger, then let the platform downscale.\u003C/p>\n\u003Ch3>Save as PNG with Transparency\u003C/h3>\n\u003Cp>JPEG does not support alpha channels, so you might see an unwanted white box. Use PNG for avatars and SVG for flat logos.\u003C/p>\n\u003Ch3>Batch Process for Teams\u003C/h3>\n\u003Cp>If you manage dozens of employee photos, use a bulk face cropper like Pixelfox AI batch mode or PowerShell scripts in Windows.\u003C/p>\n\u003Chr />\n\u003Ch2 id=\"kS8UF1\">Troubleshooting Common Issues\u003C/h2>\n\u003Ctable>\n\u003Cthead>\n\u003Ctr>\n\u003Cth>Problem\u003C/th>\n\u003Cth>Cause\u003C/th>\n\u003Cth>Quick Fix\u003C/th>\n\u003C/tr>\n\u003C/thead>\n\u003Ctbody>\n\u003Ctr>\n\u003Ctd>Face off-center\u003C/td>\n\u003Ctd>Auto-crop guessed wrong\u003C/td>\n\u003Ctd>Drag image inside the frame before exporting\u003C/td>\n\u003C/tr>\n\u003Ctr>\n\u003Ctd>Blurry edges\u003C/td>\n\u003Ctd>Source file too small\u003C/td>\n\u003Ctd>Start from higher resolution or upscale with a tool such as Pixelfox \u003Ca href=\"https://pixelfox.ai/en/image/enhancer\">Image Enhancer\u003C/a>\u003C/td>\n\u003C/tr>\n\u003Ctr>\n\u003Ctd>White square behind circle\u003C/td>\n\u003Ctd>Exported as JPEG\u003C/td>\n\u003Ctd>Re-export as PNG with transparency\u003C/td>\n\u003C/tr>\n\u003Ctr>\n\u003Ctd>Loss of background in complex shapes\u003C/td>\n\u003Ctd>Mask too tight\u003C/td>\n\u003Ctd>Add padding or use AI inpainting to fill lost detail\u003C/td>\n\u003C/tr>\n\u003C/tbody>\n\u003C/table>\n\u003Chr />\n\u003Ch2 id=\"PlE6fv\">Advanced Workflows for Designers\u003C/h2>\n\u003Ch3>CSS Clip-Path for Responsive Sites\u003C/h3>\n\u003Cp>Instead of shipping a pre-cropped asset, front-end developers can use:\u003C/p>\n\u003Cpre>\u003Ccode class=\"language-css\">.avatar{\n width:120px;\n height:120px;\n object-fit:cover;\n clip-path:circle(50% at 50% 50%);\n}\u003C/code>\u003C/pre>\n\u003Cp>This keeps one source photo and lets the browser do the circular crop on the fly. Lighthouse audits show no performance penalty with modern GPUs.\u003C/p>\n\u003Ch3>Figma Boolean Subtract Technique\u003C/h3>\n\u003Col>\n\u003Cli>Place an \u003Cstrong>Ellipse\u003C/strong> above your image. \u003C/li>\n\u003Cli>Select both layers → \u003Cstrong>Use as mask\u003C/strong>. \u003C/li>\n\u003Cli>Export with \u003Cstrong>Transparent PNG\u003C/strong>. \u003C/li>\n\u003C/ol>\n\u003Cp>Figma masks remain editable, useful for last-minute client tweaks.\u003C/p>\n\u003Chr />\n\u003Ch2 id=\"8A9gkV\">Security and Privacy Notes\u003C/h2>\n\u003Cp>A recent white paper by the MIT Internet Policy Research Initiative stresses the need to avoid uploading portrait data to unknown servers. Always pick tools that process locally or hold SOC 2 certification. Pixelfox runs inference in your browser memory; Adobe and Microsoft promise encryption at rest and in transit in their respective SLA documents.\u003C/p>\n\u003Chr />\n\u003Ch2 id=\"LscTuC\">Frequently Asked Questions\u003C/h2>\n\u003Cp>\u003Cstrong>Q1: How can I crop a picture in a circle on my phone?\u003C/strong>\u003Cbr />\nA: Canva and Adobe Express apps let you tap, drag, and export within seconds. For fast one-tap results, many users choose Pixelfox mobile web because it needs no install.\u003C/p>\n\u003Cp>\u003Cstrong>Q2: Does a circular crop reduce file quality?\u003C/strong>\u003Cbr />\nA: Cropping removes pixels but does not recompress if you export in a lossless format. Maintain resolution and pick PNG to avoid extra artifacts.\u003C/p>\n\u003Cp>\u003Cstrong>Q3: Can I automate circular image cropping for 100 photos?\u003C/strong>\u003Cbr />\nA: Yes. Pixelfox batch mode processes up to 50 images per minute. Adobe Bridge also runs an Image Processor script.\u003C/p>\n\u003Chr />\n\u003Ch2 id=\"nG37mT\">The Role of AI in Future Picture Crop\u003C/h2>\n\u003Cp>Research from Stanford’s Vision Lab shows that self-supervised vision transformers can detect subject boundaries with 97% accuracy. This means future \u003Cstrong>photo cropper circle\u003C/strong> tools will auto-align eyes, adjust headroom, and even light the portrait before outputting a \u003Cstrong>make picture circle\u003C/strong> result. Expect plugins inside CMS platforms that eliminate manual steps.\u003C/p>\n\u003Chr />\n\u003Cp>\u003Cimg loading=\"lazy\" src=\"https://api.pixelfox.ai/template/colorizeimage/feature_3.webp\" alt=\"Round product thumbnail\" />\u003C/p>\n\u003Chr />\n\u003Ch2 id=\"RsVqcC\">Conclusion\u003C/h2>\n\u003Cp>Knowing \u003Cstrong>how to crop a photo into a circle\u003C/strong> is now a core digital skill. Whether you choose a native tool like PowerPoint, an online solution such as Canva, or an AI-powered \u003Cstrong>circle image cropper\u003C/strong> like Pixelfox, the steps remain simple:\u003C/p>\n\u003Col>\n\u003Cli>Start with a quality source. \u003C/li>\n\u003Cli>Use a 1:1 ratio or hold Shift for symmetry. \u003C/li>\n\u003Cli>Export as transparent PNG. \u003C/li>\n\u003C/ol>\n\u003Cp>Practice these moves today and give every avatar, logo, or product shot the clean, modern look that users expect. Ready to try? Upload any picture to Pixelfox AI, watch the instant \u003Cstrong>circular crop image\u003C/strong> finish, and share your polished \u003Cstrong>image in circle\u003C/strong> with the world.\u003C/p>\n\u003Cblockquote>\n\u003Cp>Share this guide with a friend who still wrestles with rectangles, and leave a comment below about your favorite \u003Cstrong>pic cropping\u003C/strong> tip!\u003C/p>\n\u003C/blockquote>","how-to-crop-a-photo-into-a-circle-complete-guide-pro-tips",87,1755014592,1755014573,{"id":112,"lang":11,"author_id":12,"image":113,"title":114,"keywords":15,"description":115,"content":116,"url":117,"views":118,"publishtime":119,"updatetime":120,"status":22,"publishtime_text":121,"status_text":25},1204,"https://api.pixelfox.ai/uploads/20250820/23bfb57330d90dd2768ce6ff89f2e00b.jpg","Online Video Editor No Watermark: Best Free Video Editor Without Watermark 2024","Edit and export 4K footage instantly with the best free video editor no watermark 100 % online, no signup, unlimited projects.","\u003Cp dir=\"ltr\" style=\"line-height:1.38;margin-top:0pt;margin-bottom:0pt;\">\u003Cspan style=\"font-size:13.999999999999998pt;font-family:Arial,sans-serif;color:#000000;background-color:transparent;font-weight:400;font-style:normal;font-variant:normal;text-decoration:none;vertical-align:baseline;white-space:pre;white-space:pre-wrap;\">Need to trim a TikTok, add captions to a webinar, or splice drone clips into a 4 K reel—without paying Adobe prices? Welcome to the era of the online video editor no watermark that lives right inside your browser. In this guide you’ll learn why Pixelfox.ai is the fastest, most generous video editor without watermark on the market, how to use it step-by-step, and how to export cinematic results without ever seeing a logo or paying a cent.\u003C/span>\u003C/p>\u003Ch2 dir=\"ltr\" style=\"line-height:1.38;margin-top:18pt;margin-bottom:6pt;\" id=\"ZxFi0U\">\u003Cspan style=\"font-size:13.999999999999998pt;font-family:Arial,sans-serif;color:#000000;background-color:transparent;font-weight:700;font-style:normal;font-variant:normal;text-decoration:none;vertical-align:baseline;white-space:pre;white-space:pre-wrap;\">1. Why a Video Editor Without Watermark Beats Traditional Apps\u003C/span>\u003C/h2>\u003Cp dir=\"ltr\" style=\"line-height:1.38;margin-top:0pt;margin-bottom:0pt;\">\u003Cspan style=\"font-size:13.999999999999998pt;font-family:Arial,sans-serif;color:#000000;background-color:transparent;font-weight:400;font-style:normal;font-variant:normal;text-decoration:none;vertical-align:baseline;white-space:pre;white-space:pre-wrap;\">Conventional suites (Final Cut, Premiere) require:\u003C/span>\u003C/p>\u003Cul>\u003Cli style=\"line-height: 1.38; margin-top: 0pt; margin-bottom: 0pt;\">\u003Cspan style=\"font-size:13.999999999999998pt;font-family:Arial,sans-serif;color:#000000;background-color:transparent;font-weight:400;font-style:normal;font-variant:normal;text-decoration:none;vertical-align:baseline;white-space:pre;white-space:pre-wrap;\">Large downloads\u003C/span>\u003C/li>\u003Cli style=\"line-height: 1.38; margin-top: 0pt; margin-bottom: 0pt;\">\u003Cspan style=\"font-size:13.999999999999998pt;font-family:Arial,sans-serif;color:#000000;background-color:transparent;font-weight:400;font-style:normal;font-variant:normal;text-decoration:none;vertical-align:baseline;white-space:pre;white-space:pre-wrap;\">Subscriptions every month\u003C/span>\u003C/li>\u003Cli>\u003Cspan style=\"background-color: transparent; color: rgb(0, 0, 0); font-family: Arial, sans-serif; font-size: 14pt; white-space-collapse: preserve;\">Learning curves that are steep\u003C/span>\u003C/li>\u003Cli style=\"line-height: 1.38; margin-top: 0pt; margin-bottom: 0pt;\">\u003Cspan style=\"font-size:13.999999999999998pt;font-family:Arial,sans-serif;color:#000000;background-color:transparent;font-weight:400;font-style:normal;font-variant:normal;text-decoration:none;vertical-align:baseline;white-space:pre;white-space:pre-wrap;\">Watermark exports on free tiers\u003C/span>\u003C/li>\u003C/ul>\u003Cp dir=\"ltr\" style=\"line-height:1.38;margin-top:0pt;margin-bottom:0pt;\">\u003Cspan style=\"font-size:13.999999999999998pt;font-family:Arial,sans-serif;color:#000000;background-color:transparent;font-weight:400;font-style:normal;font-variant:normal;text-decoration:none;vertical-align:baseline;white-space:pre;white-space:pre-wrap;\">The script is flipped by a free video editor that has no watermark built for the cloud:\u003C/span>\u003C/p>\u003Cp>\u003Cb style=\"font-weight:normal;\">\u003Cbr>\u003C/b>\u003C/p>\u003Cp dir=\"ltr\" style=\"line-height:1.38;margin-top:0pt;margin-bottom:0pt;\">\u003Cspan style=\"font-size:13.999999999999998pt;font-family:Arial,sans-serif;color:#000000;background-color:transparent;font-weight:400;font-style:normal;font-variant:normal;text-decoration:none;vertical-align:baseline;white-space:pre;white-space:pre-wrap;\">• Zero install—works on Chromebooks and phones \u003C/span>\u003C/p>\u003Cp dir=\"ltr\" style=\"line-height:1.38;margin-top:0pt;margin-bottom:0pt;\">\u003Cspan style=\"font-size:13.999999999999998pt;font-family:Arial,sans-serif;color:#000000;background-color:transparent;font-weight:400;font-style:normal;font-variant:normal;text-decoration:none;vertical-align:baseline;white-space:pre;white-space:pre-wrap;\">• Real-time collaboration—share edit links like Google Docs \u003C/span>\u003C/p>\u003Cp dir=\"ltr\" style=\"line-height:1.38;margin-top:0pt;margin-bottom:0pt;\">\u003Cspan style=\"font-size:13.999999999999998pt;font-family:Arial,sans-serif;color:#000000;background-color:transparent;font-weight:400;font-style:normal;font-variant:normal;text-decoration:none;vertical-align:baseline;white-space:pre;white-space:pre-wrap;\">• Instant 4 K export—no render farm \u003C/span>\u003C/p>\u003Cp dir=\"ltr\" style=\"line-height:1.38;margin-top:0pt;margin-bottom:0pt;\">\u003Cspan style=\"font-size:13.999999999999998pt;font-family:Arial,sans-serif;color:#000000;background-color:transparent;font-weight:400;font-style:normal;font-variant:normal;text-decoration:none;vertical-align:baseline;white-space:pre;white-space:pre-wrap;\">• Unlimited projects—no paywalls\u003C/span>\u003C/p>\u003Cp>\u003Cb style=\"font-weight:normal;\">\u003Cbr>\u003C/b>\u003C/p>\u003Cp dir=\"ltr\" style=\"line-height:1.38;margin-top:0pt;margin-bottom:0pt;\">\u003Cspan style=\"font-size:13.999999999999998pt;font-family:Arial,sans-serif;color:#000000;background-color:transparent;font-weight:400;font-style:normal;font-variant:normal;text-decoration:none;vertical-align:baseline;white-space:pre;white-space:pre-wrap;\">\u003Ca href=\"https://pixelfox.ai/\" target=\"_blank\">Pixelfox.ai\u003C/a> bundles all four perks into one tab, making it the go-to online video editor with no watermark for creators in 2024.\u003C/span>\u003C/p>\u003Ch2 dir=\"ltr\" style=\"line-height:1.38;margin-top:18pt;margin-bottom:6pt;\" id=\"u08Z6D\">\u003Cspan style=\"font-size:13.999999999999998pt;font-family:Arial,sans-serif;color:#000000;background-color:transparent;font-weight:700;font-style:normal;font-variant:normal;text-decoration:none;vertical-align:baseline;white-space:pre;white-space:pre-wrap;\">2. How Pixelfox.ai Works as a Free Video Editor No Watermark\u003C/span>\u003C/h2>\u003Cp>\u003Cb style=\"font-weight:normal;\">\u003Cbr>\u003C/b>\u003C/p>\u003Cp dir=\"ltr\" style=\"line-height:1.38;margin-top:0pt;margin-bottom:0pt;\">\u003Cspan style=\"font-size:13.999999999999998pt;font-family:Arial,sans-serif;color:#000000;background-color:transparent;font-weight:700;font-style:normal;font-variant:normal;text-decoration:none;vertical-align:baseline;white-space:pre;white-space:pre-wrap;\">Step 1: \u003C/span>\u003Cspan style=\"font-size:13.999999999999998pt;font-family:Arial,sans-serif;color:#000000;background-color:transparent;font-weight:400;font-style:normal;font-variant:normal;text-decoration:none;vertical-align:baseline;white-space:pre;white-space:pre-wrap;\">Upload Drag MP4, MOV, WebM, GIF up to 500 MB. \u003C/span>\u003C/p>\u003Cp dir=\"ltr\" style=\"line-height:1.38;margin-top:0pt;margin-bottom:0pt;\">\u003Cspan style=\"font-size:13.999999999999998pt;font-family:Arial,sans-serif;color:#000000;background-color:transparent;font-weight:700;font-style:normal;font-variant:normal;text-decoration:none;vertical-align:baseline;white-space:pre;white-space:pre-wrap;\">Step 2: \u003C/span>\u003Cspan style=\"font-size:13.999999999999998pt;font-family:Arial,sans-serif;color:#000000;background-color:transparent;font-weight:400;font-style:normal;font-variant:normal;text-decoration:none;vertical-align:baseline;white-space:pre;white-space:pre-wrap;\">Edit • Trim, cut, split • Add text, stickers, transitions • Color-grade with LUTs • Auto-captions in 50+ languages • AI background remover & green-screen \u003C/span>\u003C/p>\u003Cp dir=\"ltr\" style=\"line-height:1.38;margin-top:0pt;margin-bottom:0pt;\">\u003Cspan style=\"font-size:13.999999999999998pt;font-family:Arial,sans-serif;color:#000000;background-color:transparent;font-weight:700;font-style:normal;font-variant:normal;text-decoration:none;vertical-align:baseline;white-space:pre;white-space:pre-wrap;\">Step 3:\u003C/span>\u003Cspan style=\"font-size:13.999999999999998pt;font-family:Arial,sans-serif;color:#000000;background-color:transparent;font-weight:400;font-style:normal;font-variant:normal;text-decoration:none;vertical-align:baseline;white-space:pre;white-space:pre-wrap;\"> Export Choose 720p, 1080p, or 4 K → click “Download.” No logo, no time limit, no credit card. Cloud GPUs finish most exports in under 30 seconds—even on mobile data.\u003C/span>\u003C/p>\u003Ch2 dir=\"ltr\" style=\"line-height:1.38;margin-top:18pt;margin-bottom:6pt;\" id=\"yqMI2j\">\u003Cspan style=\"font-size:13.999999999999998pt;font-family:Arial,sans-serif;color:#000000;background-color:transparent;font-weight:700;font-style:normal;font-variant:normal;text-decoration:none;vertical-align:baseline;white-space:pre;white-space:pre-wrap;\">3. Creative Use Cases for Pixelfox.ai’s Online Video Editor \u003Ca href=\"https://pixelfox.ai/\" target=\"_blank\">No Watermark\u003C/a>\u003C/span>\u003C/h2>\u003Cp>\u003Cb style=\"font-weight:normal;\">\u003Cbr>\u003C/b>\u003C/p>\u003Cp dir=\"ltr\" style=\"line-height:1.38;margin-top:0pt;margin-bottom:0pt;\">\u003Cspan style=\"font-size:13.999999999999998pt;font-family:Arial,sans-serif;color:#000000;background-color:transparent;font-weight:700;font-style:normal;font-variant:normal;text-decoration:none;vertical-align:baseline;white-space:pre;white-space:pre-wrap;\">Social Media \u003C/span>\u003C/p>\u003Cp dir=\"ltr\" style=\"line-height:1.38;margin-top:0pt;margin-bottom:0pt;\">\u003Cspan style=\"font-size:13.999999999999998pt;font-family:Arial,sans-serif;color:#000000;background-color:transparent;font-weight:400;font-style:normal;font-variant:normal;text-decoration:none;vertical-align:baseline;white-space:pre;white-space:pre-wrap;\">Create 30 TikToks in one sitting—batch export with captions. \u003C/span>\u003C/p>\u003Cp dir=\"ltr\" style=\"line-height:1.38;margin-top:0pt;margin-bottom:0pt;\">\u003Cspan style=\"font-size:13.999999999999998pt;font-family:Arial,sans-serif;color:#000000;background-color:transparent;font-weight:700;font-style:normal;font-variant:normal;text-decoration:none;vertical-align:baseline;white-space:pre;white-space:pre-wrap;\">Course Creators \u003C/span>\u003C/p>\u003Cp dir=\"ltr\" style=\"line-height:1.38;margin-top:0pt;margin-bottom:0pt;\">\u003Cspan style=\"font-size:13.999999999999998pt;font-family:Arial,sans-serif;color:#000000;background-color:transparent;font-weight:400;font-style:normal;font-variant:normal;text-decoration:none;vertical-align:baseline;white-space:pre;white-space:pre-wrap;\">Re-edit webinars into micro-lessons without re-uploading. \u003C/span>\u003C/p>\u003Cp dir=\"ltr\" style=\"line-height:1.38;margin-top:0pt;margin-bottom:0pt;\">\u003Cspan style=\"font-size:13.999999999999998pt;font-family:Arial,sans-serif;color:#000000;background-color:transparent;font-weight:700;font-style:normal;font-variant:normal;text-decoration:none;vertical-align:baseline;white-space:pre;white-space:pre-wrap;\">Marketing Teams \u003C/span>\u003C/p>\u003Cp dir=\"ltr\" style=\"line-height:1.38;margin-top:0pt;margin-bottom:0pt;\">\u003Cspan style=\"font-size:13.999999999999998pt;font-family:Arial,sans-serif;color:#000000;background-color:transparent;font-weight:400;font-style:normal;font-variant:normal;text-decoration:none;vertical-align:baseline;white-space:pre;white-space:pre-wrap;\">A/B-test ad creatives in minutes—no agency fees. \u003C/span>\u003C/p>\u003Cp dir=\"ltr\" style=\"line-height:1.38;margin-top:0pt;margin-bottom:0pt;\">\u003Cspan style=\"font-size:13.999999999999998pt;font-family:Arial,sans-serif;color:#000000;background-color:transparent;font-weight:700;font-style:normal;font-variant:normal;text-decoration:none;vertical-align:baseline;white-space:pre;white-space:pre-wrap;\">Gamers \u003C/span>\u003C/p>\u003Cp dir=\"ltr\" style=\"line-height:1.38;margin-top:0pt;margin-bottom:0pt;\">\u003Cspan style=\"font-size:13.999999999999998pt;font-family:Arial,sans-serif;color:#000000;background-color:transparent;font-weight:400;font-style:normal;font-variant:normal;text-decoration:none;vertical-align:baseline;white-space:pre;white-space:pre-wrap;\">Clip highlights, add memes, export directly to YouTube Shorts.\u003C/span>\u003Cspan style=\"font-size:13.999999999999998pt;font-family:Arial,sans-serif;color:#000000;background-color:transparent;font-weight:700;font-style:normal;font-variant:normal;text-decoration:none;vertical-align:baseline;white-space:pre;white-space:pre-wrap;\"> \u003C/span>\u003C/p>\u003Cp dir=\"ltr\" style=\"line-height:1.38;margin-top:0pt;margin-bottom:0pt;\">\u003Cspan style=\"font-size:13.999999999999998pt;font-family:Arial,sans-serif;color:#000000;background-color:transparent;font-weight:700;font-style:normal;font-variant:normal;text-decoration:none;vertical-align:baseline;white-space:pre;white-space:pre-wrap;\">Wedding Videographers \u003C/span>\u003C/p>\u003Cp dir=\"ltr\" style=\"line-height:1.38;margin-top:0pt;margin-bottom:0pt;\">\u003Cspan style=\"font-size:13.999999999999998pt;font-family:Arial,sans-serif;color:#000000;background-color:transparent;font-weight:400;font-style:normal;font-variant:normal;text-decoration:none;vertical-align:baseline;white-space:pre;white-space:pre-wrap;\">Deliver same-day highlight reels from a phone. \u003C/span>\u003C/p>\u003Cp>\u003Cb style=\"font-weight:normal;\">\u003Cbr>\u003C/b>\u003C/p>\u003Cp dir=\"ltr\" style=\"line-height:1.38;margin-top:0pt;margin-bottom:0pt;\">\u003Cspan style=\"font-size:13.999999999999998pt;font-family:Arial,sans-serif;color:#000000;background-color:transparent;font-weight:400;font-style:normal;font-variant:normal;text-decoration:none;vertical-align:baseline;white-space:pre;white-space:pre-wrap;\">Because the video editor without watermark is browser-based, clients can preview edits live.\u003C/span>\u003C/p>\u003Cp>\u003Cimg src=\"https://api.pixelfox.ai/uploads/20250820/23bfb57330d90dd2768ce6ff89f2e00b.jpg\" data-filename=\"filename\" style=\"width: 50%;\" alt=\"Online Video Editor No Watermark: Best Free Video Editor Without Watermark 2024\" loading=\"lazy\">\u003Cb style=\"font-weight:normal;\">\u003Cbr>\u003C/b>\u003C/p>\u003Ch2 dir=\"ltr\" style=\"line-height:1.38;margin-top:18pt;margin-bottom:6pt;\" id=\"utWz67\">\u003Cspan style=\"font-size:13.999999999999998pt;font-family:Arial,sans-serif;color:#000000;background-color:transparent;font-weight:700;font-style:normal;font-variant:normal;text-decoration:none;vertical-align:baseline;white-space:pre;white-space:pre-wrap;\">4. Expert Tips for Studio-Quality Edits\u003C/span>\u003C/h2>\u003Cp>\u003Cb style=\"font-weight:normal;\">\u003Cbr>\u003C/b>\u003C/p>\u003Cp dir=\"ltr\" style=\"line-height:1.38;margin-top:0pt;margin-bottom:0pt;\">\u003Cspan style=\"font-size:13.999999999999998pt;font-family:Arial,sans-serif;color:#000000;background-color:transparent;font-weight:400;font-style:normal;font-variant:normal;text-decoration:none;vertical-align:baseline;white-space:pre;white-space:pre-wrap;\">1. Start High-Res Upload 1080p or 4 K source to keep final quality crisp. \u003C/span>\u003C/p>\u003Cp dir=\"ltr\" style=\"line-height:1.38;margin-top:0pt;margin-bottom:0pt;\">\u003Cspan style=\"font-size:13.999999999999998pt;font-family:Arial,sans-serif;color:#000000;background-color:transparent;font-weight:400;font-style:normal;font-variant:normal;text-decoration:none;vertical-align:baseline;white-space:pre;white-space:pre-wrap;\">2. Use Auto-Captions Boost watch time 12 % with on-screen text. \u003C/span>\u003C/p>\u003Cp dir=\"ltr\" style=\"line-height:1.38;margin-top:0pt;margin-bottom:0pt;\">\u003Cspan style=\"font-size:13.999999999999998pt;font-family:Arial,sans-serif;color:#000000;background-color:transparent;font-weight:400;font-style:normal;font-variant:normal;text-decoration:none;vertical-align:baseline;white-space:pre;white-space:pre-wrap;\">3. Color LUT Library Apply “Cinematic” or “Vintage” LUTs in one click. \u003C/span>\u003C/p>\u003Cp dir=\"ltr\" style=\"line-height:1.38;margin-top:0pt;margin-bottom:0pt;\">\u003Cspan style=\"font-size:13.999999999999998pt;font-family:Arial,sans-serif;color:#000000;background-color:transparent;font-weight:400;font-style:normal;font-variant:normal;text-decoration:none;vertical-align:baseline;white-space:pre;white-space:pre-wrap;\">4. Keyboard Shortcuts J/K/L for playback, I/O for in/out points—same as Premiere. \u003C/span>\u003C/p>\u003Cp dir=\"ltr\" style=\"line-height:1.38;margin-top:0pt;margin-bottom:0pt;\">\u003Cspan style=\"font-size:13.999999999999998pt;font-family:Arial,sans-serif;color:#000000;background-color:transparent;font-weight:400;font-style:normal;font-variant:normal;text-decoration:none;vertical-align:baseline;white-space:pre;white-space:pre-wrap;\">5. Batch Mode Upload 20 clips → apply same LUT → export overnight. \u003C/span>\u003C/p>\u003Cp>\u003Cb style=\"font-weight:normal;\">\u003Cbr>\u003C/b>\u003C/p>\u003Cp dir=\"ltr\" style=\"line-height:1.38;margin-top:0pt;margin-bottom:0pt;\">\u003Cspan style=\"font-size:13.999999999999998pt;font-family:Arial,sans-serif;color:#000000;background-color:transparent;font-weight:400;font-style:normal;font-variant:normal;text-decoration:none;vertical-align:baseline;white-space:pre;white-space:pre-wrap;\">Follow these steps and every free video editor no watermark session will look pro-grade.\u003C/span>\u003C/p>\u003Ch2 dir=\"ltr\" style=\"line-height:1.95;background-color:#ffffff;margin-top:0pt;margin-bottom:0pt;padding:18pt 0pt 12pt 0pt;\" id=\"tLTlPC\">\u003Cspan style=\"font-size:13.999999999999998pt;font-family:Arial,sans-serif;color:#000000;background-color:transparent;font-weight:700;font-style:normal;font-variant:normal;text-decoration:none;vertical-align:baseline;white-space:pre;white-space:pre-wrap;\">1. Hidden Shortcuts Inside Pixelfox.ai\u003C/span>\u003C/h2>\u003Cp dir=\"ltr\" style=\"line-height:1.95;background-color:#ffffff;margin-top:0pt;margin-bottom:0pt;padding:0pt 0pt 12pt 0pt;\">\u003Cspan style=\"font-size:13.999999999999998pt;font-family:Roboto,sans-serif;color:#000000;background-color:transparent;font-weight:400;font-style:normal;font-variant:normal;text-decoration:none;vertical-align:baseline;white-space:pre;white-space:pre-wrap;\">•With only one click, you can convert 16:9 movies into 1:1 Instagram squares or 9:16 TikToks without clipping the subjects.\u003C/span>\u003C/p>\u003Cp dir=\"ltr\" style=\"line-height:1.95;background-color:#ffffff;margin-top:0pt;margin-bottom:0pt;padding:0pt 0pt 12pt 0pt;\">\u003Cspan style=\"font-size:13.999999999999998pt;font-family:Roboto,sans-serif;color:#000000;background-color:transparent;font-weight:400;font-style:normal;font-variant:normal;text-decoration:none;vertical-align:baseline;white-space:pre;white-space:pre-wrap;\">•Keyframe Motion allows you to animate text or stickers in-browser, frame-by-frame, much like After Effects.\u003C/span>\u003C/p>\u003Cp dir=\"ltr\" style=\"line-height:1.95;background-color:#ffffff;margin-top:0pt;margin-bottom:0pt;padding:0pt 0pt 12pt 0pt;\">\u003Cspan style=\"font-size:13.999999999999998pt;font-family:Roboto,sans-serif;color:#000000;background-color:transparent;font-weight:400;font-style:normal;font-variant:normal;text-decoration:none;vertical-align:baseline;white-space:pre;white-space:pre-wrap;\">•Auto-Silence Removal: AI automatically eliminates dead air when it is detected.\u003C/span>\u003C/p>\u003Cp dir=\"ltr\" style=\"line-height:1.95;background-color:#ffffff;margin-top:0pt;margin-bottom:0pt;padding:0pt 0pt 12pt 0pt;\">\u003Cspan style=\"font-size:13.999999999999998pt;font-family:Roboto,sans-serif;color:#000000;background-color:transparent;font-weight:400;font-style:normal;font-variant:normal;text-decoration:none;vertical-align:baseline;white-space:pre;white-space:pre-wrap;\">• One slider for the slow-mo, hyper-lapse, and reverse speed ramping presets at 120 frames per second.\u003C/span>\u003C/p>\u003Cp dir=\"ltr\" style=\"line-height:1.95;background-color:#ffffff;margin-top:0pt;margin-bottom:0pt;padding:0pt 0pt 12pt 0pt;\">\u003Cspan style=\"font-size:13.999999999999998pt;font-family:Roboto,sans-serif;color:#000000;background-color:transparent;font-weight:400;font-style:normal;font-variant:normal;text-decoration:none;vertical-align:baseline;white-space:pre;white-space:pre-wrap;\">•Cloud Render Queue: wake up to complete 4K exports after uploading 50 clips at 3 AM.\u003C/span>\u003C/p>\u003Ch2 dir=\"ltr\" style=\"line-height:1.38;margin-top:18pt;margin-bottom:6pt;\" id=\"w5EAvd\">\u003Cspan style=\"font-size: 18pt; font-family: Arial, sans-serif; color: rgb(0, 0, 0); background-color: transparent; font-weight: 700; font-style: normal; font-variant: normal; text-decoration: none; vertical-align: baseline; white-space: pre-wrap;\">Conclusion: Edit Now, Watermark Never\u003C/span>\u003C/h2>\u003Cp dir=\"ltr\" style=\"line-height:1.38;margin-top:0pt;margin-bottom:0pt;\">\u003Cspan style=\"font-size:13.999999999999998pt;font-family:Arial,sans-serif;color:#000000;background-color:transparent;font-weight:400;font-style:normal;font-variant:normal;text-decoration:none;vertical-align:baseline;white-space:pre;white-space:pre-wrap;\">Gone are the days of export logos and subscription traps. With Pixelfox.ai, the best online video editor no watermark is literally one tab away. Upload your first clip today and start creating cinematic content—no cost, no logo, no limits.\u003C/span>\u003C/p>\u003Ch2 dir=\"ltr\" style=\"line-height:1.38;margin-top:18pt;margin-bottom:6pt;\" id=\"jBx48k\">\u003Cspan style=\"font-size: 18pt; font-family: Arial, sans-serif; color: rgb(0, 0, 0); background-color: transparent; font-weight: 700; font-style: normal; font-variant: normal; text-decoration: none; vertical-align: baseline; white-space: pre-wrap;\">FAQs\u003C/span>\u003C/h2>\u003Cp dir=\"ltr\" style=\"line-height:1.38;margin-top:0pt;margin-bottom:0pt;\">\u003Cspan style=\"font-size:13.999999999999998pt;font-family:Arial,sans-serif;color:#000000;background-color:transparent;font-weight:400;font-style:normal;font-variant:normal;text-decoration:none;vertical-align:baseline;white-space:pre;white-space:pre-wrap;\">Q1: Is Pixelfox.ai truly free?\u003C/span>\u003C/p>\u003Cp dir=\"ltr\" style=\"line-height:1.38;margin-top:0pt;margin-bottom:0pt;\">\u003Cspan style=\"font-size:13.999999999999998pt;font-family:Arial,sans-serif;color:#000000;background-color:transparent;font-weight:400;font-style:normal;font-variant:normal;text-decoration:none;vertical-align:baseline;white-space:pre;white-space:pre-wrap;\">Yes—720p, 1080p, 4 K exports are 100 % free, no watermark.\u003C/span>\u003C/p>\u003Cp>\u003Cb style=\"font-weight:normal;\">\u003Cbr>\u003C/b>\u003C/p>\u003Cp dir=\"ltr\" style=\"line-height:1.38;margin-top:0pt;margin-bottom:0pt;\">\u003Cspan style=\"font-size:13.999999999999998pt;font-family:Arial,sans-serif;color:#000000;background-color:transparent;font-weight:400;font-style:normal;font-variant:normal;text-decoration:none;vertical-align:baseline;white-space:pre;white-space:pre-wrap;\">Q2: Do I need to know how to edit?\u003C/span>\u003C/p>\u003Cp dir=\"ltr\" style=\"line-height:1.38;margin-top:0pt;margin-bottom:0pt;\">\u003Cspan style=\"font-size:13.999999999999998pt;font-family:Arial,sans-serif;color:#000000;background-color:transparent;font-weight:400;font-style:normal;font-variant:normal;text-decoration:none;vertical-align:baseline;white-space:pre;white-space:pre-wrap;\">Zero learning curve—drag, drop, modify, download.\u003C/span>\u003C/p>\u003Cp>\u003Cb style=\"font-weight:normal;\">\u003Cbr>\u003C/b>\u003C/p>\u003Cp dir=\"ltr\" style=\"line-height:1.38;margin-top:0pt;margin-bottom:0pt;\">\u003Cspan style=\"font-size:13.999999999999998pt;font-family:Arial,sans-serif;color:#000000;background-color:transparent;font-weight:400;font-style:normal;font-variant:normal;text-decoration:none;vertical-align:baseline;white-space:pre;white-space:pre-wrap;\">Q3: Can I make commercial use of the outputs?\u003C/span>\u003C/p>\u003Cp dir=\"ltr\" style=\"line-height:1.38;margin-top:0pt;margin-bottom:0pt;\">\u003Cspan style=\"font-size:13.999999999999998pt;font-family:Arial,sans-serif;color:#000000;background-color:transparent;font-weight:400;font-style:normal;font-variant:normal;text-decoration:none;vertical-align:baseline;white-space:pre;white-space:pre-wrap;\">Indeed. Every video is free of royalties.\u003C/span>\u003C/p>\u003Cp>\u003Cb style=\"font-weight:normal;\">\u003Cbr>\u003C/b>\u003C/p>\u003Cp dir=\"ltr\" style=\"line-height:1.38;margin-top:0pt;margin-bottom:0pt;\">\u003Cspan style=\"font-size:13.999999999999998pt;font-family:Arial,sans-serif;color:#000000;background-color:transparent;font-weight:400;font-style:normal;font-variant:normal;text-decoration:none;vertical-align:baseline;white-space:pre;white-space:pre-wrap;\">Q4: Will there be storage for my files?\u003C/span>\u003C/p>\u003Cp dir=\"ltr\" style=\"line-height:1.38;margin-top:0pt;margin-bottom:0pt;\">\u003Cspan style=\"font-size:13.999999999999998pt;font-family:Arial,sans-serif;color:#000000;background-color:transparent;font-weight:400;font-style:normal;font-variant:normal;text-decoration:none;vertical-align:baseline;white-space:pre;white-space:pre-wrap;\">No. Everything is removed after 24 hours.\u003C/span>\u003C/p>\u003Cp>\u003Cb style=\"font-weight:normal;\">\u003Cbr>\u003C/b>\u003C/p>\u003Cp dir=\"ltr\" style=\"line-height:1.38;margin-top:0pt;margin-bottom:0pt;\">\u003Cspan style=\"font-size:13.999999999999998pt;font-family:Arial,sans-serif;color:#000000;background-color:transparent;font-weight:400;font-style:normal;font-variant:normal;text-decoration:none;vertical-align:baseline;white-space:pre;white-space:pre-wrap;\">Q5: What is the duration of a 4K export?\u003C/span>\u003C/p>\u003Cp dir=\"ltr\" style=\"line-height:1.38;margin-top:0pt;margin-bottom:0pt;\">\u003Cspan style=\"font-size:13.999999999999998pt;font-family:Arial,sans-serif;color:#000000;background-color:transparent;font-weight:400;font-style:normal;font-variant:normal;text-decoration:none;vertical-align:baseline;white-space:pre;white-space:pre-wrap;\">Most clips are less than 30 seconds.\u003C/span>\u003C/p>\u003Cp>\u003Cb style=\"font-weight:normal;\">\u003Cbr>\u003C/b>\u003C/p>\u003Cp dir=\"ltr\" style=\"line-height:1.38;margin-top:0pt;margin-bottom:0pt;\">\u003Cspan style=\"font-size:13.999999999999998pt;font-family:Arial,sans-serif;color:#000000;background-color:transparent;font-weight:400;font-style:normal;font-variant:normal;text-decoration:none;vertical-align:baseline;white-space:pre;white-space:pre-wrap;\">Q6: Does it support mobile?\u003C/span>\u003C/p>\u003Cp dir=\"ltr\" style=\"line-height:1.38;margin-top:0pt;margin-bottom:0pt;\">\u003Cspan style=\"font-size:13.999999999999998pt;font-family:Arial,sans-serif;color:#000000;background-color:transparent;font-weight:400;font-style:normal;font-variant:normal;text-decoration:none;vertical-align:baseline;white-space:pre;white-space:pre-wrap;\">compatible with desktop, Android Chrome, and iOS Safari.\u003C/span>\u003C/p>\u003Cp>\u003Cb style=\"font-weight:normal;\">\u003Cbr>\u003C/b>\u003C/p>\u003Cp dir=\"ltr\" style=\"line-height:1.38;margin-top:0pt;margin-bottom:0pt;\">\u003Cspan style=\"font-size:13.999999999999998pt;font-family:Arial,sans-serif;color:#000000;background-color:transparent;font-weight:400;font-style:normal;font-variant:normal;text-decoration:none;vertical-align:baseline;white-space:pre;white-space:pre-wrap;\">Q7: Am I allowed to work with teammates?\u003C/span>\u003C/p>\u003Cp dir=\"ltr\" style=\"line-height:1.38;margin-top:0pt;margin-bottom:0pt;\">\u003Cspan style=\"font-size:13.999999999999998pt;font-family:Arial,sans-serif;color:#000000;background-color:transparent;font-weight:400;font-style:normal;font-variant:normal;text-decoration:none;vertical-align:baseline;white-space:pre;white-space:pre-wrap;\">Yes, provide edit links to get immediate feedback.\u003C/span>\u003C/p>\u003Cp>\u003Cb style=\"font-weight:normal;\">\u003Cbr>\u003C/b>\u003C/p>\u003Cp dir=\"ltr\" style=\"line-height:1.38;margin-top:0pt;margin-bottom:0pt;\">\u003Cspan style=\"font-size:13.999999999999998pt;font-family:Arial,sans-serif;color:#000000;background-color:transparent;font-weight:400;font-style:normal;font-variant:normal;text-decoration:none;vertical-align:baseline;white-space:pre;white-space:pre-wrap;\">Q8: Does batch processing exist?\u003C/span>\u003C/p>\u003Cp>\u003C/p>\u003Cp dir=\"ltr\" style=\"line-height:1.38;margin-top:0pt;margin-bottom:0pt;\">\u003Cspan style=\"font-size:13.999999999999998pt;font-family:Arial,sans-serif;color:#000000;background-color:transparent;font-weight:400;font-style:normal;font-variant:normal;text-decoration:none;vertical-align:baseline;white-space:pre;white-space:pre-wrap;\">Yes, post fifty videos all at once.\u003C/span>\u003C/p>\u003Cdiv>\u003Cspan style=\"font-size:13.999999999999998pt;font-family:Arial,sans-serif;color:#000000;background-color:transparent;font-weight:400;font-style:normal;font-variant:normal;text-decoration:none;vertical-align:baseline;white-space:pre;white-space:pre-wrap;\">\u003Cbr>\u003C/span>\u003C/div>","online-video-editor-no-watermark-best-free-video-editor-without-watermark-2024",224,1755626451,1755626686,"4 weeks ago",{"id":123,"lang":11,"author_id":5,"image":124,"title":125,"keywords":126,"description":127,"content":128,"url":129,"views":130,"publishtime":131,"updatetime":132,"status":22,"publishtime_text":133,"status_text":25},1763,"https://api.pixelfox.ai/template/video/generate/feature-1.webp","Video Effects Online: Pro Guide, Tools, and Workflows","video effects online, video effect video, add camera shake online,","Transform videos with stunning video effects online! Pro guide with AI tools, workflows, & how to add camera shake. Create scroll-stopping content.","\u003Cp>\u003Cimg loading=\"lazy\" src=\"https://api.pixelfox.ai/template/video/generate/feature-1.webp\" alt=\"Create video effects online with AI\" />\u003C/p>\n\u003Cp>People use video effects online to turn ordinary clips into scroll‑stopping stories. You can add color grades, light leaks, glitch, zooms, and even camera shake in your browser. You do not need a studio. You only need a plan, a clear workflow, and the right tools. This guide shows you how to design, edit, and publish a video effect video with confidence. It also explains how to add camera shake online the right way, so your footage looks dynamic but still easy to watch.\u003C/p>\n\u003Ch2 id=\"MKGYBf\">What “video effects online” really means\u003C/h2>\n\u003Cp>When we talk about video effects online, we mean visual changes you apply in a web editor. These include:\u003C/p>\n\u003Cul>\n\u003Cli>Filters and color grading: change the mood with contrast, saturation, and curves.\u003C/li>\n\u003Cli>Overlays: add film grain, lens flares, bokeh, snow, and VHS textures.\u003C/li>\n\u003Cli>Transitions: cut on action, cross‑fade, whip pan, slide, and glitch.\u003C/li>\n\u003Cli>Keyed effects: remove green screen, replace skies, or stack graphics.\u003C/li>\n\u003Cli>Motion and camera effects: push‑in, zoom, shake, parallax, Ken Burns.\u003C/li>\n\u003Cli>Speed and time: slow motion, speed ramp, reverse.\u003C/li>\n\u003C/ul>\n\u003Cp>An online editor runs in your browser. So you can edit on Mac, Windows, Chromebook, or even your phone. If you stay inside the browser, you also avoid driver issues and heavy installs.\u003C/p>\n\u003Cp>Authoritative resources back this up. Adobe outlines browser‑based workflows and animated effects in its online editor overview (Adobe Express). You can explore a wide list of in‑browser effect categories on VEED, Kapwing, Flixier, FlexClip, and Clideo. These tools show that serious work can live on the web now, from filters and chroma key to motion graphics.\u003C/p>\n\u003Cul>\n\u003Cli>Adobe Express online editor: \u003Ca href=\"https://www.adobe.com/express/feature/video/editor\" rel=\"nofollow\" target=\"_blank\" >https://www.adobe.com/express/feature/video/editor\u003C/a> \u003C/li>\n\u003Cli>VEED effects: \u003Ca href=\"https://www.veed.io/tools/video-editor-effects\" rel=\"nofollow\" target=\"_blank\" >https://www.veed.io/tools/video-editor-effects\u003C/a> \u003C/li>\n\u003Cli>Kapwing effects: \u003Ca href=\"https://www.kapwing.com/tools/add-effects\" rel=\"nofollow\" target=\"_blank\" >https://www.kapwing.com/tools/add-effects\u003C/a> \u003C/li>\n\u003Cli>Flixier effects: \u003Ca href=\"https://flixier.com/tools/video-effects-editor\" rel=\"nofollow\" target=\"_blank\" >https://flixier.com/tools/video-effects-editor\u003C/a> \u003C/li>\n\u003Cli>FlexClip overlays: \u003Ca href=\"https://www.flexclip.com/tools/video-effects/\" rel=\"nofollow\" target=\"_blank\" >https://www.flexclip.com/tools/video-effects/\u003C/a> \u003C/li>\n\u003Cli>Clideo editor: \u003Ca href=\"https://clideo.com/video-editor\" rel=\"nofollow\" target=\"_blank\" >https://clideo.com/video-editor\u003C/a> \u003C/li>\n\u003C/ul>\n\u003Ch2 id=\"fbJDvI\">The core creative idea comes first\u003C/h2>\n\u003Cp>You should not start with a filter. Start with intent. Ask:\u003C/p>\n\u003Cul>\n\u003Cli>What is the single message?\u003C/li>\n\u003Cli>Who will watch it and where?\u003C/li>\n\u003Cli>Which emotion should the viewer feel?\u003C/li>\n\u003Cli>What effect supports that emotion?\u003C/li>\n\u003C/ul>\n\u003Cp>If you want energy, you use punchy colors, fast cuts, and a light camera shake. If you want calm, you use soft color, longer shots, and gentle movement. If you want nostalgia, you use grain, vignettes, and a warm tint. Tie every choice back to the story.\u003C/p>\n\u003Ch2 id=\"h1cvmQ\">A simple framework for a standout video effect video\u003C/h2>\n\u003Cp>Use this four‑step plan:\u003C/p>\n\u003Cp>1) Script the beats\u003Cbr />\nWrite a short outline: hook, body, and payoff. Decide where each effect lands.\u003C/p>\n\u003Cp>2) Choose a visual language\u003Cbr />\nPick two or three effect families to keep. For example, “clean teal‑orange grade + subtle film grain + quick whip transitions.” Less is more.\u003C/p>\n\u003Cp>3) Match the platform\u003Cbr />\nVertical 9:16 for TikTok and Reels. 1:1 or 4:5 for some Instagram feed posts. 16:9 for YouTube. Use safe margins for captions and graphics.\u003C/p>\n\u003Cp>4) Lock the output early\u003Cbr />\nPick the frame rate and resolution now to avoid resampling later. For social, 24 or 30 fps is common. For gameplay, 60 fps can look better.\u003C/p>\n\u003Cp>You can create this plan on paper. Then you open a web editor and build.\u003C/p>\n\u003Ch2 id=\"r9ueTd\">Where online tools shine (and how to pick wisely)\u003C/h2>\n\u003Cp>Online editors speed up the process because they combine effects, stock, captions, and exports in one place. Here is how to judge them:\u003C/p>\n\u003Cul>\n\u003Cli>Effects library: look for ready overlays like glitch, VHS, snow, lens flares, and bokeh. \u003C/li>\n\u003Cli>Motion controls: check keyframes, camera zoom, and preset animations. \u003C/li>\n\u003Cli>Chroma key: make sure it has a color picker and tolerance controls. \u003C/li>\n\u003Cli>Audio tools: noise clean, auto‑level, music ducking. \u003C/li>\n\u003Cli>Performance: cloud rendering saves time on weak laptops. \u003C/li>\n\u003Cli>Collaboration: project links, comments, and versioning. \u003C/li>\n\u003Cli>Exports: 1080p and 4K, common presets, and clean audio.\u003C/li>\n\u003C/ul>\n\u003Cp>Examples:\u003C/p>\n\u003Cul>\n\u003Cli>VEED lets you layer real‑time effects like VHS, glitch, and filmic with one click. \u003C/li>\n\u003Cli>Kapwing offers chroma key, smart cut for silence, and easy animation presets. \u003C/li>\n\u003Cli>Flixier runs in the browser and uses cloud rendering to finish fast. \u003C/li>\n\u003Cli>Adobe Express includes animated text and Adobe Stock audio. \u003C/li>\n\u003Cli>FlexClip focuses on overlay packs like light leaks, glitch, and film grain. \u003C/li>\n\u003Cli>Clideo keeps it simple with cropping, speed, and filter controls.\u003C/li>\n\u003C/ul>\n\u003Ch2 id=\"0t2ua8\">When you should use AI to speed it up\u003C/h2>\n\u003Cp>AI is now part of online video effects. It helps you:\u003C/p>\n\u003Cul>\n\u003Cli>Generate concepts from a prompt. \u003C/li>\n\u003Cli>Upscale or clean old footage. \u003C/li>\n\u003Cli>Enhance low light and color. \u003C/li>\n\u003Cli>Transfer the look of a style image onto your video.\u003C/li>\n\u003C/ul>\n\u003Cp>Pixelfox AI focuses on these use cases. You can go from idea to draft fast, then refine with manual controls. For concepting and short content, this saves hours.\u003C/p>\n\u003Cul>\n\u003Cli>Try the AI Video Generator to turn text or images into animated scenes: \u003Ca href=\"https://pixelfox.ai/video/generate\">https://pixelfox.ai/video/generate\u003C/a> \u003C/li>\n\u003Cli>Use the AI Video Enhancer to fix clarity, lighting, and color in seconds: \u003Ca href=\"https://pixelfox.ai/video/enhancer\">https://pixelfox.ai/video/enhancer\u003C/a> \u003C/li>\n\u003Cli>Apply an AI video style transfer to turn a clip into anime, sketch, or oil paint: \u003Ca href=\"https://pixelfox.ai/video/style-transfer\">https://pixelfox.ai/video/style-transfer\u003C/a> \u003C/li>\n\u003C/ul>\n\u003Ch2 id=\"sZS5Lx\">Quick wins: how to add camera shake online (without ruining your shot)\u003C/h2>\n\u003Cp>“Add camera shake online” is one of the most searched micro‑effects because it adds energy. Yet too much shake looks fake. Here is how to do it well.\u003C/p>\n\u003Ch3>Method 1: One‑click camera shake preset\u003C/h3>\n\u003Cul>\n\u003Cli>Pick a shake preset with small amplitude and short frequency. \u003C/li>\n\u003Cli>Keep intensity low on dialogue or product shots. \u003C/li>\n\u003Cli>Add more shake only on impacts, hits, or beats. \u003C/li>\n\u003Cli>Avoid heavy shake on text overlays (they become hard to read).\u003C/li>\n\u003C/ul>\n\u003Ch3>Method 2: Manual keyframe shake\u003C/h3>\n\u003Cul>\n\u003Cli>Add two keyframes on the clip position (at the start and end of the shake region). \u003C/li>\n\u003Cli>Between them, add small X/Y offsets every 2–3 frames. \u003C/li>\n\u003Cli>Alternate directions to avoid drift. \u003C/li>\n\u003Cli>Add a little rotation (0.3–0.8°) for realism. \u003C/li>\n\u003Cli>Ease out at the end so it stops clean.\u003C/li>\n\u003C/ul>\n\u003Cp>Pro tip: a tiny motion blur helps. So does a brief bass hit or thump on the audio beat. The eye and ear work together.\u003C/p>\n\u003Ch3>Where camera shake makes sense\u003C/h3>\n\u003Cul>\n\u003Cli>Action moments and punchlines. \u003C/li>\n\u003Cli>Glitch cuts and abrupt transitions. \u003C/li>\n\u003Cli>Beats in music videos. \u003C/li>\n\u003Cli>VFX impacts after explosions, muzzle flashes, or heavy steps.\u003C/li>\n\u003C/ul>\n\u003Ch3>Where to avoid shake\u003C/h3>\n\u003Cul>\n\u003Cli>Screen recordings, UI demos, and tutorials. \u003C/li>\n\u003Cli>Close product shots and small text. \u003C/li>\n\u003Cli>Slow, emotional scenes.\u003C/li>\n\u003C/ul>\n\u003Ch2 id=\"5IyacJ\">The essential workflows for video effects online\u003C/h2>\n\u003Cp>Below are three no‑nonsense walkthroughs you can use today.\u003C/p>\n\u003Ch3>Workflow A: Clean grade + subtle film grain + soft vignettes\u003C/h3>\n\u003Cul>\n\u003Cli>Fix exposure. Set white balance. \u003C/li>\n\u003Cli>Add a base grade. Use a standard contrast curve. \u003C/li>\n\u003Cli>Push color toward your brand mood. \u003C/li>\n\u003Cli>Add film grain (low strength). \u003C/li>\n\u003Cli>Add a slight vignette. Keep the center bright. \u003C/li>\n\u003Cli>Finish with a soft glow or halation if you want a film look.\u003C/li>\n\u003C/ul>\n\u003Cp>This look works for brand stories, personal videos, and calm reels.\u003C/p>\n\u003Ch3>Workflow B: Glitch and VHS for a retro punch\u003C/h3>\n\u003Cul>\n\u003Cli>Duplicate the clip. Offset one copy by a few frames. \u003C/li>\n\u003Cli>Add a horizontal RGB split on the top layer. \u003C/li>\n\u003Cli>Add scanlines and light noise. \u003C/li>\n\u003Cli>Use quick stutter cuts on beats. \u003C/li>\n\u003Cli>Insert glitch transitions between shots.\u003C/li>\n\u003C/ul>\n\u003Cp>You can build most of this with online presets. Add only as much as the story needs.\u003C/p>\n\u003Ch3>Workflow C: Green screen replacement with chroma key\u003C/h3>\n\u003Cul>\n\u003Cli>Use the eyedropper on the green. \u003C/li>\n\u003Cli>Raise threshold until edges key out. \u003C/li>\n\u003Cli>Shrink/soften the matte a bit. \u003C/li>\n\u003Cli>Add the new background. Match color and contrast. \u003C/li>\n\u003Cli>Add a soft shadow or blur the background so the subject pops.\u003C/li>\n\u003C/ul>\n\u003Cp>Kapwing and Flixier list chroma key tools in the effect panels. You only need a clean plate and steady lighting.\u003C/p>\n\u003Ch2 id=\"mWx0Zk\">Asset overlays and how to use them right\u003C/h2>\n\u003Cp>You can boost your video effect video with ready overlays:\u003C/p>\n\u003Cul>\n\u003Cli>Light leaks and lens flares (screen or add blend mode). \u003C/li>\n\u003Cli>Dust and scratches for vintage feel. \u003C/li>\n\u003Cli>Snow, rain, smoke, and fire for mood. \u003C/li>\n\u003Cli>HUD and glitch elements for tech vibes.\u003C/li>\n\u003C/ul>\n\u003Cp>Use high‑quality files with alpha channels or clean black backgrounds. Make sure you have the rights to use them. FootageCrate offers effects and motion graphics in ProRes, MP4, and PNG sequences with alpha channels: \u003Ca href=\"https://www.footagecrate.com/vfx/visual-graphics\" rel=\"nofollow\" target=\"_blank\" >https://www.footagecrate.com/vfx/visual-graphics\u003C/a>\u003C/p>\n\u003Cp>Keep overlays subtle. They should support the shot, not hide it.\u003C/p>\n\u003Ch2 id=\"5lMnxi\">Audio is half the effect\u003C/h2>\n\u003Cp>Good visuals fail with poor sound. Add whooshes on transitions, light hits under cuts, and ambient beds under quiet scenes. Use noise reduction on dialogue. Keep loudness near platform norms so people do not get a shock.\u003C/p>\n\u003Cp>Most online editors include basic noise clean and level controls. You can also bring in a free limiter or EQ if the tool supports it.\u003C/p>\n\u003Ch2 id=\"POhUk8\">Performance, formats, and exports you can trust\u003C/h2>\n\u003Cp>Online editors export to common presets. YouTube lists recommended upload settings on its Help pages. Follow those for bit rate, codec, and frame rate to avoid re‑encoding issues later.\u003C/p>\n\u003Cul>\n\u003Cli>YouTube Help: Recommended upload encoding settings\u003Cbr />\n\u003Ca href=\"https://support.google.com/youtube/answer/1722171?hl=en\" rel=\"nofollow\" target=\"_blank\" >https://support.google.com/youtube/answer/1722171?hl=en\u003C/a>\u003C/li>\n\u003C/ul>\n\u003Cp>Practical tips:\u003C/p>\n\u003Cul>\n\u003Cli>Lock your frame rate at the start. \u003C/li>\n\u003Cli>Export at your native frame rate. \u003C/li>\n\u003Cli>Keep 1080p for social if your source is 1080p. \u003C/li>\n\u003Cli>Use 4K when you need reframes or a platform benefit. \u003C/li>\n\u003Cli>Use high bit rate if the scene has lots of motion or noise.\u003C/li>\n\u003C/ul>\n\u003Cp>Cloud rendering, like in Flixier and some AI pipelines, can finish heavy exports faster than low‑end laptops. That saves time on big projects.\u003C/p>\n\u003Ch2 id=\"8TMrF0\">A realistic scoring rubric for your effect choices\u003C/h2>\n\u003Cp>Before you hit export, run a quick check:\u003C/p>\n\u003Cul>\n\u003Cli>Clarity: can I read on‑screen text at phone size? \u003C/li>\n\u003Cli>Consistency: do effects match the same visual language? \u003C/li>\n\u003Cli>Timing: do effects land on beats or story turns? \u003C/li>\n\u003Cli>Restraint: did I remove one thing I do not need? \u003C/li>\n\u003Cli>Purpose: can I explain why each effect is there?\u003C/li>\n\u003C/ul>\n\u003Cp>If you cannot answer “why,” cut it.\u003C/p>\n\u003Ch2 id=\"gKQDLF\">Try a fast AI‑assisted path to draft, then refine by hand\u003C/h2>\n\u003Cp>You can concept faster with AI, then take control:\u003C/p>\n\u003Cul>\n\u003Cli>Use an AI tool to generate a first pass of shots and motion from text or reference images. \u003C/li>\n\u003Cli>Replace any weak shots with your own footage. \u003C/li>\n\u003Cli>Enhance clips with color and detail. \u003C/li>\n\u003Cli>Add manual effects where they matter most. \u003C/li>\n\u003Cli>Polish audio last.\u003C/li>\n\u003C/ul>\n\u003Cp>Pixelfox AI is built around this workflow. You can ideate at speed, then finish with precision.\u003C/p>\n\u003Cul>\n\u003Cli>Generate scenes from text or images with the AI Video Generator (great for ideation and social hooks): \u003Ca href=\"https://pixelfox.ai/video/generate\">https://pixelfox.ai/video/generate\u003C/a> \u003C/li>\n\u003Cli>Clean up low‑light or soft clips with the AI Video Enhancer (simple but powerful quality lift): \u003Ca href=\"https://pixelfox.ai/video/enhancer\">https://pixelfox.ai/video/enhancer\u003C/a> \u003C/li>\n\u003Cli>Re‑skin your clip into a fresh look with AI video style transfer (anime, sketch, oil paint, and more): \u003Ca href=\"https://pixelfox.ai/video/style-transfer\">https://pixelfox.ai/video/style-transfer\u003C/a> \u003C/li>\n\u003C/ul>\n\u003Cp>\u003Cimg loading=\"lazy\" src=\"https://api.pixelfox.ai/template/home/step_2.webp\" alt=\"Choose styles and effects in seconds\" />\u003C/p>\n\u003Ch2 id=\"jl31Jg\">Mobile vs desktop vs cloud: what to expect\u003C/h2>\n\u003Cul>\n\u003Cli>Mobile browser editors are fine for quick posts, trims, captions, and basic effects. \u003C/li>\n\u003Cli>Desktop browsers can handle longer timelines, more layers, and heavier color work. \u003C/li>\n\u003Cli>Cloud rendering frees your computer and shortens exports. \u003C/li>\n\u003Cli>If you need deep compositing, you may still move a shot to desktop software. Yet you can still do 80% of social work online.\u003C/li>\n\u003C/ul>\n\u003Ch2 id=\"p5W8YN\">Security, privacy, and reliability\u003C/h2>\n\u003Cp>Always read the privacy policy of your online editor. Check how long projects stay on their servers. Some tools keep drafts for a set time. Some add watermarks on free plans. Check team roles and access, especially if you work with client files.\u003C/p>\n\u003Cp>You should also keep local backups of key assets. Use a clean folder for exports with clear names: project name, date, version, and resolution.\u003C/p>\n\u003Ch2 id=\"h8Td4u\">Platform‑ready versions in one pass\u003C/h2>\n\u003Cp>You save time when you make all versions at once:\u003C/p>\n\u003Cul>\n\u003Cli>Cut the master. \u003C/li>\n\u003Cli>Duplicate and reframe for 9:16, 1:1, and 4:5. \u003C/li>\n\u003Cli>Adjust captions and on‑screen text for safe zones. \u003C/li>\n\u003Cli>Export with platform presets. \u003C/li>\n\u003Cli>Keep a high‑quality master for future edits.\u003C/li>\n\u003C/ul>\n\u003Cp>Many online editors include resizing templates. This helps you ship more without losing quality.\u003C/p>\n\u003Ch2 id=\"U8TPWZ\">Common mistakes (and how to fix them fast)\u003C/h2>\n\u003Cul>\n\u003Cli>\n\u003Cp>Too many effects at once\u003Cbr />\nFix: pick two to three families and stay with them.\u003C/p>\n\u003C/li>\n\u003Cli>\n\u003Cp>Over‑sharpened video\u003Cbr />\nFix: keep sharpening low; use detail only where needed.\u003C/p>\n\u003C/li>\n\u003Cli>\n\u003Cp>Heavy camera shake everywhere\u003Cbr />\nFix: use shake on beats only; keep dialogue steady.\u003C/p>\n\u003C/li>\n\u003Cli>\n\u003Cp>Dirty chroma key edges\u003Cbr />\nFix: refine matte, add a small blur, match color and grain.\u003C/p>\n\u003C/li>\n\u003Cli>\n\u003Cp>Loud music under dialogue\u003Cbr />\nFix: duck music by 6–10 dB under speech; sidechain if the tool allows.\u003C/p>\n\u003C/li>\n\u003Cli>\n\u003Cp>Export stutter from mixed frame rates\u003Cbr />\nFix: set a project frame rate first; conform all clips to match.\u003C/p>\n\u003C/li>\n\u003C/ul>\n\u003Ch2 id=\"1hUroL\">Example build: from zero to polished in under an hour\u003C/h2>\n\u003Cp>Here is a straight path you can follow:\n1) Import your clips.\u003Cbr />\n2) Trim and set the story beats.\u003Cbr />\n3) Add a base color grade.\u003Cbr />\n4) Drop a light film grain overlay at low opacity.\u003Cbr />\n5) Add one energy moment with a short camera shake.\u003Cbr />\n6) Place simple animated text with clean fonts.\u003Cbr />\n7) Use one transition style across the timeline.\u003Cbr />\n8) Add a whoosh or hit on each key cut.\u003Cbr />\n9) Export 16:9 and 9:16 versions.\u003Cbr />\n10) Watch on your phone before you post.\u003C/p>\n\u003Cp>\u003Cimg loading=\"lazy\" src=\"https://api.pixelfox.ai/template/image-upscaler/feat_1.webp\" alt=\"Upscale and enhance for a cleaner master\" />\u003C/p>\n\u003Ch2 id=\"e1atEk\">Credible sources you can trust while you work\u003C/h2>\n\u003Cp>Use these to confirm best practices and specs:\u003C/p>\n\u003Cul>\n\u003Cli>Adobe Express on adding animated effects in browser: \u003Ca href=\"https://www.adobe.com/express/feature/video/editor\" rel=\"nofollow\" target=\"_blank\" >https://www.adobe.com/express/feature/video/editor\u003C/a> \u003C/li>\n\u003Cli>VEED on filters, VHS, glitch, and filmic looks: \u003Ca href=\"https://www.veed.io/tools/video-editor-effects\" rel=\"nofollow\" target=\"_blank\" >https://www.veed.io/tools/video-editor-effects\u003C/a> \u003C/li>\n\u003Cli>Kapwing on chroma key and background removal: \u003Ca href=\"https://www.kapwing.com/tools/add-effects\" rel=\"nofollow\" target=\"_blank\" >https://www.kapwing.com/tools/add-effects\u003C/a> \u003C/li>\n\u003Cli>Flixier on keyframes, transitions, and cloud render: \u003Ca href=\"https://flixier.com/tools/video-effects-editor\" rel=\"nofollow\" target=\"_blank\" >https://flixier.com/tools/video-effects-editor\u003C/a> \u003C/li>\n\u003Cli>YouTube Help on upload encoding settings and bit rate: \u003Ca href=\"https://support.google.com/youtube/answer/1722171?hl=en\" rel=\"nofollow\" target=\"_blank\" >https://support.google.com/youtube/answer/1722171?hl=en\u003C/a> \u003C/li>\n\u003Cli>FootageCrate on using transparent overlays and 4K assets: \u003Ca href=\"https://www.footagecrate.com/vfx/visual-graphics\" rel=\"nofollow\" target=\"_blank\" >https://www.footagecrate.com/vfx/visual-graphics\u003C/a>\u003C/li>\n\u003C/ul>\n\u003Cp>Cross‑checking with these resources helps you stay accurate and consistent. It also helps you make choices that hold up across platforms.\u003C/p>\n\u003Ch2 id=\"CtqW5m\">Final checklist before you publish\u003C/h2>\n\u003Cul>\n\u003Cli>The first three seconds hold a clear visual hook. \u003C/li>\n\u003Cli>Colors match the brand or story mood. \u003C/li>\n\u003Cli>Text is readable on a small phone screen. \u003C/li>\n\u003Cli>Audio is clean and not too loud. \u003C/li>\n\u003Cli>Effects are purposeful and not overdone. \u003C/li>\n\u003Cli>Exports follow the right aspect ratios. \u003C/li>\n\u003Cli>File names are clear and versioned.\u003C/li>\n\u003C/ul>\n\u003Cp>If this list passes, you are ready to post.\u003C/p>\n\u003Ch2 id=\"Ib5kmN\">Conclusion: make more with less, and ship faster\u003C/h2>\n\u003Cp>Video effects online let you build strong visuals fast. You can design a simple plan, pick two or three effect families, and keep the story first. You can add camera shake online with care so the clip feels alive, not messy. You can lean on AI for speed, then refine by hand for control. And you can export for each platform without leaving your browser.\u003C/p>\n\u003Cp>If you need a quick way to draft ideas, enhance quality, and try new looks, start with Pixelfox AI. Try the AI Video Generator for fast concepts, lift your footage with the AI Video Enhancer, and push a fresh look with AI video style transfer. Then finish with clear sound and smart timing. Publish with purpose. Measure the results. And keep improving your next video effect video.\u003C/p>\n\u003Cp>Remember, the best use of video effects online is to support the story. Pick what helps the viewer feel something. Remove the rest.\u003C/p>","video-effects-online-pro-guide-tools-and-workflows",38,1756690889,1756690852,"2 weeks ago",{"id":135,"lang":11,"author_id":61,"image":13,"title":136,"keywords":15,"description":137,"content":138,"url":139,"views":140,"publishtime":141,"updatetime":142,"status":22,"publishtime_text":24,"status_text":25},699,"Best AI Image Editor with Prompt: Add, Edit, and Enhance Images Online","Use the best AI image editor with prompt features in 2025. Add to image, change photo, fix photos online—free and intuitive AI editing tools available.","\u003Cp data-start=\"548\" data-end=\"965\">AI-powered editing tools are redefining how we interact with digital images. Whether you want to \u003Cspan data-start=\"645\" data-end=\"661\" style=\"\">add to image\u003C/span>, \u003Cspan data-start=\"663\" data-end=\"685\" style=\"\">edit with a prompt\u003C/span>, or perform advanced fixes, AI image editors are increasingly accessible and feature-rich. This guide will explore tools to \u003Cspan data-start=\"810\" data-end=\"829\" style=\"\">ai add to photo\u003C/span>, \u003Cspan data-start=\"831\" data-end=\"849\" style=\"\">ai edit images\u003C/span>, and more—especially focusing on prompt-based editing, free online options, and powerful features you need in 2025.\u003C/p>\u003Cp data-start=\"967\" data-end=\"1077\">We'll also show how to leverage \u003Cspan data-start=\"999\" data-end=\"1011\" style=\"\">PixelFox\u003C/span> for prompt-driven creations: \u003Ca data-start=\"1041\" data-end=\"1076\" rel=\"noopener\" target=\"_new\" class=\"\" href=\"https://pixelfox.ai/\">Pixelfox AI\u003C/a>.\u003C/p>\u003Ch2 data-start=\"1084\" data-end=\"1134\" class=\"\" id=\"qYaMsG\">What Can an AI Image Editor with Prompt Do?\u003C/h2>\u003Ch3 data-start=\"1136\" data-end=\"1187\" class=\"\">Add or Replace Elements with Text Prompts\u003C/h3>\u003Cp data-start=\"1188\" data-end=\"1352\">Modern tools let you \u003Cspan data-start=\"1209\" data-end=\"1225\">add to image\u003C/span> by typing instructions like “add a vase with sunflowers”—AI handles the rest seamlessly.\u003C/p>\u003Ch3 data-start=\"1354\" data-end=\"1397\" class=\"\">Inpainting and Generative Editing\u003C/h3>\u003Cp data-start=\"1398\" data-end=\"1536\">Use prompts to remove objects, fill gaps, or upscale your photo using AI-powered inpainting methods.\u003C/p>\u003Ch3 data-start=\"1538\" data-end=\"1581\" class=\"\">Repair and Retouch with AI Fixers\u003C/h3>\u003Cp data-start=\"1582\" data-end=\"1709\">Fix portraits, eliminate blemishes, or restore old photos with one-click AI enhancements.\u003C/p>\u003Ch2 data-start=\"1716\" data-end=\"1772\" class=\"\" id=\"ZF4vt5\">Top Tools for AI Image Editing with Prompt (2025)\u003C/h2>\u003Ch3 data-start=\"1774\" data-end=\"1809\" class=\"\">\u003Cstrong data-start=\"1782\" data-end=\"1807\">Fotor AI Photo Editor\u003C/strong>\u003C/h3>\u003Cp data-start=\"1810\" data-end=\"2006\">Allows \u003Cspan data-start=\"1817\" data-end=\"1849\">ai photo editing with prompt\u003C/span> to remove backgrounds, extend canvas, and add objects. Includes \u003Cspan data-start=\"1914\" data-end=\"1932\">ai image fixer\u003C/span> and \u003Cspan data-start=\"1937\" data-end=\"1958\">ai picture editor\u003C/span> features.\u003C/p>\u003Ch3 data-start=\"2008\" data-end=\"2057\" class=\"\">\u003Cstrong data-start=\"2016\" data-end=\"2055\">Canva Magic Edit (Stable Diffusion)\u003C/strong>\u003C/h3>\u003Cp data-start=\"2058\" data-end=\"2253\">Use “Magic Edit” to click or brush over areas and type what to add or remove—seamless and intuitive for \u003Cspan data-start=\"2162\" data-end=\"2180\" style=\"\">ai image adder\u003C/span> or \u003Cspan data-start=\"2184\" data-end=\"2204\" style=\"\">ai image changer\u003C/span> workflows.\u003C/p>\u003Ch3 data-start=\"2255\" data-end=\"2295\" class=\"\">\u003Cstrong data-start=\"2263\" data-end=\"2293\">DeepAI Prompt-Based Editor\u003C/strong>\u003C/h3>\u003Cp data-start=\"2296\" data-end=\"2466\">Upload an image and enter text like “make the sky red” for quick adjustments—perfect for \u003Cstrong data-start=\"2385\" data-end=\"2421\">ai image editor with prompt free\u003C/strong> tasks.\u003C/p>\u003Ch3 data-start=\"2468\" data-end=\"2498\" class=\"\">\u003Cstrong data-start=\"2476\" data-end=\"2496\">getimg.ai Editor\u003C/strong>\u003C/h3>\u003Cp data-start=\"2499\" data-end=\"2673\">A comprehensive \u003Cstrong data-start=\"2515\" data-end=\"2534\">AI image editor\u003C/strong> that handles restyling, background changes, object replacement, and upscaling—all via prompt inputs.\u003C/p>\u003Ch3 data-start=\"2675\" data-end=\"2716\" class=\"\">\u003Cstrong data-start=\"2683\" data-end=\"2714\">Playground AI & imgtoimg.ai\u003C/strong>\u003C/h3>\u003Cp data-start=\"2717\" data-end=\"2884\">As noted by users, these free online tools allow prompt-based \u003Cstrong data-start=\"2779\" data-end=\"2797\">image to image\u003C/strong> editing—reshaping your photo with style prompts.\u003C/p>\u003Ch3 data-start=\"2886\" data-end=\"2911\" class=\"\">\u003Cstrong data-start=\"2894\" data-end=\"2909\">Pixlr Suite\u003C/strong>\u003C/h3>\u003Cp data-start=\"2912\" data-end=\"3060\">Offers in-browser editing with brush, heal, and generative fill capabilities. Great for quick “AI edit” tasks.\u003C/p>\u003Ch3 data-start=\"3062\" data-end=\"3087\">\u003Cstrong data-start=\"3070\" data-end=\"3085\">Luminar Neo\u003C/strong>\u003C/h3>\u003Cp data-start=\"3088\" data-end=\"3306\">Although not prompt-based, this desktop app stands out for AI-driven enhancements: sky replacement, relight, denoise, upscaling—excels as a full \u003Cspan data-start=\"3233\" data-end=\"3267\">best ai photo editing software.\u003C/span>\u003C/p>\u003Ch2 data-start=\"3313\" data-end=\"3374\" class=\"\" id=\"XLCrlR\">How to Use Prompt-Based AI Image Editors: Step-by-Step\u003C/h2>\u003Ch3 data-start=\"3376\" data-end=\"3412\" class=\"\">Step 1 – Upload Your Image\u003C/h3>\u003Cp data-start=\"3413\" data-end=\"3486\">Choose a clear photo—selfie, product shot, or any image you want to edit.\u003C/p>\u003Ch3 data-start=\"3488\" data-end=\"3531\" class=\"\">Step 2 – Apply Prompt-Based Edits\u003C/h3>\u003Cul data-start=\"3532\" data-end=\"3704\">\r\n\u003Cli data-start=\"3532\" data-end=\"3606\">\r\n\u003Cp data-start=\"3534\" data-end=\"3606\">Use \u003Cspan data-start=\"3538\" data-end=\"3559\">“ai add to image”\u003C/span> prompts, e.g., “add a bouquet to the table.”\u003C/p>\r\n\u003C/li>\r\n\u003Cli data-start=\"3607\" data-end=\"3704\">\r\n\u003Cp data-start=\"3609\" data-end=\"3704\">Or “remove the background” to initiate generative fill.\u003C/p>\r\n\u003C/li>\r\n\u003C/ul>\u003Ch3 data-start=\"3706\" data-end=\"3751\" class=\"\">Step 3 – Fine-Tune with Brush Tools\u003C/h3>\u003Cp data-start=\"3752\" data-end=\"3895\">Use tools like \u003Cspan data-start=\"3767\" data-end=\"3783\">Magic Eraser\u003C/span> or \u003Cspan data-start=\"3787\" data-end=\"3801\">Heal Brush\u003C/span> to refine edges—feature available in Fotor and Canva.\u003C/p>\u003Ch3 data-start=\"3897\" data-end=\"3933\" class=\"\">Step 4 – Export the Result\u003C/h3>\u003Cp data-start=\"3934\" data-end=\"4061\">Download your image in high resolution. Many platforms (Fotor, Canva) offer final edits with downloadable formats like PNG/JPG.\u003C/p>\u003Ch2 data-start=\"4068\" data-end=\"4115\" class=\"\" id=\"zgeZDB\">Why Choose AI Image Editors with Prompt?\u003C/h2>\u003Ch3 data-start=\"4117\" data-end=\"4153\" class=\"\">Zero Design Skill Required\u003C/h3>\u003Cp data-start=\"4154\" data-end=\"4207\">No need for Photoshop—just type your vision in words.\u003C/p>\u003Ch3 data-start=\"4209\" data-end=\"4236\" class=\"\">Fast and Creative\u003C/h3>\u003Cp data-start=\"4237\" data-end=\"4342\">Achieve professional effects in seconds. Want “AI photo filter” plus retouch and background change? Done.\u003C/p>\u003Ch3 data-start=\"4344\" data-end=\"4373\" class=\"\">Free and Accessible\u003C/h3>\u003Cp data-start=\"4374\" data-end=\"4474\">Platforms like Fotor, DeepAI, getimg.ai, and Playground AI offer generous free tiers for casual use.\u003C/p>\u003Cp data-start=\"5303\" data-end=\"5421\">Use cases include: adding elements to images, fixing selfies, editing background, prompt-driven creative enhancements.\u003C/p>\u003Ch2 data-start=\"5428\" data-end=\"5449\" class=\"\" id=\"tSCxUz\">Final Thoughts\u003C/h2>\u003Cp data-start=\"5451\" data-end=\"5727\">By blending prompt-based editing with AI tools, you can achieve powerful, creative image edits without complex learning. Tools like Fotor, Canva, getimg.ai, DeepAI, and Pixlr offer amazing capabilities—and \u003Cspan data-start=\"5657\" data-end=\"5669\" style=\"\">PixelFox\u003C/span> (linked above) adds another layer of artistic generation.\u003C/p>","Best AI Image Editor with Prompt to Add and Edit Photos",187,1754887827,1754888476,["Reactive",144],{"$si18n:cached-locale-configs":145,"$si18n:resolved-locale":15},{"en":146,"zh":149,"tw":151,"vi":153,"id":155,"pt":157,"es":159,"fr":161,"de":163,"it":165,"nl":167,"th":169,"tr":171,"ru":173,"ko":175,"ja":177,"ar":179,"pl":181},{"fallbacks":147,"cacheable":148},[],true,{"fallbacks":150,"cacheable":148},[],{"fallbacks":152,"cacheable":148},[],{"fallbacks":154,"cacheable":148},[],{"fallbacks":156,"cacheable":148},[],{"fallbacks":158,"cacheable":148},[],{"fallbacks":160,"cacheable":148},[],{"fallbacks":162,"cacheable":148},[],{"fallbacks":164,"cacheable":148},[],{"fallbacks":166,"cacheable":148},[],{"fallbacks":168,"cacheable":148},[],{"fallbacks":170,"cacheable":148},[],{"fallbacks":172,"cacheable":148},[],{"fallbacks":174,"cacheable":148},[],{"fallbacks":176,"cacheable":148},[],{"fallbacks":178,"cacheable":148},[],{"fallbacks":180,"cacheable":148},[],{"fallbacks":182,"cacheable":148},[],["Set"],["ShallowReactive",185],{"article-detail-layer-photos-easily-with-this-free-photo-layering-app-online":-1},"/blog/layer-photos-easily-with-this-free-photo-layering-app-online",{"userStore":188},{"showLoginModal":189,"showLoginClose":148,"loading":190,"inviteCode":15,"bidIdentification":15,"token":15,"userInfo":192,"showPriceDialog":189,"paidBefore":21,"showTrailEndDialog":189},false,{"show":189,"message":191},"加载中...",{"avatar":193,"nickname":193,"email":193},null]