 Credit

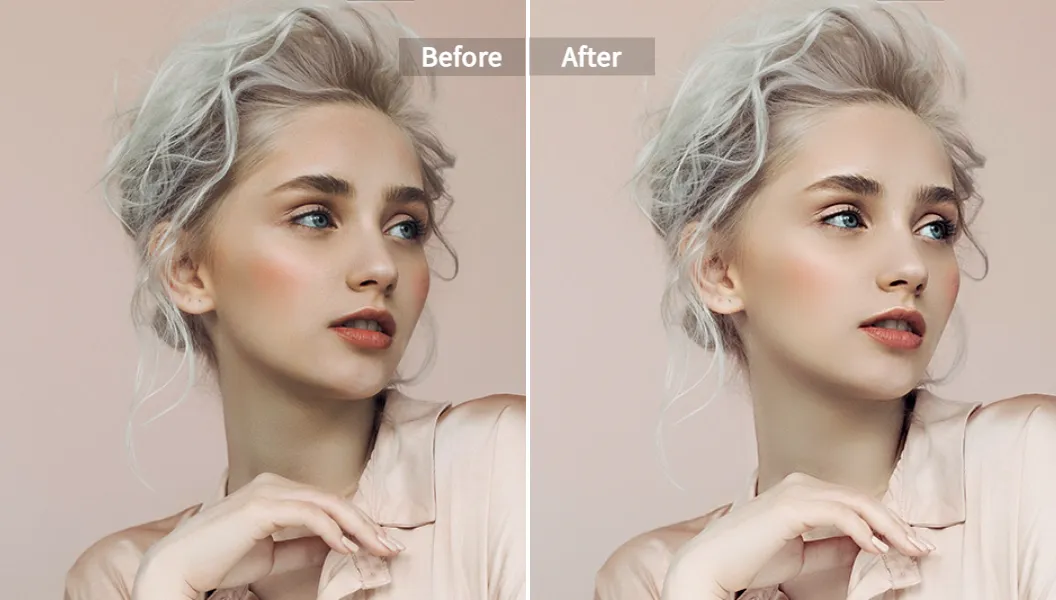
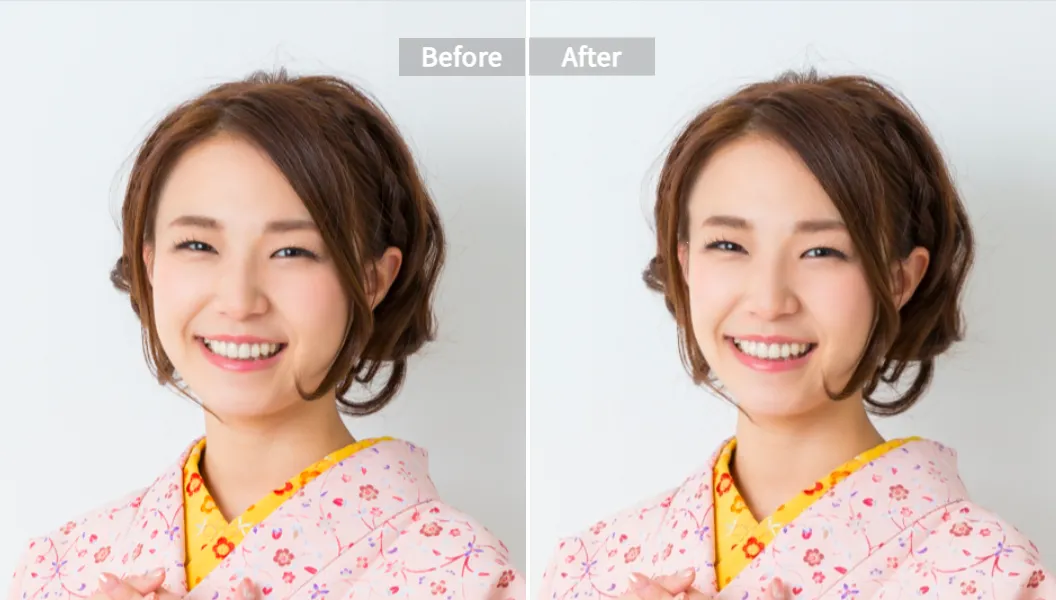
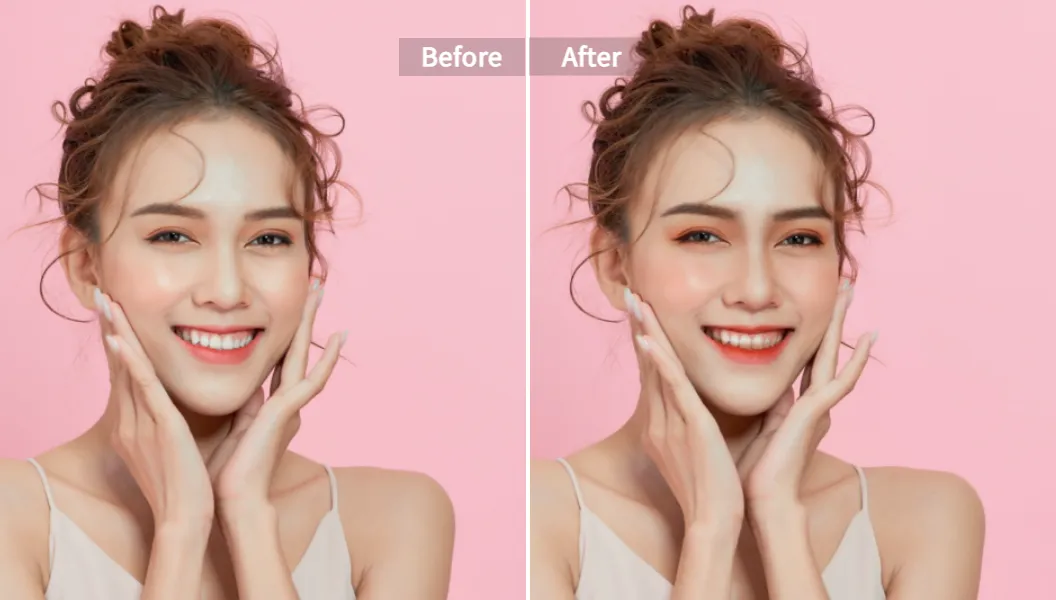
If you’ve ever stared at a shot that should be fire but your skin looks muddy, your pores look like the moon, and your smile hides a surprise pimple, you’re not alone. The good news: make face clear AI is now fast, natural, and easy. This guide unpacks how modern AI cleans up faces without that plastic Barbie sheen. You’ll learn why photos look unclear, how the tech fixes it, and how to get pro results in minutes using Pixelfox AI. You’ll also see real cases, advanced tips, and a fair comparison with Photoshop and other online tools. And yes, we’ll talk about the “clear skin filter online” crowd-pleasers too.
Why so many faces look unclear in photos
Smartphone cameras are good. Lighting and compression still wreck shots. Low light boosts noise. Front cameras can over-smooth by default. Digital zoom chews detail. Compression from social apps blurs edges and adds halos. And a quick “beauty” filter can remove texture and make skin look fake.
And there’s the human part. We rush. We shoot in bad light. We post without checking sharpness. We crop way too tight. So the image loses micro-contrast and skin detail. The result is a portrait with dull tone, soft edges, and uneven texture.
This is why people search “clear skin filter online” and “make face clear AI.” The intent is simple. Get a clean, natural face with no manual Photoshop wizardry. Keep pores. Lose acne. Keep identity. Lose artifacts. And finish in under a minute.
What “make face clear AI” actually does
Under the hood, good AI face enhancers use a few steps.
- They detect the face. Then they map key regions like skin, eyes, lips, and hair.
- They find problems. Acne, blemishes, dark circles, shallow wrinkles, uneven tone, blur, and noise.
- They fix with masks. One pass smooths the skin texture. One pass sharpens edges. One pass adjusts tone and contrast. A final pass blends the whole thing so it looks real.
Gartner has tracked rapid maturity in computer vision and generative AI for imaging across recent Hype Cycles. Forrester’s 2024 guidance on AI design reminds teams to preserve identity and transparency in outputs. Nielsen Norman Group has long noted that interfaces with clear feedback and simple controls increase trust. These ideas show up in the best photo tools today: one-click actions, sliders for intensity, side-by-side previews, and fast download. It sounds simple. It works because the hard math runs on trained models tuned to skin.
And no, a good “make face clear AI” is not the same as a “blurry beauty cam.” A proper model retains micro-texture and tiny pores. It fixes problems but does not erase human features. It can upscale too, so you get crisp edges and fewer compression artifacts.
Why I recommend Pixelfox AI as your daily driver
You want results that look good on Instagram and LinkedIn. You want control that doesn’t force a 20-minute tutorial. You want speed. That’s why I push Pixelfox AI as the first stop for make face clear AI.
- It offers true one-click “AI Face Beauty.” It smooths skin, evens tone, removes blemishes, and boosts clarity in one pass. You can tune the intensity so you keep natural pores.
- It adds smart controls like “AI Face Reshape” if you need subtle contour changes. You can narrow a jawline, lift a nose bridge, or balance lips. No liquify headaches. Just a slider.
- It has a clean UI. You upload. You tweak. You download. You feel like a pro without a PhD in layers.
- It respects privacy. The platform highlights security and keeps edits private. This matters for headshots and client work.
- It’s web-based. No heavy install. It supports common formats. It plays nice on laptops and phones.
You can start with the core AI Face Beauty. When you need more control, jump to AI Face Reshape. If you want a post-ready glow, test the AI Makeup Filter. And if your selfie is for a vlog or Story, there’s even an AI Portrait Enhancer for video.
Step-by-step: make face clear AI with Pixelfox (in under 2 minutes)
Use this flow when you need a clean portrait fast and you want to avoid that “overdone” look.
1) Upload your photo
Go to AI Face Beauty. Click Upload. Drop in your JPG or PNG. Use a shot with decent light if you can.
2) Apply Face Beauty
Hit Apply. The model scans the face and cleans up acne, small blemishes, and uneven tone. It boosts clarity while keeping texture. It also brightens the face a touch.
3) Adjust intensity
Use the slider to dial the effect. Keep some pores. Aim for “wow, you slept well” not “you switched faces.” If you see plastic, back off the smoothness by 10–20%.
4) Sharpen and tone
Nudge clarity if edges look soft. Add small contrast for sculpting. Avoid wild saturation. Your skin should look like skin.
5) Export
Download a high-quality file. Keep a full-res version for print and a smaller one for socials. Done.
Tip: Shoot near a window with soft side light. AI loves good input. Your edits will look cleaner, and skin tones will stay true. A quick wipe of the lens helps too. Yes, really.
Fine-tune with AI Face Reshape when you need tiny corrections
Sometimes you just want a tiny chin tuck or a subtle nose balance for symmetry. The AI Face Reshape tool does that with simple sliders. You don’t need to drag pixels around like in old-school liquify.
- Slim the jawline for a cleaner angle.
- Enlarge eyes slightly for a more open look.
- Adjust nose contour to fix lens distortion.
- Refine mouth shape after a weird mid-laugh capture.
Keep changes light. If you can spot the edit at a glance, you went too far. Less is more. Your audience is good at sniffing out filter abuse.
Tip: Save three versions: original, light edit, slightly stronger edit. Post the middle one. Keep the stronger version for small profile pictures or thumbnails where details compress.
Add tasteful polish with AI Makeup Filter
If your face is clear but the shot needs polish, use the AI Makeup Filter. It applies foundation, soft blush, lip color, and eyeshadow that fit your skin tone and face shape.
Keep it natural for LinkedIn. Go glam for a campaign or cover. You can test looks without buying a single product. It’s fun. It’s fast. And it saves you from “I blinked” reshoots.
The “clear skin filter online” checklist for natural results
You want clean skin. You do not want ceramic. Use this simple checklist.
- Keep skin texture at least 20–30%. Zoom in and look for pores.
- Decrease smoothness near eyes and lips. Keep detail in high-movement zones.
- Preserve freckles if that’s your look. Reduce them only if they distract.
- Avoid heavy global sharpening. Use light clarity instead.
- Watch your white balance. Warm skin looks alive. Blue skin looks… not great.
- Compare on a second device. Edits can look different on a laptop vs. a phone.
Pixelfox makes this easy because you can adjust intensity quickly, then preview. And the presets don’t nuke skin texture.
Pro settings that change everything
If you want that “this looks like a magazine” vibe without overkill, use these quick moves.
- Start with AI Face Beauty at 60–70% intensity. Then add 5–10% clarity.
- Use AI Face Reshape to fix lens distortion. Phones can widen faces near the edge. Narrow the face by 5–8% to counter it.
- Add AI Makeup Filter with a Natural preset. A light foundation and gentle blush even tone without screaming “filter.”
- Export at high resolution. Then resize for social. You keep micro-contrast this way.
- Batch similar edits for a series. Keep your look consistent across a carousel.
And if your selfie is for Reels or a vlog intro, apply the AI Portrait Enhancer for videos to keep skin consistent across frames.
How Pixelfox stacks up against Photoshop
Photoshop is powerful. It’s also time-heavy. It shines for complex composites, masks, and pixel-level control. It’s overkill when you want a quick, natural face cleanup.
-
Speed
Pixelfox does in 20–40 seconds what can take 10–20 minutes with manual healing, frequency separation, and dodge/burn. -
Consistency
AI gives you even results across a batch. Manual retouching varies by your energy and time. -
Learning curve
Photoshop needs real practice for clean skin work. Pixelfox uses sensible sliders and preview. -
Texture
Frequency separation can do magic. It also breaks fast and looks fake if you push it. Pixelfox keeps texture by default, and the model is trained to avoid plasticity.
Use Photoshop when you need surgery. Use Pixelfox when you need a clean, fast, natural face.
How Pixelfox compares to other online tools
There are many solid tools. Some are great at one thing. Others try to do all the things. Here’s a candid take so you choose well.
-
SnapEdit
Nice one-tap acne and blemish removal. Mobile-friendly. Good for quick selfies. It may oversmooth on high-intensity. -
VanceAI
Strong at acne and wrinkle removal. Has enhance and sharpen. Good if you want simple passes. Watch for over-processed edges on heavy settings. -
Fotor
Big toolkit. One-click blemish and wrinkle tools. Fun extras like teeth whitening and reshaping. The UI is packed, so plan a few minutes to find your ideal flow. -
Picsart
Great enhancer and a full editor. Strong API/SDK for devs. Lots of creative tools beyond face edits. Can be a bit much if you only want skin fixes. -
AI Ease
Clean “Manual” mode for precise touch-ups. Simple interface. Balanced results for headshots and resumes. -
Evoto
Pro-grade workflow for photographers. Batch editing, presets, great for weddings and teams. Requires a heavier setup but pays off at scale. -
Enhancor
Amazing at fixing AI-generated portraits that look too smooth. If your Midjourney skin looks waxy, this tool makes it look real. -
Nero AI
Simple face enhancement with sharpening. Good for quick clarity boosts on portraits.
Where Pixelfox wins: fast one-click Face Beauty, natural texture by default, friendly sliders for intensity, privacy-first posture, and a tight set of add-ons like AI Face Reshape and AI Makeup Filter that work together. You don’t wander through 40 panels. You edit and ship.
And one more point on trust. According to Nielsen Norman Group, users trust interfaces that give immediate feedback and predictable results. Pixelfox previews changes and sticks to realistic tones, which aligns with those best practices. That’s why people come back to it.
Real-world case studies
Case 1: Freelance content creator, NYC
She shoots on an iPhone at golden hour. The skin looks great in person but turns a bit blotchy on camera. She runs the image through AI Face Beauty at 65% intensity, then adds 8% clarity and a Natural preset in AI Makeup Filter. The result looks like a good night’s sleep and a soft glam. She posts a carousel for a brand partner. The brand notes better saves and shares compared to her previous batch. The reason is simple: crisp skin stands out on small screens.
Case 2: Startup founder headshot for LinkedIn
He used a fluorescent-lit office shot. The image had blue tint and under-eye shadows. He used AI Face Beauty to balance tone and remove mild blemishes. Then he used AI Face Reshape to narrow the jawline by 6% to reverse the lens distortion. He exported a high-res version and a cropped one. Recruiters responded faster to messages that week. The headshot looked like him. Just sharper. Just more awake.
Common mistakes and how to fix them
Mistake 1: Maxing out smoothness
You lose pores. You look fake. Solution: cap smoothness near 70%. Keep 20–30% skin texture visible.
Mistake 2: Sharpening too much
Halos appear around hair and jawline. Solution: use clarity sparingly. Add 5–10%. Zoom in to check edges.
Mistake 3: Ignoring color balance
Blue or green casts make skin look sick. Solution: nudge warmth. Compare on a second device.
Mistake 4: Heavy edits near eyes and lips
Creases and micro-lines tell the truth. Solution: reduce intensity around these zones to keep expression real.
Mistake 5: Editing a low-res crop
You can’t invent detail from nothing. Solution: edit the full-res image first. Then crop and resize.
Mistake 6: Mixing styles across a carousel
One photo looks creamy. The next is crunchy. Solution: reuse the same settings across related images.
Mistake 7: Forgetting the hairline and neck
The face looks polished but the neck and hair look noisy. Solution: add a light clarity pass across neck and hairline to match.
How to avoid “clear skin filter online” backfiring
Pick tools that keep texture. Stop if your freckles vanish entirely. Avoid heavy blur around the nose, eyes, and mouth. Keep tone even but not flat. Test outdoors and indoors. And if a tool doesn’t let you dial intensity, look elsewhere.
Pro advice for a natural clear skin workflow
Shoot in soft light. Clean lens. Use AI Face Beauty at medium strength. Add just a dash of clarity. Keep whites warm. Save full-res, then export for social. And if you tweak shapes, keep it under 10%. People should see you, not an avatar.
Advanced plays that seasoned users love
-
LinkedIn headshot that passes the “human check”
Use AI Face Beauty around 60–65%. Add a Natural makeup pass. Nudge warmth. Tuck jawline by 5% with AI Face Reshape. This holds texture on a retina display and still looks good in the tiny circle. -
Creator thumbnails with instant pop
Clean the face with AI Face Beauty. Add 10% clarity and slight contrast. If needed, use the AI Face Slimming Tool at 4–6% to counter wide-angle distortion. Your face reads clear even at 200 px. -
Product models on white or brand color
Clear the face first. Then place the model on your brand background in your design tool. Because the skin is crisp, the composite looks clean and your colors look intentional. -
Video shorts consistency
Run your talking head through the AI Portrait Enhancer for video so the skin stays consistent across clips. This keeps trust high and saves your editor’s time.
How “make face clear AI” fits trusted UX and ROI
Trust matters. Clean faces increase perceived quality. HubSpot has written for years about high-quality visuals lifting conversion. Gartner and Forrester both highlight that AI-powered image quality can improve customer experience when used transparently and ethically. Picsart even markets numbers like “higher engagement on enhanced images.” The message is simple. Clarity helps. It helps on DMs. It helps on shop pages. It helps for creators. It helps in resumes. AI speeds that up for you.
And a small workflow note. A predictable, fast UI with before/after previews reduces bounce. Nielsen Norman Group points out that visible system status builds trust. Pixelfox checks that box by rendering previews fast and by letting you dial back effects in seconds.
FAQs
How do I make my face clear with AI without looking fake?
Use a tool that preserves texture. Start at medium intensity. Keep pores. Reduce smoothing near eyes and lips. Add light clarity. If your freckles disappear, back off.
Why does my selfie look blurry even on new phones?
Low light and compression. Phones smooth to hide noise. Apps compress for speed. Use AI to restore edges and even tone. Shoot in soft daylight when you can.
Can AI remove acne and wrinkles in one click?
Yes. AI Face Beauty can remove small acne, reduce shallow wrinkles, and balance tone with one pass. Keep intensity moderate to avoid plastic skin.
What’s the difference between AI face enhancer and a clear skin filter online?
A simple filter often just blurs skin. An AI enhancer detects facial regions, fixes defects, sharpens edges, and blends the result so it looks natural.
How do I keep my identity the same after AI edits?
Avoid extreme reshape. Keep changes under 10%. Do not alter unique features like moles or freckles unless you want to. Maintain natural color and contrast.
Can I use AI edits for professional headshots?
Yes. Many teams do. Keep edits subtle. Use AI Face Beauty for cleanup, then export full-res. Recruiters and clients want “you, but rested.”
The smart move you can make today
Your time matters. You should not spend 30 minutes cloning out a tiny blemish. You want a face that looks like you, but clearer. Make face clear AI gives you that in seconds. Pixelfox AI does it best with one-click AI Face Beauty, precise AI Face Reshape, and realistic polish from the AI Makeup Filter. If you create video, lock in your look with the AI Portrait Enhancer for videos. Try a photo right now. See your skin keep its life. See your smile pop. Then hit post with confidence.
—
Author: A senior content strategist and AI imaging nerd with 10+ years building SEO content for high-competition tech. Views are based on hands-on testing and current UX research. For citations and links to industry sources (Gartner, Forrester, Nielsen Norman Group), your editor can add references on publication.