 Credit

By 2025, image editing will be a different world and Pixelfox will lead the charge. Pixelfox places professional Photoshop AI free tools directly in your hands without the cost of a monthly subscription. The whole creation process was ever so quick, efficient and accessible with artificial intelligence Photoshop free. We are going to discuss the features that Pixelfox offers and how it can help you make the most of Photoshop AI free in this blog.
What is Pixelfox and How Does It Unlock Photoshop AI for Free?
Pixelfox has developed a game-changing model to offer the Photoshop AI free tools to creatives across the globe. It is an innovative service offering access to the modern features of Photoshop provided by Adobe using AI such as the revolutionary Generative Fill, Generative Expand and Harmonize tools free of charge.
Photoshop was previously available only to users who could afford a monthly subscription fee which excluded beginners and casual creators for many years. Pixelfox transforms that story by creating a service that offers the AI-enabled capabilities of Photoshop to its users at a fraction of the price of Adobe's Creative Cloud solutions.
Why You Should Use Pixelfox for Photoshop AI Free Tools
1. Access to the Latest AI Tools for Free
Pixelfox is also an AI-enabled tool that uses many of Photoshop's AI capabilities without requiring a paid subscription. It is particularly relevant to anyone just entering the creative business or those needing advanced features but cannot afford a high price tag.
Pixelfox provides the feature of replacement of backgrounds, removal of unwanted objects and expansion of pictures at no cost and eliminates the aspect of manual editing.
2. Seamless Editing with Photoshop AI Free Features
The days are gone when you had to spend time perfecting everything by hand. Using Pixelfox and its Photoshop AI free tools, you can automate repetitive routines and focus on the creative process. Pixelfox is your companion tool that enables artificial intelligence of Photoshop in your hands.
How to Start Using Pixelfox and Photoshop AI Free Tools
As a graphic designer, photographer or digital artist, you can take advantage of the power of artificial intelligence in Photoshop for free and have access to some of the most powerful editing capabilities.
Step 1: Sign Up for a Free Pixelfox Account
Creating a free account is the first step to unlocking the full potential of Photoshop AI free tools on Pixelfox. It is simple and fast. Here are the steps you should follow:
Log on to the Pixelfox site.
Click on the Sign Up button and provide your information (email and password).
After registration, you can proceed to use the free features immediately.
Step 2: Upload Your Image or Create a New Project
When you have registered and logged on to your Pixelfox account, you can either upload a picture that you want to work on or start a new project. Here’s how:
To add an image, press the Upload Image button and select your desired image from your device.
If you'd like to start with a blank canvas, you can paint a picture or design something piece by piece.
Step 3: Explore the AI Tools in Pixelfox
A significant strength of Pixelfox is its compatibility with Photoshop AI free features including Generative Fill, Generative Expand and Harmonize. Here is how you can access these tools at no charge:
Generative Fill
It is a photo manipulation tool that can add or delete items in a picture using just a text prompt. Here is how you can apply it:
Click the region in your picture that you wish to add to or delete.
In the Pixelfox editor, select the Generative Fill tool.
Write a very short description about what you want to add or remove (e.g., “add a sunset” or “remove the tree”).
Click "Generate" and the AI will do its work. Pixelfox will simply add or subtract the requested elements and blend them perfectly with the inverse image.
Generative Expand
With the help of this tool, you can increase the borders of a given picture and fill the new areas with pictorial material. Here is how to use it:
Choose the Crop Tool in the Pixelfox toolbar.
Drag crop box handles to enlarge the canvas in the appropriate direction (left, right, top, or bottom).
After extending the image, click on Generative Expand.
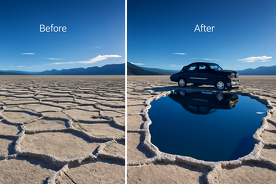
Harmonize
Harmonize is a feature in Pixelfox that automatically balances the lighting, color and shadow of any newly added elements to an image. To apply Harmonize, complete the following stages:
Once you have added a new element to your photo with Generative Fill, select the new area.
Select Harmonize in the toolbar.
Step 4: Download and Share Your Creation
When you are satisfied with your art, you can effortlessly save your picture in a number of formats in the following manner:
Click the Download button on the top right of the Pixelfox editor.
Select your format and resolution.
When the image is created, save it on your device.
Conclusion
The landscape of image editing will evolve and Pixelfox will be at the forefront of making Photoshop AI free and available to everyone. Pixelfox is a platform where beginners seeking to experiment with AI tools and professionals who require advanced editing options can find what they need without having to overpay.
You can use the AI features of Adobe such as Generative Fill, Generative Expand and Harmonize, on Pixelfox allowing you to do even more with your photos than was previously available at an affordable price through the use of Adobe.