 Credit

Ever wish you had a photo big enough that you could print it and post it and not lose even one tiny ounce of detail? Whether it's a fuzzy family memory, a beautiful but cropped landscape, or a less-than-perfectly clear social media image, a big size picture with no content loss is crucial. Thankfully, you no longer need expensive equipment or editing skills. That’s where a free, browser-based tool called PixelFox comes in handy, giving us a reliable method of how to enlarge photos and increasing the size of images without losing quality. Moreover, it's built with smart AI technology to convert any image to a photo large within a few moments.
Why You Need a Photo Enlarger Device
Resizing an image manually, in general, means a loss of detail and quality. This is most evident when resizing a small image to a big size image. That's where photo enlargers come in; they can intelligently enlarge your images, ensuring you get the right blend of missing pixels and clarity.
Pros of Using an Online Photo Magnifier – What are they?
Fast Enlargement: Make an enlargement big in a couple of clicks.
AI Upscaling: Various tools like PixelFox apply intelligent algorithms to upscale the images automatically.
No Downloads: Play quality slot games right from your web browser, no software.
Works with All Formats: You’re using JPG and PNG, meanwhile your friend prefers TIF, so they all take it.
Ideal for Prints: Get a poster-size picture with no loss of quality.
Best Tools to Make Your Photo Bigger Instantly
1- PixelFox Photo Enlarger
Beyond the object removal, PixelFox is one of the simplest and effective photograph enlarger tools on the market. Whether you would like to touch up a portrait, product shot, or travel photo, PixelFox provides clear, high-quality images every time.
Key Features:
Smart AI enhancement engine
No signup or download required
Maintains texture and detail
Ideal for personal or professional use
PixelFox is the easy-to-use photo zoomer for rapid, clean, attractive enlargements.
2- Upscale Media
A quick, free tool for using AI to produce a large image of anything, upres a photo in seconds. It works superbly for both portraits and product images.
Highlights:
Drag-and-drop interface
HD output
Mobile-optimized tool
3- Let’s Enhance
Perfect for creative professionals and content creators. Not only that, it even magnifies, better lightens, and takes off any noise while magnifying.
Top Benefits:
Supports large resolutions
Includes batch processing
Preserves photo realism
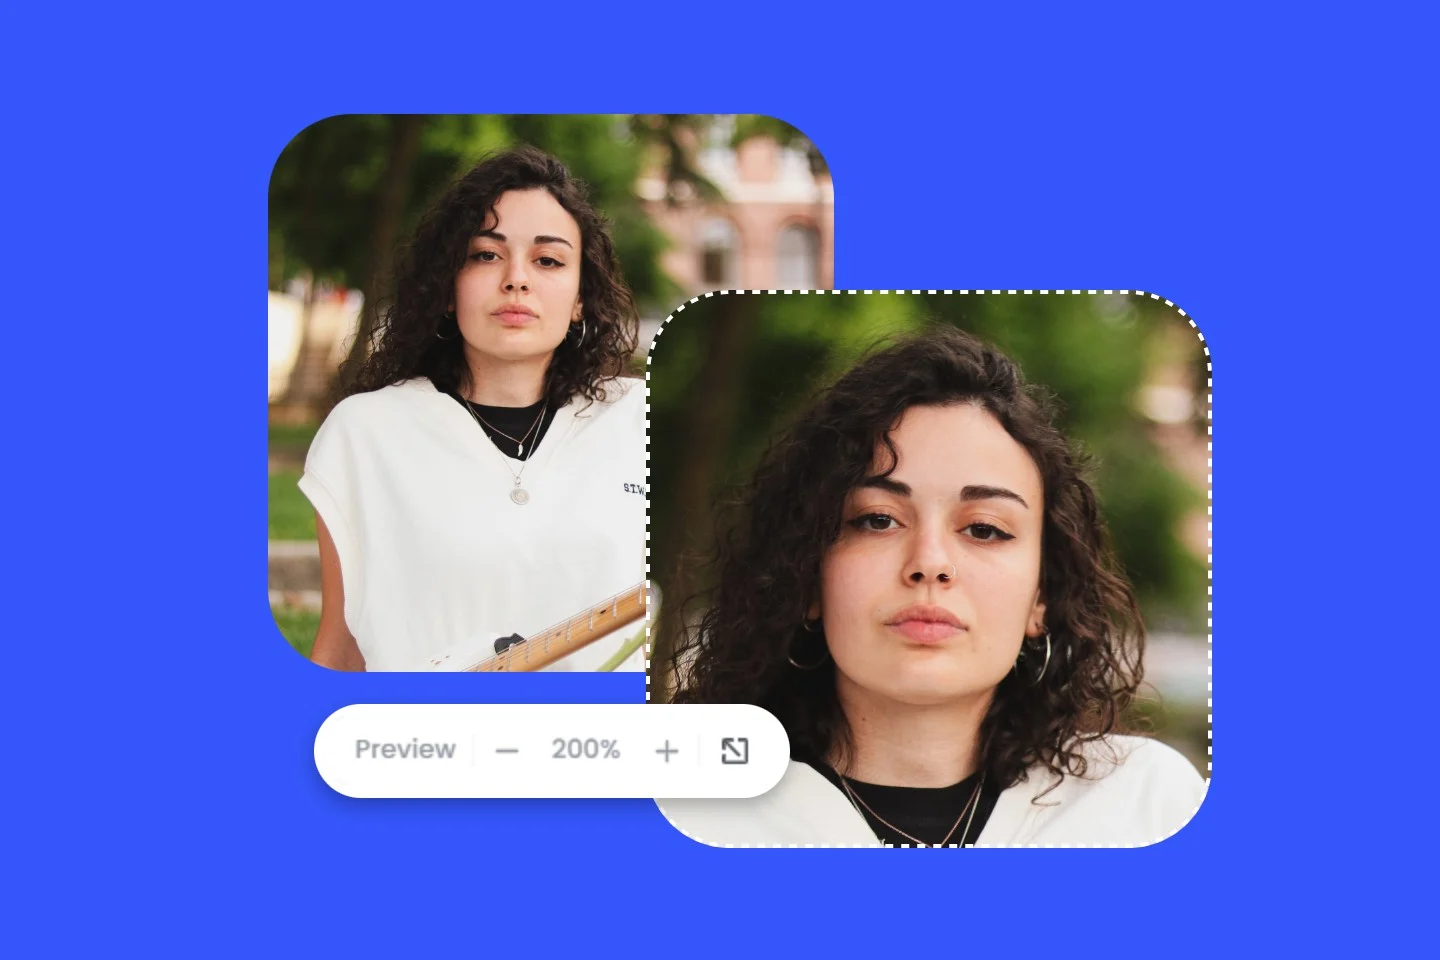
How does a Photo Magnifier Work?
A Photo magnifier tool like PixelFox is based on sophisticated machine learning models trained with high-quality images. When you upload your photo, this AI technology analyzes the textures, lighting, patterns, and then generates other missing details as it increases the image size. This is not simply a Zoom feature; it is a smart enhancement. With PixelFox, the final image appears to be clean, proportional, and detailed when enlarged many times over.
Why Do You Need a Photo Enlarger Tool
Scaling a photo the hard way usually results in a loss of detail and quality. This is most evident when enlarging a small image to a larger picture with a larger size. Enter photo enlargers, which upsize your images smartly; goofy pixels are added where needed, and everything stays sharp and clear.
Advantages of Using an Online Picture Magnifier:
Rapid expansion: in control of big things in a few clicks.
AI Upscaling: AI upscaling is employed by programs such as PixelFox to automatically improve images using clever algorithms.
No Downloads Necessary: Play PixelFox directly from your browser—no installs needed.
Works With All Formats: Whether it’s JPG, PNG, or even TIFF, with few exceptions, most tools will work with anything.
Get perfect Prints: Charcoal Artwork from You can now order large prints of your charcoal artwork without the distressing look of pixelation or blurriness.
Top Tools: How to Make a Photo Large in No Time
When Should You Use a Photo Enlarger?

Photo enlarger tools such as PixelFox are great for those who want to upscale images in just a few seconds, without losing quality. Here are some of the most popular use cases:
ECom Sellers: You need professional design and high-quality images to sell your products online. Use PixelFox to crop product images for a professional, clear listing that separates you from the competition.
Content Creators: Whether you are creating YouTube thumbnails, blog graphics, or social media posts, PixelFox will let you upscale your graphics for the best engagement and sharability possible.
Researchers & Students: It is difficult to read scanned images of books, documents, illustrations, etc., at small font sizes. PixelFox helps to clarify the image so that details are readable in the presentation or report.
Photographers: Revive old or low-res images. Use PixelFox to elevate your photos for printing or framing - yet keep the detail without losing its texture.
Whether you’re simply sharing with friends or using high-quality content to sell your products, PixelFox takes the work out of the process, so photo big look clean and professional.
Final Thoughts
For larger files, such as professional or personal photos, there's no longer a need to have expensive editing software installed on your computer. With your present-day photograph enlarger and photo magnifier devices like PixelFox’s, you can still achieve a hulk image size that remains sharp and rich, and clear. Whether you’re printing posters, creating marketing visuals, or optimizing your social media content, PixelFox makes it easy. It's quick, free, and does not require any design skills. Upload, Enlarger, and get a Large Picture easy-to-hang to hang photo print in seconds.