 Credit

You need a strategy to safeguard your work if you're a photographer, content producer, or just someone who shares pictures online. A watermark is an easy-to-use solution. However, it can be quite difficult to locate a reliable batch watermark freeware—software that can handle multiple photographs at once without charging a dime. Let's examine the qualities of a superb watermark program, weigh the practical benefits and drawbacks of free alternatives, and present you with a potent, cutting-edge substitute.
What Is a Batch Watermark Freeware?
One kind of free watermark software that enables you to apply the same watermark—such as text, a logo, or a signature—on numerous photos at once is called batch watermark shareware. With a program like Photoshop, you specify your preferences once and let the program handle the heavy lifting, rather than tweaking each picture individually. Anyone working with portfolios, client previews, or social networking information in volume will find this to be a huge time-saver.
Key Features to Look For in a Free Watermark Program
Not all free tools are made equal. The following factors are crucial for a seamless process when assessing a watermark soft solution:
The essential element is true batch processing. You should be able to drag and drop a whole image folder.
Options for Customization: The font, size, opacity, position, and rotation of your watermark must all be under your control.
Multiple Watermark Types: Seek out the option to include both image (such as a logo or graphic) and text (such as your name or website) watermarks.
Output Quality Control: The software must let you choose the output format (JPG, PNG) and quality settings so your images don’t get compressed into a pixelated mess.
A Simple Interface: You shouldn’t need a manual to figure it out. Clean, intuitive design is key.
The Real-World Drawbacks of Traditional Freeware
Free desktop programs have limits that can negatively impact your professional workflow, even though they can be helpful. Based on comprehensive testing, following are the common issues:
Older Interfaces: It has been years since many well-known freeware programs were updated. They may feel and look awkward.
Hidden Limitations: Unless you purchase a premium version, several programs will watermark your photos with their own, negating the whole point.
Absence of Cloud Storage: These are limited to desktops. The software must be downloaded, and files must be managed on a single machine.
Restricted capabilities: Paid versions frequently have access to more sophisticated capabilities like batch resizing, template saving, and intelligent positioning.
Pixelfox.ai: A Modern Web-Based Alternative
This is where a web-based tool like Pixelfox.ai changes the game. It fulfills the core need of a batch watermark freeware but does so directly in your web browser, eliminating the headaches of traditional software.
How does it work?
You upload your batch of images, create your custom text or logo watermark, adjust its style and position, and process everything in one go. There’s nothing to download or install.
How to Batch Watermark Your Photos in 4 Steps
The process is straightforward and mirrors the best parts of freeware without the downsides.
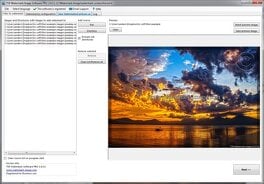
1. Upload Your Batch: Drag and drop your chosen photos into the Pixelfox.ai interface. A true batch tool can handle hundreds or even thousands at once.
2. Create Your Watermark: Upload your transparent PNG logo or add your text (e.g., “© Your Name 2024”) and choose your font, color, and size here.
3. Style and Position It: Drag the watermark to a consistent location on each image, such as the center or bottom corner. The best part is that this setting applies to your entire batch.
4. Process and Download: Press the process button, and the tool applies the watermark to each image.
Why a Web-Based Tool Beats Old Freeware
As a team that works with images daily, we prefer web-based tools for most tasks. The advantages are clear:
Accessibility: Work from any computer, anywhere. Your operating system (Windows, Mac, Chrome OS) doesn’t matter.
No Bloat: It doesn’t take up space on your hard drive or require system updates.
Always Updated: You instantly get access to new features and improvements without having to download a new version.
Integrated Workflows: It often fits more seamlessly into a modern creator’s workflow, which already happens online.
FAQ: Your Watermark Software Questions Answered
Q: Is it safe to download free watermark software?
A: In most cases, sure, but you have to download from the developer's official website. Steer clear of third-party download sites, which frequently include malicious software.
Q: What location is ideal for a watermark?
A: Put it in a textured region or across a main topic where it's difficult to crop out without destroying the image. A bottom corner is a popular and useful location.
Q: Could someone just take my watermark off?
A: With enough time and expertise, a dedicated individual can remove any watermark. The intention is to deter casual theft and make it simple for honest individuals to give you credit.
Q: What kind of picture format is best for a watermark on a logo?
A PNG file with a transparent background should always be used. This eliminates the white area around your brand, allowing it to merge seamlessly over any image.
Q: Do my photos get stored on Pixelfox.ai?
A: Privacy is really important. After you download your photographs, trustworthy web tools process them instantly and don't save them on their servers. Verify a provider's privacy statement at all times.