 Credit

You nail a photo.
Good light. Good angle. No double chin.
Then you zoom in and see a stranger in the back doing… whatever that is. 😑
That is when you start searching “magic eraser”, “ai eraser”, “magic eraser app”, smashing every result from magiceraser com to magic eraser io, and hoping one of them doesn’t completely ruin your background.
This guide is for that moment.
We’ll walk through:
- What a magic eraser / AI eraser actually does
- Why some tools work and some produce weird mushy blobs
- How to use a magic eraser tool step by step
- Pro tricks for background editing, product shots, and even “clothes remover” (with a big, clear warning)
- How Pixelfox AI fits in and why it should probably live in your bookmarks
And yes, magic eraser will show up a lot, because Google likes that, and you like search results that actually help.
What is a magic eraser in 2025, really?
People throw the term “magic eraser” around for a few different things:
- Google Photos’ Magic Eraser feature on Pixel and Google One
- Online tools like magic eraser io and magiceraser com
- Old-school tools like the magic wand eraser in Photoshop
- Generic “eraser app” on iOS and Android that claim to remove anything
Under all these names, the idea is the same:
You select something you don’t want in a photo.
The AI eraser removes it and fills the gap so the photo still looks real.
So a magic eraser tool today can:
- Remove unwanted people and objects
- Remove text, subtitles, and logos
- Act as a magic eraser background editor for quick clean backgrounds
- Clean up watermarks (with legal and ethical limits, we’ll talk about that)
Most people use this for:
- Social media posts
- Product photos for Etsy, Amazon, Shopify
- Portraits and headshots
- Quick fixes before sending photos to clients or family
According to UX research from groups like Nielsen Norman Group, people judge visuals in just a few seconds. If there is clutter in your frame, you lose attention fast. So this “one click erase” thing is not a gimmick. It matters.
The challenge is simple:
You want a magic eraser app that is fast, free (or close), and doesn’t destroy the image.
That is where a good web tool like Pixelfox AI comes in.
How AI eraser tools actually work (without fake tech hype)
Let’s keep this simple. AI erasers use three big steps:
-
Find the thing
You paint over or tap on the object.
The model segments that area and understands “this is a person / car / trash can / text”. -
Remove the pixels
The tool wipes out those pixels from the photo. -
Fill the hole
A “generative” model looks at the rest of the scene.
It predicts what should be behind the object and paints new pixels that blend in.
This is why some tools work great on:
- Blue sky
- Sand
- Grass
- Simple walls
And struggle with:
- Text on busy patterns
- Edges near hair
- Reflections in water or mirrors
When you use something like Pixelfox’s free online AI Object Remover, the heavy brain work happens on their server.
You just draw a rough mask, and the AI does the fill and blend.
A lot of the “AI hallucination” drama you see on Reddit or X comes from this fill step.
If the model guesses wrong, you get:
- Repeated patterns
- Weird ghost limbs
- Bent lines that look “off”
So the trick is not just “pick any eraser app”.
You want one that has a good model, and you want to help it a bit with smart brushing.
The best magic eraser apps and tools right now
People don’t care about tools. They care about what saves them time and doesn’t look fake.
Still, tools matter, so let’s map the main ones.
1. Pixelfox AI – browser-based “grab and go” magic eraser
Pixelfox AI runs in your browser, so you don’t need to install anything.
The image eraser is built as an AI object remover that can:
- Remove people, objects, and clutter
- Clean text, subtitles, and watermarks
- Help with product photos for e‑commerce
- Protect privacy by removing faces, license plates, addresses, and more
They also offer:
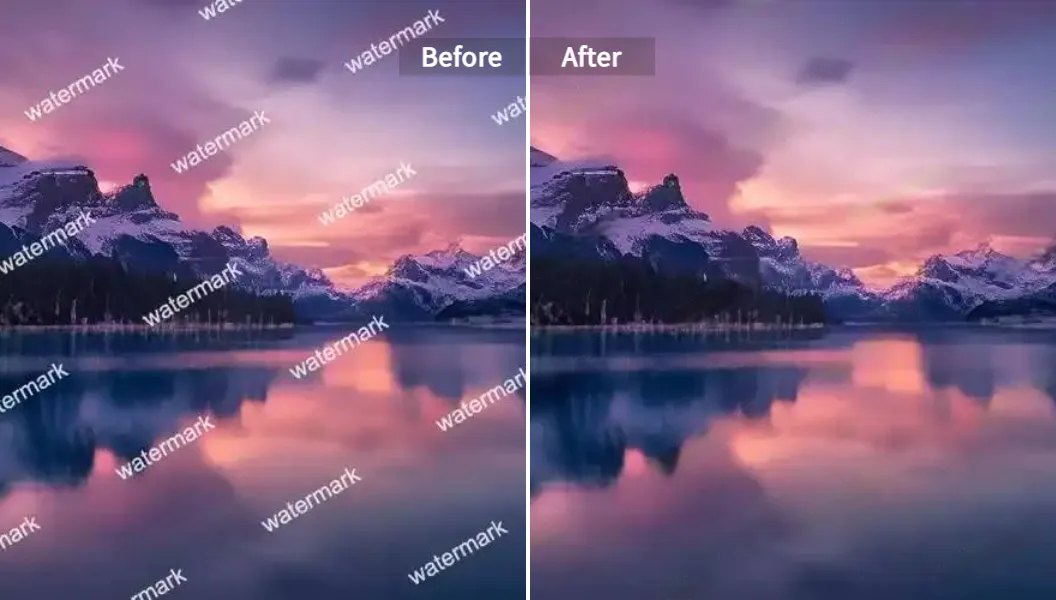
- A free AI watermark remover for photos and videos: Pixelfox AI Watermark Remover
- An AI logo remover for brands that have rights to their assets
- A photo subtitle remover for text baked into images
- An AI face reshape tool to refine portraits after cleanup
You can use Pixelfox as your “daily driver” magic eraser, and then keep Photoshop for deep retouch if you really need pixel-level control.
Tip
If you just want to remove objects and people from photos with no signup drama, keep a simple rule:
Browser tab + Pixelfox AI + one brush = done. No app store, no ads, no update popups.
2. Google Photos Magic Eraser
Google’s Magic Eraser runs inside Google Photos (mainly on Pixel phones and some Google One plans).
Good for:
- Fast fixes on your phone
- Auto suggestions (“remove photobombers?” prompts)
- People who live inside the Google ecosystem
But:
- Not everyone can access it
- The brush can be a bit rough on edges
- Large objects in complex scenes still break it
If you are on Android and already pay for Google One, it is nice.
If you are not, you are locked out, so you need a web tool anyway.
3. magic eraser io / magiceraser com and other single-use sites
Sites like magic eraser io and magiceraser com became popular because they are dead simple:
- Upload
- Paint
- Download
The catch is common:
- Free version may add watermarks
- Or limit resolution
- Or cap how many images you can do each day
So these tools are fine for one‑off edits.
If you edit often for work or content, a more complete tool like Pixelfox is easier to live with.
4. Canva, Photoshop, and mobile eraser apps
You also see:
- Canva’s magic eraser background editor inside its design tool
- Photoshop’s content-aware fill, clone stamp, and the old magic wand eraser
- Mobile apps like TouchRetouch and random “eraser app” clones in app stores
These are great when:
- You are already deep in those tools
- You need detailed masking
- You want layers and advanced color control
But for most people, for “I just need that guy gone”, a simple AI eraser in the browser wins.
Step-by-step: how to use a magic eraser tool with Pixelfox AI
Enough theory. Let’s walk through a real workflow that actually works and does not assume you have a $3k laptop.
Step 1: Upload your image
Go to Pixelfox’s AI Object Remover page.
You can:
- Drag and drop a JPG, PNG, or WebP
- Or click to upload
- Or just hit
Ctrl + Vand paste from your clipboard
The tool loads the image in a clean editor. No busy UI. No 18 toolbars. 👍
Step 2: Select the object you want to erase
You get a brush tool. You just paint over what you want gone.
- Make the brush a bit larger than the object edge
- Cover the full shape (don’t leave small parts unmarked)
- Stay inside the object if the background has sharp lines or patterns
If the object has a shadow, mark that too.
The AI needs to know that the shadow should vanish as well.
Tip
Zoom in before you paint over important edges like hair, hands, or product outlines.
A quick zoom plus a slightly smaller brush often makes the difference between “nice edit” and “why is her arm melting into the wall”.
Step 3: Let the AI remove the object
Now you click the button to remove.
Pixelfox runs the AI eraser model and fills the gap.
What happens:
- The tool samples nearby pixels
- It guesses the missing background
- It blends texture, color, and light so the spot looks natural
If you don’t like the first result:
- Undo
- Adjust your selection
- Run the remove again
Sometimes a tighter mask around the object or a different brush path gives a much better fill.
Step 4: Download the cleaned image
When you are happy:
- Hit download
- Save the JPG or PNG
You can then post it, upload to your store, or drop it into your design tool.
That’s it. No “advanced mode” hidden in settings.
A good magic eraser tool should be this boring.
Pro tricks: background editor, “clothes remover” and other spicy use cases
Let’s go past “remove that random guy” and do the stuff power users do.
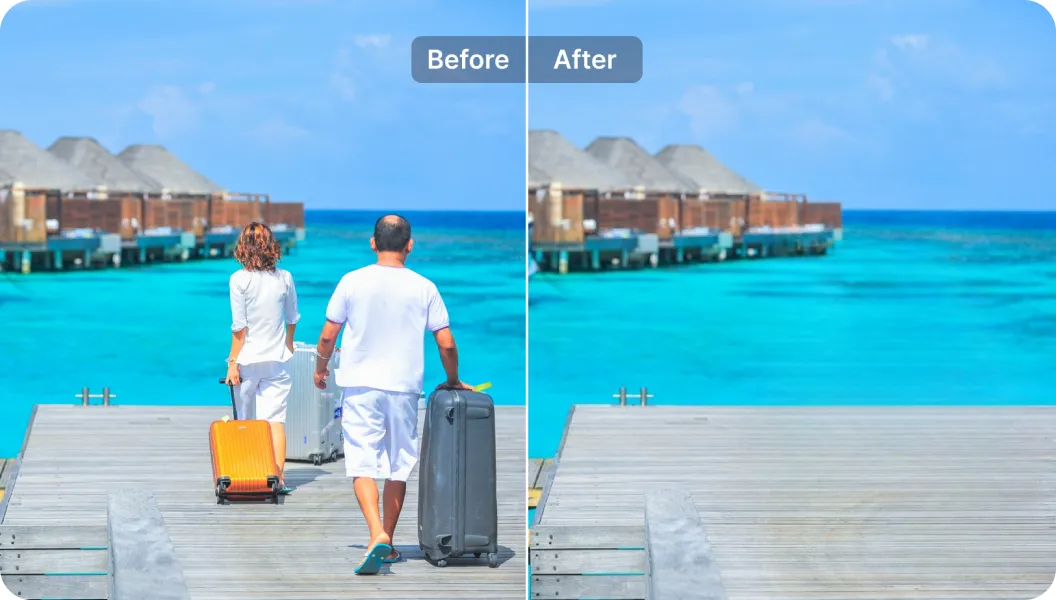
1. Use magic eraser as a background editor for product photos
Clean product photos can boost trust and sales.
Reports from firms like Forrester and HubSpot keep repeating the same thing: clear product images help people decide faster.
You can use Pixelfox AI like a magic eraser background editor:
- Shoot the product on any simple background
- Use the AI eraser to remove:
- Wrinkles in fabric
- Straps, stands, or clips
- Random clutter near the edges
- If there are logos or text you own, use the AI logo remover to clean them or swap them
- Export and drop into your store template
You get clean, minimal shots without building a full studio.
2. Create thumbnail-ready photos for YouTube and social
Thumbnails that pop often use:
- Clean subject
- No random trash in the background
- Clear text
You can:
- Remove bystanders and signs behind you
- Use the AI watermark remover when you have test images with overlay text or old branding
- Then add fresh, readable text in your editor
This gives you a “studio” look with tools you run in a browser.
3. “Magic eraser clothes remover”… but the right way
Let’s talk about that spicy long‑tail: magic eraser clothes remover.
People search this for two very different reasons:
- Legit:
- Remove stains or logos on clothes in product shots
- Clean up wrinkles or loose threads
- Not okay:
- Try to remove clothes from real people in photos
Tools like Pixelfox are built to help with the first case.
They can act like a smart patch: remove stains, unwanted prints, brand marks, or folds.
But they are not for the second case.
Trying to strip clothes off people with AI is creepy, often illegal, and also against the terms of most platforms and tools.
So use “magic eraser clothes remover” only in this safe sense:
- Remove a logo from a shirt you own the rights to
- Clear a stain for a catalog shot
- Fix an outfit line that looks odd in a portrait
If you need more polish after this, Pixelfox’s photo retouch and AI face reshape tool can refine the full portrait.
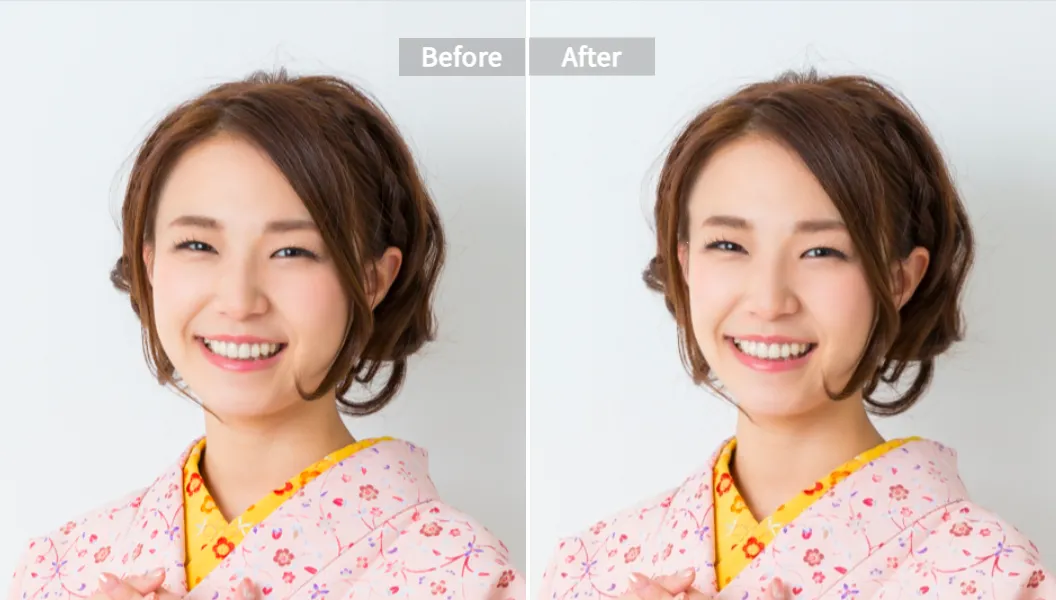
4. Combine object removal with subtle retouch
For portraits and headshots:
- Use the AI eraser to clean the background and remove distractions
- Use Pixelfox’s skin retouch AI (their photo retoucher) to:
- Smooth small blemishes
- Soften wrinkles a bit
- Keep natural skin texture
This stack gives you a “magazine cover” vibe without turning people into plastic dolls.
Tip
Fix the scene first, then fix the face.
If the background is noisy, no amount of skin smoothing will make the shot feel “premium”.
Magic eraser vs Photoshop and other traditional tools
People who grew up with Photoshop sometimes roll their eyes at “one click” tools.
Fair. Let’s compare in real terms.
Magic eraser vs Photoshop
Photoshop wins when:
- You need full control over every pixel
- You work with complex composites and layers
- You want pro color grading, masks, and print‑ready files
You have tools like:
- Clone stamp
- Healing brush
- Content-aware fill
- The old magic wand eraser for hard edges
They are powerful, but:
- You pay a monthly subscription
- You need time to learn them
- You often need a decent machine
Magic eraser tools like Pixelfox win when:
- You just need to erase people or objects fast
- You work on a cheap laptop, old Mac, or even a tablet
- You don’t want to open a heavy app for a simple job
The ideal setup for many people:
- Use a browser AI eraser like Pixelfox as the first pass
- If you are a pro, do final tweaks in Photoshop only when needed
This cuts your edit time without killing quality.
Magic eraser vs other online eraser apps
There are many sites with “free magic eraser” in the title.
They are not equal.
When you compare:
- Check if they add watermarks
- Check output resolution
- Check how they handle busy backgrounds
- Check privacy and data handling
Pixelfox leans into:
- Clean, simple UI
- Focus on image quality instead of heavy filters
- Extra tools around it (logo remover, watermark remover, subtitle remover) so you don’t jump between sites
Other tools might be fine for a one‑time fix.
But if you edit weekly, the small pain points stack up fast.
Real-world case studies: how people actually use AI eraser
These are simplified, but they match what creators and small teams do every day.
Case 1: Instagram creator killing the photobombers
Sara runs a small travel page on Instagram.
She shoots everything on her phone.
Her problem:
- Every nice photo from a city square has ten strangers in the frame
- She tried app‑store eraser apps, but results looked blurry
Her new flow:
- AirDrop or upload the photo to her laptop
- Open Pixelfox AI in the browser
- Use the object remover to delete people in the background
- Use the subtitle remover when she needs to clean old overlay text from a reused template
- Export and post
Her posts look more “intentional”.
No random guy in shorts staring at the camera in the back.
Her engagement goes up because her photos look planned, not chaotic.
Case 2: Etsy shop owner fixing product shots
Leo sells handmade mugs on Etsy.
He does his own photos on a small table near a window.
His issues:
- Cables and small junk around the product
- The edge of the table and wall gaps
- Random brand logo on a cloth under the mug
His magic eraser workflow:
- Take a shot with natural light
- Upload to Pixelfox
- Use the AI object remover to:
- Remove the cable
- Hide small dust or crumbs
- Use the AI logo remover to clear a brand he doesn’t want in view
- If he has a test shot with “SAMPLE” watermark, he uses the AI watermark remover but only for his own images
He gets clean, bright mugs that look like they belong on a product page from a much bigger shop.
Case 3: Corporate headshots, but less boring
A small agency updates staff photos.
They have:
- Busy office backgrounds
- Random people walking behind the subject
- Screens with sensitive data in the frame
Their process:
- Blur or erase people and screens behind the main subject with Pixelfox’s AI object remover
- Use the subtitle remover tool to remove any text on whiteboards
- Use face reshape and skin retouch lightly to:
- Tidy eye bags
- Fix small skin issues
- Keep everyone looking like themselves
The result is a clean, professional set of headshots that still look human, not like AI dolls.
Common mistakes with magic eraser tools (and how to fix them)
New users often think “the AI will fix it” and then blame the tool when the result looks strange.
Some of that is on the tool. Some of it is on the way we use it.
Mistake 1: Using a huge brush and nuking half the photo
People drag a massive brush over the object and the background.
Then the AI has no idea what to keep or fill.
Fix:
Keep the selection close to the object edge.
Do multiple small passes instead of one giant pass.
Mistake 2: Ignoring shadows and reflections
You erase a person but leave the shadow on the ground.
Your brain sees it and goes “something is wrong”.
Fix:
Always erase:
- The object
- Its shadow
- Any reflection in glass or water
This is one of the reasons people complain “magic eraser not working 2025” on social media.
The tool did its job, but the user left artifacts.
Mistake 3: Overusing the tool until the image looks fake
You can remove:
- People
- Objects
- Text
So you remove everything.
Now the photo looks like a weird stock image.
Fix:
Leave some life in the frame:
- Keep a bit of texture
- Keep some small objects that help tell the story
Use the magic eraser like a cleanup brush, not like a nuke.
Mistake 4: Expecting perfect fills in impossible scenes
Very complex scenes (thin tree branches, glass, strong patterns) are hard.
Even top tools and Photoshop struggle there.
Fix:
- Decide if the edit is worth it
- Try smaller selections
- Accept that sometimes you need manual clone / healing in a pro tool
A good rule: if you zoom to 400% to find the problem, it is probably fine for social and web.
Mistake 5: Using magic eraser for shady stuff
Trying to remove clothes from real people, or erase logos you don’t own from stock photos, is not “smart editing”.
It is often illegal or at least very risky.
Fix:
- Use magic eraser tools only on images you own or have rights to
- Don’t try to bypass licenses or basic ethics
This is not just about being “nice”.
It is about staying on the right side of platform rules and the law.
How to avoid bad results from a magic eraser background editor
Sometimes people say “I used a magic eraser background editor and the edges look crunchy or weird”.
Here is how you avoid that.
-
Work at full resolution
Don’t downscale the image before editing.
Let the AI work with more data. -
Zoom in for edge work
Edges of hair, ears, and product outlines need more care.
Paint slowly along them with a smaller brush. -
Watch lines and patterns
If tiles, bricks, or lines in a wall bend after erasing something, undo and try a smaller mask.
Straight lines sell realism. -
Check the image at normal size
A lot of “flaws” only show at crazy zoom levels.
Look at the photo at the size your audience will see it.
When you combine these, your background edits feel clean and natural instead of noisy and fake.
FAQ about magic eraser tools
How does a magic eraser app work?
A magic eraser app or web tool lets you select an area you don’t want.
The AI then removes those pixels and fills the hole based on nearby colors and textures.
It is like a very smart clone and heal tool with extra brain power.
Why does my magic eraser sometimes blur or smear the background?
This often happens when:
- You erase very large objects
- The background is very complex
- You use a huge brush and include background that should stay
Try tighter selections, or do several smaller passes.
If the scene is too complex, move to a pro editor for final touch‑up.
Can I use magic eraser tools on clothes?
You can use the AI eraser to:
- Remove stains on clothes
- Remove logos and prints you own the rights to
- Fix folds or small fabric issues
You should not use it to strip clothes from real people in photos.
That is a big ethical and legal no.
What is the difference between a magic eraser tool and Photoshop?
A magic eraser tool like Pixelfox:
- Runs in your browser
- Has a simple brush-and-remove workflow
- Uses AI to do the heavy lifting for you
Photoshop:
- Has deep manual tools
- Needs more skill and time
- Gives full control over layers, masks, and color work
Many creators use both.
They start with a magic eraser for quick cleanup, then use Photoshop only when needed.
Can I replace magic eraser io or magiceraser com with Pixelfox AI?
For a lot of people, yes.
Pixelfox can:
- Remove objects and people from photos
- Act as a background cleaner
- Remove logos, watermarks, and subtitles when you have rights to do that
And because it also offers extra tools like face reshape and skin retouch, you keep more of your workflow in one place instead of jumping across five different sites.
Ready to clean up your photos with a magic eraser?
People judge your photo in a few seconds.
If there is a trash can, a stranger, or a loud logo in the frame, your content feels cheap, no matter how good your camera is.
A good magic eraser fixes that:
- You remove only what hurts the story
- You keep the scene natural
- You save a lot of time
You saw how to:
- Use an AI eraser like Pixelfox step by step
- Turn it into a magic eraser background editor for product shots and thumbnails
- Avoid common mistakes and weird AI artifacts
- Stay on the right side of ethics with things like “magic eraser clothes remover”
If you want a setup that just works in your browser, start with Pixelfox:
- Clean objects and people with the AI Object Remover
- Clear watermarks you own with the AI watermark remover
- Fix logos, subtitles, and even facial details with the linked tools above
Open a tab, drop in a photo, and let the magic eraser do the boring work so you can focus on the fun part — creating stuff people actually want to look at. 🎯