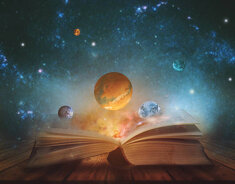
\u003C/p>\n\u003Ch2 id=\"EqGQwF\">What “text to clipart” really is\u003C/h2>\n\u003Cp>Clip art is a small, self‑contained graphic file. It should be light, sharp, and easy to move from one design to another. When you run a text to clipart workflow, you start with a word or sentence, then you apply styling. You can add outline, shadow, bevel, gradient, texture, or animation frames. Then you export as a portable format like SVG or PNG. A good text graphics generator gives you all those controls. You pick a typeface. You set size. You tune spacing. You save in the right format. The output becomes a building block you can reuse.\u003C/p>\n\u003Ch2 id=\"x4XoEc\">Why teams use text to clipart\u003C/h2>\n\u003Cul>\n\u003Cli>It is fast. You can make a headline sticker for a slide or social post in minutes. \u003C/li>\n\u003Cli>It is flexible. You can export many sizes and keep a master file. \u003C/li>\n\u003Cli>It is on brand. You can set your font and colors once and keep using them. \u003C/li>\n\u003Cli>It is clear. Good graphic text is easier to read on busy backgrounds. \u003C/li>\n\u003Cli>It is repeatable. The same action steps will work across many projects.\u003C/li>\n\u003C/ul>\n\u003Ch2 id=\"wKazYR\">Vector vs raster: pick the right format\u003C/h2>\n\u003Cp>You will see two common formats for clip art.\u003C/p>\n\u003Cul>\n\u003Cli>SVG (vector). An SVG file uses math to draw shapes. It stays sharp at any size. You can edit colors later. It is perfect for logos, icons, and word art. The W3C keeps the SVG standard and docs. You can read the Scalable Vector Graphics overview on the W3C site for the full spec and benefits (an authoritative technical reference). \u003C/li>\n\u003Cli>PNG (raster). A PNG file uses pixels. It supports transparency. It is ideal when you need a textured effect, glow, or complex gradient that may be hard to vectorize. You should export at the largest size you need to avoid blur.\u003C/li>\n\u003C/ul>\n\u003Cp>Use SVG for clean shapes and infinite scale. Use PNG when you want soft shadows, photo textures, or animated GIF variants. Many “graphic text maker” tools allow you to export both. Some will also export JPG, GIF, or APNG.\u003C/p>\n\u003Ch2 id=\"BpCMRZ\">Core steps in a text to clipart workflow\u003C/h2>\n\u003Cul>\n\u003Cli>Write your text. Keep it short. Short words read better on small screens. \u003C/li>\n\u003Cli>Pick a font. Choose a face that fits the mood and is easy to read. \u003C/li>\n\u003Cli>Set sizes. Match your output use. Social posts need bigger letters than slides. \u003C/li>\n\u003Cli>Add style. Outline for contrast. Shadow for depth. Gradient for energy. \u003C/li>\n\u003Cli>Check spacing. Adjust letter spacing and line height for balance. \u003C/li>\n\u003Cli>Export. Choose SVG for vectors or PNG for textured effects and transparency. \u003C/li>\n\u003Cli>Test. Place your clip art on a light and a dark background. Make sure it pops.\u003C/li>\n\u003C/ul>\n\u003Ch2 id=\"Lpdoz6\">What makes clip art readable\u003C/h2>\n\u003Cp>Good text clip art is simple and strong. The message should read in one glance. Use these rules.\u003C/p>\n\u003Cul>\n\u003Cli>Contrast. Put light text on dark backgrounds and the other way around. Add a thin outline if needed. \u003C/li>\n\u003Cli>Hierarchy. Make the most important word largest. Reduce the rest. \u003C/li>\n\u003Cli>Spacing. Slightly increase letter spacing for all caps. Keep line height tight for stacked lines. \u003C/li>\n\u003Cli>Alignment. Center for labels and badges. Left align for sentence‑style blocks. \u003C/li>\n\u003Cli>Color. Use your brand palette. Limit yourself to two or three colors. \u003C/li>\n\u003Cli>Effects. Use one primary effect (for example, bevel or glow). Do not stack four at once. \u003C/li>\n\u003Cli>Accessibility. Colors should pass contrast checks when possible.\u003C/li>\n\u003C/ul>\n\u003Ch2 id=\"RAQMct\">Tools you can use today\u003C/h2>\n\u003Cp>You have three broad paths.\u003C/p>\n\u003Cp>1) Classic text graphics generator sites\u003Cbr />\nThese sites turn text into styled images with prebuilt effects. They work in the browser and export PNG or GIF. They are great for fast badges and logos.\u003C/p>\n\u003Cul>\n\u003Cli>CoolText is a free graphics generator with many logo styles. You choose a style, enter your text, and download a PNG or GIF. It is quick when you want flame, neon, or chrome effects without design software. \u003C/li>\n\u003Cli>TextStudio focuses on word art and 3D effects. It lets you control outlines, shadows, extrusions, and bevels, then exports PNG/JPG or animated formats. It is flexible and can mimic retro and synthwave looks. \u003C/li>\n\u003Cli>SmallSEOTools offers a simple text to image converter. It lets you set font, color, and background and then download as JPG, PNG, BMP, or GIF. It is useful for plain caption block images.\u003C/li>\n\u003C/ul>\n\u003Cp>These services are easy. They handle the heavy lifting. You get a styled result in minutes.\u003C/p>\n\u003Cp>2) AI prompt‑based “word image creator” tools\u003Cbr />\nAI can generate clip art from a written prompt. You can describe a style, shape, and color, then get outputs you can refine. This path shines when you need unique styles or theme packs.\u003C/p>\n\u003Cul>\n\u003Cli>Canva’s AI Art Generator (Magic Media) turns text to images and offers presets like Watercolor, Neon, or Retrowave. Canva also lets you add text animations and layer assets in its editor. This is helpful for social design flows. \u003C/li>\n\u003Cli>Adobe Firefly creates images from text and supports “image to image” guidance. Adobe states Firefly models are trained on Adobe Stock and public domain content, which supports safer commercial use (see Adobe’s Firefly feature page). Firefly also offers style and lighting controls and gives you four options per prompt. \u003C/li>\n\u003Cli>OpenArt has a “text to clip art” generator with ready prompts like “Educational icons” or “Holiday icons.” It is handy for consistent icon sets. You can iterate until you hit the style you want.\u003C/li>\n\u003C/ul>\n\u003Cp>3) Hybrid workflows in a design editor\u003Cbr />\nYou can combine a text layer with effects in a full editor. This is best when you need perfect spacing, brand colors, and export in both vector and raster.\u003C/p>\n\u003Cul>\n\u003Cli>Use a design suite to set the type, then add outline and shadow. \u003C/li>\n\u003Cli>Convert the text to curves if you want full vector export and curve edits. \u003C/li>\n\u003Cli>Export both SVG and PNG. Store the SVG as a master.\u003C/li>\n\u003C/ul>\n\u003Ch2 id=\"us3hEF\">Prompt tips for AI clip art\u003C/h2>\n\u003Cp>Plain prompts give plain results. Be clear and specific. Keep the subject simple. Add a style cue. Then define color and finish.\u003C/p>\n\u003Cul>\n\u003Cli>“Bold 3D word ‘BLAST’ in retro 80s style, magenta to cyan gradient, chrome outline, dark background, high contrast.” \u003C/li>\n\u003Cli>“Rounded sticker text ‘SALE’, thick white outline, flat pastel colors, drop shadow, transparent background.” \u003C/li>\n\u003Cli>“Vintage varsity text ‘TIGERS’, stitched texture, gold trim, navy fill, SVG icon style, clean edges.”\u003C/li>\n\u003C/ul>\n\u003Cp>If the output looks busy, remove a style. If it looks dull, add one strong effect. Keep it short. Generate three or four options. Pick the best and refine.\u003C/p>\n\u003Ch2 id=\"EpoeTF\">How Pixelfox AI fits into a clip art flow\u003C/h2>\n\u003Cp>You can make fast clip art with simple tools. You can also polish or animate your result with Pixelfox AI. Here are three practical ways to speed up your pipeline:\u003C/p>\n\u003Cul>\n\u003Cli>Recolor clip art for new campaigns. If you have a word badge in black and want it in your seasonal palette, you can change colors in seconds. Try the Pixelfox \u003Ca href=\"https://pixelfox.ai/image/recolor\">AI Image Colour Changer\u003C/a> to switch fills and accents without re‑drawing. \u003C/li>\n\u003Cli>Turn a photo wordmark into a cartoon badge. If you shot a textured word on a wall or a letterpress title, you can convert it to a cartoon‑like style for sticker packs. Use the Pixelfox \u003Ca href=\"https://pixelfox.ai/image/anime-generator\">AI Anime Generator\u003C/a> to stylize it into cute, crisp clip art. \u003C/li>\n\u003Cli>Animate your clip art for reels. A static text sticker can become a short loop that draws attention. Use the Pixelfox \u003Ca href=\"https://pixelfox.ai/video/generate\">AI Video Generator\u003C/a> to add motion to your text badge with one prompt.\u003C/li>\n\u003C/ul>\n\u003Cp>\u003Cimg loading=\"lazy\" src=\"https://api.pixelfox.ai/template/recolorimage/feature_1.webp\" alt=\"AI Image Colour Changer\" />\u003C/p>\n\u003Ch2 id=\"jWX091\">Design rules that keep word art clean\u003C/h2>\n\u003Cp>Pick one core idea and build around it. The most common errors come from doing too much. Follow these checklists.\u003C/p>\n\u003Cp>Font choice \u003C/p>\n\u003Cul>\n\u003Cli>Use sans serif for modern labels and UI‑style badges. \u003C/li>\n\u003Cli>Use slab or display faces for bold posters. \u003C/li>\n\u003Cli>Avoid ultra‑thin weights for small sizes. \u003C/li>\n\u003Cli>Limit yourself to one font per badge.\u003C/li>\n\u003C/ul>\n\u003Cp>Color and contrast \u003C/p>\n\u003Cul>\n\u003Cli>Use a two‑tone base: a main color and a high‑contrast outline. \u003C/li>\n\u003Cli>Add one accent color if needed. \u003C/li>\n\u003Cli>Check contrast on light and dark backgrounds. \u003C/li>\n\u003Cli>Avoid low‑contrast pairs like red on black without a white stroke.\u003C/li>\n\u003C/ul>\n\u003Cp>Outline and shadow \u003C/p>\n\u003Cul>\n\u003Cli>Outline thickness should scale with font size. \u003C/li>\n\u003Cli>Keep drop shadows soft and subtle for a real‑world feel. \u003C/li>\n\u003Cli>Use long hard shadows for retro or isometric looks, but test readability. \u003C/li>\n\u003Cli>Do not stack glow + bevel + long shadow + inner shadow. One or two effects are enough.\u003C/li>\n\u003C/ul>\n\u003Cp>Spacing and layout \u003C/p>\n\u003Cul>\n\u003Cli>Track all‑caps slightly looser (+2% to +5%). \u003C/li>\n\u003Cli>Keep line height tight (100% to 115%) for stacked lines. \u003C/li>\n\u003Cli>Center align for badges; left align for sentences. \u003C/li>\n\u003Cli>Use even padding around the word when making stickers.\u003C/li>\n\u003C/ul>\n\u003Cp>Texture and finish \u003C/p>\n\u003Cul>\n\u003Cli>Use grain or halftone sparingly. \u003C/li>\n\u003Cli>Make sure texture scale matches the output size. \u003C/li>\n\u003Cli>If you need clean SVG, avoid heavy textures and stick to flat fills and strokes.\u003C/li>\n\u003C/ul>\n\u003Ch2 id=\"umz6dH\">SEO and file hygiene for clip art\u003C/h2>\n\u003Cp>If you plan to post or embed your clip art on the web, set it up right.\u003C/p>\n\u003Cul>\n\u003Cli>File names. Use clear names like sale-sticker-red.svg or neon-title-blast.png. \u003C/li>\n\u003Cli>Alt text. Describe the content and purpose: “Retro neon ‘BLAST’ text sticker.” \u003C/li>\n\u003Cli>Size. Export the smallest size that stays sharp for PNG. Keep SVG clean of extra metadata. \u003C/li>\n\u003Cli>Format choice. Use SVG for crisp vector word art on web pages. Use PNG for complex lighting or when you need a transparent raster. \u003C/li>\n\u003Cli>Compression. Use a compression pass on PNG if the file is large. \u003C/li>\n\u003Cli>Consistency. Keep a shared style guide for colors and stroke widths.\u003C/li>\n\u003C/ul>\n\u003Ch2 id=\"RY2mfZ\">Licensing and safe use\u003C/h2>\n\u003Cp>Use fonts that allow the use you need. Some free fonts do not allow commercial use. Some require attribution. Always check the license file. If you generate clip art with AI, read the tool’s terms. Adobe states that Firefly models are trained on Adobe Stock and public domain content where copyright has expired, which aims to support commercially safer results (see Adobe Firefly’s “Designed to be commercially safe” note on its feature page). Canva notes that Free plan users have limited AI generations, and Pro unlocks more use. You still need to follow each platform’s acceptable use policy. Also avoid logos and trademarked word styles unless you have permission. When in doubt, ask legal or pick a different look.\u003C/p>\n\u003Ch2 id=\"rOC0Mk\">How to do text to clipart in five real workflows\u003C/h2>\n\u003Cp>1) Fast classic logo effect (CoolText approach) \u003C/p>\n\u003Cul>\n\u003Cli>Open CoolText. \u003C/li>\n\u003Cli>Pick a style, such as Neon or Chrome. \u003C/li>\n\u003Cli>Enter your word. \u003C/li>\n\u003Cli>Set font and size. \u003C/li>\n\u003Cli>Download PNG with a transparent background. \u003C/li>\n\u003Cli>Drop it into your slide or banner.\u003C/li>\n\u003C/ul>\n\u003Cp>2) Retro 3D word art (TextStudio approach) \u003C/p>\n\u003Cul>\n\u003Cli>Open TextStudio and select a retro or 3D effect. \u003C/li>\n\u003Cli>Type your text; adjust outline, extrusions, and shadows. \u003C/li>\n\u003Cli>Tune gradient and stroke width to fit your brand palette. \u003C/li>\n\u003Cli>Export PNG for texture. If the tool offers vector exports for certain styles, save the vector too. \u003C/li>\n\u003Cli>Test on a dark and a light background.\u003C/li>\n\u003C/ul>\n\u003Cp>3) Simple caption block (SmallSEOTools approach) \u003C/p>\n\u003Cul>\n\u003Cli>Open SmallSEOTools’ text to image tool. \u003C/li>\n\u003Cli>Paste your sentence. \u003C/li>\n\u003Cli>Pick font, text color, and background color. \u003C/li>\n\u003Cli>Set padding so the words breathe. \u003C/li>\n\u003Cli>Download as PNG for crisp edges.\u003C/li>\n\u003C/ul>\n\u003Cp>4) AI icon‑style text pack (OpenArt approach) \u003C/p>\n\u003Cul>\n\u003Cli>Open OpenArt’s clip art generator. \u003C/li>\n\u003Cli>Choose a theme like Educational or Holiday. \u003C/li>\n\u003Cli>Prompt a style: “Rounded label badges, thick outline, high contrast.” \u003C/li>\n\u003Cli>Generate a set. \u003C/li>\n\u003Cli>Keep the ones that read well. \u003C/li>\n\u003Cli>Clean edges in your editor if needed and export as SVG/PNG.\u003C/li>\n\u003C/ul>\n\u003Cp>5) AI art word badge (Canva or Firefly approach) \u003C/p>\n\u003Cul>\n\u003Cli>In Canva Magic Media, use Text to Image. \u003C/li>\n\u003Cli>Prompt a style: “3D jelly text ‘FRESH’ with glossy plastic look, pastel colors, white outline, sticker.” \u003C/li>\n\u003Cli>Insert the chosen result into a design. Add a type layer on top if you want crisp live text. \u003C/li>\n\u003Cli>In Adobe Firefly, write a similar prompt. Try an “image to image” guide if you have a reference badge. \u003C/li>\n\u003Cli>Export in the largest size you need. If the effect is clean, trace to vector in your editor.\u003C/li>\n\u003C/ul>\n\u003Cp>\u003Cimg loading=\"lazy\" src=\"https://api.pixelfox.ai/template/humananimestyle/feature_1.webp\" alt=\"AI Anime Generator\" />\u003C/p>\n\u003Ch2 id=\"oN0Eh3\">Quality checks before you export\u003C/h2>\n\u003Cul>\n\u003Cli>Readability. Can you read the word at phone size? \u003C/li>\n\u003Cli>Contrast. Does it stand out on both light and dark? \u003C/li>\n\u003Cli>Edges. Are strokes even and clean? \u003C/li>\n\u003Cli>Scale. Does the texture hold up when scaled? \u003C/li>\n\u003Cli>Weight. Is the outline thick enough for stickers? \u003C/li>\n\u003Cli>Brand. Does it match your color and font rules? \u003C/li>\n\u003Cli>Format. Do you have both SVG and PNG if needed?\u003C/li>\n\u003C/ul>\n\u003Ch2 id=\"YpLeN9\">Troubleshooting common issues\u003C/h2>\n\u003Cp>The text looks blurry. \u003C/p>\n\u003Cul>\n\u003Cli>PNG was exported too small. Export a bigger size and scale down in your editor. \u003C/li>\n\u003Cli>You scaled a small PNG up. Do not do that. Export at final size or use SVG. \u003C/li>\n\u003Cli>The export had a colored matte. Export with a transparent background.\u003C/li>\n\u003C/ul>\n\u003Cp>Edges look jagged. \u003C/p>\n\u003Cul>\n\u003Cli>The outline is too thin for the size. Increase stroke width. \u003C/li>\n\u003Cli>The contrast is too low. Add a white stroke under the colored stroke. \u003C/li>\n\u003Cli>The image was compressed too much. Re‑export with higher quality.\u003C/li>\n\u003C/ul>\n\u003Cp>Colors look different on upload. \u003C/p>\n\u003Cul>\n\u003Cli>The file used a wide color profile. Convert to sRGB before export. \u003C/li>\n\u003Cli>The platform applies compression. Check the platform’s image settings.\u003C/li>\n\u003C/ul>\n\u003Cp>The effect feels busy. \u003C/p>\n\u003Cul>\n\u003Cli>Remove one effect. Keep either bevel or glow, not both. \u003C/li>\n\u003Cli>Reduce gradient steps. Use two or three stops only. \u003C/li>\n\u003Cli>Increase spacing slightly to give the letters room.\u003C/li>\n\u003C/ul>\n\u003Cp>The file size is too large. \u003C/p>\n\u003Cul>\n\u003Cli>For PNG, reduce dimensions or apply lossless compression. \u003C/li>\n\u003Cli>For SVG, simplify paths, remove hidden layers, and remove unused defs.\u003C/li>\n\u003C/ul>\n\u003Ch2 id=\"W9TI7m\">Clip‑worthy styles that work across use cases\u003C/h2>\n\u003Cul>\n\u003Cli>Sticker style. Bold fill, white border, drop shadow. Works for speed and clarity. \u003C/li>\n\u003Cli>Retro chrome. Strong gradient, subtle highlight, medium outline. Great for hero words. \u003C/li>\n\u003Cli>Varsity knit. Two‑tone fill, inner stroke, light texture. Good for sports themes. \u003C/li>\n\u003Cli>Neon glow. Thin inner letter, strong outer glow, dark background. Good for posters. \u003C/li>\n\u003Cli>Flat icon. Solid fill, 1–2 px stroke, no shadows. Best for vector packs and UI.\u003C/li>\n\u003C/ul>\n\u003Ch2 id=\"QolP9a\">Evidence‑backed notes on visuals\u003C/h2>\n\u003Cp>Design systems and standards bodies point to vector formats for scalable logos and word marks. The W3C has maintained the SVG standard for years and outlines its benefits for crisp, resolution‑independent graphics in its documentation (the W3C specification is the primary authority here). Major platforms have also published guidance on AI image generation. Canva describes preset styles and editor workflows on its AI Art Generator page, which helps non‑designers create consistent visuals. Adobe’s Firefly page explains how it trains models on Adobe Stock and public domain content, which supports more responsible commercial use. These public resources align with best practices: start with clean shapes, keep contrast high, and export with the right format for the job.\u003C/p>\n\u003Ch2 id=\"STDjb4\">Production checklist for “text to clipart”\u003C/h2>\n\u003Cul>\n\u003Cli>Text is short and clear. \u003C/li>\n\u003Cli>Font matches tone and stays readable. \u003C/li>\n\u003Cli>Outline width fits size. \u003C/li>\n\u003Cli>Only one main effect is used. \u003C/li>\n\u003Cli>Colors follow brand and pass contrast checks. \u003C/li>\n\u003Cli>SVG exported for vector needs. \u003C/li>\n\u003Cli>PNG exported with transparency for textured needs. \u003C/li>\n\u003Cli>File names and alt text set. \u003C/li>\n\u003Cli>Test on light and dark. \u003C/li>\n\u003Cli>Store master files.\u003C/li>\n\u003C/ul>\n\u003Ch2 id=\"wEias7\">Case examples by channel\u003C/h2>\n\u003Cul>\n\u003Cli>Classroom worksheets. Use flat icon word art for titles. Export SVG so the title stays sharp when you print at A4 and A3. Build a small pack for subjects like “Math,” “Science,” “Reading.” \u003C/li>\n\u003Cli>E‑commerce banners. Use a sticker style for “SALE” or “NEW” badges. Export PNG with transparency and place it over product images. Keep an SVG master so you can swap colors each season. \u003C/li>\n\u003Cli>Social posts. Use retro chrome for a hero word that introduces a carousel. Export two PNG sizes (1080 and 1350 wide) for square and portrait posts. Keep weight high for mobile. \u003C/li>\n\u003Cli>Slides. Use a simple flat outline style for section titles. Export SVG and scale freely. Keep colors within your brand template. \u003C/li>\n\u003Cli>YouTube thumbnails. Use bold, high‑contrast words with thick outlines. Export at 1920×1080. Test at tiny size to ensure it reads on the sidebar.\u003C/li>\n\u003C/ul>\n\u003Ch2 id=\"ks40DI\">Level‑up moves you can try next\u003C/h2>\n\u003Cul>\n\u003Cli>Build a style system. Set rules for outline widths, drop‑shadow offsets, and color roles. Your clip art will look consistent across campaigns. \u003C/li>\n\u003Cli>Create a mini word pack. Make a set of frequently used words (for example, SALE, NEW, FREE, TODAY) in your house style and store them as SVG and PNG. \u003C/li>\n\u003Cli>Batch recolor. Use an automated recolor tool to produce seasonal sets fast. For quick palette swaps, a tool like the Pixelfox AI Image Colour Changer can do the work in one pass. \u003C/li>\n\u003Cli>Animate on scroll. Convert your static word badge into a short loop for reels and shorts. An AI video tool can add simple motion to your text sticker with one prompt.\u003C/li>\n\u003C/ul>\n\u003Ch2 id=\"CTxWoK\">FAQs\u003C/h2>\n\u003Cp>How is “text to clipart” different from simple text on a photo? \u003C/p>\n\u003Cul>\n\u003Cli>Clip art is a standalone graphic. It keeps its own edges, background, and format. You can reuse it without the original photo. It is also easier to align and scale.\u003C/li>\n\u003C/ul>\n\u003Cp>Should I always export SVG? \u003C/p>\n\u003Cul>\n\u003Cli>Use SVG when the art is made of clean shapes and simple fills. Use PNG when you need soft glows, textures, or photo‑like shading. Keep both when possible.\u003C/li>\n\u003C/ul>\n\u003Cp>Can AI produce usable clip art from a prompt? \u003C/p>\n\u003Cul>\n\u003Cli>Yes. You can prompt a single word and a style. Many tools now generate clean, icon‑like outputs. You often need to clean edges or trace to vector if you want true SVG curves.\u003C/li>\n\u003C/ul>\n\u003Cp>Which fonts work best? \u003C/p>\n\u003Cul>\n\u003Cli>Bold sans serif faces read well at small sizes. Display faces work for large hero words. Script can work if the outline is strong. Always test at phone size.\u003C/li>\n\u003C/ul>\n\u003Cp>How do I keep things on brand? \u003C/p>\n\u003Cul>\n\u003Cli>Set your brand colors as presets. Pick a short list of approved typefaces. Define one or two effect styles. Save master files and reuse them as templates.\u003C/li>\n\u003C/ul>\n\u003Ch2 id=\"sb2jVB\">Final thoughts and next steps\u003C/h2>\n\u003Cp>The fastest way to ship a great header or badge is simple. Start with clear words. Style them with care. Export in the right format. Test on real screens. A solid “text to clipart” flow will save hours and keep your visuals sharp. You can build everything with classic generators, with AI, or with a mix of both. If you want to recolor a badge to match a campaign, try Pixelfox’s \u003Ca href=\"https://pixelfox.ai/image/recolor\">AI Image Colour Changer\u003C/a>. If you want to turn a photo wordmark into a fun cartoon sticker, use the Pixelfox \u003Ca href=\"https://pixelfox.ai/image/anime-generator\">AI Anime Generator\u003C/a>. And if you want to add motion, the Pixelfox \u003Ca href=\"https://pixelfox.ai/video/generate\">AI Video Generator\u003C/a> can bring your clip art to life. Keep it simple. Keep it readable. That is how you win with text to clipart.\u003C/p>\n\u003Ch2 id=\"CvFQIe\">External references for deeper reading\u003C/h2>\n\u003Cul>\n\u003Cli>Canva AI Art Generator overview and style presets: \u003Ca href=\"https://www.canva.com/ai-art-generator/\" rel=\"nofollow\" target=\"_blank\" >https://www.canva.com/ai-art-generator/\u003C/a> \u003C/li>\n\u003Cli>Adobe Firefly Text to Image features and commercial‑safety notes: \u003Ca href=\"https://www.adobe.com/products/firefly/features/text-to-image.html\" rel=\"nofollow\" target=\"_blank\" >https://www.adobe.com/products/firefly/features/text-to-image.html\u003C/a> \u003C/li>\n\u003Cli>W3C Scalable Vector Graphics (SVG) specification and primer: \u003Ca href=\"https://www.w3.org/Graphics/SVG/\" rel=\"nofollow\" target=\"_blank\" >https://www.w3.org/Graphics/SVG/\u003C/a>\u003C/li>\n\u003C/ul>","text-to-clipart-the-complete-guide-for-fast-graphic-text",11,1755446737,1755446712,{"id":53,"lang":11,"author_id":54,"image":55,"title":56,"keywords":15,"description":57,"content":58,"url":59,"views":60,"publishtime":61,"updatetime":62,"status":22,"publishtime_text":63,"status_text":25},341,9575,"https://api.pixelfox.ai/template/default.webp","Photoshop Color Replacement Tool - How to Swap Colors in Photoshop Like a Pro","Learn to use the Photoshop Color replacement tool to easily swap colors in any image. A complete guide for manipulating colors while leaving the texture or likeness of the details in place.","\u003Cp dir=\"ltr\">\u003Cspan>Have you taken a photo that you wish later in life that you could change the color of the shirt? Or perhaps you want to match a product color to your brand? Photoshop is the answer. Luckily for you, you do not have to be a designer to do it right.\u003C/span>\u003C/p>\u003Cp dir=\"ltr\">\u003Cspan>Perhaps the easiest way to change colors in an image is the color replacement tool in Photoshop. It is quick and works great by leaving all of the texture in place while switching one color for another. Let’s learn more about the \u003C/span>\u003Cspan>PS color replacement tool\u003C/span>\u003Cspan>!\u003C/span>\u003C/p>\u003Ch2 id=\"m2hkZW\" dir=\"ltr\">\u003Cspan>What Is the Color Replacement Tool in Photoshop?\u003C/span>\u003C/h2>\u003Cp dir=\"ltr\">\u003Cspan>The color replacement tool allows for the painting over an existing color in the photo and replacing it with a new color. And, what's really pretty cool about it is that it keeps all of the shading, folding, shadows, and lighting from the original area. So, for example, if you're switching a red t-shirt to green, it still looks like fabric with all its creases and shadows. It just happens to be green and not red.\u003C/span>\u003C/p>\u003Ch2 id=\"DFKp8M\" dir=\"ltr\">\u003Cspan>Where to Find the PS Color Replacement Tool?\u003C/span>\u003C/h2>\u003Cp dir=\"ltr\">\u003Cspan>Here's how to find the PS color replacement tool:\u003C/span>\u003C/p>\u003Cul>\u003Cli dir=\"ltr\" aria-level=\"1\">\u003Cp dir=\"ltr\" role=\"presentation\">\u003Cspan>Open Photoshop and load your image.\u003C/span>\u003C/p>\u003C/li>\u003Cli dir=\"ltr\" aria-level=\"1\">\u003Cp dir=\"ltr\" role=\"presentation\">\u003Cspan>On the left toolbar, find the Brush Tool.\u003C/span>\u003C/p>\u003C/li>\u003Cli dir=\"ltr\" aria-level=\"1\">\u003Cp dir=\"ltr\" role=\"presentation\">\u003Cspan>Click and hold the brush icon until a list of tools appears.\u003C/span>\u003C/p>\u003C/li>\u003Cli dir=\"ltr\" aria-level=\"1\">\u003Cp dir=\"ltr\" role=\"presentation\">\u003Cspan>Select the Color Replacement Tool from that list.\u003C/span>\u003C/p>\u003C/li>\u003C/ul>\u003Cp dir=\"ltr\">\u003Cspan>You’re ready to go.\u003C/span>\u003C/p>\u003Cp dir=\"ltr\">\u003Cimg loading=\"lazy\" alt=\"Photoshop Color Replacement Tool - How to Swap Colors in Photoshop Like a Pro\" src=\"https://api.pixelfox.ai/uploads/20250728/6932c98dbbbb2516997b93f26312ab00.jpg\" style=\"width: 50%;\" data-filename=\"filename\">\u003Cspan>\u003Cbr>\u003C/span>\u003C/p>\u003Ch3 dir=\"ltr\">\u003Cspan>Setting Up the Tool\u003C/span>\u003C/h3>\u003Cp dir=\"ltr\">\u003Cspan>Before using it, make sure your settings are dialed in:\u003C/span>\u003C/p>\u003Cp dir=\"ltr\">\u003Cspan>Foreground Color: \u003C/span>\u003Cspan>Pick the new color you want to apply. This will replace the old one.\u003C/span>\u003C/p>\u003Cp dir=\"ltr\">\u003Cspan>Brush Size: \u003C/span>\u003Cspan>Choose a size based on the area you're painting.\u003C/span>\u003C/p>\u003Cp dir=\"ltr\">\u003Cspan>Sampling Mode: \u003C/span>\u003Cspan>Continuous keeps sampling as you move. Once use the color, you first click on. Background Swatch only replaces the background color set in your toolbar.\u003C/span>\u003C/p>\u003Cp dir=\"ltr\">\u003Cspan>Tolerance: \u003C/span>\u003Cspan>This controls how much of the similar colors should change. Start at about 30% and change it according to how picky you want to be. \u003C/span>\u003C/p>\u003Cp dir=\"ltr\">\u003Cspan>Blending Mode: \u003C/span>\u003Cspan>Set to Color (Top menu bar) to only change the color and not the brightness. \u003C/span>\u003C/p>\u003Ch2 id=\"FwuRkz\" dir=\"ltr\">\u003Cspan>How to Exchange Colors in Photoshop?\u003C/span>\u003C/h2>\u003Cp dir=\"ltr\">\u003Cspan>We'll do a real example: say you want to change a blue hoodie into a yellow hoodie. \u003C/span>\u003C/p>\u003Ch3 dir=\"ltr\">\u003Cspan>Step 1: Open your image\u003C/span>\u003C/h3>\u003Cp dir=\"ltr\">\u003Cspan>Open up Photoshop and the image you would like to change. \u003C/span>\u003C/p>\u003Ch3 dir=\"ltr\">\u003Cspan>Step 2: Select the Color Replacement Tool\u003C/span>\u003C/h3>\u003Cp dir=\"ltr\">\u003Cspan>It can be found in the Brush Tool group as I described before. \u003C/span>\u003C/p>\u003Ch3 dir=\"ltr\">\u003Cspan>Step 3: Choose Your Replacement Color \u003C/span>\u003C/h3>\u003Cp dir=\"ltr\">\u003Cspan>Click on the foreground color square (bottom of the toolbar) and pick the color to replace with, like yellow. \u003C/span>\u003C/p>\u003Ch3 dir=\"ltr\">\u003Cspan>Step 4: Adjust the Brush\u003C/span>\u003C/h3>\u003Cp dir=\"ltr\">\u003Cspan>Set your brush size - it should not be too big or too small, but just enough to provide control and prevent painting on colors you don't want to change. \u003C/span>\u003C/p>\u003Ch3 dir=\"ltr\">\u003Cspan>Step 5: Choose Your Settings\u003C/span>\u003C/h3>\u003Cp dir=\"ltr\">\u003Cspan>Set the Sampling to Once, Limits to Contiguous, and Tolerance 30-50%. Make sure the Mode is set to Color. \u003C/span>\u003C/p>\u003Ch3 dir=\"ltr\">\u003Cspan>Step 6: Start Painting\u003C/span>\u003C/h3>\u003Cp dir=\"ltr\">\u003Cspan>Zoom in on the part that you want to change and start brushing over it. You will see the color change right away, while everything else —shadows, wrinkles, and edges—stays the same.\u003C/span>\u003C/p>\u003Ch2 id=\"lzLu3V\" dir=\"ltr\">\u003Cspan>Tips to Get Cleaner Results\u003C/span>\u003C/h2>\u003Cp dir=\"ltr\">\u003Cspan>Zoom In: \u003C/span>\u003Cspan>Helps stay inside the lines and avoid color leaks.\u003C/span>\u003C/p>\u003Cp dir=\"ltr\">\u003Cspan>Lower Tolerance: \u003C/span>\u003Cspan>If it starts changing areas you didn’t intend, lower the tolerance.\u003C/span>\u003C/p>\u003Cp dir=\"ltr\">\u003Cspan>Use a Soft Brush: \u003C/span>\u003Cspan>Makes edges blend better and avoids hard lines.\u003C/span>\u003C/p>\u003Cp dir=\"ltr\">\u003Cspan>Keep \"Once\" Sampling On: Prevents the tool from changing too many areas as you brush.\u003C/span>\u003C/p>\u003Ch2 id=\"C21WUn\" dir=\"ltr\">\u003Cspan>When Should You Use This Tool?\u003C/span>\u003C/h2>\u003Cp dir=\"ltr\">\u003Cspan>The Photoshop color replacement tool works best in these cases:\u003C/span>\u003C/p>\u003Cul>\u003Cli dir=\"ltr\" aria-level=\"1\">\u003Cp dir=\"ltr\" role=\"presentation\">\u003Cspan>Replacing solid or consistent colors\u003C/span>\u003C/p>\u003C/li>\u003Cli dir=\"ltr\" aria-level=\"1\">\u003Cp dir=\"ltr\" role=\"presentation\">\u003Cspan>Editing product photos for listings\u003C/span>\u003C/p>\u003C/li>\u003Cli dir=\"ltr\" aria-level=\"1\">\u003Cp dir=\"ltr\" role=\"presentation\">\u003Cspan>Changing outfit colors in portraits\u003C/span>\u003C/p>\u003C/li>\u003Cli dir=\"ltr\" aria-level=\"1\">\u003Cp dir=\"ltr\" role=\"presentation\">\u003Cspan>Swapping out background colors (simple ones)\u003C/span>\u003C/p>\u003C/li>\u003C/ul>\u003Ch2 id=\"yNPwg5\" dir=\"ltr\">\u003Cspan>Different Ways to Edit Colors in Photoshop Color Replacement Tool\u003C/span>\u003C/h2>\u003Ch3 dir=\"ltr\">\u003Cspan>1. Hue/Saturation Adjustment Layer: \u003C/span>\u003C/h3>\u003Cp dir=\"ltr\">\u003Cspan>Select Layer > New Adjustment Layer > Hue/Saturation. \u003C/span>\u003C/p>\u003Cp dir=\"ltr\">\u003Cspan>Select the checkbox that says Colorize. \u003C/span>\u003C/p>\u003Cp dir=\"ltr\">\u003Cspan>Move the hue, saturation, and lightness sliders until you find a color you like. \u003C/span>\u003C/p>\u003Cp dir=\"ltr\">\u003Cspan>Control where it is showing up with a layer mask.\u003C/span>\u003C/p>\u003Ch3 dir=\"ltr\">\u003Cspan>2. Replace Color Dialog: \u003C/span>\u003C/h3>\u003Cp dir=\"ltr\">\u003Cspan>Select Image > Adjustments > Replace Color.\u003C/span>\u003C/p>\u003Cp dir=\"ltr\">\u003Cspan>Select the color(s) you want for your changes.\u003C/span>\u003C/p>\u003Cp dir=\"ltr\">\u003Cspan>Change the fuzziness slider where needed to control how far the change reaches.\u003C/span>\u003C/p>\u003Cp dir=\"ltr\">\u003Cspan>Choose the new color using the result color box.\u003C/span>\u003C/p>\u003Ch3 dir=\"ltr\">\u003Cspan>3. Solid Color Fill Layer with Masking:\u003C/span>\u003C/h3>\u003Cp dir=\"ltr\">\u003Cspan>Create a solid color fill layer. \u003C/span>\u003C/p>\u003Cp dir=\"ltr\">\u003Cspan>Use a layer mask to paint the application of color where needed.\u003C/span>\u003C/p>\u003Cp dir=\"ltr\">\u003Cspan>Set the blending mode of the layer to \"Color\" or \"Overlay.\"\u003C/span>\u003C/p>\u003Ch2 id=\"3DI9HG\" dir=\"ltr\">\u003Cspan>Common Problems And How to Fix Them?\u003C/span>\u003C/h2>\u003Ch3 dir=\"ltr\">\u003Cspan>Problem:1\u003C/span>\u003C/h3>\u003Cp dir=\"ltr\">\u003Cspan>Color bleeds into nearby areas\u003C/span>\u003C/p>\u003Cp dir=\"ltr\">\u003Cspan>Fix: \u003C/span>\u003Cspan>Lower the tolerance or switch to “Contiguous” limits.\u003C/span>\u003C/p>\u003Ch3 dir=\"ltr\">\u003Cspan>Problem:2\u003C/span>\u003C/h3>\u003Cp dir=\"ltr\">\u003Cspan>It doesn’t cover all of the original color\u003C/span>\u003C/p>\u003Cp dir=\"ltr\">\u003Cspan>Fix: \u003C/span>\u003Cspan>Raise the tolerance a bit, or change sampling from “Once” to “Continuous.”\u003C/span>\u003C/p>\u003Ch3 dir=\"ltr\">\u003Cspan>Problem: 3\u003C/span>\u003C/h3>\u003Cp dir=\"ltr\">\u003Cspan>The Color looks dull or weird\u003C/span>\u003C/p>\u003Cp dir=\"ltr\">\u003Cspan>Fix: \u003C/span>\u003Cspan>Double-check that your brush is set to “Color” mode, not “Normal.” Try adjusting brightness after color replacement.\u003C/span>\u003C/p>\u003Ch2 id=\"ItgiON\" dir=\"ltr\">\u003Cspan>Conclusion\u003C/span>\u003C/h2>\u003Cp dir=\"ltr\">\u003Cspan>Once you understand it, Photoshop has fast and easy color replacement options. The color replacement tool is great for simply changing a color without masks or selections. It leaves you with a natural blend and the perfect option for photos where you only want to replace one color and leave everything else unchanged.\u003C/span>\u003C/p>\u003Ch2 id=\"AzNUC3\" dir=\"ltr\">\u003Cspan>FAQs\u003C/span>\u003C/h2>\u003Cp dir=\"ltr\">\u003Cspan>Can I use the PS color replacement tool to change hair color?\u003C/span>\u003C/p>\u003Cp dir=\"ltr\">\u003Cspan>Yes, but make sure to use a soft brush and low tolerance. Hair has lots of small details, so zoom in for control.\u003C/span>\u003C/p>\u003Cp dir=\"ltr\">\u003Cspan>Is the color replacement tool available in Photoshop Elements?\u003C/span>\u003C/p>\u003Cp dir=\"ltr\">\u003Cspan>Yes, a limited version is available. It works the same, but you might have fewer options.\u003C/span>\u003C/p>\u003Cp dir=\"ltr\">\u003Cspan>Can I later undo the color change?\u003C/span>\u003C/p>\u003Cp>\u003Cspan id=\"docs-internal-guid-381987dd-7fff-b996-2dd4-f5809c1efda8\">\u003C/span>\u003C/p>\u003Cp dir=\"ltr\">\u003Cspan>If you are on the original layer, you can just use Ctrl+Z; If you want to add a little more buffer, copy the layer so you will have an original to rely back to.\u003C/span>\u003C/p>","photoshop-color-replacement-tool-how-to-swap-colors-in-photoshop-like-a-pro",65,1753714722,0,"3 weeks ago",{"id":65,"lang":11,"author_id":54,"image":66,"title":67,"keywords":15,"description":68,"content":69,"url":70,"views":71,"publishtime":72,"updatetime":73,"status":22,"publishtime_text":74,"status_text":25},711,"https://lh7-rt.googleusercontent.com/docsz/AD_4nXf26EHJoAJLBBTBJHQtcm8TZIDHN89HUV5ekyRny2WydnnhQ1kcefVedXcBEQHL0SD9Mjjui-hU5DMxIH9yKM-anctTlOHwzRa0opi-osJT6AJ53YcS99lH52BX8yHTRud1lqTFgw?key=lkbR0FFStw6L2qCbSrjMnQ","How to Improve Resolution of a Photo: AI Photo Enhancer","Learn how to increase resolution and enhance picture quality with Pixelfox AI. Easily upscale images and create HD photos for any use.","\u003Cp dir=\"ltr\">\u003Cspan>In the current world that digital images rule \u003C/span>\u003Cspan>enhance picture quality\u003C/span>\u003Cspan> has been an important skill to be possessed by a photographer, content maker or business. It is essential to understand the process if you are trying to\u003C/span>\u003Cspan> create HD photos\u003C/span>\u003Cspan> with professional portfolios in mind or you simply want to improve the quality of pictures of your memories. AI-driven \u003C/span>\u003Cspan>image enhancers\u003C/span>\u003Cspan> such as Pixelfox are simplifying the upscaling process letting anyone transform blurred images into high-resolution and high-quality photos. This guide will discuss different methods of \u003C/span>\u003Cspan>upscale image\u003C/span>\u003Cspan>, \u003C/span>\u003Cspan>how to raise the resolution of a picture\u003C/span>\u003Cspan> and \u003C/span>\u003Cspan>how to increase pixels on a photo\u003C/span>\u003Cspan>, transparent and professional by putting in minimal effort.\u003C/span>\u003C/p>\u003Ch2 dir=\"ltr\" id=\"B3y1jF\">\u003Cspan>What Is Image Resolution and Why Does It Matter?\u003C/span>\u003C/h2>\u003Cp dir=\"ltr\">\u003Cspan>Image resolution is defined as the level of detail present in a photograph. The resolution represents the number of pixels that the image contains; the higher the resolution, the clearer and sharper the image will be. An illustration is a picture with 300 DPI which is considered high resolution and 72 DPI is popular on the web. The process of\u003C/span>\u003Cspan> enhance picture quality\u003C/span>\u003Cspan> is effectively achieved by deliberately inserting more pixels in that picture making it more precise.\u003C/span>\u003C/p>\u003Ch2 dir=\"ltr\" id=\"wHBMCV\">\u003Cspan>How do you increase the resolution of a photo?\u003C/span>\u003C/h2>\u003Cp dir=\"ltr\">\u003Cspan>Using traditional photo editing programs, it was common to lose quality in\u003C/span>\u003Cspan> \u003C/span>\u003Cspan>upscaling pictures. Machine learning-based AI technologies take your image and evaluate it estimating the part that has been lost and putting it back in providing a \u003C/span>\u003Cspan>photo quality enhancer \u003C/span>\u003Cspan>that \u003C/span>\u003Cspan>upscales the picture\u003C/span>\u003Cspan> and improves detail bringing out sharpness and removing unwanted noise. The technique is referred to as \u003C/span>\u003Cspan>AI upscale\u003C/span>\u003Cspan> and it is transforming the process of upscaling low-resolution photos.\u003C/span>\u003C/p>\u003Ch2 dir=\"ltr\" id=\"CWnLvT\">\u003Cspan>How to Use Pixelfox for AI-Based Image Enhancement?\u003C/span>\u003C/h2>\u003Cp dir=\"ltr\">\u003Cspan>Pixelfox is an artificial intelligence-powered application that allows users to increase resolution in a matter of clicks. This is how you can wield it to beautify your photos:\u003C/span>\u003C/p>\u003Cp dir=\"ltr\">\u003Cspan>Upload the Picture:\u003C/span>\u003Cspan> Load Pixelfox and upload your low-resolution picture.\u003C/span>\u003C/p>\u003Cp dir=\"ltr\">\u003Cspan>Choose the AI Upscale Feature: \u003C/span>\u003Cspan>Choose the \u003C/span>\u003Cspan>AI upscale \u003C/span>\u003Cspan>picture found in the settings option and the picture will automatically get upscaled with the resolution.\u003C/span>\u003C/p>\u003Cp dir=\"ltr\">\u003Cspan>Adjust Settings: \u003C/span>\u003Cspan>It is possible to adjust the settings to improve the enhancement process.\u003C/span>\u003C/p>\u003Cp dir=\"ltr\">\u003Cspan>Preview the Changes:\u003C/span>\u003Cspan> Pixelfox has a before and after comparison of the original and improved images.\u003C/span>\u003C/p>\u003Cp dir=\"ltr\">\u003Cspan>Download Your High-Resolution Image:\u003C/span>\u003Cspan> After liking the effect, the\u003C/span>\u003Cspan> upscale image\u003C/span>\u003Cspan> is downloaded.\u003C/span>\u003C/p>\u003Ch2 dir=\"ltr\" id=\"ALfBCS\">\u003Cspan>What Happens When You Enhance a Photo?\u003C/span>\u003C/h2>\u003Cp dir=\"ltr\">\u003Cspan>Increasing the resolution of an image increases the number of pixels in the photo therefore enlarging and clarifying it. The \u003C/span>\u003Cspan>photo enhancer free \u003C/span>\u003Cspan>software such as Pixelfox colour and the details that are lost since the missing pixel information is replaced using an analysis of the photo. The result is a more detailed image that is easier to read and zoom in on without visual degradation.\u003C/span>\u003C/p>\u003Ch2 dir=\"ltr\" id=\"AJ4h5W\">\u003Cspan>How Can I Improve the Resolution of an Image?\u003C/span>\u003C/h2>\u003Cp dir=\"ltr\">\u003Cspan>Pixelfox adds pixels to an image regardless of whether you are using a \u003C/span>\u003Cspan>high-quality resolution photo\u003C/span>\u003Cspan> on a smartphone or an old photograph. The reason AI-powered tools are a good choice in answering the question \u003C/span>\u003Cspan>How can I make the resolution of a picture higher\u003C/span>\u003Cspan>? It is because it allows the user to increase the resolution of an image without distorting it.\u003C/span>\u003C/p>\u003Cp dir=\"ltr\">\u003Cspan>Pixelfox automatically improve the number of pixels in the image to increase the resolution without compromising quality. And the next time you need to think \u003C/span>\u003Cspan>how can I increase the pixels of an image?\u003C/span>\u003Cspan> Pixelfox uses AI to perform a quick and effective image improvement.\u003C/span>\u003C/p>\u003Ch2 dir=\"ltr\" id=\"g3kuMx\">\u003Cspan>How to Increase the Pixels on a Picture?\u003C/span>\u003C/h2>\u003Cp dir=\"ltr\">\u003Cspan>\u003Cspan>\u003Cimg src=\"https://api.pixelfox.ai/uploads/20250811/e6f0b3e32434bf51c1c3e27e52bdac7c.jpg\" width=\"600\" height=\"401\" alt=\"How to Improve Resolution of a Photo: AI Photo Enhancer\" loading=\"lazy\">\u003C/span>\u003C/span>\u003C/p>\u003Cp dir=\"ltr\">\u003Cspan>The number one frequent request is: \u003C/span>\u003Cspan>how do I increase the pixels of an image\u003C/span>\u003Cspan>? It may appear to be a complicated process and \u003C/span>\u003Cspan>AI upscale image\u003C/span>\u003Cspan> technology makes it easy. \u003C/span>\u003Cspan>Photo quality enhancers\u003C/span>\u003Cspan> such as Pixelfox can add pixels to pictures, which enhances the clarity and sharpness of the photographs even when taken with low-definition devices.\u003C/span>\u003C/p>\u003Ch2 dir=\"ltr\" id=\"y1anq5\">\u003Cspan>How to Raise the Resolution of a Picture for Different Purposes?\u003C/span>\u003C/h2>\u003Ch3 dir=\"ltr\">\u003Cspan>For Social Media\u003C/span>\u003C/h3>\u003Cp dir=\"ltr\">\u003Cspan>An image in high resolution may be a game-changer when it comes to sharing content on social media. Selfies, landscape or food photography, \u003C/span>\u003Cspan>AI photo enhancer\u003C/span>\u003Cspan> tools make your images stand out on the screen. Pixelfox AI has the potential to boost high-resolution rapidly providing you with impressive and attention-grabbing photos to post on social media accounts.\u003C/span>\u003C/p>\u003Ch3 dir=\"ltr\">\u003Cspan>For E-commerce\u003C/span>\u003C/h3>\u003Cp dir=\"ltr\">\u003Cspan>In e-commerce, your product images are essential to convert into sales. \u003C/span>\u003Cspan>Image quality enhancers\u003C/span>\u003Cspan> also help you get your product images done in a clear, detailed and professional way. The\u003C/span>\u003Cspan> AI upscale \u003C/span>\u003Cspan>option of Pixelfox is particularly optimal in generating product shots that resonate with prospective buyers.\u003C/span>\u003C/p>\u003Ch3 dir=\"ltr\">\u003Cspan>For Professional Use\u003C/span>\u003C/h3>\u003Cp dir=\"ltr\">\u003Cspan>The capability to increase the density of a photo without compromising information is an advantage to professional photographers and content creators. Pixelfox is a perfect portrait camera event camera and so on. It helps you to\u003C/span>\u003Cspan> improve picture quality\u003C/span>\u003Cspan> which would make your work in a competitive creative industry.\u003C/span>\u003C/p>\u003Ch2 dir=\"ltr\" id=\"R8LvIs\">\u003Cspan>Conclusion\u003C/span>\u003C/h2>\u003Cp dir=\"ltr\">\u003Cspan>Increasing the resolution of your picture is now easy and quick. Pixelfox is an AI-driven, non-destructive online image upscaling tool to help you \u003C/span>\u003Cspan>upscale\u003C/span>\u003Cspan> \u003C/span>\u003Cspan>images\u003C/span>\u003Cspan> easily \u003C/span>\u003Cspan>enhance picture quality\u003C/span>\u003Cspan> and\u003C/span>\u003Cspan> create HD photos\u003C/span>\u003Cspan> with just a few steps. So no matter if you are a content creator, e-commerce entrepreneur or someone who wishes to give life to their photos Pixelfox is a straightforward and effective tool for all your image refinement needs.\u003C/span>\u003C/p>\u003Cp dir=\"ltr\">\u003Cspan>“There are millions of pixels in the world; create yours to shine”\u003C/span>\u003Cspan>.\u003C/span>\u003C/p>","how-to-improve-resolution-of-a-photo-ai-photo-enhancer",25,1754917994,1754918035,"1 week ago",{"id":76,"lang":11,"author_id":54,"image":55,"title":77,"keywords":15,"description":78,"content":79,"url":80,"views":81,"publishtime":82,"updatetime":62,"status":22,"publishtime_text":83,"status_text":25},221,"Photo Morphing App Errors That Ruin Smooth Face Transitions","Find out the greatest photo morphing app mistakes that destroy seamless face fusion. Find out how to correct distortions, align features and improve image quality with AI tools, such as PixelFox. ai.","\u003Cp dir=\"ltr\">\u003Cspan>Morphing faces ought to feel magical, two pictures melding smoothly into one liquid transformation. But when your photo morphing app is a kludge, you end up looking like anything but an enchantress. Stretchy faces and jerky cuts Some of these mistakes can make a work of art turn into a digital flop in an instant.\u003C/span>\u003C/p>\u003Cp dir=\"ltr\">\u003Cspan>In this guide, we’re going to get into what are the most frequent bad practices that kill smooth face morphs, how to keep clear of them, and which tools actually do what they say on the tin.\u003C/span>\u003C/p>\u003Ch2 id=\"9gpEAa\" dir=\"ltr\">\u003Cspan>What Is a Photo Morphing App?\u003C/span>\u003C/h2>\u003Cp dir=\"ltr\">\u003Ca href=\"https://pixelfox.ai\">\u003Cspan>A photo morphing app\u003C/span>\u003C/a>\u003Cspan> is primarily made for blending two or more faces together, but it can also apply quality effects to the user’s photos and create stunning imagery. You can see one person slowly turning into another, frame by frame. Those apps employ facial recognition, warping algorithms and cross-dissolve techniques to trick the eye into thinking it perceives movement.\u003C/span>\u003C/p>\u003Cp dir=\"ltr\">\u003Cspan>Available on well-liked apps like Face Morph, Morphy and FaceApp, such functions can vary from basic GIF morphs to more sophisticated video transitions. Some even let you turn into animals, celebrities or other fantasies.\u003C/span>\u003C/p>\u003Ch3 dir=\"ltr\">\u003Cspan>Why Smooth Face Transitions Matter\u003C/span>\u003C/h3>\u003Cp dir=\"ltr\">\u003Cspan>A seamless morph is not just about aesthetics — it’s also about believability. When those transitions are seamless, here we make them feel submerged. But when the animation stutters, warps, stutters or glitches, the spell is broken.\u003C/span>\u003C/p>\u003Cp dir=\"ltr\">\u003Cspan>Here’s what a decent morph should be able to do:\u003C/span>\u003C/p>\u003Cul>\u003Cli dir=\"ltr\" aria-level=\"1\">\u003Cp dir=\"ltr\" role=\"presentation\">\u003Cspan>Align facial features accurately\u003C/span>\u003C/p>\u003C/li>\u003Cli dir=\"ltr\" aria-level=\"1\">\u003Cp dir=\"ltr\" role=\"presentation\">\u003Cspan>Keep colour and skin grade the same throughout.\u003C/span>\u003C/p>\u003C/li>\u003Cli dir=\"ltr\" aria-level=\"1\">\u003Cp dir=\"ltr\" role=\"presentation\">\u003Cspan>Transition gradually without abrupt jumps\u003C/span>\u003C/p>\u003C/li>\u003Cli dir=\"ltr\" aria-level=\"1\">\u003Cp dir=\"ltr\" role=\"presentation\">\u003Cspan>Preserve proportions and symmetry\u003C/span>\u003C/p>\u003C/li>\u003C/ul>\u003Ch2 id=\"Yi9wbc\" dir=\"ltr\">\u003Cspan>Concept Of Morphing Errors\u003C/span>\u003C/h2>\u003Cp dir=\"ltr\">\u003Cspan>So what’s going wrong? Let’s go through some of the most common morphing app problems:\u003C/span>\u003C/p>\u003Ch3 dir=\"ltr\">\u003Cspan>Misaligned Facial Features\u003C/span>\u003C/h3>\u003Cp dir=\"ltr\">\u003Cspan>When the eyes, nose or mouth don’t align across images, the morph will appear distorted. This is usually the case when photos are snapped at different angles, or with differing expressions.\u003C/span>\u003C/p>\u003Ch3 dir=\"ltr\">\u003Cspan>Poor Image Resolution\u003C/span>\u003C/h3>\u003Cp dir=\"ltr\">\u003Cspan>Poor quality images will result in more pixelation, blurry transitions. There’s only so much even the best morphing algorithm can do to a photo that lacks great detail.\u003C/span>\u003C/p>\u003Ch3 dir=\"ltr\">\u003Cspan>Inconsistent Lighting\u003C/span>\u003C/h3>\u003Cp dir=\"ltr\">\u003Cspan>Shadows, skin tone and contrast are all affected by light. If two photos are extremely different in lighting, the morph is unusable.\u003C/span>\u003C/p>\u003Ch3 dir=\"ltr\">\u003Cspan>Overuse of Filters\u003C/span>\u003C/h3>\u003Cp dir=\"ltr\">\u003Cspan>Some of the apps go heavy on the filters, which bump and grind in transition. A vintage filter on one picture and a neon glow on another? Which is a recipe for visual chaos.\u003C/span>\u003C/p>\u003Ch3 dir=\"ltr\">\u003Cspan>Lack of Control Points\u003C/span>\u003C/h3>\u003Cp dir=\"ltr\">\u003Cspan>Apps that don’t give you the ability to manually move control points often yield sloppy looking morphs. Without precise mapping, features drift or distort unnaturally.\u003C/span>\u003C/p>\u003Ch2 id=\"uRhpJq\" dir=\"ltr\">\u003Cspan>Ways AI Image Resize Tools Can Be Helpful\u003C/span>\u003C/h2>\u003Cp dir=\"ltr\">\u003Cspan>Prepping your photos is an essential step before morphing can take place. This is where AI image resize tools come in. These software scale up low resolution photos and preserve details, so it's perfect for morphing.\u003C/span>\u003C/p>\u003Cp dir=\"ltr\">\u003Cspan>For example, PixelFox. ai applies deep learning to amplify textures, enhance edges, and remove noise. It’s more than resizing — it’s smart reconstruction.\u003C/span>\u003C/p>\u003Ch2 id=\"e9vL7M\" dir=\"ltr\">\u003Cspan>Advantages of using an AI photo enlarger:\u003C/span>\u003C/h2>\u003Cp dir=\"ltr\">\u003Cspan>Enhances the sharpness of old or new images\u003C/span>\u003C/p>\u003Cul>\u003Cli dir=\"ltr\" aria-level=\"1\">\u003Cp dir=\"ltr\" role=\"presentation\">\u003Cspan>Improves facial feature definition\u003C/span>\u003C/p>\u003C/li>\u003Cli dir=\"ltr\" aria-level=\"1\">\u003Cp dir=\"ltr\" role=\"presentation\">\u003Cspan>Reduces artifacts during morphing\u003C/span>\u003C/p>\u003C/li>\u003Cli dir=\"ltr\" aria-level=\"1\">\u003Cp dir=\"ltr\" role=\"presentation\">\u003Cspan>Ensures consistent quality across frames\u003C/span>\u003C/p>\u003C/li>\u003Cli dir=\"ltr\" aria-level=\"1\">\u003Cp dir=\"ltr\" role=\"presentation\">\u003Cspan>Tips to Improve Morphing Accuracy\u003C/span>\u003C/p>\u003C/li>\u003C/ul>\u003Ch3 dir=\"ltr\">\u003Cspan>Want smoother transitions? Follow these tips:\u003C/span>\u003C/h3>\u003Cp dir=\"ltr\">\u003Cspan>Opt frontal photos: \u003C/span>\u003Cspan>Side angles mess up facial mapping.\u003C/span>\u003C/p>\u003Cp dir=\"ltr\">\u003Cspan>Match expressions:\u003C/span>\u003Cspan> Crocodile smile in one photo and downstairs frown in the other? That’s a morphing nightmare.\u003C/span>\u003C/p>\u003Cp dir=\"ltr\">\u003Cspan>Crops should be consistent: \u003C/span>\u003Cspan>head size and head placement should be the same.\u003C/span>\u003C/p>\u003Cp dir=\"ltr\">\u003Cspan>Skip busy backgrounds: \u003C/span>\u003Cspan>They detract from the morph.\u003C/span>\u003C/p>\u003Cp dir=\"ltr\">\u003Cspan>Test with grayscale:\u003C/span>\u003Cspan> The lack of color can bring out structural mismatches.\u003C/span>\u003C/p>\u003Cp dir=\"ltr\">\u003Cspan>Think of it as making preparations to cook a recipe. The better the prep, the better the reheat.\u003C/span>\u003C/p>\u003Ch2 id=\"vGCn5c\" dir=\"ltr\">\u003Cspan>Tools That Fix Morphing Mistakes\u003C/span>\u003C/h2>\u003Cp dir=\"ltr\">\u003Cspan>You’re probably sweating as you read this but it’s fine. These tools can help:\u003C/span>\u003C/p>\u003Cul>\u003Cli dir=\"ltr\" aria-level=\"1\">\u003Cp dir=\"ltr\" role=\"presentation\">\u003Cspan>Face Morph (Android/iOS): Includes control points and preview for manual progress.\u003C/span>\u003C/p>\u003C/li>\u003Cli dir=\"ltr\" aria-level=\"1\">\u003Cp dir=\"ltr\" role=\"presentation\">\u003Cspan>Morph Age (Mac): Pro warping and blending.\u003C/span>\u003C/p>\u003C/li>\u003Cli dir=\"ltr\" aria-level=\"1\">\u003Cp dir=\"ltr\" role=\"presentation\">\u003Cspan>FotoMorph (Windows): Can do frame-by-frame editing; exports to GIF or video.\u003C/span>\u003C/p>\u003C/li>\u003Cli dir=\"ltr\" aria-level=\"1\">\u003Cp dir=\"ltr\" role=\"presentation\">\u003Cspan>PixelFox. ai: Improves image quality before the morphing process is done.\u003C/span>\u003C/p>\u003C/li>\u003C/ul>\u003Cp dir=\"ltr\">\u003Cspan>Each tool has its strengths. Test out a couple to see which one’s right for you.\u003C/span>\u003C/p>\u003Ch3 dir=\"ltr\">\u003Cspan>Stealthy Tech Bugs That Undermine Morphing Quality\u003C/span>\u003C/h3>\u003Cp dir=\"ltr\">\u003Cspan>Other apps still create jarring transitions, even when everything should be in alignment faces, lighting, resolution. Why? Because all morphing engines are not created equal, under the hood.\u003C/span>\u003C/p>\u003Cp dir=\"ltr\">\u003Cspan>Here are some little technical glitches that many people probably have never noticed:\u003C/span>\u003C/p>\u003Cp>\u003Cb id=\"docs-internal-guid-9637383c-7fff-08b9-d5eb-556c84bacb90\">\u003Cbr>\u003C/b>\u003C/p>\u003Cp dir=\"ltr\">\u003Cspan>No GPU Acceleration : \u003C/span>\u003Cspan>There is no hardware acceleration, rendering can be slow or even can crash — mainly on older devices.\u003C/span>\u003C/p>\u003Cp dir=\"ltr\">\u003Cspan>Apps like PixelFox. ai sidestep these pitfalls with deep learning models which learn to fit to the unique structure of each image.\u003C/span>\u003C/p>\u003Ch3 dir=\"ltr\">\u003Cspan>UX Mistakes That Annoy Users\u003C/span>\u003C/h3>\u003Cp dir=\"ltr\">\u003Cspan>Sometimes, the issue is not the morph, but the app. Janky interfaces and bad UX design can totally disrupt your creative momentum.\u003C/span>\u003C/p>\u003Cp dir=\"ltr\">\u003Cspan>Watch out for:\u003C/span>\u003C/p>\u003Cp dir=\"ltr\">\u003Cspan>No Undo Button One errant tap and you’re back to square \u003C/span>\u003C/p>\u003Cp dir=\"ltr\">\u003Cspan>\u003Cb>Export Options Are Limited:\u003C/b> \u003C/span>\u003Cspan>Some apps restrict saving to only low-resolution formats or watermark your work if you don’t pay.\u003C/span>\u003C/p>\u003Cp dir=\"ltr\">\u003Cspan>\u003Cb>Forced Filters:\u003C/b> \u003C/span>\u003Cspan>Automatically applied filters in apps can often ruin the aesthetic.\u003C/span>\u003C/p>\u003Cp dir=\"ltr\">\u003Cspan>\u003Cb>Subscription Traps: \u003C/b>\u003C/span>\u003Cspan>Free trials that automatically renew without warning are among the more common complaints.\u003C/span>\u003C/p>\u003Cp dir=\"ltr\">\u003Cspan>Always read reviews before downloading. Sites like JustUseApp and Probleme. app highlight (The real ones) user issues, from crashes to billing issues.\u003C/span>\u003C/p>\u003Cp dir=\"ltr\">\u003Cspan>\u003Cb>In The Real World:\u003C/b> \u003C/span>\u003Cspan>When Morphing Attacks\u003C/span>\u003C/p>\u003Cp dir=\"ltr\">\u003Cspan>Here are a few instances where morphing errors wreaked havoc:\u003C/span>\u003C/p>\u003Cp dir=\"ltr\">\u003Cspan>\u003Cb>Marketing Mishap:\u003C/b>\u003C/span>\u003Cspan> A company attempted to turn customer selfies into product mascots. The result? Twisted faces — and backlash over creepy images.\u003C/span>\u003C/p>\u003Cp dir=\"ltr\">\u003Cspan>\u003Cb>Failed Family Album: \u003C/b>\u003C/span>\u003Cspan>One user magnified childhood photos to create a slide show. Because of misalignment the animation made relatives appear as melting wax figures.\u003C/span>\u003C/p>\u003Cp dir=\"ltr\">\u003Cspan>What Developers Can Do With Morphing Apps\u003C/span>\u003C/p>\u003Cp dir=\"ltr\">\u003Cspan>If you’re developing or redesigning a photo morphing app, here’s what users really want:\u003C/span>\u003C/p>\u003Cp dir=\"ltr\">\u003Cspan>\u003Cb>Manual Control Points:\u003C/b>\u003C/span>\u003Cspan>\u003Cb> \u003C/b>Allow users to fine-tune transitions themselves.\u003C/span>\u003C/p>\u003Cp dir=\"ltr\">\u003Cspan>\u003Cb>Style Presets:\u003C/b> \u003C/span>\u003Cspan>Provide changing styles with presets such as cinema, cartoon, surreal…\u003C/span>\u003C/p>\u003Cp dir=\"ltr\">\u003Cspan>\u003Cb>Lossless Export:\u003C/b>\u003C/span>\u003Cspan>\u003Cb> \u003C/b>No quality degradation in each frame.\u003C/span>\u003C/p>\u003Cp dir=\"ltr\">\u003Cspan>\u003Cb>AI Face Matching: \u003C/b>\u003C/span>\u003Cspan>Automatically match your face with another face from a different angle.\u003C/span>\u003C/p>\u003Cp dir=\"ltr\">\u003Cspan>\u003Cb>Cross-Platform Sync:\u003C/b> \u003C/span>\u003Cspan>Lets users pick up where they left off on mobile and on the desktop.\u003C/span>\u003C/p>\u003Cp dir=\"ltr\">\u003Cspan>Apps that prioritize these elements shine — and hook people in a way that keeps them coming back.\u003C/span>\u003C/p>\u003Ch2 id=\"ow3TZi\" dir=\"ltr\">\u003Cspan>FAQs\u003C/span>\u003C/h2>\u003Cp dir=\"ltr\">\u003Cspan>Q1: Why does my morph appear broken?\u003C/span>\u003C/p>\u003Cp dir=\"ltr\">\u003Cspan>A: The reason is often misaligned facial features, or low-resolution photos. Use a Ai photo upscaler like PixelFox. ai to improve clarity.\u003C/span>\u003C/p>\u003Cp dir=\"ltr\">\u003Cspan>Q2: How to manually resolve morphing conflicts?\u003C/span>\u003C/p>\u003Cp dir=\"ltr\">\u003Cspan>A: Yes. Apps such as Morph Age and Face Morph enable you to manipulate control points and preview transitions.\u003C/span>\u003C/p>\u003Cp dir=\"ltr\">\u003Cspan>Q3: Is there a free AI image enlarger that I can use?\u003C/span>\u003C/p>\u003Cp dir=\"ltr\">\u003Cspan>A: Absolutely. PixelFox. ai comes with a free version of their smart enhancement features.\u003C/span>\u003C/p>\u003Cp dir=\"ltr\">\u003Cspan>Q4: Do lighting differences affect morphing?\u003C/span>\u003C/p>\u003Cp dir=\"ltr\">\u003Cspan>A: Definitely. Varying lighting conditions may result in sudden changes in tone and contrast in transition areas.\u003C/span>\u003C/p>\u003Cp dir=\"ltr\">\u003Cspan>Q5 How do you prepare images for this kind of morph?\u003C/span>\u003C/p>\u003Cp>\u003C/p>\u003Cp dir=\"ltr\">\u003Cspan>A: ATake front, non-copyrighted, hq photos of the same expression and lighting is preferred. Make them bigger first using an AI resize image tool, prior to a morph.\u003C/span>\u003C/p>\u003Cdiv>\u003Cspan>\u003Cbr>\u003C/span>\u003C/div>","photo-morphing-app-errors-that-ruin-smooth-face-transitions",70,1753106893,"1 month ago",{"id":85,"lang":11,"author_id":54,"image":55,"title":86,"keywords":15,"description":87,"content":88,"url":89,"views":90,"publishtime":91,"updatetime":62,"status":22,"publishtime_text":83,"status_text":25},216,"App to Make Photos Talk: Best Fixes for Glitchy Animations","Learn simple fixes for glitchy animations in your favourite app so your photos can talk with confidence. Explore tips for syncing lips, improving audio, and boosting image quality in every talking picture.","\u003Cp dir=\"ltr\">\u003Cspan>Ever recorded a speaking portrait only to be greeted by a stiff grin or a voice that echoes like tin? You’re definitely not the only one. Animated-\u003C/span>\u003Ca href=\"https://pixelfox.ai\">\u003Cspan>App to make photos Talk \u003C/span>\u003C/a>\u003Cspan>programmes have exploded in popularity, yet every user has encountered a bug along the way. Be it free or paid, whether the simplest app or a high-end face-talker, weird bugs can ruin the work. The positive thing is that flawless, realistic videos can become yours through a few simple adjustments.\u003C/span>\u003C/p>\u003Ch2 id=\"TrzwLI\" dir=\"ltr\">\u003Cspan>\u003Cb>What Is a Talking App to Make Photos?\u003C/b>\u003C/span>\u003C/h2>\u003Cp dir=\"ltr\">\u003Cspan>A talking-photo app harnesses artificial intelligence to animate a still picture, and then matches that movement to spoken words or typed text. In short, it gives a selfie, a pet or an artwork the power of speech. Creators can use the technology for\u003C/span>\u003C/p>\u003Cul>\u003Cli dir=\"ltr\" aria-level=\"1\">\u003Cp dir=\"ltr\" role=\"presentation\">\u003Cspan>eye-popping social media stories,\u003C/span>\u003C/p>\u003C/li>\u003Cli dir=\"ltr\" aria-level=\"1\">\u003Cp dir=\"ltr\" role=\"presentation\">\u003Cspan>custom greetings that feel personal,\u003C/span>\u003C/p>\u003C/li>\u003Cli dir=\"ltr\" aria-level=\"1\">\u003Cp dir=\"ltr\" role=\"presentation\">\u003Cspan>captivating lessons in the classroom,\u003C/span>\u003C/p>\u003C/li>\u003Cli dir=\"ltr\" aria-level=\"1\">\u003Cp dir=\"ltr\" role=\"presentation\">\u003Cspan>snappy marketing or product demos.\u003C/span>\u003C/p>\u003C/li>\u003C/ul>\u003Cp dir=\"ltr\">\u003Cspan>Because of its versatility, the talking-photo tool is fast becoming essential for influencers, educators, small businesses—even playful pranksters.\u003C/span>\u003C/p>\u003Ch3 dir=\"ltr\">\u003Cspan>\u003Cb>Common Glitches in Talking App TO Make Photo \u003C/b>\u003C/span>\u003C/h3>\u003Ch3 dir=\"ltr\">\u003Cspan>Before troubleshooting: \u003C/span>\u003Cspan> it helps to name the most common gremlins:\u003C/span>\u003C/h3>\u003Cp dir=\"ltr\">\u003Cspan>lip-sync mismatches: \u003C/span>\u003Cspan> where the mouth opens but words emerge late or early;\u003C/span>\u003C/p>\u003Cp dir=\"ltr\">\u003Cspan>frozen frames:\u003C/span>\u003Cspan> in which animation kicks off only to freeze mid-smile;\u003C/span>\u003C/p>\u003Cp dir=\"ltr\">\u003Cspan>audio delays: \u003C/span>\u003Cspan>so the voice arrives a heartbeat after the lips part.\u003C/span>\u003C/p>\u003Cp dir=\"ltr\">\u003Cspan>Facial recognition errors: The app sometimes animates the wrong region of a photograph—or, in frustrating cases, does nothing at all.\u003C/span>\u003C/p>\u003Cp>\u003Cb id=\"docs-internal-guid-03002c8b-7fff-b3e3-d2bc-a52d4b27d573\">\u003Cbr>\u003C/b>\u003C/p>\u003Cp dir=\"ltr\">\u003Cspan>Such glitches can appear in any programme that makes still images speak, particularly when the original picture or sound track is poorly lit, distorted, or mismatched.\u003C/span>\u003C/p>\u003Ch2 id=\"WK3zgu\" dir=\"ltr\">\u003Cspan>\u003Cb>Top App to Make Photos Talk\u003C/b>\u003C/span>\u003C/h2>\u003Cp dir=\"ltr\">\u003Cspan>To help users dodge disappointment, we review leading tools and list straightforward fixes for their quirks.\u003C/span>\u003C/p>\u003Ch3 dir=\"ltr\">\u003Cspan>1. Talkr\u003C/span>\u003C/h3>\u003Cp dir=\"ltr\">\u003Cspan>Talkr remains a favourite among iOS devotees because it moves cheeks, eyes, and mouth with convincing realism.\u003C/span>\u003C/p>\u003Cp dir=\"ltr\">\u003Cspan>Fixes for Talkr glitches:\u003C/span>\u003C/p>\u003Cp dir=\"ltr\">\u003Cspan>Always use a front facing well lit picture, record audio somewhere quiet and update the app as often as possible in order to avoid the ever present lip-sync bugs.\u003C/span>\u003C/p>\u003Ch3 dir=\"ltr\">\u003Cspan>2. SpeakPic\u003C/span>\u003C/h3>\u003Cp dir=\"ltr\">\u003Cspan>SpeakPic allows typing phrases and selecting a parade of light-hearted fun voice effects, which makes animation humorous and simple to learn.\u003C/span>\u003C/p>\u003Cp dir=\"ltr\">\u003Cspan>Fixes for SpeakPic issues:\u003C/span>\u003C/p>\u003Cp dir=\"ltr\">\u003Cspan>Stick to short sentences so timing stays tight, use the preview feature before exporting a final video, and clear the cache if the app suddenly crashes.\u003C/span>\u003C/p>\u003Ch3 dir=\"ltr\">\u003Cspan>3. FaceTalk\u003C/span>\u003C/h3>\u003Cp dir=\"ltr\">\u003Cspan>FaceTalk shines in real-time animation, and it lets users mix in custom audio recorded on the spot.\u003C/span>\u003C/p>\u003Cp dir=\"ltr\">\u003Cspan>Fixes for FaceTalk bugs:\u003C/span>\u003C/p>\u003Cp dir=\"ltr\">\u003Cspan>Always avoid low-res images, wear headphones while recording to cut echo, and restart the app after long sessions so memory leaks do not slow progress.\u003C/span>\u003C/p>\u003Ch3 dir=\"ltr\">\u003Cspan>4. Myheritage Deep Nostalgia\u003C/span>\u003C/h3>\u003Cp dir=\"ltr\">\u003Cspan>Lastly, Deep Nostalgia works best on loved family pictures and results can be quite emotional.\u003C/span>\u003C/p>\u003Cp dir=\"ltr\">\u003Cspan>Deep Nostalgia bugs solutions\u003C/span>\u003C/p>\u003Cp dir=\"ltr\">\u003Cspan>High-resolution scan all the old photos, apply the in-built enhancement feature and check the copyright restrictions on archival contents before animatching them.\u003C/span>\u003C/p>\u003Cp dir=\"ltr\">\u003Cspan>Use head-and-shoulder makeup; that yields the neatest results.\u003C/span>\u003C/p>\u003Ch3 dir=\"ltr\">\u003Cspan>5. Pixelfox AI\u003C/span>\u003C/h3>\u003Cp dir=\"ltr\">\u003Cspan>Pixelfox.ai is fast making a name in the animated-photo market. The app uses powerful machine-learning engines, which enable realistic and crisp motion to be achieved close to the push of a button.\u003C/span>\u003C/p>\u003Cp dir=\"ltr\">\u003Cspan>Why Pixelfox Stands Out:\u003C/span>\u003C/p>\u003Cp dir=\"ltr\">\u003Cspan>- Outperforms rivals in dimly lit shots.\u003C/span>\u003C/p>\u003Cp dir=\"ltr\">\u003Cspan>- Includes adjustable voice effects.\u003C/span>\u003C/p>\u003Cp dir=\"ltr\">\u003Cspan>- Remains stable even with larger media files.\u003C/span>\u003C/p>\u003Cp dir=\"ltr\">\u003Cspan>Visit Pixelfox.ai for a test drive.\u003C/span>\u003C/p>\u003Ch2 id=\"iV0kdI\" dir=\"ltr\">\u003Cspan>\u003Cb>Best Fixes for Glitchy Animations\u003C/b>\u003C/span>\u003C/h2>\u003Cp dir=\"ltr\">\u003Cspan>Use this checklist for slicker talking photos:\u003C/span>\u003C/p>\u003Ch3 dir=\"ltr\">\u003Cspan>1. Update the App Regularly\u003C/span>\u003C/h3>\u003Cp dir=\"ltr\">\u003Cspan>Dev teams patch bugs and improve features with every release.\u003C/span>\u003C/p>\u003Cp dir=\"ltr\">\u003Cspan>How to Check:\u003C/span>\u003C/p>\u003Cp dir=\"ltr\">\u003Cspan>Open your app store.\u003C/span>\u003C/p>\u003Cp dir=\"ltr\">\u003Cspan>Turn on automatic updates, if that option is there.\u003C/span>\u003C/p>\u003Ch3 dir=\"ltr\">\u003Cspan>2. Start With High-Quality Images\u003C/span>\u003C/h3>\u003Cp dir=\"ltr\">\u003Cspan>Fuzzy or heavily compressed pictures confuse the model.\u003C/span>\u003C/p>\u003Ch3 dir=\"ltr\">\u003Cspan>3. Optimize Audio Input\u003C/span>\u003C/h3>\u003Cp dir=\"ltr\">\u003Cspan>Clear sound equals smooth movement.\u003C/span>\u003C/p>\u003Ch3 dir=\"ltr\">\u003Cspan>4. Calibrate Facial Recognition\u003C/span>\u003C/h3>\u003Cp dir=\"ltr\">\u003Cspan>If the option exists, manually set key landmarks on the face.\u003C/span>\u003C/p>\u003Ch3 dir=\"ltr\">\u003Cspan>5. Clear Cache and Restart\u003C/span>\u003C/h3>\u003Cp dir=\"ltr\">\u003Cspan>An old-school remedy that still fixes most temporary glitches.\u003C/span>\u003C/p>\u003Cp dir=\"ltr\">\u003Cspan>Steps:\u003C/span>\u003C/p>\u003Cul>\u003Cli dir=\"ltr\" aria-level=\"1\">\u003Cp dir=\"ltr\" role=\"presentation\">\u003Cspan>Open the app settings menu.\u003C/span>\u003C/p>\u003C/li>\u003Cli dir=\"ltr\" aria-level=\"1\">\u003Cp dir=\"ltr\" role=\"presentation\">\u003Cspan>Select the Clear Cache option.\u003C/span>\u003C/p>\u003C/li>\u003C/ul>\u003Cp dir=\"ltr\">\u003Cspan>Run your voice recording through Audacity to remove background noise.\u003C/span>\u003C/p>\u003Cp dir=\"ltr\">\u003Cspan>Use CapCut or Canva to add polish to the animations.\u003C/span>\u003C/p>\u003Cp dir=\"ltr\">\u003Cspan>Always export the final file in HD to keep details sharp.\u003C/span>\u003C/p>\u003Ch2 id=\"TtmhqB\" dir=\"ltr\">\u003Cspan>\u003Cb>Real-World Wins from Talking Photo Apps\u003C/b>\u003C/span>\u003C/h2>\u003Cp dir=\"ltr\">\u003Cspan>One content creator animated her cat reciting affirmations with SpeakPic; the clip racked up 2 million views in five days because it felt genuine and playful.\u003C/span>\u003C/p>\u003Cp dir=\"ltr\">\u003Cspan>A history teacher used Deep Nostalgia to make pictures talk famous figures speak, leaving her students amazed and boosting class participation.\u003C/span>\u003C/p>\u003Cp dir=\"ltr\">\u003Cspan>A small business turned its product packaging into talking avatars with Vidnoz AI, and customer feedback soared along with a 45 percent lift in sales.\u003C/span>\u003C/p>\u003Ch3 dir=\"ltr\">\u003Cspan>\u003Cb>Creative Uses\u003C/b>\u003C/span>\u003C/h3>\u003Cp dir=\"ltr\">\u003Cspan>Post a cat that sings or let your selfie deliver pep talks on social media.\u003C/span>\u003C/p>\u003Cp dir=\"ltr\">\u003Cspan>Have your product \"introduce\" itself in ads or on landing pages.\u003C/span>\u003C/p>\u003Cp dir=\"ltr\">\u003Cspan>Animate landmark figures to narrate lessons in virtual classrooms.\u003C/span>\u003C/p>\u003Cp dir=\"ltr\">\u003Cspan>Want Better Results? Here’s What Makes a Photo “Talkable.”\u003C/span>\u003C/p>\u003Cp dir=\"ltr\">\u003Cspan>Begin with strong lighting. Shadows and motion blur confuse AI, so pick photos with an evenly lit, centred face.\u003C/span>\u003C/p>\u003Cp dir=\"ltr\">\u003Cspan>Record audio at a normal speaking volume. Excess background noise or mumbling will make the lip-sync drift.\u003C/span>\u003C/p>\u003Cp dir=\"ltr\">\u003Cspan>Keep clips brief. The shorter the message, the more natural the movement appears in the final animation.\u003C/span>\u003C/p>\u003Cp dir=\"ltr\">\u003Cspan>Skip group shots unless the app explicitly supports multi-face talk. Otherwise, mouths will open and close at random.\u003C/span>\u003C/p>\u003Ch2 id=\"ZKbTCs\" dir=\"ltr\">\u003Cspan>\u003Cb>FAQs\u003C/b>\u003C/span>\u003C/h2>\u003Cp dir=\"ltr\">\u003Cspan>Q1: What’s the best free app to make photos talk?\u003C/span>\u003C/p>\u003Cp dir=\"ltr\">\u003Cspan>A: SpeakPic and FaceTalk are both solid and free. If you want more controls, give Pixelfox.ai a try.\u003C/span>\u003C/p>\u003Cp dir=\"ltr\">\u003Cspan>Q2: Can I animate pet photos? \u003C/span>\u003C/p>\u003Cp dir=\"ltr\">\u003Cspan>A: Absolutely! Tokking Heads and DubDub Lab both let you animate animal faces.\u003C/span>\u003C/p>\u003Cp dir=\"ltr\">\u003Cspan>Q3: How do I fix lip-sync issues? \u003C/span>\u003C/p>\u003Cp dir=\"ltr\">\u003Cspan>A: Use clear, short audio clips and manually mark key facial points where the app allows.\u003C/span>\u003C/p>\u003Cp dir=\"ltr\">\u003Cspan>Q4: Is the use of talking-photo apps safe? \u003C/span>\u003C/p>\u003Cp dir=\"ltr\">\u003Cspan>A: The majority of them are secure, yet refer to the privacy policy once before uploading the personal images.\u003C/span>\u003C/p>\u003Ch2 id=\"fapZgt\" dir=\"ltr\">\u003Cspan>\u003Cb>Final Thoughts:\u003C/b>\u003C/span>\u003C/h2>\u003Cp dir=\"ltr\">\u003Ca href=\"https://pixelfox.ai\">\u003Cspan>Talking photo apps \u003C/span>\u003C/a>\u003Cspan>are fun, technically mind-blowing, and sometimes more emotional than they should be. \u003C/span>\u003C/p>\u003Cp>\u003C/p>\u003Cp dir=\"ltr\">\u003Cspan>That said, any persistent bug can quickly drain the fun. Whether you choose a mouth-animation tool or a full-face generator, the outcome rests on solid prep: feed it crisp recordings, install the latest updates, and play around with settings until it clicks. Your images can tell stories of their own; just ensure that the story comes through clearly.\u003C/span>\u003C/p>\u003Cdiv>\u003Cspan>\u003Cbr>\u003C/span>\u003C/div>","app-to-make-photos-talk-best-fixes-for-glitchy-animations",76,1753105304,{"id":93,"lang":11,"author_id":12,"image":55,"title":94,"keywords":15,"description":95,"content":96,"url":97,"views":98,"publishtime":99,"updatetime":62,"status":22,"publishtime_text":100,"status_text":25},534,"Free Cartoon Person Maker – Create Cartoon Avatars from Photos Instantly","Turn your photos into animated characters with a free cartoon person maker. No sign-up required. Generate cartoon avatars and custom cartoon profile pictures in seconds.","\u003Cp dir=\"ltr\" style=\"line-height:1.7999999999999998;margin-top:12pt;margin-bottom:12pt;\">\u003Cspan style=\"font-size: 18pt; font-family: "Times New Roman", serif; color: rgb(0, 0, 0); background-color: transparent; font-weight: 700; font-style: normal; font-variant: normal; text-decoration: none; vertical-align: baseline; white-space: pre-wrap;\">Introduction\u003C/span>\u003C/p>\u003Cp dir=\"ltr\" style=\"line-height:1.7999999999999998;margin-top:12pt;margin-bottom:12pt;\">\u003Cspan style=\"font-size:12pt;font-family:'Times New Roman',serif;color:#000000;background-color:transparent;font-weight:400;font-style:normal;font-variant:normal;text-decoration:none;vertical-align:baseline;white-space:pre;white-space:pre-wrap;\">Have you ever wanted to know what a cartoon version of yourself would be like? With today’s AI tools, you no longer need to be an artist to create one. Whether you want a fun new profile picture or a unique animated character for social media or gaming, the \u003C/span>\u003Cspan style=\"font-size:12pt;font-family:'Times New Roman',serif;color:#000000;background-color:transparent;font-weight:700;font-style:normal;font-variant:normal;text-decoration:none;vertical-align:baseline;white-space:pre;white-space:pre-wrap;\">free cartoon person maker\u003C/span>\u003Cspan style=\"font-size:12pt;font-family:'Times New Roman',serif;color:#000000;background-color:transparent;font-weight:400;font-style:normal;font-variant:normal;text-decoration:none;vertical-align:baseline;white-space:pre;white-space:pre-wrap;\"> by \u003C/span>\u003Ca href=\"http://pixelfox.ai\" style=\"text-decoration:none;\">\u003Cspan style=\"font-size:12pt;font-family:'Times New Roman',serif;color:#1155cc;background-color:transparent;font-weight:400;font-style:normal;font-variant:normal;text-decoration:underline;-webkit-text-decoration-skip:none;text-decoration-skip-ink:none;vertical-align:baseline;white-space:pre;white-space:pre-wrap;\">Pixelfox.AI\u003C/span>\u003C/a>\u003Cspan style=\"font-size:12pt;font-family:'Times New Roman',serif;color:#000000;background-color:transparent;font-weight:400;font-style:normal;font-variant:normal;text-decoration:none;vertical-align:baseline;white-space:pre;white-space:pre-wrap;\"> is your one-click solution.\u003C/span>\u003C/p>\u003Cp dir=\"ltr\" style=\"line-height:1.7999999999999998;margin-top:12pt;margin-bottom:12pt;\">\u003Cspan style=\"font-size:12pt;font-family:'Times New Roman',serif;color:#000000;background-color:transparent;font-weight:400;font-style:normal;font-variant:normal;text-decoration:none;vertical-align:baseline;white-space:pre;white-space:pre-wrap;\">By using this powerful \u003C/span>\u003Cspan style=\"font-size:12pt;font-family:'Times New Roman',serif;color:#000000;background-color:transparent;font-weight:700;font-style:normal;font-variant:normal;text-decoration:none;vertical-align:baseline;white-space:pre;white-space:pre-wrap;\">cartoon avatar maker,\u003C/span>\u003Cspan style=\"font-size:12pt;font-family:'Times New Roman',serif;color:#000000;background-color:transparent;font-weight:400;font-style:normal;font-variant:normal;text-decoration:none;vertical-align:baseline;white-space:pre;white-space:pre-wrap;\"> you can transform any photo of yours into a customized cartoon character instantly, all this would be done online, and with \u003C/span>\u003Cspan style=\"font-size:12pt;font-family:'Times New Roman',serif;color:#000000;background-color:transparent;font-weight:700;font-style:normal;font-variant:normal;text-decoration:none;vertical-align:baseline;white-space:pre;white-space:pre-wrap;\">no sign-up required\u003C/span>\u003Cspan style=\"font-size:12pt;font-family:'Times New Roman',serif;color:#000000;background-color:transparent;font-weight:400;font-style:normal;font-variant:normal;text-decoration:none;vertical-align:baseline;white-space:pre;white-space:pre-wrap;\">. This tool will allow you to say goodbye to boring selfies and hello to stylized, animated versions of yourself, your friends, or even your pets.\u003C/span>\u003C/p>\u003Cp dir=\"ltr\" style=\"line-height:1.7999999999999998;margin-top:12pt;margin-bottom:12pt;\">\u003Cspan style=\"font-size:12pt;font-family:'Times New Roman',serif;color:#000000;background-color:transparent;font-weight:700;font-style:normal;font-variant:normal;text-decoration:none;vertical-align:baseline;white-space:pre;white-space:pre-wrap;\">What Is a Cartoon Person Maker?\u003C/span>\u003C/p>\u003Cp dir=\"ltr\" style=\"line-height:1.7999999999999998;margin-top:12pt;margin-bottom:12pt;\">\u003Cspan style=\"font-size:12pt;font-family:'Times New Roman',serif;color:#000000;background-color:transparent;font-weight:400;font-style:normal;font-variant:normal;text-decoration:none;vertical-align:baseline;white-space:pre;white-space:pre-wrap;\">A \u003C/span>\u003Cspan style=\"font-size:12pt;font-family:'Times New Roman',serif;color:#000000;background-color:transparent;font-weight:700;font-style:normal;font-variant:normal;text-decoration:none;vertical-align:baseline;white-space:pre;white-space:pre-wrap;\">cartoon person maker\u003C/span>\u003Cspan style=\"font-size:12pt;font-family:'Times New Roman',serif;color:#000000;background-color:transparent;font-weight:400;font-style:normal;font-variant:normal;text-decoration:none;vertical-align:baseline;white-space:pre;white-space:pre-wrap;\"> is an AI-powered tool where you can upload your photos, and the tool turns them into a cartoon-style avatar. Such avatars usually consist of unrealistic characteristics and funny facial expressions, as well as bold colors; they are ideal for creating a unique digital identity.\u003C/span>\u003C/p>\u003Cp dir=\"ltr\" style=\"line-height:1.7999999999999998;margin-top:12pt;margin-bottom:12pt;\">\u003Cspan style=\"font-size:12pt;font-family:'Times New Roman',serif;color:#000000;background-color:transparent;font-weight:400;font-style:normal;font-variant:normal;text-decoration:none;vertical-align:baseline;white-space:pre;white-space:pre-wrap;\">Pixelfox’s AI Anime Generator provides realistic, anime-inspired, and comic-style results. It gives full creative freedom without needing to install software or learn graphic design to its users.\u003C/span>\u003C/p>\u003Cp dir=\"ltr\" style=\"line-height:1.7999999999999998;margin-top:12pt;margin-bottom:12pt;\">\u003Cspan style=\"font-size:12pt;font-family:'Times New Roman',serif;color:#000000;background-color:transparent;font-weight:400;font-style:normal;font-variant:normal;text-decoration:none;vertical-align:baseline;white-space:pre;white-space:pre-wrap;\">\u003Cbr>\u003C/span>\u003C/p>\u003Cp dir=\"ltr\" style=\"line-height:1.7999999999999998;margin-top:12pt;margin-bottom:12pt;\">\u003Cspan style=\"font-size:12pt;font-family:'Times New Roman',serif;color:#000000;background-color:transparent;font-weight:700;font-style:normal;font-variant:normal;text-decoration:none;vertical-align:baseline;white-space:pre;white-space:pre-wrap;\">Key Features of Pixelfox’s Free Cartoon Avatar Maker\u003C/span>\u003C/p>\u003Cp dir=\"ltr\" style=\"line-height:1.7999999999999998;margin-top:12pt;margin-bottom:12pt;\">\u003Cspan style=\"font-size:12pt;font-family:'Times New Roman',serif;color:#000000;background-color:transparent;font-weight:700;font-style:normal;font-variant:normal;text-decoration:none;vertical-align:baseline;white-space:pre;white-space:pre-wrap;\">Create a Cartoon Avatar from a Photo\u003C/span>\u003C/p>\u003Cp dir=\"ltr\" style=\"line-height:1.7999999999999998;margin-top:12pt;margin-bottom:12pt;\">\u003Cspan style=\"font-size:12pt;font-family:'Times New Roman',serif;color:#000000;background-color:transparent;font-weight:400;font-style:normal;font-variant:normal;text-decoration:none;vertical-align:baseline;white-space:pre;white-space:pre-wrap;\">By using this tool, you can \u003C/span>\u003Cspan style=\"font-size:12pt;font-family:'Times New Roman',serif;color:#000000;background-color:transparent;font-weight:700;font-style:normal;font-variant:normal;text-decoration:none;vertical-align:baseline;white-space:pre;white-space:pre-wrap;\">generate cartoon avatars from a photo for free\u003C/span>\u003Cspan style=\"font-size:12pt;font-family:'Times New Roman',serif;color:#000000;background-color:transparent;font-weight:400;font-style:normal;font-variant:normal;text-decoration:none;vertical-align:baseline;white-space:pre;white-space:pre-wrap;\">. This tool makes the process as simple as uploading an image. Pixelfox AI Anime Generator recognizes the faces automatically and transforms your selfie or a photo instantly into a stylized cartoon.\u003C/span>\u003C/p>\u003Cp dir=\"ltr\" style=\"line-height:1.7999999999999998;margin-top:12pt;margin-bottom:12pt;\">\u003Cspan style=\"font-size:12pt;font-family:'Times New Roman',serif;color:#000000;background-color:transparent;font-weight:700;font-style:normal;font-variant:normal;text-decoration:none;vertical-align:baseline;white-space:pre;white-space:pre-wrap;\">Customize Your Animated Character\u003C/span>\u003C/p>\u003Cp dir=\"ltr\" style=\"line-height:1.7999999999999998;margin-top:12pt;margin-bottom:12pt;\">\u003Cspan style=\"font-size:12pt;font-family:'Times New Roman',serif;color:#000000;background-color:transparent;font-weight:400;font-style:normal;font-variant:normal;text-decoration:none;vertical-align:baseline;white-space:pre;white-space:pre-wrap;\">Do you want your cartoon self to wear glasses, smile more, or have a specific hairstyle? The custom animated characters tool gives you the chance to make adjustments to fit your appearance in real life, or just go whole hog and have an entirely new image.\u003C/span>\u003C/p>\u003Cp dir=\"ltr\" style=\"line-height:1.7999999999999998;margin-top:12pt;margin-bottom:12pt;\">\u003Cspan style=\"font-size:12pt;font-family:'Times New Roman',serif;color:#000000;background-color:transparent;font-weight:700;font-style:normal;font-variant:normal;text-decoration:none;vertical-align:baseline;white-space:pre;white-space:pre-wrap;\">Free Animated Characters – \u003Ca href=\"https://pixelfox.ai/\" target=\"_blank\">No Sign Up\u003C/a>\u003C/span>\u003C/p>\u003Cp dir=\"ltr\" style=\"line-height:1.7999999999999998;margin-top:12pt;margin-bottom:12pt;\">\u003Cspan style=\"font-size:12pt;font-family:'Times New Roman',serif;color:#000000;background-color:transparent;font-weight:400;font-style:normal;font-variant:normal;text-decoration:none;vertical-align:baseline;white-space:pre;white-space:pre-wrap;\">No registration, no fees, and no hassle. You can \u003C/span>\u003Cspan style=\"font-size:12pt;font-family:'Times New Roman',serif;color:#000000;background-color:transparent;font-weight:700;font-style:normal;font-variant:normal;text-decoration:none;vertical-align:baseline;white-space:pre;white-space:pre-wrap;\">create cartoon avatars\u003C/span>\u003Cspan style=\"font-size:12pt;font-family:'Times New Roman',serif;color:#000000;background-color:transparent;font-weight:400;font-style:normal;font-variant:normal;text-decoration:none;vertical-align:baseline;white-space:pre;white-space:pre-wrap;\"> and download them without creating an account. It’s a perfect choice for those who want a \u003C/span>\u003Cspan style=\"font-size:12pt;font-family:'Times New Roman',serif;color:#000000;background-color:transparent;font-weight:700;font-style:normal;font-variant:normal;text-decoration:none;vertical-align:baseline;white-space:pre;white-space:pre-wrap;\">free animated character generator\u003C/span>\u003Cspan style=\"font-size:12pt;font-family:'Times New Roman',serif;color:#000000;background-color:transparent;font-weight:400;font-style:normal;font-variant:normal;text-decoration:none;vertical-align:baseline;white-space:pre;white-space:pre-wrap;\"> for fast, privacy-safe use.\u003C/span>\u003C/p>\u003Cp dir=\"ltr\" style=\"line-height:1.7999999999999998;margin-top:12pt;margin-bottom:12pt;\">\u003Cspan style=\"font-size:12pt;font-family:'Times New Roman',serif;color:#000000;background-color:transparent;font-weight:700;font-style:normal;font-variant:normal;text-decoration:none;vertical-align:baseline;white-space:pre;white-space:pre-wrap;\">Cartoon Profile Picture Generator\u003C/span>\u003C/p>\u003Cp dir=\"ltr\" style=\"line-height:1.7999999999999998;margin-top:12pt;margin-bottom:12pt;\">\u003Cspan style=\"font-size:12pt;font-family:'Times New Roman',serif;color:#000000;background-color:transparent;font-weight:400;font-style:normal;font-variant:normal;text-decoration:none;vertical-align:baseline;white-space:pre;white-space:pre-wrap;\">Would you like to refresh your social media image? It is also an Instagram, TikTok, Discord, and LinkedIn profile picture cartoon creator, with which you can create a unique profile picture.\u003C/span>\u003C/p>\u003Cp dir=\"ltr\" style=\"line-height:1.7999999999999998;margin-top:12pt;margin-bottom:12pt;\">\u003Cspan style=\"font-size:12pt;font-family:'Times New Roman',serif;color:#000000;background-color:transparent;font-weight:700;font-style:normal;font-variant:normal;text-decoration:none;vertical-align:baseline;white-space:pre;white-space:pre-wrap;\">Fast, AI-Powered Results\u003C/span>\u003C/p>\u003Cp dir=\"ltr\" style=\"line-height:1.7999999999999998;margin-top:12pt;margin-bottom:12pt;\">\u003Cspan style=\"font-size:12pt;font-family:'Times New Roman',serif;color:#000000;background-color:transparent;font-weight:400;font-style:normal;font-variant:normal;text-decoration:none;vertical-align:baseline;white-space:pre;white-space:pre-wrap;\">Thanks to advanced AI, this \u003C/span>\u003Cspan style=\"font-size:12pt;font-family:'Times New Roman',serif;color:#000000;background-color:transparent;font-weight:700;font-style:normal;font-variant:normal;text-decoration:none;vertical-align:baseline;white-space:pre;white-space:pre-wrap;\">animated character creator\u003C/span>\u003Cspan style=\"font-size:12pt;font-family:'Times New Roman',serif;color:#000000;background-color:transparent;font-weight:400;font-style:normal;font-variant:normal;text-decoration:none;vertical-align:baseline;white-space:pre;white-space:pre-wrap;\"> delivers results in under 10 seconds.\u003C/span>\u003Cspan style=\"font-size:11pt;font-family:Arial,sans-serif;color:#000000;background-color:transparent;font-weight:400;font-style:normal;font-variant:normal;text-decoration:none;vertical-align:baseline;white-space:pre;white-space:pre-wrap;\"> \u003C/span>\u003Cspan style=\"font-size:12pt;font-family:'Times New Roman',serif;color:#000000;background-color:transparent;font-weight:400;font-style:normal;font-variant:normal;text-decoration:none;vertical-align:baseline;white-space:pre;white-space:pre-wrap;\">It does all intensive tasks, such as face recognition, coloring, and matching style, all in the cloud.\u003C/span>\u003C/p>\u003Cp dir=\"ltr\" style=\"line-height:1.7999999999999998;margin-top:12pt;margin-bottom:12pt;\">\u003Cspan style=\"font-size:12pt;font-family:'Times New Roman',serif;color:#000000;background-color:transparent;font-weight:700;font-style:normal;font-variant:normal;text-decoration:none;vertical-align:baseline;white-space:pre;white-space:pre-wrap;\">Why Use a Free Cartoon \u003Ca href=\"https://pixelfox.ai/\" target=\"_blank\">Avatar Maker\u003C/a>?\u003C/span>\u003C/p>\u003Cp dir=\"ltr\" style=\"line-height:1.7999999999999998;margin-top:12pt;margin-bottom:12pt;\">\u003Cspan style=\"font-size:12pt;font-family:'Times New Roman',serif;color:#000000;background-color:transparent;font-weight:700;font-style:normal;font-variant:normal;text-decoration:none;vertical-align:baseline;white-space:pre;white-space:pre-wrap;\">Express Your Personality\u003C/span>\u003C/p>\u003Cp dir=\"ltr\" style=\"line-height:1.7999999999999998;margin-top:12pt;margin-bottom:12pt;\">\u003Cspan style=\"font-size:12pt;font-family:'Times New Roman',serif;color:#000000;background-color:transparent;font-weight:400;font-style:normal;font-variant:normal;text-decoration:none;vertical-align:baseline;white-space:pre;white-space:pre-wrap;\">This cool cartoon avatar shows your mood, personality, or sense of humor. Whether you want to look professional, quirky, or artistic, you can \u003C/span>\u003Cspan style=\"font-size:12pt;font-family:'Times New Roman',serif;color:#000000;background-color:transparent;font-weight:700;font-style:normal;font-variant:normal;text-decoration:none;vertical-align:baseline;white-space:pre;white-space:pre-wrap;\">make a cartoon avatar from a photo\u003C/span>\u003Cspan style=\"font-size:12pt;font-family:'Times New Roman',serif;color:#000000;background-color:transparent;font-weight:400;font-style:normal;font-variant:normal;text-decoration:none;vertical-align:baseline;white-space:pre;white-space:pre-wrap;\"> that fits your vibe.\u003C/span>\u003C/p>\u003Cp dir=\"ltr\" style=\"line-height:1.7999999999999998;margin-top:12pt;margin-bottom:12pt;\">\u003Cspan style=\"font-size:12pt;font-family:'Times New Roman',serif;color:#000000;background-color:transparent;font-weight:700;font-style:normal;font-variant:normal;text-decoration:none;vertical-align:baseline;white-space:pre;white-space:pre-wrap;\">Stay Private Online\u003C/span>\u003C/p>\u003Cp dir=\"ltr\" style=\"line-height:1.7999999999999998;margin-top:12pt;margin-bottom:12pt;\">\u003Cspan style=\"font-size:12pt;font-family:'Times New Roman',serif;color:#000000;background-color:transparent;font-weight:400;font-style:normal;font-variant:normal;text-decoration:none;vertical-align:baseline;white-space:pre;white-space:pre-wrap;\">Many people do not want to use real photos online.\u003C/span>\u003Cspan style=\"font-size:11pt;font-family:Arial,sans-serif;color:#000000;background-color:transparent;font-weight:400;font-style:normal;font-variant:normal;text-decoration:none;vertical-align:baseline;white-space:pre;white-space:pre-wrap;\"> \u003C/span>\u003Cspan style=\"font-size:12pt;font-family:'Times New Roman',serif;color:#000000;background-color:transparent;font-weight:400;font-style:normal;font-variant:normal;text-decoration:none;vertical-align:baseline;white-space:pre;white-space:pre-wrap;\">A \u003C/span>\u003Cspan style=\"font-size:12pt;font-family:'Times New Roman',serif;color:#000000;background-color:transparent;font-weight:700;font-style:normal;font-variant:normal;text-decoration:none;vertical-align:baseline;white-space:pre;white-space:pre-wrap;\">cartoon profile picture generator\u003C/span>\u003Cspan style=\"font-size:12pt;font-family:'Times New Roman',serif;color:#000000;background-color:transparent;font-weight:400;font-style:normal;font-variant:normal;text-decoration:none;vertical-align:baseline;white-space:pre;white-space:pre-wrap;\"> is a safe resource that is creative and keeps your info private, but still is eye-catching.\u003C/span>\u003C/p>\u003Cp dir=\"ltr\" style=\"line-height:1.7999999999999998;margin-top:12pt;margin-bottom:12pt;\">\u003Cspan style=\"font-size:12pt;font-family:'Times New Roman',serif;color:#000000;background-color:transparent;font-weight:700;font-style:normal;font-variant:normal;text-decoration:none;vertical-align:baseline;white-space:pre;white-space:pre-wrap;\">Build Personal Brands\u003C/span>\u003C/p>\u003Cp dir=\"ltr\" style=\"line-height:1.7999999999999998;margin-top:12pt;margin-bottom:12pt;\">\u003Cspan style=\"font-size:12pt;font-family:'Times New Roman',serif;color:#000000;background-color:transparent;font-weight:400;font-style:normal;font-variant:normal;text-decoration:none;vertical-align:baseline;white-space:pre;white-space:pre-wrap;\">Whether a content creator, gamer, influencer, or professional, custom avatars will aid in establishing a familiar personal brand. With a \u003C/span>\u003Cspan style=\"font-size:12pt;font-family:'Times New Roman',serif;color:#000000;background-color:transparent;font-weight:700;font-style:normal;font-variant:normal;text-decoration:none;vertical-align:baseline;white-space:pre;white-space:pre-wrap;\">cartoon avatar maker\u003C/span>\u003Cspan style=\"font-size:12pt;font-family:'Times New Roman',serif;color:#000000;background-color:transparent;font-weight:400;font-style:normal;font-variant:normal;text-decoration:none;vertical-align:baseline;white-space:pre;white-space:pre-wrap;\">, you can generate consistent visuals for all your platforms.\u003C/span>\u003C/p>\u003Cp dir=\"ltr\" style=\"line-height:1.7999999999999998;margin-top:12pt;margin-bottom:12pt;\">\u003Cspan style=\"font-size:12pt;font-family:'Times New Roman',serif;color:#000000;background-color:transparent;font-weight:700;font-style:normal;font-variant:normal;text-decoration:none;vertical-align:baseline;white-space:pre;white-space:pre-wrap;\">Easy and Accessible for Everyone\u003C/span>\u003C/p>\u003Cp dir=\"ltr\" style=\"line-height:1.7999999999999998;margin-top:12pt;margin-bottom:0pt;\">\u003Cspan style=\"font-size:12pt;font-family:'Times New Roman',serif;color:#000000;background-color:transparent;font-weight:400;font-style:normal;font-variant:normal;text-decoration:none;vertical-align:baseline;white-space:pre;white-space:pre-wrap;\">In contrast to graphic design software tools or commission services, this animated character creator is easy to use and fast, and it does not cost anything. You do not have to be an artist or know how to work with software; you simply upload a photo and leave it to AI.\u003C/span>\u003C/p>\u003Cp dir=\"ltr\" style=\"line-height:1.7999999999999998;margin-top:12pt;margin-bottom:12pt;\">\u003Cspan style=\"font-size:12pt;font-family:'Times New Roman',serif;color:#000000;background-color:transparent;font-weight:700;font-style:normal;font-variant:normal;text-decoration:none;vertical-align:baseline;white-space:pre;white-space:pre-wrap;\">How to Use the Free Cartoon Person Maker Online\u003C/span>\u003C/p>\u003Cp dir=\"ltr\" style=\"line-height:1.7999999999999998;margin-top:12pt;margin-bottom:12pt;\">\u003Cspan style=\"font-size:12pt;font-family:'Times New Roman',serif;color:#000000;background-color:transparent;font-weight:700;font-style:normal;font-variant:normal;text-decoration:none;vertical-align:baseline;white-space:pre;white-space:pre-wrap;\">Step 1\u003C/span>\u003C/p>\u003Cp dir=\"ltr\" style=\"line-height:1.7999999999999998;margin-top:12pt;margin-bottom:12pt;\">\u003Cspan style=\"font-size:12pt;font-family:'Times New Roman',serif;color:#000000;background-color:transparent;font-weight:400;font-style:normal;font-variant:normal;text-decoration:none;vertical-align:baseline;white-space:pre;white-space:pre-wrap;\"> Open \u003C/span>\u003Ca href=\"http://pixelfox.ai\" style=\"text-decoration:none;\">\u003Cspan style=\"font-size:12pt;font-family:'Times New Roman',serif;color:#1155cc;background-color:transparent;font-weight:400;font-style:normal;font-variant:normal;text-decoration:underline;-webkit-text-decoration-skip:none;text-decoration-skip-ink:none;vertical-align:baseline;white-space:pre;white-space:pre-wrap;\">Pixelfox.AI\u003C/span>\u003C/a>\u003Cspan style=\"font-size:12pt;font-family:'Times New Roman',serif;color:#000000;background-color:transparent;font-weight:400;font-style:normal;font-variant:normal;text-decoration:none;vertical-align:baseline;white-space:pre;white-space:pre-wrap;\"> ’s \u003C/span>\u003Cspan style=\"font-size:12pt;font-family:'Times New Roman',serif;color:#000000;background-color:transparent;font-weight:700;font-style:normal;font-variant:normal;text-decoration:none;vertical-align:baseline;white-space:pre;white-space:pre-wrap;\">free cartoon person maker\u003C/span>\u003Cspan style=\"font-size:12pt;font-family:'Times New Roman',serif;color:#000000;background-color:transparent;font-weight:400;font-style:normal;font-variant:normal;text-decoration:none;vertical-align:baseline;white-space:pre;white-space:pre-wrap;\"> tool\u003C/span>\u003Cspan style=\"font-size:12pt;font-family:'Times New Roman',serif;color:#000000;background-color:transparent;font-weight:400;font-style:normal;font-variant:normal;text-decoration:none;vertical-align:baseline;white-space:pre;white-space:pre-wrap;\">\u003Cbr>\u003C/span>\u003Cspan style=\"font-size:12pt;font-family:'Times New Roman',serif;color:#000000;background-color:transparent;font-weight:400;font-style:normal;font-variant:normal;text-decoration:none;vertical-align:baseline;white-space:pre;white-space:pre-wrap;\"> \u003C/span>\u003Cspan style=\"font-size:12pt;font-family:'Times New Roman',serif;color:#000000;background-color:transparent;font-weight:700;font-style:normal;font-variant:normal;text-decoration:none;vertical-align:baseline;white-space:pre;white-space:pre-wrap;\">Step 2\u003C/span>\u003C/p>\u003Cp dir=\"ltr\" style=\"line-height:1.7999999999999998;margin-top:12pt;margin-bottom:12pt;\">\u003Cspan style=\"font-size:12pt;font-family:'Times New Roman',serif;color:#000000;background-color:transparent;font-weight:400;font-style:normal;font-variant:normal;text-decoration:none;vertical-align:baseline;white-space:pre;white-space:pre-wrap;\"> Upload the photo you’d like to cartoonize\u003C/span>\u003Cspan style=\"font-size:12pt;font-family:'Times New Roman',serif;color:#000000;background-color:transparent;font-weight:400;font-style:normal;font-variant:normal;text-decoration:none;vertical-align:baseline;white-space:pre;white-space:pre-wrap;\">\u003Cbr>\u003C/span>\u003Cspan style=\"font-size:12pt;font-family:'Times New Roman',serif;color:#000000;background-color:transparent;font-weight:400;font-style:normal;font-variant:normal;text-decoration:none;vertical-align:baseline;white-space:pre;white-space:pre-wrap;\"> \u003C/span>\u003Cspan style=\"font-size:12pt;font-family:'Times New Roman',serif;color:#000000;background-color:transparent;font-weight:700;font-style:normal;font-variant:normal;text-decoration:none;vertical-align:baseline;white-space:pre;white-space:pre-wrap;\">Step 3\u003C/span>\u003C/p>\u003Cp dir=\"ltr\" style=\"line-height:1.7999999999999998;margin-top:12pt;margin-bottom:12pt;\">\u003Cspan style=\"font-size:12pt;font-family:'Times New Roman',serif;color:#000000;background-color:transparent;font-weight:400;font-style:normal;font-variant:normal;text-decoration:none;vertical-align:baseline;white-space:pre;white-space:pre-wrap;\"> Choose your favourite style (e.g., classic cartoon, anime, comic-style)\u003C/span>\u003Cspan style=\"font-size:12pt;font-family:'Times New Roman',serif;color:#000000;background-color:transparent;font-weight:400;font-style:normal;font-variant:normal;text-decoration:none;vertical-align:baseline;white-space:pre;white-space:pre-wrap;\">\u003Cbr>\u003C/span>\u003Cspan style=\"font-size:12pt;font-family:'Times New Roman',serif;color:#000000;background-color:transparent;font-weight:400;font-style:normal;font-variant:normal;text-decoration:none;vertical-align:baseline;white-space:pre;white-space:pre-wrap;\"> \u003C/span>\u003Cspan style=\"font-size:12pt;font-family:'Times New Roman',serif;color:#000000;background-color:transparent;font-weight:700;font-style:normal;font-variant:normal;text-decoration:none;vertical-align:baseline;white-space:pre;white-space:pre-wrap;\">Step 4\u003C/span>\u003C/p>\u003Cp dir=\"ltr\" style=\"line-height:1.7999999999999998;margin-top:12pt;margin-bottom:12pt;\">\u003Cspan style=\"font-size:12pt;font-family:'Times New Roman',serif;color:#000000;background-color:transparent;font-weight:400;font-style:normal;font-variant:normal;text-decoration:none;vertical-align:baseline;white-space:pre;white-space:pre-wrap;\"> Just hit “Generate” to let the AI transform your photo\u003C/span>\u003Cspan style=\"font-size:12pt;font-family:'Times New Roman',serif;color:#000000;background-color:transparent;font-weight:400;font-style:normal;font-variant:normal;text-decoration:none;vertical-align:baseline;white-space:pre;white-space:pre-wrap;\">\u003Cbr>\u003C/span>\u003Cspan style=\"font-size:12pt;font-family:'Times New Roman',serif;color:#000000;background-color:transparent;font-weight:400;font-style:normal;font-variant:normal;text-decoration:none;vertical-align:baseline;white-space:pre;white-space:pre-wrap;\"> \u003C/span>\u003Cspan style=\"font-size:12pt;font-family:'Times New Roman',serif;color:#000000;background-color:transparent;font-weight:700;font-style:normal;font-variant:normal;text-decoration:none;vertical-align:baseline;white-space:pre;white-space:pre-wrap;\">Step 5\u003C/span>\u003C/p>\u003Cp dir=\"ltr\" style=\"line-height:1.7999999999999998;margin-top:12pt;margin-bottom:12pt;\">\u003Cspan style=\"font-size:12pt;font-family:'Times New Roman',serif;color:#000000;background-color:transparent;font-weight:400;font-style:normal;font-variant:normal;text-decoration:none;vertical-align:baseline;white-space:pre;white-space:pre-wrap;\"> Download your new \u003C/span>\u003Cspan style=\"font-size:12pt;font-family:'Times New Roman',serif;color:#000000;background-color:transparent;font-weight:700;font-style:normal;font-variant:normal;text-decoration:none;vertical-align:baseline;white-space:pre;white-space:pre-wrap;\">cartoon avatar\u003C/span>\u003Cspan style=\"font-size:12pt;font-family:'Times New Roman',serif;color:#000000;background-color:transparent;font-weight:400;font-style:normal;font-variant:normal;text-decoration:none;vertical-align:baseline;white-space:pre;white-space:pre-wrap;\"> and use it where you want!\u003C/span>\u003C/p>\u003Cp dir=\"ltr\" style=\"line-height:1.7999999999999998;margin-top:12pt;margin-bottom:12pt;\">\u003Cimg src=\"https://api.pixelfox.ai/uploads/20250808/ce1a1d67db78defd11d3f7950b4e6326.jpg\" style=\"width: 50%;\" data-filename=\"filename\" alt=\"Free Cartoon Person Maker – Create Cartoon Avatars from Photos Instantly\" loading=\"lazy\">\u003C/p>\u003Cp dir=\"ltr\" style=\"line-height:1.7999999999999998;margin-top:12pt;margin-bottom:12pt;\">\u003Cbr>\u003C/p>\u003Cp dir=\"ltr\" style=\"line-height:1.7999999999999998;margin-top:12pt;margin-bottom:0pt;\">\u003Cspan style=\"font-size:12pt;font-family:'Times New Roman',serif;color:#000000;background-color:transparent;font-weight:400;font-style:normal;font-variant:normal;text-decoration:none;vertical-align:baseline;white-space:pre;white-space:pre-wrap;\">You can do it over and over again, experimenting with other photos, styles, and expressions. And the most exciting thing about it! No sign-up, no software purchase.\u003C/span>\u003C/p>\u003Cp dir=\"ltr\" style=\"line-height:1.7999999999999998;margin-top:12pt;margin-bottom:12pt;\">\u003Cspan style=\"font-size:12pt;font-family:'Times New Roman',serif;color:#000000;background-color:transparent;font-weight:700;font-style:normal;font-variant:normal;text-decoration:none;vertical-align:baseline;white-space:pre;white-space:pre-wrap;\">Who Can Use This Cartoon Avatar Generator?\u003C/span>\u003C/p>\u003Cp dir=\"ltr\" style=\"line-height:1.7999999999999998;margin-top:12pt;margin-bottom:12pt;\">\u003Cspan style=\"font-size:12pt;font-family:'Times New Roman',serif;color:#000000;background-color:transparent;font-weight:400;font-style:normal;font-variant:normal;text-decoration:none;vertical-align:baseline;white-space:pre;white-space:pre-wrap;\">This tool is ideal for:\u003C/span>\u003C/p>\u003Cul style=\"margin-top:0;margin-bottom:0;padding-inline-start:48px;\">\u003Cli dir=\"ltr\" style=\"list-style-type:disc;font-size:11pt;font-family:Arial,sans-serif;color:#000000;background-color:transparent;font-weight:400;font-style:normal;font-variant:normal;text-decoration:none;vertical-align:baseline;white-space:pre;\" aria-level=\"1\">\u003Cp dir=\"ltr\" style=\"line-height:1.7999999999999998;margin-top:12pt;margin-bottom:0pt;\" role=\"presentation\">\u003Cspan style=\"font-size:12pt;font-family:'Times New Roman',serif;color:#000000;background-color:transparent;font-weight:700;font-style:normal;font-variant:normal;text-decoration:none;vertical-align:baseline;white-space:pre;white-space:pre-wrap;\">Social Media Users\u003C/span>\u003C/p>\u003C/li>\u003Cli dir=\"ltr\" style=\"list-style-type:disc;font-size:11pt;font-family:Arial,sans-serif;color:#000000;background-color:transparent;font-weight:400;font-style:normal;font-variant:normal;text-decoration:none;vertical-align:baseline;white-space:pre;\" aria-level=\"1\">\u003Cp dir=\"ltr\" style=\"line-height:1.7999999999999998;margin-top:0pt;margin-bottom:0pt;\" role=\"presentation\">\u003Cspan style=\"font-size:12pt;font-family:'Times New Roman',serif;color:#000000;background-color:transparent;font-weight:700;font-style:normal;font-variant:normal;text-decoration:none;vertical-align:baseline;white-space:pre;white-space:pre-wrap;\">Gamers\u003C/span>\u003C/p>\u003C/li>\u003Cli dir=\"ltr\" style=\"list-style-type:disc;font-size:11pt;font-family:Arial,sans-serif;color:#000000;background-color:transparent;font-weight:400;font-style:normal;font-variant:normal;text-decoration:none;vertical-align:baseline;white-space:pre;\" aria-level=\"1\">\u003Cp dir=\"ltr\" style=\"line-height:1.7999999999999998;margin-top:0pt;margin-bottom:0pt;\" role=\"presentation\">\u003Cspan style=\"font-size:12pt;font-family:'Times New Roman',serif;color:#000000;background-color:transparent;font-weight:700;font-style:normal;font-variant:normal;text-decoration:none;vertical-align:baseline;white-space:pre;white-space:pre-wrap;\">Content Creators\u003C/span>\u003C/p>\u003C/li>\u003Cli dir=\"ltr\" style=\"list-style-type:disc;font-size:11pt;font-family:Arial,sans-serif;color:#000000;background-color:transparent;font-weight:400;font-style:normal;font-variant:normal;text-decoration:none;vertical-align:baseline;white-space:pre;\" aria-level=\"1\">\u003Cp dir=\"ltr\" style=\"line-height:1.7999999999999998;margin-top:0pt;margin-bottom:0pt;\" role=\"presentation\">\u003Cspan style=\"font-size:12pt;font-family:'Times New Roman',serif;color:#000000;background-color:transparent;font-weight:700;font-style:normal;font-variant:normal;text-decoration:none;vertical-align:baseline;white-space:pre;white-space:pre-wrap;\">Teachers/Students\u003C/span>\u003C/p>\u003C/li>\u003Cli dir=\"ltr\" style=\"list-style-type:disc;font-size:11pt;font-family:Arial,sans-serif;color:#000000;background-color:transparent;font-weight:400;font-style:normal;font-variant:normal;text-decoration:none;vertical-align:baseline;white-space:pre;\" aria-level=\"1\">\u003Cp dir=\"ltr\" style=\"line-height:1.7999999999999998;margin-top:0pt;margin-bottom:0pt;\" role=\"presentation\">\u003Cspan style=\"font-size:12pt;font-family:'Times New Roman',serif;color:#000000;background-color:transparent;font-weight:700;font-style:normal;font-variant:normal;text-decoration:none;vertical-align:baseline;white-space:pre;white-space:pre-wrap;\">Business Professionals\u003C/span>\u003C/p>\u003C/li>\u003Cli dir=\"ltr\" style=\"list-style-type:disc;font-size:11pt;font-family:Arial,sans-serif;color:#000000;background-color:transparent;font-weight:400;font-style:normal;font-variant:normal;text-decoration:none;vertical-align:baseline;white-space:pre;\" aria-level=\"1\">\u003Cp dir=\"ltr\" style=\"line-height:1.7999999999999998;margin-top:0pt;margin-bottom:12pt;\" role=\"presentation\">\u003Cspan style=\"font-size:12pt;font-family:'Times New Roman',serif;color:#000000;background-color:transparent;font-weight:700;font-style:normal;font-variant:normal;text-decoration:none;vertical-align:baseline;white-space:pre;white-space:pre-wrap;\">Families & Kids\u003C/span>\u003C/p>\u003C/li>\u003C/ul>\u003Cp dir=\"ltr\" style=\"line-height:1.7999999999999998;margin-top:12pt;margin-bottom:0pt;\">\u003Cspan style=\"font-size:12pt;font-family:'Times New Roman',serif;color:#000000;background-color:transparent;font-weight:400;font-style:normal;font-variant:normal;text-decoration:none;vertical-align:baseline;white-space:pre;white-space:pre-wrap;\">Whether you are creating a character for branding, fun, or even privacy, this tool is flexible enough to satisfy your needs.\u003C/span>\u003C/p>\u003Cp dir=\"ltr\" style=\"line-height:1.7999999999999998;margin-top:12pt;margin-bottom:12pt;\">\u003Cspan style=\"font-size:12pt;font-family:'Times New Roman',serif;color:#000000;background-color:transparent;font-weight:700;font-style:normal;font-variant:normal;text-decoration:none;vertical-align:baseline;white-space:pre;white-space:pre-wrap;\">Final Thoughts\u003C/span>\u003C/p>\u003Cp dir=\"ltr\" style=\"line-height:1.7999999999999998;margin-top:12pt;margin-bottom:12pt;\">\u003Cspan style=\"font-size:12pt;font-family:'Times New Roman',serif;color:#000000;background-color:transparent;font-weight:400;font-style:normal;font-variant:normal;text-decoration:none;vertical-align:baseline;white-space:pre;white-space:pre-wrap;\">Creating a cartoon version of yourself has never been easier. With the \u003C/span>\u003Cspan style=\"font-size:12pt;font-family:'Times New Roman',serif;color:#000000;background-color:transparent;font-weight:700;font-style:normal;font-variant:normal;text-decoration:none;vertical-align:baseline;white-space:pre;white-space:pre-wrap;\">free cartoon person maker\u003C/span>\u003Cspan style=\"font-size:12pt;font-family:'Times New Roman',serif;color:#000000;background-color:transparent;font-weight:400;font-style:normal;font-variant:normal;text-decoration:none;vertical-align:baseline;white-space:pre;white-space:pre-wrap;\"> from Pixelfox, you can transform your ordinary pictures into fun and expressive animated characters, and all this could be done in seconds, with \u003C/span>\u003Cspan style=\"font-size:12pt;font-family:'Times New Roman',serif;color:#000000;background-color:transparent;font-weight:700;font-style:normal;font-variant:normal;text-decoration:none;vertical-align:baseline;white-space:pre;white-space:pre-wrap;\">no sign-up and zero cost\u003C/span>\u003Cspan style=\"font-size:12pt;font-family:'Times New Roman',serif;color:#000000;background-color:transparent;font-weight:400;font-style:normal;font-variant:normal;text-decoration:none;vertical-align:baseline;white-space:pre;white-space:pre-wrap;\">.\u003C/span>\u003C/p>\u003Cp dir=\"ltr\" style=\"line-height:1.7999999999999998;margin-top:12pt;margin-bottom:12pt;\">\u003Cspan style=\"font-size:12pt;font-family:'Times New Roman',serif;color:#000000;background-color:transparent;font-weight:400;font-style:normal;font-variant:normal;text-decoration:none;vertical-align:baseline;white-space:pre;white-space:pre-wrap;\">You can use this AI-powered tool to \u003C/span>\u003Cspan style=\"font-size:12pt;font-family:'Times New Roman',serif;color:#000000;background-color:transparent;font-weight:700;font-style:normal;font-variant:normal;text-decoration:none;vertical-align:baseline;white-space:pre;white-space:pre-wrap;\">make your cartoon character\u003C/span>\u003Cspan style=\"font-size:12pt;font-family:'Times New Roman',serif;color:#000000;background-color:transparent;font-weight:400;font-style:normal;font-variant:normal;text-decoration:none;vertical-align:baseline;white-space:pre;white-space:pre-wrap;\">, revitalise your social media presence, or just have a laugh and see what kind of results this tool can produce without spending your life learning how to do that stuff.\u003C/span>\u003C/p>\u003Cp dir=\"ltr\" style=\"line-height:1.7999999999999998;margin-top:12pt;margin-bottom:12pt;\">\u003Cspan style=\"font-size:12pt;font-family:'Times New Roman',serif;color:#000000;background-color:transparent;font-weight:400;font-style:normal;font-variant:normal;text-decoration:none;vertical-align:baseline;white-space:pre;white-space:pre-wrap;\">So, are you ready to cartoon yourself?\u003C/span>\u003C/p>\u003Cp dir=\"ltr\" style=\"line-height:1.7999999999999998;margin-top:12pt;margin-bottom:12pt;\">\u003Cspan style=\"font-size:12pt;font-family:'Times New Roman',serif;color:#000000;background-color:transparent;font-weight:700;font-style:normal;font-variant:normal;text-decoration:none;vertical-align:baseline;white-space:pre;white-space:pre-wrap;\">Try Pixelfox’s Free Cartoon Avatar Maker Now\u003C/span>\u003Cspan style=\"font-size:12pt;font-family:'Times New Roman',serif;color:#000000;background-color:transparent;font-weight:400;font-style:normal;font-variant:normal;text-decoration:none;vertical-align:baseline;white-space:pre;white-space:pre-wrap;\"> and see the magic unfold in just one click.\u003C/span>\u003C/p>\u003Cp dir=\"ltr\" style=\"line-height:1.7999999999999998;margin-top:12pt;margin-bottom:0pt;\">\u003Cspan style=\"font-size:12pt;font-family:'Times New Roman',serif;color:#000000;background-color:transparent;font-weight:400;font-style:normal;font-variant:normal;text-decoration:none;vertical-align:baseline;white-space:pre;white-space:pre-wrap;\"> \u003C/span>\u003Cimg src=\"https://api.pixelfox.ai/uploads/20250808/434c098d211e78bbc0e34212b42ede44.jpg\" style=\"width: 225px;\" data-filename=\"filename\" alt=\"Free Cartoon Person Maker – Create Cartoon Avatars from Photos Instantly\" loading=\"lazy\">\u003C/p>\u003Cp dir=\"ltr\" style=\"line-height:1.7999999999999998;margin-top:12pt;margin-bottom:12pt;\">\u003Cspan style=\"font-size:12pt;font-family:'Times New Roman',serif;color:#000000;background-color:transparent;font-weight:700;font-style:normal;font-variant:normal;text-decoration:none;vertical-align:baseline;white-space:pre;white-space:pre-wrap;\">FAQs:\u003C/span>\u003C/p>\u003Cp dir=\"ltr\" style=\"line-height:1.7999999999999998;margin-top:12pt;margin-bottom:12pt;\">\u003Cspan style=\"font-size:12pt;font-family:'Times New Roman',serif;color:#000000;background-color:transparent;font-weight:700;font-style:normal;font-variant:normal;text-decoration:none;vertical-align:baseline;white-space:pre;white-space:pre-wrap;\">Can I make a cartoon avatar from a group photo?\u003C/span>\u003C/p>\u003Cp dir=\"ltr\" style=\"line-height:1.7999999999999998;margin-top:12pt;margin-bottom:12pt;\">\u003Cspan style=\"font-size:12pt;font-family:'Times New Roman',serif;color:#000000;background-color:transparent;font-weight:400;font-style:normal;font-variant:normal;text-decoration:none;vertical-align:baseline;white-space:pre;white-space:pre-wrap;\">Yes, but for the best results, crop each face and upload it one at a time. The generated cartoon avatar through the photo tool\u003C/span>\u003Cspan style=\"font-size:12pt;font-family:'Times New Roman',serif;color:#000000;background-color:transparent;font-weight:700;font-style:normal;font-variant:normal;text-decoration:none;vertical-align:baseline;white-space:pre;white-space:pre-wrap;\"> \u003C/span>\u003Cspan style=\"font-size:12pt;font-family:'Times New Roman',serif;color:#000000;background-color:transparent;font-weight:400;font-style:normal;font-variant:normal;text-decoration:none;vertical-align:baseline;white-space:pre;white-space:pre-wrap;\">performs better with good front-facing photos.\u003C/span>\u003C/p>\u003Cp dir=\"ltr\" style=\"line-height:1.7999999999999998;margin-top:12pt;margin-bottom:12pt;\">\u003Cspan style=\"font-size:12pt;font-family:'Times New Roman',serif;color:#000000;background-color:transparent;font-weight:700;font-style:normal;font-variant:normal;text-decoration:none;vertical-align:baseline;white-space:pre;white-space:pre-wrap;\">What file types are supported to create a cartoon avatar?\u003C/span>\u003C/p>\u003Cp dir=\"ltr\" style=\"line-height:1.7999999999999998;margin-top:12pt;margin-bottom:12pt;\">\u003Cspan style=\"font-size:12pt;font-family:'Times New Roman',serif;color:#000000;background-color:transparent;font-weight:400;font-style:normal;font-variant:normal;text-decoration:none;vertical-align:baseline;white-space:pre;white-space:pre-wrap;\">Most common picture formats, such as JPG, PNG, and HEIC, are accepted for avatars.\u003C/span>\u003C/p>\u003Cp dir=\"ltr\" style=\"line-height:1.7999999999999998;margin-top:12pt;margin-bottom:12pt;\">\u003Cspan style=\"font-size:12pt;font-family:'Times New Roman',serif;color:#000000;background-color:transparent;font-weight:700;font-style:normal;font-variant:normal;text-decoration:none;vertical-align:baseline;white-space:pre;white-space:pre-wrap;\">Can I use the avatar commercially?\u003C/span>\u003C/p>\u003Cp>\u003Cspan id=\"docs-internal-guid-0f7b5be1-7fff-4ac5-22da-df2b1e6a052d\">\u003C/span>\u003C/p>\u003Cp dir=\"ltr\" style=\"line-height:1.7999999999999998;margin-top:12pt;margin-bottom:0pt;\">\u003Cspan style=\"font-size:12pt;font-family:'Times New Roman',serif;color:#000000;background-color:transparent;font-weight:400;font-style:normal;font-variant:normal;text-decoration:none;vertical-align:baseline;white-space:pre;white-space:pre-wrap;\">Indeed, the produced avatars are royalty-free, which may be used either for personal or business purposes.\u003C/span>\u003C/p>","free-cartoon-person-maker-create-cartoon-avatars-from-photos-instantly",67,1754645922,"2 weeks ago",{"id":102,"lang":11,"author_id":5,"image":103,"title":104,"keywords":105,"description":106,"content":107,"url":108,"views":109,"publishtime":110,"updatetime":111,"status":22,"publishtime_text":112,"status_text":25},1359,"https://api.pixelfox.ai/template/extendimagestyle/feature_1.webp","Image to Image AI: Transform Your Photos with AI for Free","image to image ai free, convert image to ai art online, image to image ai, image to image, best text to image ai, image to image generator, ai image converter, upload image ai generator, ai image to real image, best ai image, how to turn an image into something else using ai, ai internet photo ai uploader, best image to image ai generator, picture transformer, turn photo into ai art, turn image into ai art, artificial intelligence image converter, upload photo ai generator, upload image to ai, ai image uploader, turn photos into ai, upload picture ai generator, ai image generator upload image, turn picture into ai art, ai picture upload, turn pic into ai, turn pictures into ai, ai with photo input, turn image into ai, image to real,","Turn your photos into stunning AI art for FREE! Discover Image to Image AI to restyle, enhance, & reimagine any picture with simple prompts.","\u003Cp>Have you ever looked at a photo and wished you could change its style, add new elements, or see it in a completely different world? Technology now makes this possible. The world of digital creativity is changing fast. \u003Cstrong>Image to image AI\u003C/strong> is a groundbreaking tool leading this change. It lets you upload a picture and transform it using simple text prompts. This technology is not just for tech experts anymore. It is for artists, marketers, and anyone with a creative idea.\u003C/p>\n\u003Cp>This guide explores the exciting world of the \u003Cstrong>image to image generator\u003C/strong>. We will cover what it is, how it works, and how you can use a free tool like Pixelfox AI to \u003Cstrong>turn photos into AI\u003C/strong> art. You can finally take control of your visuals and bring your imagination to life. Get ready to learn \u003Cstrong>how to turn an image into something else using AI\u003C/strong>.\u003C/p>\n\u003Ch2 id=\"jt4Dfz\">What Exactly is Image to Image AI?\u003C/h2>\n\u003Cp>\u003Cstrong>Image to image AI\u003C/strong> is a type of artificial intelligence that uses an existing image as a starting point. You provide a source image and a text prompt describing the changes you want. The AI then generates a new image that combines the structure of your original photo with the ideas from your text. This makes it a powerful \u003Cstrong>picture transformer\u003C/strong>.\u003C/p>\n\u003Cp>This is different from the \u003Cstrong>best text to image AI\u003C/strong>, which creates visuals from text descriptions alone. A text-to-image generator starts with a blank canvas. An \u003Cstrong>image to image AI\u003C/strong> starts with your picture. This means it preserves the core composition, layout, and key elements of your original image. It gives you amazing control over the final result. You can change the style to a watercolor painting, make a character smile, or place your product in a fantasy landscape, all while keeping the original subject recognizable.\u003C/p>\n\u003Cp>This technology acts as an advanced \u003Cstrong>AI image converter\u003C/strong>. It is perfect for anyone who wants to modify, restyle, or reimagine existing visuals without starting from scratch. It is the ideal tool to \u003Cstrong>turn image into AI art\u003C/strong>.\u003C/p>\n\u003Ch2 id=\"a0cYKP\">How Does This Picture Transformer Technology Work?\u003C/h2>\n\u003Cp>The magic behind an \u003Cstrong>image to image AI generator\u003C/strong> comes from complex technologies like generative adversarial networks (GANs) and diffusion models. Let's break it down in simple terms.\u003C/p>\n\u003Cp>Think of it like a very skilled artist who can perfectly mimic and adapt styles. When you \u003Cstrong>upload image to AI\u003C/strong>, the system first analyzes your picture. It uses a neural network to understand all the important parts: the shapes, colors, textures, and the objects in the scene. It creates a mathematical representation of your image.\u003C/p>\n\u003Cp>Next, it looks at your text prompt. It uses Natural Language Processing (NLP) to understand what you want to change. Do you want to \"add a superhero cape\" or \"change the background to a cyberpunk city\"? The AI understands these commands.\u003C/p>\n\u003Cp>Then, the core process begins. Many modern tools, including industry-leading models like Google's Imagen and the popular Stable Diffusion, use a diffusion model. This process works by:\u003C/p>\n\u003Col>\n\u003Cli>\u003Cstrong>Adding Noise:\u003C/strong> The AI takes your original image data and gradually adds digital \"noise\" until it becomes almost random static.\u003C/li>\n\u003Cli>\u003Cstrong>Denoising with Guidance:\u003C/strong> This is the creative step. The AI then reverses the process. It removes the noise step-by-step to reconstruct an image. But here’s the trick: it uses your text prompt as a guide during this denoising process. It rebuilds the image to match both the original structure and your new instructions.\u003C/li>\n\u003C/ol>\n\u003Cp>This allows the \u003Cstrong>artificial intelligence image converter\u003C/strong> to create an \u003Cstrong>image to real\u003C/strong> or surreal final product that blends your photo and your words seamlessly. It's a smart system that gives you incredible creative freedom.\u003C/p>\n\u003Cp>\u003Cimg loading=\"lazy\" src=\"https://api.pixelfox.ai/template/extendimagestyle/feature_1.webp\" alt=\"An example of AI style transfer, turning a normal photo into a work of art.\" />\u003C/p>\n\u003Ch2 id=\"jzkTqv\">Top Use Cases: Why You Should Turn Photos into AI Art\u003C/h2>\n\u003Cp>The applications for \u003Cstrong>image to image AI\u003C/strong> are vast and growing every day. It's a versatile tool that helps professionals and hobbyists alike. Here are some of the most popular ways people are using it.\u003C/p>\n\u003Ch3>Consistent Character Creation for Storytelling\u003C/h3>\n\u003Cp>Creators of comics, animations, and storyboards need their characters to look consistent across different scenes and poses. An \u003Cstrong>image to image AI generator\u003C/strong> is perfect for this. You can upload a character's face and use prompts to change their expression, clothing, or background without redrawing them from scratch each time. This saves a huge amount of time and ensures your characters remain recognizable. It is an amazing way to maintain visual continuity.\u003C/p>\n\u003Ch3>Artistic Exploration and Style Transfer\u003C/h3>\n\u003Cp>Do you want to see what your photo would look like as a Van Gogh painting or a piece of pop art? With an \u003Cstrong>image to image ai free\u003C/strong> tool, you can easily \u003Cstrong>convert image to ai art online\u003C/strong>. This is great for artists looking for inspiration or anyone wanting to create a unique social media post. You can \u003Cstrong>turn picture into AI art\u003C/strong> with just a few clicks, exploring dozens of styles in minutes.\u003C/p>\n\u003Ch3>Marketing and Branding\u003C/h3>\n\u003Cp>Marketers need to create a lot of visual content that fits a consistent brand aesthetic. An \u003Cstrong>image to image AI\u003C/strong> can help generate multiple ad variations, social media graphics, or product shots all in the same style. For example, you can upload one product photo and use prompts to create versions for different holidays or campaigns, all while maintaining brand colors and mood. You can even use an \u003Ccode>AI Image Blender\u003C/code> to combine your product with different backgrounds seamlessly.\u003C/p>\n\u003Ch3>AI Photo Editing and Enhancement\u003C/h3>\n\u003Cp>This technology is also a powerful photo editor. You can use a text prompt to make subtle but significant changes. Want to change the time of day from noon to sunset? Or add a dramatic cloudy sky to a landscape photo? You can do this without complex software. It allows you to \u003Cstrong>turn an image into something else using AI\u003C/strong>, from minor tweaks to complete transformations. It's also a great way to \u003Ccode>Image Inpainting\u003C/code>, replacing unwanted objects with something that fits the scene.\u003C/p>\n\u003Ch3>Fun and Personal Projects\u003C/h3>\n\u003Cp>You don't need to be a professional to use an \u003Cstrong>upload image AI generator\u003C/strong>. It's a fun tool for personal projects. You can \u003Cstrong>turn pic into AI\u003C/strong> creations for birthday cards, create a fantasy version of your pet, or design a unique profile picture. The only limit is your imagination. This is what makes an \u003Cstrong>ai picture upload\u003C/strong> so exciting for everyone.\u003C/p>\n\u003Ch2 id=\"MAZ3Ll\">How to Turn an Image into AI Art: A Simple Guide\u003C/h2>\n\u003Cp>Getting started with an \u003Cstrong>image to image AI generator\u003C/strong> is easier than you think. With a user-friendly tool like Pixelfox AI, you can begin creating in seconds. Here's a simple three-step process to \u003Cstrong>turn your photos into AI\u003C/strong> masterpieces.\u003C/p>\n\u003Ch3>Step 1: Upload Your Image\u003C/h3>\n\u003Cp>First, find the image you want to transform. It can be a portrait, a landscape, a product photo, or even a simple sketch. Go to the Pixelfox AI \u003Cstrong>image to image\u003C/strong> tool. You can drag and drop your file directly onto the webpage or click the upload button. The platform is an \u003Cstrong>ai image uploader\u003C/strong> that accepts common formats like JPG, PNG, and WEBP. The best part is that it is a completely \u003Cstrong>image to image ai free\u003C/strong> tool with no sign-up required.\u003C/p>\n\u003Cp>\u003Cimg loading=\"lazy\" src=\"https://api.pixelfox.ai/template/home/step_1.webp\" alt=\"A user interface showing an image being uploaded to an AI tool.\" />\u003C/p>\n\u003Ch3>Step 2: Write a Descriptive Prompt\u003C/h3>\n\u003Cp>This is where you tell the AI what you want to create. In the prompt box, describe the changes you want to see. Be as specific as you can for the best results.\u003C/p>\n\u003Cul>\n\u003Cli>\u003Cstrong>For a style change:\u003C/strong> \"A cat sitting on a chair, in the style of an oil painting.\"\u003C/li>\n\u003Cli>\u003Cstrong>For adding elements:\u003C/strong> \"A photo of a beach, add a pirate ship on the water.\"\u003C/li>\n\u003Cli>\u003Cstrong>For changing the mood:\u003C/strong> \"A city street, make it a rainy night with neon lights.\"\u003C/li>\n\u003C/ul>\n\u003Cp>Don't be afraid to experiment. You can always change your prompt and try again. This is the core of using an \u003Cstrong>ai with photo input\u003C/strong>.\u003C/p>\n\u003Ch3>Step 3: Generate and Download\u003C/h3>\n\u003Cp>After you've written your prompt, click the \"Generate\" button. The AI will process your image and text, and in just a few seconds, it will provide you with several new image variations. You can review the results, pick your favorite, or tweak the prompt to generate more options. Once you have the perfect image, you can download it in high quality. The process is fast, intuitive, and lets you quickly iterate on your ideas.\u003C/p>\n\u003Ch2 id=\"gfNnxe\">Choosing the Best Image to Image AI Generator in 2025\u003C/h2>\n\u003Cp>With so many tools available, finding the \u003Cstrong>best image to image AI generator\u003C/strong> can be a challenge. When you're looking for the right platform, you should consider a few key factors: quality, speed, ease of use, and cost.\u003C/p>\n\u003Cp>For these reasons, \u003Cstrong>Pixelfox AI\u003C/strong> stands out as a top choice for 2025. Here’s why:\u003C/p>\n\u003Cul>\n\u003Cli>\u003Cstrong>High-Quality Results:\u003C/strong> Pixelfox AI uses advanced models to produce stunning, high-resolution images. It excels at creating everything from photorealistic edits (\u003Cstrong>ai image to real image\u003C/strong>) to imaginative artistic styles, ensuring your final image looks professional.\u003C/li>\n\u003Cli>\u003Cstrong>Free and Accessible:\u003C/strong> Pixelfox AI is a true \u003Cstrong>image to image ai free\u003C/strong> tool. You can start generating images immediately without creating an account or providing payment information. This makes it one of the most accessible \u003Cstrong>upload picture AI generator\u003C/strong> platforms online.\u003C/li>\n\u003Cli>\u003Cstrong>User-Friendly Interface:\u003C/strong> The platform is designed to be simple and intuitive. You don't need any technical skills to use it. The straightforward upload and prompt system makes it easy for anyone to \u003Cstrong>upload image to AI\u003C/strong> and start creating.\u003C/li>\n\u003Cli>\u003Cstrong>Speed and Efficiency:\u003C/strong> Creativity shouldn't have to wait. Pixelfox AI delivers multiple image variations in seconds, allowing you to experiment with different ideas quickly.\u003C/li>\n\u003Cli>\u003Cstrong>Advanced Customization:\u003C/strong> Beyond basic transformations, Pixelfox offers a suite of tools that give you more creative control. You can adjust parameters to fine-tune your results, making it more than just a simple \u003Cstrong>AI image uploader\u003C/strong>.\u003C/li>\n\u003C/ul>\n\u003Cp>While other tools exist, Pixelfox AI offers a powerful combination of quality, accessibility, and speed, making it the \u003Cstrong>best AI image\u003C/strong> tool for both beginners and experienced creators.\u003C/p>\n\u003Ch2 id=\"0uacBd\">Go Beyond: Advanced Features of Image to Image AI\u003C/h2>\n\u003Cp>The best \u003Cstrong>image to image AI\u003C/strong> platforms offer more than just simple style changes. They provide advanced features that unlock even more creative possibilities. These tools allow for a level of control and precision that was once only possible with professional editing software.\u003C/p>\n\u003Cp>One of the most exciting advanced features is \u003Ccode>AI Style Transfer\u003C/code>. This goes beyond just applying a generic \"painting\" filter. With a tool like Pixelfox's \u003Cstrong>AI Style Transfer\u003C/strong>, you can upload a reference image for the style you want to replicate. For instance, you can upload a picture of a starry night and apply its colors and textures to your own landscape photo. This gives you the power to migrate the exact aesthetic from one image to another, creating a truly unique look.\u003C/p>\n\u003Cp>Another powerful capability is the ability to combine multiple images. This is where tools like an \u003Cstrong>AI Image Blender\u003C/strong> come in. You can take a subject from one photo and place it into the scene of another, with the AI intelligently blending the lighting, shadows, and colors to create a seamless composite. This is perfect for creating surreal art or realistic product mockups.\u003C/p>\n\u003Cp>Finally, precise editing tools like \u003Cstrong>Image Inpainting\u003C/strong> allow you to change specific parts of an image. You can select an object you want to remove and instruct the AI to fill in the space, or you can replace it with something entirely new based on a text prompt. This gives you pixel-level control over your final creation. These advanced features turn a simple \u003Cstrong>ai image generator upload image\u003C/strong> tool into a full creative suite.\u003C/p>\n\u003Ch2 id=\"S5RVjX\">Frequently Asked Questions about Image to Image AI\u003C/h2>\n\u003Ch3>How is image-to-image different from text-to-image?\u003C/h3>\n\u003Cp>Image-to-image AI starts with an existing image and modifies it based on your text prompt, preserving the original composition. Text-to-image AI creates a new image from scratch using only a text description.\u003C/p>\n\u003Ch3>Can I use an image to image AI free?\u003C/h3>\n\u003Cp>Yes! Many platforms offer free access. Pixelfox AI is an excellent example of an \u003Cstrong>image to image ai free\u003C/strong> generator that lets you create high-quality images without any cost or sign-up.\u003C/p>\n\u003Ch3>How do I convert image to AI art online?\u003C/h3>\n\u003Cp>To \u003Cstrong>convert image to ai art online\u003C/strong>, use an \u003Cstrong>image to image generator\u003C/strong> like Pixelfox AI. Simply upload your photo, then write a prompt describing the artistic style you want, such as \"in the style of impressionism\" or \"as a modern abstract painting.\" The AI will then transform your photo into a work of art.\u003C/p>\n\u003Ch3>Can I use the generated images for commercial projects?\u003C/h3>\n\u003Cp>This depends on the terms of service of the AI tool you are using and the copyright of the original image you upload. Many AI-generated images, especially those from models trained on licensed or public domain content like Adobe Firefly, can be used commercially. Pixelfox AI also allows commercial use for the images you create, giving you more freedom for your projects. Always check the platform's policies to be sure.\u003C/p>\n\u003Ch3>What types of images work best with an AI image generator upload image function?\u003C/h3>\n\u003Cp>Clear, well-lit images with a distinct subject generally produce the best results. However, modern AI models are very flexible and can work with a wide range of inputs, including sketches, illustrations, and low-resolution photos. Don't hesitate to experiment with different types of images to see what you can create.\u003C/p>\n\u003Ch2 id=\"jdCYes\">Start Creating with Image to Image AI Today\u003C/h2>\n\u003Cp>The world of \u003Cstrong>image to image AI\u003C/strong> has opened up a universe of creative opportunities. Whether you want to \u003Cstrong>turn an image into AI art\u003C/strong>, create consistent characters for a story, or produce stunning marketing visuals, this technology gives you the power to do it all. With free and accessible tools like Pixelfox AI, there has never been a better time to start exploring.\u003C/p>\n\u003Cp>You no longer need to be a professional designer to bring your visual ideas to life. All you need is an image and an idea. So go ahead, find a photo, think of a creative prompt, and see what amazing things you can create with an \u003Cstrong>image to image AI generator\u003C/strong>. Your next masterpiece is just a click away.\u003C/p>","image-to-image-ai-transform-your-photos-with-ai-for-free",5,1755879308,1755879277,"22 hours ago",{"id":114,"lang":11,"author_id":12,"image":115,"title":116,"keywords":15,"description":117,"content":118,"url":119,"views":19,"publishtime":120,"updatetime":121,"status":22,"publishtime_text":122,"status_text":25},1188,"https://lh7-rt.googleusercontent.com/docsz/AD_4nXdfneOcNC-5wPV8ls82eTCkdL6VJWKFpulupl_mYi9xVvLC5kdkA1i0EaT3HsOaa7yGI5hT8_ooSA6Jrd7sPpSue12tcFToH9QHopkI0A8uaAXkImftTOUKKZ5NMCYFB4kc7XUo?key=qf7Z0fleu0mjXGwPUf3DgA","Resizing Pictures: Easy Solutions to Reducing Photo Size without Destroying the Image","Have to send big pictures via email? Find out how to resize images for email to squeeze the quality. Compress photo size, reduce image size, and transport easily using the free software, such as PixelFox.","\u003Cp dir=\"ltr\" style=\"line-height:1.38;margin-top:0pt;margin-bottom:0pt;\">\u003Cspan style=\"font-size:13.999999999999998pt;font-family:Arial,sans-serif;color:#000000;background-color:transparent;font-weight:400;font-style:normal;font-variant:normal;text-decoration:none;vertical-align:baseline;white-space:pre;white-space:pre-wrap;\">Has it ever happened to you to\u003C/span>\u003Cspan style=\"font-size:13.999999999999998pt;font-family:Arial,sans-serif;color:#000000;background-color:transparent;font-weight:700;font-style:normal;font-variant:normal;text-decoration:none;vertical-align:baseline;white-space:pre;white-space:pre-wrap;\"> reduce the size of a photo \u003C/span>\u003Cspan style=\"font-size:13.999999999999998pt;font-family:Arial,sans-serif;color:#000000;background-color:transparent;font-weight:400;font-style:normal;font-variant:normal;text-decoration:none;vertical-align:baseline;white-space:pre;white-space:pre-wrap;\">to send by email, and were blocked by a message that you cannot send because the file is too large? And you know, you are not the only one. In current times, with the use of high-resolution cameras and smartphones easily finding their way to a huge catalogue of photo files that are much too large to deliver via normal email accounts.\u003C/span>\u003C/p>\u003Cp dir=\"ltr\" style=\"line-height:1.38;margin-top:0pt;margin-bottom:0pt;\">\u003Cspan style=\"font-size:13.999999999999998pt;font-family:Arial,sans-serif;color:#000000;background-color:transparent;font-weight:400;font-style:normal;font-variant:normal;text-decoration:none;vertical-align:baseline;white-space:pre;white-space:pre-wrap;\">Luckily, it is not something that requires a lot of technical knowledge and costly programs to resolve. This guide will teach you not only t\u003C/span>\u003Cspan style=\"font-size:13.999999999999998pt;font-family:Arial,sans-serif;color:#000000;background-color:transparent;font-weight:700;font-style:normal;font-variant:normal;text-decoration:none;vertical-align:baseline;white-space:pre;white-space:pre-wrap;\">o resize pictures to email\u003C/span>\u003Cspan style=\"font-size:13.999999999999998pt;font-family:Arial,sans-serif;color:#000000;background-color:transparent;font-weight:400;font-style:normal;font-variant:normal;text-decoration:none;vertical-align:baseline;white-space:pre;white-space:pre-wrap;\"> but also to do it fast and easily while preserving image quality. We will also present you with \u003C/span>\u003Cspan style=\"font-size:13.999999999999998pt;font-family:Arial,sans-serif;color:#000000;background-color:transparent;font-weight:700;font-style:normal;font-variant:normal;text-decoration:none;vertical-align:baseline;white-space:pre;white-space:pre-wrap;\">PixelFox\u003C/span>\u003Cspan style=\"font-size:13.999999999999998pt;font-family:Arial,sans-serif;color:#000000;background-color:transparent;font-weight:400;font-style:normal;font-variant:normal;text-decoration:none;vertical-align:baseline;white-space:pre;white-space:pre-wrap;\">, a free and smart AI automated tool that makes resizing and compressing images online easier, as you need zero downloads or logins.\u003C/span>\u003C/p>\u003Ch2 dir=\"ltr\" style=\"line-height:1.38;margin-top:18pt;margin-bottom:6pt;\" id=\"HN4Gh9\">\u003Cspan style=\"font-size:16pt;font-family:Arial,sans-serif;color:#000000;background-color:transparent;font-weight:700;font-style:normal;font-variant:normal;text-decoration:none;vertical-align:baseline;white-space:pre;white-space:pre-wrap;\">Why Resize to Email?\u003C/span>\u003C/h2>\u003Cp dir=\"ltr\" style=\"line-height:1.38;margin-top:0pt;margin-bottom:0pt;\">\u003Cspan style=\"font-size:13.999999999999998pt;font-family:Arial,sans-serif;color:#000000;background-color:transparent;font-weight:400;font-style:normal;font-variant:normal;text-decoration:none;vertical-align:baseline;white-space:pre;white-space:pre-wrap;\">Attachment limits are set by most email providers. The table below is a brief overview of the most frequent limits:\u003C/span>\u003C/p>\u003Cul style=\"margin-top:0;margin-bottom:0;padding-inline-start:48px;\">\u003Cli dir=\"ltr\" style=\"list-style-type:disc;font-size:13.999999999999998pt;font-family:Arial,sans-serif;color:#000000;background-color:transparent;font-weight:400;font-style:normal;font-variant:normal;text-decoration:none;vertical-align:baseline;white-space:pre;\" aria-level=\"1\">\u003Cp dir=\"ltr\" style=\"line-height:1.38;margin-top:0pt;margin-bottom:0pt;\" role=\"presentation\">\u003Cspan style=\"font-size:13.999999999999998pt;font-family:Arial,sans-serif;color:#000000;background-color:transparent;font-weight:400;font-style:normal;font-variant:normal;text-decoration:none;vertical-align:baseline;white-space:pre;white-space:pre-wrap;\">Gmail: 25MB\u003C/span>\u003C/p>\u003C/li>\u003Cli dir=\"ltr\" style=\"list-style-type:disc;font-size:13.999999999999998pt;font-family:Arial,sans-serif;color:#000000;background-color:transparent;font-weight:400;font-style:normal;font-variant:normal;text-decoration:none;vertical-align:baseline;white-space:pre;\" aria-level=\"1\">\u003Cp dir=\"ltr\" style=\"line-height:1.38;margin-top:0pt;margin-bottom:0pt;\" role=\"presentation\">\u003Cspan style=\"font-size:13.999999999999998pt;font-family:Arial,sans-serif;color:#000000;background-color:transparent;font-weight:400;font-style:normal;font-variant:normal;text-decoration:none;vertical-align:baseline;white-space:pre;white-space:pre-wrap;\">Outlook/hotmail: 20 mb\u003C/span>\u003C/p>\u003C/li>\u003Cli dir=\"ltr\" style=\"list-style-type:disc;font-size:13.999999999999998pt;font-family:Arial,sans-serif;color:#000000;background-color:transparent;font-weight:400;font-style:normal;font-variant:normal;text-decoration:none;vertical-align:baseline;white-space:pre;\" aria-level=\"1\">\u003Cp dir=\"ltr\" style=\"line-height:1.38;margin-top:0pt;margin-bottom:0pt;\" role=\"presentation\">\u003Cspan style=\"font-size:13.999999999999998pt;font-family:Arial,sans-serif;color:#000000;background-color:transparent;font-weight:400;font-style:normal;font-variant:normal;text-decoration:none;vertical-align:baseline;white-space:pre;white-space:pre-wrap;\">Yahoo Mail: 25mb\u003C/span>\u003C/p>\u003C/li>\u003Cli dir=\"ltr\" style=\"list-style-type:disc;font-size:13.999999999999998pt;font-family:Arial,sans-serif;color:#000000;background-color:transparent;font-weight:400;font-style:normal;font-variant:normal;text-decoration:none;vertical-align:baseline;white-space:pre;\" aria-level=\"1\">\u003Cp dir=\"ltr\" style=\"line-height:1.38;margin-top:0pt;margin-bottom:0pt;\" role=\"presentation\">\u003Cspan style=\"font-size:13.999999999999998pt;font-family:Arial,sans-serif;color:#000000;background-color:transparent;font-weight:400;font-style:normal;font-variant:normal;text-decoration:none;vertical-align:baseline;white-space:pre;white-space:pre-wrap;\">Apple Mail: depends on the provider, but is usually 20-25 MB\u003C/span>\u003C/p>\u003C/li>\u003C/ul>\u003Cp>\u003Cb style=\"font-weight:normal;\" id=\"docs-internal-guid-33803b28-7fff-78fd-c5a0-fd4ab0042710\">\u003Cbr>\u003C/b>\u003C/p>\u003Cp dir=\"ltr\" style=\"line-height:1.38;margin-top:0pt;margin-bottom:0pt;\">\u003Cspan style=\"font-size:13.999999999999998pt;font-family:Arial,sans-serif;color:#000000;background-color:transparent;font-weight:400;font-style:normal;font-variant:normal;text-decoration:none;vertical-align:baseline;white-space:pre;white-space:pre-wrap;\">When multiple images are used, it does not take long before the full files add up.\u003C/span>\u003C/p>\u003Cp dir=\"ltr\" style=\"line-height:1.38;margin-top:0pt;margin-bottom:0pt;\">\u003Cspan style=\"font-size:13.999999999999998pt;font-family:Arial,sans-serif;color:#000000;background-color:transparent;font-weight:400;font-style:normal;font-variant:normal;text-decoration:none;vertical-align:baseline;white-space:pre;white-space:pre-wrap;\">The \u003C/span>\u003Cspan style=\"font-size:13.999999999999998pt;font-family:Arial,sans-serif;color:#000000;background-color:transparent;font-weight:700;font-style:normal;font-variant:normal;text-decoration:none;vertical-align:baseline;white-space:pre;white-space:pre-wrap;\">use of resizing the image\u003C/span>\u003Cspan style=\"font-size:13.999999999999998pt;font-family:Arial,sans-serif;color:#000000;background-color:transparent;font-weight:400;font-style:normal;font-variant:normal;text-decoration:none;vertical-align:baseline;white-space:pre;white-space:pre-wrap;\"> can assist you in:\u003C/span>\u003C/p>\u003Cul style=\"margin-top:0;margin-bottom:0;padding-inline-start:48px;\">\u003Cli dir=\"ltr\" style=\"list-style-type:disc;font-size:13.999999999999998pt;font-family:Arial,sans-serif;color:#000000;background-color:transparent;font-weight:400;font-style:normal;font-variant:normal;text-decoration:none;vertical-align:baseline;white-space:pre;\" aria-level=\"1\">\u003Cp dir=\"ltr\" style=\"line-height:1.38;margin-top:0pt;margin-bottom:0pt;\" role=\"presentation\">\u003Cspan style=\"font-size:13.999999999999998pt;font-family:Arial,sans-serif;color:#000000;background-color:transparent;font-weight:400;font-style:normal;font-variant:normal;text-decoration:none;vertical-align:baseline;white-space:pre;white-space:pre-wrap;\">Avert unsuccessful email transmits because of size constraints.\u003C/span>\u003C/p>\u003C/li>\u003Cli dir=\"ltr\" style=\"list-style-type:disc;font-size:13.999999999999998pt;font-family:Arial,sans-serif;color:#000000;background-color:transparent;font-weight:400;font-style:normal;font-variant:normal;text-decoration:none;vertical-align:baseline;white-space:pre;\" aria-level=\"1\">\u003Cp dir=\"ltr\" style=\"line-height:1.38;margin-top:0pt;margin-bottom:0pt;\" role=\"presentation\">\u003Cspan style=\"font-size:13.999999999999998pt;font-family:Arial,sans-serif;color:#000000;background-color:transparent;font-weight:400;font-style:normal;font-variant:normal;text-decoration:none;vertical-align:baseline;white-space:pre;white-space:pre-wrap;\">Accelerate the rate of uploads and downloads.ds\u003C/span>\u003C/p>\u003C/li>\u003Cli dir=\"ltr\" style=\"list-style-type:disc;font-size:13.999999999999998pt;font-family:Arial,sans-serif;color:#000000;background-color:transparent;font-weight:400;font-style:normal;font-variant:normal;text-decoration:none;vertical-align:baseline;white-space:pre;\" aria-level=\"1\">\u003Cp dir=\"ltr\" style=\"line-height:1.38;margin-top:0pt;margin-bottom:0pt;\" role=\"presentation\">\u003Cspan style=\"font-size:13.999999999999998pt;font-family:Arial,sans-serif;color:#000000;background-color:transparent;font-weight:400;font-style:normal;font-variant:normal;text-decoration:none;vertical-align:baseline;white-space:pre;white-space:pre-wrap;\">Spare device storage space\u003C/span>\u003C/p>\u003C/li>\u003Cli dir=\"ltr\" style=\"list-style-type:disc;font-size:13.999999999999998pt;font-family:Arial,sans-serif;color:#000000;background-color:transparent;font-weight:400;font-style:normal;font-variant:normal;text-decoration:none;vertical-align:baseline;white-space:pre;\" aria-level=\"1\">\u003Cp dir=\"ltr\" style=\"line-height:1.38;margin-top:0pt;margin-bottom:0pt;\" role=\"presentation\">\u003Cspan style=\"font-size:13.999999999999998pt;font-family:Arial,sans-serif;color:#000000;background-color:transparent;font-weight:400;font-style:normal;font-variant:normal;text-decoration:none;vertical-align:baseline;white-space:pre;white-space:pre-wrap;\">Consider making emails more effective and business-like\u003C/span>\u003C/p>\u003C/li>\u003C/ul>\u003Ch2 dir=\"ltr\" style=\"line-height:1.38;margin-top:18pt;margin-bottom:6pt;\" id=\"RNo8SP\">\u003Cspan style=\"font-size:16pt;font-family:Arial,sans-serif;color:#000000;background-color:transparent;font-weight:700;font-style:normal;font-variant:normal;text-decoration:none;vertical-align:baseline;white-space:pre;white-space:pre-wrap;\">What is Resizing an Image?\u003C/span>\u003C/h2>\u003Cp dir=\"ltr\" style=\"line-height:1.38;margin-top:0pt;margin-bottom:0pt;\">\u003Cspan style=\"font-size:13.999999999999998pt;font-family:Arial,sans-serif;color:#000000;background-color:transparent;font-weight:400;font-style:normal;font-variant:normal;text-decoration:none;vertical-align:baseline;white-space:pre;white-space:pre-wrap;\">Optimising a picture to send by mail often consists of one or more of the following:\u003C/span>\u003C/p>\u003Cul style=\"margin-top:0;margin-bottom:0;padding-inline-start:48px;\">\u003Cli dir=\"ltr\" style=\"list-style-type:disc;font-size:13.999999999999998pt;font-family:Arial,sans-serif;color:#000000;background-color:transparent;font-weight:400;font-style:normal;font-variant:normal;text-decoration:none;vertical-align:baseline;white-space:pre;\" aria-level=\"1\">\u003Cp dir=\"ltr\" style=\"line-height:1.38;margin-top:0pt;margin-bottom:0pt;\" role=\"presentation\">\u003Cspan style=\"font-size:13.999999999999998pt;font-family:Arial,sans-serif;color:#000000;background-color:transparent;font-weight:700;font-style:normal;font-variant:normal;text-decoration:none;vertical-align:baseline;white-space:pre;white-space:pre-wrap;\">Reducing Dimensions:\u003C/span>\u003Cspan style=\"font-size:13.999999999999998pt;font-family:Arial,sans-serif;color:#000000;background-color:transparent;font-weight:400;font-style:normal;font-variant:normal;text-decoration:none;vertical-align:baseline;white-space:pre;white-space:pre-wrap;\"> Decreasing the pixel width and height of an image.\u003C/span>\u003C/p>\u003C/li>\u003Cli dir=\"ltr\" style=\"list-style-type:disc;font-size:13.999999999999998pt;font-family:Arial,sans-serif;color:#000000;background-color:transparent;font-weight:400;font-style:normal;font-variant:normal;text-decoration:none;vertical-align:baseline;white-space:pre;\" aria-level=\"1\">\u003Cp dir=\"ltr\" style=\"line-height:1.38;margin-top:0pt;margin-bottom:0pt;\" role=\"presentation\">\u003Cspan style=\"font-size:13.999999999999998pt;font-family:Arial,sans-serif;color:#000000;background-color:transparent;font-weight:700;font-style:normal;font-variant:normal;text-decoration:none;vertical-align:baseline;white-space:pre;white-space:pre-wrap;\">Compression of File\u003C/span>\u003Cspan style=\"font-size:13.999999999999998pt;font-family:Arial,sans-serif;color:#000000;background-color:transparent;font-weight:400;font-style:normal;font-variant:normal;text-decoration:none;vertical-align:baseline;white-space:pre;white-space:pre-wrap;\">: Reduction of file size and not visual quality.\u003C/span>\u003C/p>\u003C/li>\u003Cli dir=\"ltr\" style=\"list-style-type:disc;font-size:13.999999999999998pt;font-family:Arial,sans-serif;color:#000000;background-color:transparent;font-weight:400;font-style:normal;font-variant:normal;text-decoration:none;vertical-align:baseline;white-space:pre;\" aria-level=\"1\">\u003Cp dir=\"ltr\" style=\"line-height:1.38;margin-top:0pt;margin-bottom:0pt;\" role=\"presentation\">\u003Cspan style=\"font-size:13.999999999999998pt;font-family:Arial,sans-serif;color:#000000;background-color:transparent;font-weight:700;font-style:normal;font-variant:normal;text-decoration:none;vertical-align:baseline;white-space:pre;white-space:pre-wrap;\">Change the Format:\u003C/span>\u003Cspan style=\"font-size:13.999999999999998pt;font-family:Arial,sans-serif;color:#000000;background-color:transparent;font-weight:400;font-style:normal;font-variant:normal;text-decoration:none;vertical-align:baseline;white-space:pre;white-space:pre-wrap;\"> As such, changing a PNG into a JPG to be more compressible.\u003C/span>\u003C/p>\u003C/li>\u003C/ul>\u003Cp dir=\"ltr\" style=\"line-height:1.38;margin-top:0pt;margin-bottom:0pt;\">\u003Cspan style=\"font-size:13.999999999999998pt;font-family:Arial,sans-serif;color:#000000;background-color:transparent;font-weight:400;font-style:normal;font-variant:normal;text-decoration:none;vertical-align:baseline;white-space:pre;white-space:pre-wrap;\">The idea is to optimize the postage to minimize the size of the file without compromising the quality that your recipient will need to see the image well.\u003C/span>\u003C/p>\u003Ch2 dir=\"ltr\" style=\"line-height:1.38;margin-top:18pt;margin-bottom:6pt;\" id=\"560Gjt\">\u003Cspan style=\"font-size:16pt;font-family:Arial,sans-serif;color:#000000;background-color:transparent;font-weight:700;font-style:normal;font-variant:normal;text-decoration:none;vertical-align:baseline;white-space:pre;white-space:pre-wrap;\">Image Resizing Tools to send in Email\u003C/span>\u003C/h2>\u003Ch2 dir=\"ltr\" style=\"line-height:1.38;margin-top:18pt;margin-bottom:6pt;\" id=\"fwUe4J\">\u003Cspan style=\"font-size:16pt;font-family:Arial,sans-serif;color:#000000;background-color:transparent;font-weight:700;font-style:normal;font-variant:normal;text-decoration:none;vertical-align:baseline;white-space:pre;white-space:pre-wrap;\">\u003Cspan style=\"border:none;display:inline-block;overflow:hidden;width:624px;height:423px;\">\u003Cimg src=\"https://lh7-rt.googleusercontent.com/docsz/AD_4nXdfneOcNC-5wPV8ls82eTCkdL6VJWKFpulupl_mYi9xVvLC5kdkA1i0EaT3HsOaa7yGI5hT8_ooSA6Jrd7sPpSue12tcFToH9QHopkI0A8uaAXkImftTOUKKZ5NMCYFB4kc7XUo?key=qf7Z0fleu0mjXGwPUf3DgA\" width=\"624\" height=\"423\" style=\"margin-left:0px;margin-top:0px;\" alt=\"Resizing Pictures: Easy Solutions to Reducing Photo Size without Destroying the Image\" loading=\"lazy\">\u003C/span>\u003C/span>\u003C/h2>\u003Cp dir=\"ltr\" style=\"line-height:1.38;margin-top:0pt;margin-bottom:0pt;\">\u003Cspan style=\"font-size:13.999999999999998pt;font-family:Arial,sans-serif;color:#000000;background-color:transparent;font-weight:400;font-style:normal;font-variant:normal;text-decoration:none;vertical-align:baseline;white-space:pre;white-space:pre-wrap;\">Resizing an image could be done easily and effectively in a few steps. This is a breakdown:\u003C/span>\u003C/p>\u003Cp dir=\"ltr\" style=\"line-height:1.38;margin-top:0pt;margin-bottom:0pt;\">\u003Cspan style=\"font-size:13.999999999999998pt;font-family:Arial,sans-serif;color:#000000;background-color:transparent;font-weight:700;font-style:normal;font-variant:normal;text-decoration:none;vertical-align:baseline;white-space:pre;white-space:pre-wrap;\">1. The finest free image resizer on the web is \u003Ca href=\"https://pixelfox.ai/\" target=\"_blank\">PixelFox\u003C/a>\u003C/span>\u003C/p>\u003Cp dir=\"ltr\" style=\"line-height:1.38;margin-top:0pt;margin-bottom:0pt;\">\u003Cspan style=\"font-size:13.999999999999998pt;font-family:Arial,sans-serif;color:#000000;background-color:transparent;font-weight:400;font-style:normal;font-variant:normal;text-decoration:none;vertical-align:baseline;white-space:pre;white-space:pre-wrap;\">PixelFox is an image editor based on AI that is made to be easy, free, and accessible. It can be very handy, such as rescaling and compressing pictures to use in email.\u003C/span>\u003C/p>\u003Cp dir=\"ltr\" style=\"line-height:1.38;margin-top:0pt;margin-bottom:0pt;\">\u003Cspan style=\"font-size:13.999999999999998pt;font-family:Arial,sans-serif;color:#000000;background-color:transparent;font-weight:400;font-style:normal;font-variant:normal;text-decoration:none;vertical-align:baseline;white-space:pre;white-space:pre-wrap;\">Using PixelFox to send email:\u003C/span>\u003C/p>\u003Cul style=\"margin-top:0;margin-bottom:0;padding-inline-start:48px;\">\u003Cli dir=\"ltr\" style=\"list-style-type:disc;font-size:13.999999999999998pt;font-family:Arial,sans-serif;color:#000000;background-color:transparent;font-weight:400;font-style:normal;font-variant:normal;text-decoration:none;vertical-align:baseline;white-space:pre;\" aria-level=\"1\">\u003Cp dir=\"ltr\" style=\"line-height:1.38;margin-top:0pt;margin-bottom:0pt;\" role=\"presentation\">\u003Cspan style=\"font-size:13.999999999999998pt;font-family:Arial,sans-serif;color:#000000;background-color:transparent;font-weight:400;font-style:normal;font-variant:normal;text-decoration:none;vertical-align:baseline;white-space:pre;white-space:pre-wrap;\">Go to https://pixelfox.ai\u003C/span>\u003C/p>\u003C/li>\u003Cli dir=\"ltr\" style=\"list-style-type:disc;font-size:13.999999999999998pt;font-family:Arial,sans-serif;color:#000000;background-color:transparent;font-weight:400;font-style:normal;font-variant:normal;text-decoration:none;vertical-align:baseline;white-space:pre;\" aria-level=\"1\">\u003Cp dir=\"ltr\" style=\"line-height:1.38;margin-top:0pt;margin-bottom:0pt;\" role=\"presentation\">\u003Cspan style=\"font-size:13.999999999999998pt;font-family:Arial,sans-serif;color:#000000;background-color:transparent;font-weight:400;font-style:normal;font-variant:normal;text-decoration:none;vertical-align:baseline;white-space:pre;white-space:pre-wrap;\">Press the option of either Resize Image or Image Compressor.\u003C/span>\u003C/p>\u003C/li>\u003Cli dir=\"ltr\" style=\"list-style-type:disc;font-size:13.999999999999998pt;font-family:Arial,sans-serif;color:#000000;background-color:transparent;font-weight:400;font-style:normal;font-variant:normal;text-decoration:none;vertical-align:baseline;white-space:pre;\" aria-level=\"1\">\u003Cp dir=\"ltr\" style=\"line-height:1.38;margin-top:0pt;margin-bottom:0pt;\" role=\"presentation\">\u003Cspan style=\"font-size:13.999999999999998pt;font-family:Arial,sans-serif;color:#000000;background-color:transparent;font-weight:400;font-style:normal;font-variant:normal;text-decoration:none;vertical-align:baseline;white-space:pre;white-space:pre-wrap;\">Make a copy of your photograph.\u003C/span>\u003C/p>\u003C/li>\u003Cli dir=\"ltr\" style=\"list-style-type:disc;font-size:13.999999999999998pt;font-family:Arial,sans-serif;color:#000000;background-color:transparent;font-weight:400;font-style:normal;font-variant:normal;text-decoration:none;vertical-align:baseline;white-space:pre;\" aria-level=\"1\">\u003Cp dir=\"ltr\" style=\"line-height:1.38;margin-top:0pt;margin-bottom:0pt;\" role=\"presentation\">\u003Cspan style=\"font-size:13.999999999999998pt;font-family:Arial,sans-serif;color:#000000;background-color:transparent;font-weight:400;font-style:normal;font-variant:normal;text-decoration:none;vertical-align:baseline;white-space:pre;white-space:pre-wrap;\">Select dimensions or have AI optimise for email size.\u003C/span>\u003C/p>\u003C/li>\u003Cli dir=\"ltr\" style=\"list-style-type:disc;font-size:13.999999999999998pt;font-family:Arial,sans-serif;color:#000000;background-color:transparent;font-weight:400;font-style:normal;font-variant:normal;text-decoration:none;vertical-align:baseline;white-space:pre;\" aria-level=\"1\">\u003Cp dir=\"ltr\" style=\"line-height:1.38;margin-top:0pt;margin-bottom:0pt;\" role=\"presentation\">\u003Cspan style=\"font-size:13.999999999999998pt;font-family:Arial,sans-serif;color:#000000;background-color:transparent;font-weight:400;font-style:normal;font-variant:normal;text-decoration:none;vertical-align:baseline;white-space:pre;white-space:pre-wrap;\">Click Download, no watermark- no account needed.\u003C/span>\u003C/p>\u003C/li>\u003C/ul>\u003Ch2 dir=\"ltr\" style=\"line-height:1.38;margin-top:18pt;margin-bottom:6pt;\" id=\"RjeEUP\">\u003Cspan style=\"font-size:13.999999999999998pt;font-family:Arial,sans-serif;color:#000000;background-color:transparent;font-weight:700;font-style:normal;font-variant:normal;text-decoration:none;vertical-align:baseline;white-space:pre;white-space:pre-wrap;\">2. Employ Built Computerized Tools\u003C/span>\u003C/h2>\u003Cp dir=\"ltr\" style=\"line-height:1.38;margin-top:0pt;margin-bottom:0pt;\">\u003Cspan style=\"font-size:13.999999999999998pt;font-family:Arial,sans-serif;color:#000000;background-color:transparent;font-weight:700;font-style:normal;font-variant:normal;text-decoration:none;vertical-align:baseline;white-space:pre;white-space:pre-wrap;\">Windows:\u003C/span>\u003C/p>\u003Col style=\"margin-top:0;margin-bottom:0;padding-inline-start:48px;\">\u003Cli dir=\"ltr\" style=\"list-style-type:decimal;font-size:13.999999999999998pt;font-family:Arial,sans-serif;color:#000000;background-color:transparent;font-weight:700;font-style:normal;font-variant:normal;text-decoration:none;vertical-align:baseline;white-space:pre;\" aria-level=\"1\">\u003Cp dir=\"ltr\" style=\"line-height:1.38;margin-top:0pt;margin-bottom:0pt;\" role=\"presentation\">\u003Cspan style=\"font-size:13.999999999999998pt;font-family:Arial,sans-serif;color:#000000;background-color:transparent;font-weight:400;font-style:normal;font-variant:normal;text-decoration:none;vertical-align:baseline;white-space:pre;white-space:pre-wrap;\">View the picture in Photos\u003C/span>\u003C/p>\u003C/li>\u003Cli dir=\"ltr\" style=\"list-style-type:decimal;font-size:13.999999999999998pt;font-family:Arial,sans-serif;color:#000000;background-color:transparent;font-weight:700;font-style:normal;font-variant:normal;text-decoration:none;vertical-align:baseline;white-space:pre;\" aria-level=\"1\">\u003Cp dir=\"ltr\" style=\"line-height:1.38;margin-top:0pt;margin-bottom:0pt;\" role=\"presentation\">\u003Cspan style=\"font-size:13.999999999999998pt;font-family:Arial,sans-serif;color:#000000;background-color:transparent;font-weight:400;font-style:normal;font-variant:normal;text-decoration:none;vertical-align:baseline;white-space:pre;white-space:pre-wrap;\">Tap on the \"...\" > Resize\u003C/span>\u003C/p>\u003C/li>\u003Cli dir=\"ltr\" style=\"list-style-type:decimal;font-size:13.999999999999998pt;font-family:Arial,sans-serif;color:#000000;background-color:transparent;font-weight:700;font-style:normal;font-variant:normal;text-decoration:none;vertical-align:baseline;white-space:pre;\" aria-level=\"1\">\u003Cp dir=\"ltr\" style=\"line-height:1.38;margin-top:0pt;margin-bottom:0pt;\" role=\"presentation\">\u003Cspan style=\"font-size:13.999999999999998pt;font-family:Arial,sans-serif;color:#000000;background-color:transparent;font-weight:400;font-style:normal;font-variant:normal;text-decoration:none;vertical-align:baseline;white-space:pre;white-space:pre-wrap;\">Select Small or Medium, or enter specification dimensions.\u003C/span>\u003C/p>\u003C/li>\u003C/ol>\u003Cp dir=\"ltr\" style=\"line-height:1.38;margin-top:0pt;margin-bottom:0pt;\">\u003Cspan style=\"font-size:13.999999999999998pt;font-family:Arial,sans-serif;color:#000000;background-color:transparent;font-weight:700;font-style:normal;font-variant:normal;text-decoration:none;vertical-align:baseline;white-space:pre;white-space:pre-wrap;\">On Mac:\u003C/span>\u003C/p>\u003Col style=\"margin-top:0;margin-bottom:0;padding-inline-start:48px;\">\u003Cli dir=\"ltr\" style=\"list-style-type:decimal;font-size:13.999999999999998pt;font-family:Arial,sans-serif;color:#000000;background-color:transparent;font-weight:700;font-style:normal;font-variant:normal;text-decoration:none;vertical-align:baseline;white-space:pre;\" aria-level=\"1\">\u003Cp dir=\"ltr\" style=\"line-height:1.38;margin-top:0pt;margin-bottom:0pt;\" role=\"presentation\">\u003Cspan style=\"font-size:13.999999999999998pt;font-family:Arial,sans-serif;color:#000000;background-color:transparent;font-weight:400;font-style:normal;font-variant:normal;text-decoration:none;vertical-align:baseline;white-space:pre;white-space:pre-wrap;\">Use Preview to bring the picture into view\u003C/span>\u003C/p>\u003C/li>\u003Cli dir=\"ltr\" style=\"list-style-type:decimal;font-size:13.999999999999998pt;font-family:Arial,sans-serif;color:#000000;background-color:transparent;font-weight:700;font-style:normal;font-variant:normal;text-decoration:none;vertical-align:baseline;white-space:pre;\" aria-level=\"1\">\u003Cp dir=\"ltr\" style=\"line-height:1.38;margin-top:0pt;margin-bottom:0pt;\" role=\"presentation\">\u003Cspan style=\"font-size:13.999999999999998pt;font-family:Arial,sans-serif;color:#000000;background-color:transparent;font-weight:400;font-style:normal;font-variant:normal;text-decoration:none;vertical-align:baseline;white-space:pre;white-space:pre-wrap;\">Go to Tool, Adjust Size\u003C/span>\u003C/p>\u003C/li>\u003Cli dir=\"ltr\" style=\"list-style-type:decimal;font-size:13.999999999999998pt;font-family:Arial,sans-serif;color:#000000;background-color:transparent;font-weight:700;font-style:normal;font-variant:normal;text-decoration:none;vertical-align:baseline;white-space:pre;\" aria-level=\"1\">\u003Cp dir=\"ltr\" style=\"line-height:1.38;margin-top:0pt;margin-bottom:0pt;\" role=\"presentation\">\u003Cspan style=\"font-size:13.999999999999998pt;font-family:Arial,sans-serif;color:#000000;background-color:transparent;font-weight:400;font-style:normal;font-variant:normal;text-decoration:none;vertical-align:baseline;white-space:pre;white-space:pre-wrap;\">Export as JPEG to minimise file size\u003C/span>\u003C/p>\u003C/li>\u003Cli dir=\"ltr\" style=\"list-style-type:decimal;font-size:13.999999999999998pt;font-family:Arial,sans-serif;color:#000000;background-color:transparent;font-weight:700;font-style:normal;font-variant:normal;text-decoration:none;vertical-align:baseline;white-space:pre;\" aria-level=\"1\">\u003Cp dir=\"ltr\" style=\"line-height:1.38;margin-top:0pt;margin-bottom:0pt;\" role=\"presentation\">\u003Cspan style=\"font-size:13.999999999999998pt;font-family:Arial,sans-serif;color:#000000;background-color:transparent;font-weight:400;font-style:normal;font-variant:normal;text-decoration:none;vertical-align:baseline;white-space:pre;white-space:pre-wrap;\">These are quick, yet may not give the best compression unless there is a degree of quality sacrifice.\u003C/span>\u003C/p>\u003C/li>\u003C/ol>\u003Ch2 dir=\"ltr\" style=\"line-height:1.38;margin-top:18pt;margin-bottom:6pt;\" id=\"vTgl3P\">\u003Cspan style=\"font-size:13.999999999999998pt;font-family:Arial,sans-serif;color:#000000;background-color:transparent;font-weight:700;font-style:normal;font-variant:normal;text-decoration:none;vertical-align:baseline;white-space:pre;white-space:pre-wrap;\">3. Online Compressors Third Party\u003C/span>\u003C/h2>\u003Cp dir=\"ltr\" style=\"line-height:1.38;margin-top:0pt;margin-bottom:0pt;\">\u003Cspan style=\"font-size:13.999999999999998pt;font-family:Arial,sans-serif;color:#000000;background-color:transparent;font-weight:400;font-style:normal;font-variant:normal;text-decoration:none;vertical-align:baseline;white-space:pre;white-space:pre-wrap;\">Say, websites such as TinyJPG, ImageResize.org, and CompressJPEG have mediocre resizing capabilities, but multiply:\u003C/span>\u003C/p>\u003Cul style=\"margin-top:0;margin-bottom:0;padding-inline-start:48px;\">\u003Cli dir=\"ltr\" style=\"list-style-type:disc;font-size:13.999999999999998pt;font-family:Arial,sans-serif;color:#000000;background-color:transparent;font-weight:400;font-style:normal;font-variant:normal;text-decoration:none;vertical-align:baseline;white-space:pre;\" aria-level=\"1\">\u003Cp dir=\"ltr\" style=\"line-height:1.38;margin-top:0pt;margin-bottom:0pt;\" role=\"presentation\">\u003Cspan style=\"font-size:13.999999999999998pt;font-family:Arial,sans-serif;color:#000000;background-color:transparent;font-weight:400;font-style:normal;font-variant:normal;text-decoration:none;vertical-align:baseline;white-space:pre;white-space:pre-wrap;\">Require sign-ups\u003C/span>\u003C/p>\u003C/li>\u003Cli dir=\"ltr\" style=\"list-style-type:disc;font-size:13.999999999999998pt;font-family:Arial,sans-serif;color:#000000;background-color:transparent;font-weight:400;font-style:normal;font-variant:normal;text-decoration:none;vertical-align:baseline;white-space:pre;\" aria-level=\"1\">\u003Cp dir=\"ltr\" style=\"line-height:1.38;margin-top:0pt;margin-bottom:0pt;\" role=\"presentation\">\u003Cspan style=\"font-size:13.999999999999998pt;font-family:Arial,sans-serif;color:#000000;background-color:transparent;font-weight:400;font-style:normal;font-variant:normal;text-decoration:none;vertical-align:baseline;white-space:pre;white-space:pre-wrap;\">Chop daily\u003C/span>\u003C/p>\u003C/li>\u003Cli dir=\"ltr\" style=\"list-style-type:disc;font-size:13.999999999999998pt;font-family:Arial,sans-serif;color:#000000;background-color:transparent;font-weight:400;font-style:normal;font-variant:normal;text-decoration:none;vertical-align:baseline;white-space:pre;\" aria-level=\"1\">\u003Cp dir=\"ltr\" style=\"line-height:1.38;margin-top:0pt;margin-bottom:0pt;\" role=\"presentation\">\u003Cspan style=\"font-size:13.999999999999998pt;font-family:Arial,sans-serif;color:#000000;background-color:transparent;font-weight:400;font-style:normal;font-variant:normal;text-decoration:none;vertical-align:baseline;white-space:pre;white-space:pre-wrap;\">Add watermarks\u003C/span>\u003C/p>\u003C/li>\u003Cli dir=\"ltr\" style=\"list-style-type:disc;font-size:13.999999999999998pt;font-family:Arial,sans-serif;color:#000000;background-color:transparent;font-weight:400;font-style:normal;font-variant:normal;text-decoration:none;vertical-align:baseline;white-space:pre;\" aria-level=\"1\">\u003Cp dir=\"ltr\" style=\"line-height:1.38;margin-top:0pt;margin-bottom:0pt;\" role=\"presentation\">\u003Cspan style=\"font-size:13.999999999999998pt;font-family:Arial,sans-serif;color:#000000;background-color:transparent;font-weight:400;font-style:normal;font-variant:normal;text-decoration:none;vertical-align:baseline;white-space:pre;white-space:pre-wrap;\">Smartly optimize your email\u003C/span>\u003C/p>\u003C/li>\u003C/ul>\u003Cp dir=\"ltr\" style=\"line-height:1.38;margin-top:0pt;margin-bottom:0pt;\">\u003Cspan style=\"font-size:13.999999999999998pt;font-family:Arial,sans-serif;color:#000000;background-color:transparent;font-weight:400;font-style:normal;font-variant:normal;text-decoration:none;vertical-align:baseline;white-space:pre;white-space:pre-wrap;\">The main advantage of PixelFox is that it does not have these drawbacks but employs AI to achieve superior outcomes.\u003C/span>\u003C/p>\u003Ch2 dir=\"ltr\" style=\"line-height:1.38;margin-top:18pt;margin-bottom:6pt;\">\u003Cspan style=\"font-size:16pt;font-family:Arial,sans-serif;color:#000000;background-color:transparent;font-weight:700;font-style:normal;font-variant:normal;text-decoration:none;vertical-align:baseline;white-space:pre;white-space:pre-wrap;\"> Optimal Settings Email-Optimized \u003Ca href=\"https://pixelfox.ai/\" target=\"_blank\">Resizing\u003C/a>\u003C/span>\u003C/h2>\u003Cp dir=\"ltr\" style=\"line-height:1.38;margin-top:0pt;margin-bottom:0pt;\">\u003Cspan style=\"font-size:13.999999999999998pt;font-family:Arial,sans-serif;color:#000000;background-color:transparent;font-weight:400;font-style:normal;font-variant:normal;text-decoration:none;vertical-align:baseline;white-space:pre;white-space:pre-wrap;\">General settings when resizing your images to use in email would be best as follows:\u003C/span>\u003C/p>\u003Cul style=\"margin-top:0;margin-bottom:0;padding-inline-start:48px;\">\u003Cli dir=\"ltr\" style=\"list-style-type:disc;font-size:13.999999999999998pt;font-family:Arial,sans-serif;color:#000000;background-color:transparent;font-weight:400;font-style:normal;font-variant:normal;text-decoration:none;vertical-align:baseline;white-space:pre;\" aria-level=\"1\">\u003Cp dir=\"ltr\" style=\"line-height:1.38;margin-top:0pt;margin-bottom:0pt;\" role=\"presentation\">\u003Cspan style=\"font-size:13.999999999999998pt;font-family:Arial,sans-serif;color:#000000;background-color:transparent;font-weight:700;font-style:normal;font-variant:normal;text-decoration:none;vertical-align:baseline;white-space:pre;white-space:pre-wrap;\">Format: \u003C/span>\u003Cspan style=\"font-size:13.999999999999998pt;font-family:Arial,sans-serif;color:#000000;background-color:transparent;font-weight:400;font-style:normal;font-variant:normal;text-decoration:none;vertical-align:baseline;white-space:pre;white-space:pre-wrap;\">JPEG (minimum file size and wide compatibility)\u003C/span>\u003C/p>\u003C/li>\u003Cli dir=\"ltr\" style=\"list-style-type:disc;font-size:13.999999999999998pt;font-family:Arial,sans-serif;color:#000000;background-color:transparent;font-weight:400;font-style:normal;font-variant:normal;text-decoration:none;vertical-align:baseline;white-space:pre;\" aria-level=\"1\">\u003Cp dir=\"ltr\" style=\"line-height:1.38;margin-top:0pt;margin-bottom:0pt;\" role=\"presentation\">\u003Cspan style=\"font-size:13.999999999999998pt;font-family:Arial,sans-serif;color:#000000;background-color:transparent;font-weight:700;font-style:normal;font-variant:normal;text-decoration:none;vertical-align:baseline;white-space:pre;white-space:pre-wrap;\">Suggested Width: \u003C/span>\u003Cspan style=\"font-size:13.999999999999998pt;font-family:Arial,sans-serif;color:#000000;background-color:transparent;font-weight:400;font-style:normal;font-variant:normal;text-decoration:none;vertical-align:baseline;white-space:pre;white-space:pre-wrap;\">800-1200 pixels\u003C/span>\u003C/p>\u003C/li>\u003Cli dir=\"ltr\" style=\"list-style-type:disc;font-size:13.999999999999998pt;font-family:Arial,sans-serif;color:#000000;background-color:transparent;font-weight:400;font-style:normal;font-variant:normal;text-decoration:none;vertical-align:baseline;white-space:pre;\" aria-level=\"1\">\u003Cp dir=\"ltr\" style=\"line-height:1.38;margin-top:0pt;margin-bottom:0pt;\" role=\"presentation\">\u003Cspan style=\"font-size:13.999999999999998pt;font-family:Arial,sans-serif;color:#000000;background-color:transparent;font-weight:700;font-style:normal;font-variant:normal;text-decoration:none;vertical-align:baseline;white-space:pre;white-space:pre-wrap;\">File Size Target:\u003C/span>\u003Cspan style=\"font-size:13.999999999999998pt;font-family:Arial,sans-serif;color:#000000;background-color:transparent;font-weight:400;font-style:normal;font-variant:normal;text-decoration:none;vertical-align:baseline;white-space:pre;white-space:pre-wrap;\"> less than 1MB per image when transmitting a series\u003C/span>\u003C/p>\u003C/li>\u003Cli dir=\"ltr\" style=\"list-style-type:disc;font-size:13.999999999999998pt;font-family:Arial,sans-serif;color:#000000;background-color:transparent;font-weight:400;font-style:normal;font-variant:normal;text-decoration:none;vertical-align:baseline;white-space:pre;\" aria-level=\"1\">\u003Cp dir=\"ltr\" style=\"line-height:1.38;margin-top:0pt;margin-bottom:0pt;\" role=\"presentation\">\u003Cspan style=\"font-size:13.999999999999998pt;font-family:Arial,sans-serif;color:#000000;background-color:transparent;font-weight:700;font-style:normal;font-variant:normal;text-decoration:none;vertical-align:baseline;white-space:pre;white-space:pre-wrap;\">DPI: \u003C/span>\u003Cspan style=\"font-size:13.999999999999998pt;font-family:Arial,sans-serif;color:#000000;background-color:transparent;font-weight:400;font-style:normal;font-variant:normal;text-decoration:none;vertical-align:baseline;white-space:pre;white-space:pre-wrap;\">72 (suitable for screens)\u003C/span>\u003C/p>\u003C/li>\u003C/ul>\u003Cp>\u003Cb style=\"font-weight:normal;\">\u003Cbr>\u003C/b>\u003C/p>\u003Cp dir=\"ltr\" style=\"line-height:1.38;margin-top:0pt;margin-bottom:0pt;\">\u003Cspan style=\"font-size:13.999999999999998pt;font-family:Arial,sans-serif;color:#000000;background-color:transparent;font-weight:700;font-style:normal;font-variant:normal;text-decoration:none;vertical-align:baseline;white-space:pre;white-space:pre-wrap;\">Pro Tip: \u003C/span>\u003Cspan style=\"font-size:13.999999999999998pt;font-family:Arial,sans-serif;color:#000000;background-color:transparent;font-weight:400;font-style:normal;font-variant:normal;text-decoration:none;vertical-align:baseline;white-space:pre;white-space:pre-wrap;\">When it comes to resizing, use compression. How to Better Understand to Successfully Resize a Photo, Find the Beta Version of GIMP\u003C/span>\u003C/p>\u003Cp dir=\"ltr\" style=\"line-height:1.38;margin-top:0pt;margin-bottom:0pt;\">\u003Cspan style=\"font-size:13.999999999999998pt;font-family:Arial,sans-serif;color:#000000;background-color:transparent;font-weight:700;font-style:normal;font-variant:normal;text-decoration:none;vertical-align:baseline;white-space:pre;white-space:pre-wrap;\">PixelFox \u003C/span>\u003Cspan style=\"font-size:13.999999999999998pt;font-family:Arial,sans-serif;color:#000000;background-color:transparent;font-weight:400;font-style:normal;font-variant:normal;text-decoration:none;vertical-align:baseline;white-space:pre;white-space:pre-wrap;\">allows you to resize and also compress during the same session, which means when you are short of time or have to send many photos in one email, you know how to do it right.\u003C/span>\u003C/p>\u003Ch2 dir=\"ltr\" style=\"line-height:1.38;margin-top:18pt;margin-bottom:6pt;\" id=\"9IcxQ1\">\u003Cspan style=\"font-size:16pt;font-family:Arial,sans-serif;color:#000000;background-color:transparent;font-weight:700;font-style:normal;font-variant:normal;text-decoration:none;vertical-align:baseline;white-space:pre;white-space:pre-wrap;\">Conclusion\u003C/span>\u003C/h2>\u003Cp dir=\"ltr\" style=\"line-height:1.38;margin-top:0pt;margin-bottom:0pt;\">\u003Cspan style=\"font-size:13.999999999999998pt;font-family:Arial,sans-serif;color:#000000;background-color:transparent;font-weight:400;font-style:normal;font-variant:normal;text-decoration:none;vertical-align:baseline;white-space:pre;white-space:pre-wrap;\">Making smaller pictures to mail does not have to be complicated to learn. Whether it is to \u003C/span>\u003Cspan style=\"font-size:13.999999999999998pt;font-family:Arial,sans-serif;color:#000000;background-color:transparent;font-weight:700;font-style:normal;font-variant:normal;text-decoration:none;vertical-align:baseline;white-space:pre;white-space:pre-wrap;\">resize a single image\u003C/span>\u003Cspan style=\"font-size:13.999999999999998pt;font-family:Arial,sans-serif;color:#000000;background-color:transparent;font-weight:400;font-style:normal;font-variant:normal;text-decoration:none;vertical-align:baseline;white-space:pre;white-space:pre-wrap;\"> or prepare a set of pictures, such as creating a presentation or updating family members, today, the tools are effective and easy to use.\u003C/span>\u003C/p>\u003Cp>\u003C/p>\u003Cp dir=\"ltr\" style=\"line-height:1.38;margin-top:0pt;margin-bottom:0pt;\">\u003Cspan style=\"font-size:13.999999999999998pt;font-family:Arial,sans-serif;color:#000000;background-color:transparent;font-weight:400;font-style:normal;font-variant:normal;text-decoration:none;vertical-align:baseline;white-space:pre;white-space:pre-wrap;\">And using intelligent, AI-driven solutions such as \u003C/span>\u003Cspan style=\"font-size:13.999999999999998pt;font-family:Arial,sans-serif;color:#000000;background-color:transparent;font-weight:700;font-style:normal;font-variant:normal;text-decoration:none;vertical-align:baseline;white-space:pre;white-space:pre-wrap;\">PixelFox\u003C/span>\u003Cspan style=\"font-size:13.999999999999998pt;font-family:Arial,sans-serif;color:#000000;background-color:transparent;font-weight:400;font-style:normal;font-variant:normal;text-decoration:none;vertical-align:baseline;white-space:pre;white-space:pre-wrap;\">, it is possible to \u003C/span>\u003Cspan style=\"font-size:13.999999999999998pt;font-family:Arial,sans-serif;color:#000000;background-color:transparent;font-weight:700;font-style:normal;font-variant:normal;text-decoration:none;vertical-align:baseline;white-space:pre;white-space:pre-wrap;\">resize and scale down an image for email\u003C/span>\u003Cspan style=\"font-size:13.999999999999998pt;font-family:Arial,sans-serif;color:#000000;background-color:transparent;font-weight:400;font-style:normal;font-variant:normal;text-decoration:none;vertical-align:baseline;white-space:pre;white-space:pre-wrap;\"> in online shareable quality without having to sacrifice time, effort, or needlessly hurdle any cumbersome processes. No downloads. No paywalls. Nothing but clean, professional, and just quick photos to go in your inbox.\u003C/span>\u003C/p>\u003Cdiv>\u003Cspan style=\"font-size:13.999999999999998pt;font-family:Arial,sans-serif;color:#000000;background-color:transparent;font-weight:400;font-style:normal;font-variant:normal;text-decoration:none;vertical-align:baseline;white-space:pre;white-space:pre-wrap;\">\u003Cbr>\u003C/span>\u003C/div>","resizing-pictures-easy-solutions-to-reducing-photo-size-without-destroying-the-image",1755616658,1755616700,"3 days ago",{"id":124,"lang":11,"author_id":54,"image":125,"title":126,"keywords":15,"description":127,"content":128,"url":129,"views":19,"publishtime":130,"updatetime":131,"status":22,"publishtime_text":122,"status_text":25},1219,"https://api.pixelfox.ai/uploads/20250820/f3176eb03e2c9e78fbff022c97343ae5.png","Bulk Image Enhancer – Professional-Grade Edits in Bulk Fast","Do you want to improve scores of images in seconds? But the difference is, with a bulk image enhancer you can upscale images in batch, deblur photos and bulk make images HD within seconds. Find the right instruments and methods!","\u003Ch2 dir=\"ltr\" style=\"line-height:1.38;background-color:#ffffff;margin-top:12pt;margin-bottom:0pt;padding:0pt 0pt 12pt 0pt;\" id=\"hLeXkU\">\u003Cspan style=\"font-size:16pt;font-family:Arial,sans-serif;color:#000000;background-color:transparent;font-weight:700;font-style:normal;font-variant:normal;text-decoration:none;vertical-align:baseline;white-space:pre;white-space:pre-wrap;\">How often do you use Bulk Image Enhancer?\u003C/span>\u003C/h2>\u003Cp dir=\"ltr\" style=\"line-height:1.38;background-color:#ffffff;margin-top:0pt;margin-bottom:0pt;padding:0pt 0pt 12pt 0pt;\">\u003Cspan style=\"font-size:12pt;font-family:Arial,sans-serif;color:#000000;background-color:transparent;font-weight:400;font-style:normal;font-variant:normal;text-decoration:none;vertical-align:baseline;white-space:pre;white-space:pre-wrap;\">I want to stop editing photos individually. And as a photographer, advertiser, or an online seller, you can understand how much pain it causes to enrich \u003C/span>\u003Ca href=\"https://pixelfox.ai\" style=\"text-decoration:none;\">\u003Cspan style=\"font-size:12pt;font-family:Arial,sans-serif;color:#1155cc;background-color:transparent;font-weight:700;font-style:normal;font-variant:normal;text-decoration:underline;-webkit-text-decoration-skip:none;text-decoration-skip-ink:none;vertical-align:baseline;white-space:pre;white-space:pre-wrap;\">bulk image enhancer\u003C/span>\u003C/a>\u003Cspan style=\"font-size:12pt;font-family:Arial,sans-serif;color:#000000;background-color:transparent;font-weight:400;font-style:normal;font-variant:normal;text-decoration:none;vertical-align:baseline;white-space:pre;white-space:pre-wrap;\"> by yourself. Super-Resolution Batch Image Upscaler — To do this, we need a batch image upscaler as follows:\u003C/span>\u003C/p>\u003Ch3 dir=\"ltr\" style=\"line-height:1.38;background-color:#ffffff;margin-top:0pt;margin-bottom:0pt;padding:0pt 0pt 12pt 0pt;\">\u003Cspan style=\"font-size:13.999999999999998pt;font-family:Arial,sans-serif;color:#000000;background-color:transparent;font-weight:700;font-style:normal;font-variant:normal;text-decoration:none;vertical-align:baseline;white-space:pre;white-space:pre-wrap;\">Download Option: Bulk Image Enhancer\u003C/span>\u003C/h3>\u003Cp dir=\"ltr\" style=\"line-height:1.38;background-color:#ffffff;margin-top:0pt;margin-bottom:0pt;padding:0pt 0pt 12pt 0pt;\">\u003Cspan style=\"font-size:12pt;font-family:Arial,sans-serif;color:#000000;background-color:transparent;font-weight:400;font-style:normal;font-variant:normal;text-decoration:none;vertical-align:baseline;white-space:pre;white-space:pre-wrap;\">Download less detailed, poorly defined or low definition images in bulk.\u003C/span>\u003C/p>\u003Cp dir=\"ltr\" style=\"line-height:1.38;background-color:#ffffff;margin-top:0pt;margin-bottom:0pt;padding:0pt 0pt 12pt 0pt;\">\u003Cspan style=\"font-size:12pt;font-family:Arial,sans-serif;color:#000000;background-color:transparent;font-weight:400;font-style:normal;font-variant:normal;text-decoration:none;vertical-align:baseline;white-space:pre;white-space:pre-wrap;\">Think about having to modify hundreds of files with a common edit profile (sharpness, contrast, noise reduction)\u003C/span>\u003C/p>\u003Cp dir=\"ltr\" style=\"line-height:1.38;background-color:#ffffff;margin-top:0pt;margin-bottom:0pt;padding:0pt 0pt 12pt 0pt;\">\u003Cspan style=\"font-size:12pt;font-family:Arial,sans-serif;color:#000000;background-color:transparent;font-weight:400;font-style:normal;font-variant:normal;text-decoration:none;vertical-align:baseline;white-space:pre;white-space:pre-wrap;\">Use AI-driven Bulk image Enhancer tools, save hours of manual retouching\u003C/span>\u003C/p>\u003Cp dir=\"ltr\" style=\"line-height:1.38;background-color:#ffffff;margin-top:0pt;margin-bottom:0pt;padding:0pt 0pt 12pt 0pt;\">\u003Cspan style=\"font-size:12pt;font-family:Arial,sans-serif;color:#000000;background-color:transparent;font-weight:400;font-style:normal;font-variant:normal;text-decoration:none;vertical-align:baseline;white-space:pre;white-space:pre-wrap;\">That gives a huge advantage to online stores, which could enhance 500 product images at once to sharpen details, bright photos and in a few clicks every photo looks professional instead of opening Photoshop for 500 times.\u003C/span>\u003C/p>\u003Cp dir=\"ltr\" style=\"line-height:1.38;background-color:#ffffff;margin-top:0pt;margin-bottom:0pt;padding:0pt 0pt 12pt 0pt;\">\u003Cimg src=\"https://api.pixelfox.ai/uploads/20250820/f3176eb03e2c9e78fbff022c97343ae5.png\" data-filename=\"filename\" style=\"width: 50%;\" alt=\"Bulk Image Enhancer – Professional-Grade Edits in Bulk Fast\" loading=\"lazy\">\u003Cspan style=\"font-size:12pt;font-family:Arial,sans-serif;color:#000000;background-color:transparent;font-weight:400;font-style:normal;font-variant:normal;text-decoration:none;vertical-align:baseline;white-space:pre;white-space:pre-wrap;\">\u003Cbr>\u003C/span>\u003C/p>\u003Ch2 dir=\"ltr\" style=\"line-height:1.38;background-color:#ffffff;margin-top:0pt;margin-bottom:0pt;padding:0pt 0pt 12pt 0pt;\" id=\"Fi6WDm\">\u003Cspan style=\"font-size:16pt;font-family:Arial,sans-serif;color:#000000;background-color:transparent;font-weight:700;font-style:normal;font-variant:normal;text-decoration:none;vertical-align:baseline;white-space:pre;white-space:pre-wrap;\">How A Batch Image Upscaler Works?\u003C/span>\u003C/h2>\u003Cp dir=\"ltr\" style=\"line-height:1.38;background-color:#ffffff;margin-top:0pt;margin-bottom:0pt;padding:0pt 0pt 12pt 0pt;\">\u003Cspan style=\"font-size:12pt;font-family:Arial,sans-serif;color:#000000;background-color:transparent;font-weight:400;font-style:normal;font-variant:normal;text-decoration:none;vertical-align:baseline;white-space:pre;white-space:pre-wrap;\">Ajuste bulk photo enhancers generally work based on AI to analyze images and enhance them. What we need is to be able to process files at scale in a way that resembles this:\u003C/span>\u003C/p>\u003Ch3 dir=\"ltr\" style=\"line-height:1.38;background-color:#ffffff;margin-top:0pt;margin-bottom:0pt;padding:0pt 0pt 12pt 0pt;\">\u003Cspan style=\"font-size:13.999999999999998pt;font-family:Arial,sans-serif;color:#000000;background-color:transparent;font-weight:700;font-style:normal;font-variant:normal;text-decoration:none;vertical-align:baseline;white-space:pre;white-space:pre-wrap;\">AI-Powered Enhancement\u003C/span>\u003C/h3>\u003Cp dir=\"ltr\" style=\"line-height:1.38;background-color:#ffffff;margin-top:0pt;margin-bottom:0pt;padding:0pt 0pt 12pt 0pt;\">\u003Cspan style=\"font-size:12pt;font-family:Arial,sans-serif;color:#000000;background-color:transparent;font-weight:400;font-style:normal;font-variant:normal;text-decoration:none;vertical-align:baseline;white-space:pre;white-space:pre-wrap;\">Blur, noise and compression artifacts are removed by means of advanced algorithms while missing details are being reconstructed. They mark the end of bas filters that only work in a simple way and instead use artificial intelligence to produce new high-quality images by intelligently filling parts.\u003C/span>\u003C/p>\u003Ch3 dir=\"ltr\" style=\"line-height:1.38;background-color:#ffffff;margin-top:0pt;margin-bottom:0pt;padding:0pt 0pt 12pt 0pt;\">\u003Cspan style=\"font-size:13.999999999999998pt;font-family:Arial,sans-serif;color:#000000;background-color:transparent;font-weight:700;font-style:normal;font-variant:normal;text-decoration:none;vertical-align:baseline;white-space:pre;white-space:pre-wrap;\">Batch Processing\u003C/span>\u003C/h3>\u003Cp dir=\"ltr\" style=\"line-height:1.38;background-color:#ffffff;margin-top:0pt;margin-bottom:0pt;padding:0pt 0pt 12pt 0pt;\">\u003Cspan style=\"font-size:12pt;font-family:Arial,sans-serif;color:#000000;background-color:transparent;font-weight:400;font-style:normal;font-variant:normal;text-decoration:none;vertical-align:baseline;white-space:pre;white-space:pre-wrap;\">Instantly upload hundreds (or even thousands) of images. It applies enhancements consistently which is important for branding and galleries of products.\u003C/span>\u003C/p>\u003Ch3 dir=\"ltr\" style=\"line-height:1.38;background-color:#ffffff;margin-top:0pt;margin-bottom:0pt;padding:0pt 0pt 12pt 0pt;\">\u003Cspan style=\"font-size:13.999999999999998pt;font-family:Arial,sans-serif;color:#000000;background-color:transparent;font-weight:700;font-style:normal;font-variant:normal;text-decoration:none;vertical-align:baseline;white-space:pre;white-space:pre-wrap;\">Customizable Settings\u003C/span>\u003C/h3>\u003Cp dir=\"ltr\" style=\"line-height:1.38;background-color:#ffffff;margin-top:0pt;margin-bottom:0pt;padding:0pt 0pt 12pt 0pt;\">\u003Cspan style=\"font-size:12pt;font-family:Arial,sans-serif;color:#000000;background-color:transparent;font-weight:400;font-style:normal;font-variant:normal;text-decoration:none;vertical-align:baseline;white-space:pre;white-space:pre-wrap;\">During recording, you can adjust sharpness, brightness and denoising strength. Some tools, like pixelfox. React Prism ai allows you to preview before publishing.\u003C/span>\u003C/p>\u003Ch2 dir=\"ltr\" style=\"line-height:1.38;background-color:#ffffff;margin-top:0pt;margin-bottom:0pt;padding:0pt 0pt 12pt 0pt;\" id=\"C0mE6J\">\u003Cspan style=\"font-size:16pt;font-family:Arial,sans-serif;color:#000000;background-color:transparent;font-weight:700;font-style:normal;font-variant:normal;text-decoration:none;vertical-align:baseline;white-space:pre;white-space:pre-wrap;\">What Are the Best Features You should be Looking for Bulk Image Enhancer\u003C/span>\u003C/h2>\u003Cp dir=\"ltr\" style=\"line-height:1.38;background-color:#ffffff;margin-top:0pt;margin-bottom:0pt;padding:0pt 0pt 12pt 0pt;\">\u003Cspan style=\"font-size:12pt;font-family:Arial,sans-serif;color:#000000;background-color:transparent;font-weight:400;font-style:normal;font-variant:normal;text-decoration:none;vertical-align:baseline;white-space:pre;white-space:pre-wrap;\">Some tools are not suitable for professional results. Be sure to consider these three familiar aspects when you select a batch image upscaler:\u003C/span>\u003C/p>\u003Ch3 dir=\"ltr\" style=\"line-height:1.38;background-color:#ffffff;margin-top:0pt;margin-bottom:0pt;padding:0pt 0pt 12pt 0pt;\">\u003Cspan style=\"font-size:13.999999999999998pt;font-family:Arial,sans-serif;color:#000000;background-color:transparent;font-weight:700;font-style:normal;font-variant:normal;text-decoration:none;vertical-align:baseline;white-space:pre;white-space:pre-wrap;\">High-Quality Upscaling \u003C/span>\u003C/h3>\u003Cp dir=\"ltr\" style=\"line-height:1.38;background-color:#ffffff;margin-top:0pt;margin-bottom:0pt;padding:0pt 0pt 12pt 0pt;\">\u003Cspan style=\"font-size:12pt;font-family:Arial,sans-serif;color:#000000;background-color:transparent;font-weight:400;font-style:normal;font-variant:normal;text-decoration:none;vertical-align:baseline;white-space:pre;white-space:pre-wrap;\">To what factor can it scale images without distortion?\u003C/span>\u003C/p>\u003Ch3 dir=\"ltr\" style=\"line-height:1.38;background-color:#ffffff;margin-top:0pt;margin-bottom:0pt;padding:0pt 0pt 12pt 0pt;\">\u003Cspan style=\"font-size:13.999999999999998pt;font-family:Arial,sans-serif;color:#000000;background-color:transparent;font-weight:700;font-style:normal;font-variant:normal;text-decoration:none;vertical-align:baseline;white-space:pre;white-space:pre-wrap;\">Noise Reduction: \u003C/span>\u003C/h3>\u003Cp dir=\"ltr\" style=\"line-height:1.38;background-color:#ffffff;margin-top:0pt;margin-bottom:12pt;\">\u003Cspan style=\"font-size:12pt;font-family:Arial,sans-serif;color:#000000;background-color:transparent;font-weight:700;font-style:normal;font-variant:normal;text-decoration:none;vertical-align:baseline;white-space:pre;white-space:pre-wrap;\">Is it able to reduce noise in grainy and low light images?\u003C/span>\u003C/p>\u003Cul style=\"margin-top:0;margin-bottom:0;padding-inline-start:48px;\">\u003Cli dir=\"ltr\" style=\"list-style-type:disc;font-size:12pt;font-family:Arial,sans-serif;color:#000000;background-color:transparent;font-weight:400;font-style:normal;font-variant:normal;text-decoration:none;vertical-align:baseline;white-space:pre;\" aria-level=\"1\">\u003Cp dir=\"ltr\" style=\"line-height:1.38;background-color:#ffffff;margin-top:12pt;margin-bottom:0pt;\" role=\"presentation\">\u003Cspan style=\"font-size:12pt;font-family:Arial,sans-serif;color:#000000;background-color:transparent;font-weight:400;font-style:normal;font-variant:normal;text-decoration:none;vertical-align:baseline;white-space:pre;white-space:pre-wrap;\">Color Correction — Auto white balance and saturation?\u003C/span>\u003C/p>\u003C/li>\u003Cli dir=\"ltr\" style=\"list-style-type:disc;font-size:12pt;font-family:Arial,sans-serif;color:#000000;background-color:transparent;font-weight:400;font-style:normal;font-variant:normal;text-decoration:none;vertical-align:baseline;white-space:pre;\" aria-level=\"1\">\u003Cp dir=\"ltr\" style=\"line-height:1.38;background-color:#ffffff;margin-top:0pt;margin-bottom:0pt;\" role=\"presentation\">\u003Cspan style=\"font-size:12pt;font-family:Arial,sans-serif;color:#000000;background-color:transparent;font-weight:400;font-style:normal;font-variant:normal;text-decoration:none;vertical-align:baseline;white-space:pre;white-space:pre-wrap;\">Fast Processing – Will it work with 1000s of records without crashing\u003C/span>\u003C/p>\u003C/li>\u003Cli dir=\"ltr\" style=\"list-style-type:disc;font-size:12pt;font-family:Arial,sans-serif;color:#000000;background-color:transparent;font-weight:400;font-style:normal;font-variant:normal;text-decoration:none;vertical-align:baseline;white-space:pre;\" aria-level=\"1\">\u003Cp dir=\"ltr\" style=\"line-height:1.38;background-color:#ffffff;margin-top:0pt;margin-bottom:12pt;\" role=\"presentation\">\u003Cspan style=\"font-size:12pt;font-family:Arial,sans-serif;color:#000000;background-color:transparent;font-weight:400;font-style:normal;font-variant:normal;text-decoration:none;vertical-align:baseline;white-space:pre;white-space:pre-wrap;\">File Support — Compatible with JPG, PNG, and RAW files?\u003C/span>\u003C/p>\u003C/li>\u003C/ul>\u003Cp dir=\"ltr\" style=\"line-height:1.38;background-color:#ffffff;margin-top:12pt;margin-bottom:0pt;padding:0pt 0pt 12pt 0pt;\">\u003Cspan style=\"font-size:12pt;font-family:Arial,sans-serif;color:#000000;background-color:transparent;font-weight:400;font-style:normal;font-variant:normal;text-decoration:none;vertical-align:baseline;white-space:pre;white-space:pre-wrap;\">For example, pixelfox. A full-featured, AI-powered bulk photo enhancer with one-click solutions for entire collections, social media & e-commerce.\u003C/span>\u003C/p>\u003Ch2 dir=\"ltr\" style=\"line-height:1.38;background-color:#ffffff;margin-top:0pt;margin-bottom:0pt;padding:0pt 0pt 12pt 0pt;\" id=\"gNkAwU\">\u003Cspan style=\"font-size:16pt;font-family:Arial,sans-serif;color:#000000;background-color:transparent;font-weight:700;font-style:normal;font-variant:normal;text-decoration:none;vertical-align:baseline;white-space:pre;white-space:pre-wrap;\">How to Bulk Image Enhance Step by Step\u003C/span>\u003C/h2>\u003Ch3 dir=\"ltr\" style=\"line-height:1.38;background-color:#ffffff;margin-top:0pt;margin-bottom:0pt;padding:0pt 0pt 12pt 0pt;\">\u003Cspan style=\"font-size:13.999999999999998pt;font-family:Arial,sans-serif;color:#000000;background-color:transparent;font-weight:700;font-style:normal;font-variant:normal;text-decoration:none;vertical-align:baseline;white-space:pre;white-space:pre-wrap;\">Step 1: Upload Your Images\u003C/span>\u003C/h3>\u003Cp dir=\"ltr\" style=\"line-height:1.38;background-color:#ffffff;margin-top:0pt;margin-bottom:0pt;padding:0pt 0pt 12pt 0pt;\">\u003Cspan style=\"font-size:12pt;font-family:Arial,sans-serif;color:#000000;background-color:transparent;font-weight:400;font-style:normal;font-variant:normal;text-decoration:none;vertical-align:baseline;white-space:pre;white-space:pre-wrap;\">How does this image enhancer tool work? Simply drag the file from your PC. Drop that into this bulk Image Enhancer Tool. This library is entirely folder-based, as most of the platforms out in the wild now support having a crazy volume of images in your folders so another process handling these for you will save spawncost!\u003C/span>\u003C/p>\u003Ch3 dir=\"ltr\" style=\"line-height:1.38;background-color:#ffffff;margin-top:0pt;margin-bottom:0pt;padding:0pt 0pt 12pt 0pt;\">\u003Cspan style=\"font-size:13.999999999999998pt;font-family:Arial,sans-serif;color:#000000;background-color:transparent;font-weight:700;font-style:normal;font-variant:normal;text-decoration:none;vertical-align:baseline;white-space:pre;white-space:pre-wrap;\">Step 2 Select Enhancement Setting\u003C/span>\u003C/h3>\u003Cp dir=\"ltr\" style=\"line-height:1.38;background-color:#ffffff;margin-top:0pt;margin-bottom:0pt;padding:0pt 0pt 12pt 0pt;\">\u003Cspan style=\"font-size:12pt;font-family:Arial,sans-serif;color:#000000;background-color:transparent;font-weight:400;font-style:normal;font-variant:normal;text-decoration:none;vertical-align:baseline;white-space:pre;white-space:pre-wrap;\">Choose (e.g., Sharpen, Denoise) or entirely manually adjust sliders.\u003C/span>\u003C/p>\u003Ch3 dir=\"ltr\" style=\"line-height:1.38;background-color:#ffffff;margin-top:0pt;margin-bottom:0pt;padding:0pt 0pt 12pt 0pt;\">\u003Cspan style=\"font-size:13.999999999999998pt;font-family:Arial,sans-serif;color:#000000;background-color:transparent;font-weight:700;font-style:normal;font-variant:normal;text-decoration:none;vertical-align:baseline;white-space:pre;white-space:pre-wrap;\">Step 3 Process & Download\u003C/span>\u003C/h3>\u003Cp dir=\"ltr\" style=\"line-height:1.38;background-color:#ffffff;margin-top:0pt;margin-bottom:0pt;padding:0pt 0pt 12pt 0pt;\">\u003Cspan style=\"font-size:12pt;font-family:Arial,sans-serif;color:#000000;background-color:transparent;font-weight:400;font-style:normal;font-variant:normal;text-decoration:none;vertical-align:baseline;white-space:pre;white-space:pre-wrap;\">Click \"Enhance All\" and wait some seconds (or minutes, for big loads). Get your edited images downloaded in a single click.\u003C/span>\u003C/p>\u003Ch2 dir=\"ltr\" style=\"line-height:1.38;background-color:#ffffff;margin-top:0pt;margin-bottom:0pt;padding:0pt 0pt 12pt 0pt;\" id=\"UQbzJZ\">\u003Cspan style=\"font-size:16pt;font-family:Arial,sans-serif;color:#000000;background-color:transparent;font-weight:700;font-style:normal;font-variant:normal;text-decoration:none;vertical-align:baseline;white-space:pre;white-space:pre-wrap;\">Bulk Photo Enhancers Commonly Put to Use\u003C/span>\u003C/h2>\u003Cp dir=\"ltr\" style=\"line-height:1.38;background-color:#ffffff;margin-top:0pt;margin-bottom:0pt;padding:0pt 0pt 12pt 0pt;\">\u003Cspan style=\"font-size:12pt;font-family:Arial,sans-serif;color:#000000;background-color:transparent;font-weight:400;font-style:normal;font-variant:normal;text-decoration:none;vertical-align:baseline;white-space:pre;white-space:pre-wrap;\">Electronic commerce product listings\u003C/span>\u003C/p>\u003Cp dir=\"ltr\" style=\"line-height:1.38;background-color:#ffffff;margin-top:0pt;margin-bottom:0pt;padding:0pt 0pt 12pt 0pt;\">\u003Cspan style=\"font-size:12pt;font-family:Arial,sans-serif;color:#000000;background-color:transparent;font-weight:400;font-style:normal;font-variant:normal;text-decoration:none;vertical-align:baseline;white-space:pre;white-space:pre-wrap;\">E-commerce websites need clean, uniform photos of their product. Ensures all thumbnails look professional (batch image upscaler)\u003C/span>\u003C/p>\u003Ch3 dir=\"ltr\" style=\"line-height:1.38;background-color:#ffffff;margin-top:0pt;margin-bottom:0pt;padding:0pt 0pt 12pt 0pt;\">\u003Cspan style=\"font-size:13.999999999999998pt;font-family:Arial,sans-serif;color:#000000;background-color:transparent;font-weight:700;font-style:normal;font-variant:normal;text-decoration:none;vertical-align:baseline;white-space:pre;white-space:pre-wrap;\">Real Estate Photography\u003C/span>\u003C/h3>\u003Cp dir=\"ltr\" style=\"line-height:1.38;background-color:#ffffff;margin-top:0pt;margin-bottom:0pt;padding:0pt 0pt 12pt 0pt;\">\u003Cspan style=\"font-size:12pt;font-family:Arial,sans-serif;color:#000000;background-color:transparent;font-weight:400;font-style:normal;font-variant:normal;text-decoration:none;vertical-align:baseline;white-space:pre;white-space:pre-wrap;\">Brighten dark rooms and sharpen details on dozens of property images at once.\u003C/span>\u003C/p>\u003Ch3 dir=\"ltr\" style=\"line-height:1.38;background-color:#ffffff;margin-top:0pt;margin-bottom:0pt;padding:0pt 0pt 12pt 0pt;\">\u003Cspan style=\"font-size:13.999999999999998pt;font-family:Arial,sans-serif;color:#000000;background-color:transparent;font-weight:700;font-style:normal;font-variant:normal;text-decoration:none;vertical-align:baseline;white-space:pre;white-space:pre-wrap;\">Social Media & Marketing\u003C/span>\u003C/h3>\u003Cp dir=\"ltr\" style=\"line-height:1.38;background-color:#ffffff;margin-top:0pt;margin-bottom:0pt;padding:0pt 0pt 12pt 0pt;\">\u003Cspan style=\"font-size:12pt;font-family:Arial,sans-serif;color:#000000;background-color:transparent;font-weight:400;font-style:normal;font-variant:normal;text-decoration:none;vertical-align:baseline;white-space:pre;white-space:pre-wrap;\">Edit bulk campaign visuals to have consistent aesthetic.\u003C/span>\u003C/p>\u003Ch2 dir=\"ltr\" style=\"line-height:1.38;background-color:#ffffff;margin-top:0pt;margin-bottom:0pt;padding:0pt 0pt 12pt 0pt;\" id=\"wIljh9\">\u003Cspan style=\"font-size:16pt;font-family:Arial,sans-serif;color:#000000;background-color:transparent;font-weight:700;font-style:normal;font-variant:normal;text-decoration:none;vertical-align:baseline;white-space:pre;white-space:pre-wrap;\">FAQs: About Bulk Image Enhancers\u003C/span>\u003C/h2>\u003Cp dir=\"ltr\" style=\"line-height:1.38;background-color:#ffffff;margin-top:0pt;margin-bottom:0pt;padding:0pt 0pt 12pt 0pt;\">\u003Cspan style=\"font-size:12pt;font-family:Arial,sans-serif;color:#000000;background-color:transparent;font-weight:400;font-style:normal;font-variant:normal;text-decoration:none;vertical-align:baseline;white-space:pre;white-space:pre-wrap;\">Q: Can a photo bulk enhancer be a photoshop alternative\u003C/span>\u003C/p>\u003Cp dir=\"ltr\" style=\"line-height:1.38;background-color:#ffffff;margin-top:0pt;margin-bottom:0pt;padding:0pt 0pt 12pt 0pt;\">\u003Cspan style=\"font-size:12pt;font-family:Arial,sans-serif;color:#000000;background-color:transparent;font-weight:400;font-style:normal;font-variant:normal;text-decoration:none;vertical-align:baseline;white-space:pre;white-space:pre-wrap;\">A: For lossless or low-quality edits (enhancing, denoising, scaling), no. If you need to do really swell advanced retouching, the one you will break out Ps for is probably still required.\u003C/span>\u003C/p>\u003Cp dir=\"ltr\" style=\"line-height:1.38;background-color:#ffffff;margin-top:0pt;margin-bottom:0pt;padding:0pt 0pt 12pt 0pt;\">\u003Cspan style=\"font-size:12pt;font-family:Arial,sans-serif;color:#000000;background-color:transparent;font-weight:400;font-style:normal;font-variant:normal;text-decoration:none;vertical-align:baseline;white-space:pre;white-space:pre-wrap;\">Q: Number of images processed at a time?\u003C/span>\u003C/p>\u003Cp dir=\"ltr\" style=\"line-height:1.38;background-color:#ffffff;margin-top:0pt;margin-bottom:0pt;padding:0pt 0pt 12pt 0pt;\">\u003Cspan style=\"font-size:12pt;font-family:Arial,sans-serif;color:#000000;background-color:transparent;font-weight:400;font-style:normal;font-variant:normal;text-decoration:none;vertical-align:baseline;white-space:pre;white-space:pre-wrap;\">A: Most tools do between 100 & 1,000 files / batch. Check your chosen platform’s limits.\u003C/span>\u003C/p>\u003Cp dir=\"ltr\" style=\"line-height:1.38;background-color:#ffffff;margin-top:0pt;margin-bottom:0pt;padding:0pt 0pt 12pt 0pt;\">\u003Cspan style=\"font-size:12pt;font-family:Arial,sans-serif;color:#000000;background-color:transparent;font-weight:400;font-style:normal;font-variant:normal;text-decoration:none;vertical-align:baseline;white-space:pre;white-space:pre-wrap;\">Q: Will it diminish the quality compared to processing on a per image basis?\u003C/span>\u003C/p>\u003Cp dir=\"ltr\" style=\"line-height:1.38;background-color:#ffffff;margin-top:0pt;margin-bottom:0pt;padding:0pt 0pt 12pt 0pt;\">\u003Cspan style=\"font-size:12pt;font-family:Arial,sans-serif;color:#000000;background-color:transparent;font-weight:400;font-style:normal;font-variant:normal;text-decoration:none;vertical-align:baseline;white-space:pre;white-space:pre-wrap;\">A: Not with AI tools. They increase file thickness instead of compressing them.\u003C/span>\u003C/p>\u003Cp dir=\"ltr\" style=\"line-height:1.38;background-color:#ffffff;margin-top:0pt;margin-bottom:0pt;padding:0pt 0pt 12pt 0pt;\">\u003Cspan style=\"font-size:12pt;font-family:Arial,sans-serif;color:#000000;background-color:transparent;font-weight:700;font-style:normal;font-variant:normal;text-decoration:none;vertical-align:baseline;white-space:pre;white-space:pre-wrap;\">Final Thoughts\u003C/span>\u003C/p>\u003Cp>\u003Cspan id=\"docs-internal-guid-a2a5aace-7fff-8a75-8546-4dc8d3865831\">\u003C/span>\u003C/p>\u003Cp dir=\"ltr\" style=\"line-height:1.38;background-color:#ffffff;margin-top:0pt;margin-bottom:12pt;\">\u003Cspan style=\"font-size:12pt;font-family:Arial,sans-serif;color:#000000;background-color:transparent;font-weight:400;font-style:normal;font-variant:normal;text-decoration:none;vertical-align:baseline;white-space:pre;white-space:pre-wrap;\">What \u003C/span>\u003Ca href=\"https://pixelfox.ai\" style=\"text-decoration:none;\">\u003Cspan style=\"font-size:12pt;font-family:Arial,sans-serif;color:#1155cc;background-color:transparent;font-weight:700;font-style:normal;font-variant:normal;text-decoration:underline;-webkit-text-decoration-skip:none;text-decoration-skip-ink:none;vertical-align:baseline;white-space:pre;white-space:pre-wrap;\">bulk image enhancers\u003C/span>\u003C/a>\u003Cspan style=\"font-size:12pt;font-family:Arial,sans-serif;color:#000000;background-color:transparent;font-weight:400;font-style:normal;font-variant:normal;text-decoration:none;vertical-align:baseline;white-space:pre;white-space:pre-wrap;\"> do is an absolute game-changer for anyone editing photo collections of any scale. You can bulk make images high quality instead of manual edits in minutes. Tools like pixelfox. Feature ai use AI for high quality and quick results that are great for photographers, businesses and creatives\u003C/span>\u003C/p>","bulk-image-enhancer-professional-grade-edits-in-bulk-fast",1755628005,1755628093,{"id":133,"lang":11,"author_id":12,"image":55,"title":134,"keywords":15,"description":135,"content":136,"url":137,"views":138,"publishtime":139,"updatetime":62,"status":22,"publishtime_text":100,"status_text":25},592,"Create a Picture from Text – Best Free AI Text to Image Generators Online","Best Free AI Text-to-Image Generators: Create Pictures from Text. PixelFox is one of the best methods to generate an image by turning text into a photo, and you can even design a font picture maker result easily.","\u003Cp dir=\"ltr\">\u003Cspan>The \u003C/span>\u003Cspan>AI text-to-image generators\u003C/span>\u003Cspan> allow you to transform an image into words, translate wording through visual representations of texts, or produce pictures with text that associates words and ideas or prompts in general. It has heard of artists, designers, educators, and content creators who can make text photos or create a visual context from just some plain text more easily than ever.\u003C/span>\u003C/p>\u003Cp dir=\"ltr\">\u003Cspan>And the best part? You do not need any fancy software or design skills. Fortunately, with free tools like\u003C/span>\u003Cspan> PixelFox,\u003C/span>\u003Cspan> you can enjoy an advanced real-time AI image generator and turn text into an image online in no time.\u003C/span>\u003C/p>\u003Ch2 dir=\"ltr\" id=\"bcRVfr\">\u003Cspan>Text to Image Generator\u003C/span>\u003C/h2>\u003Cp dir=\"ltr\">\u003Cspan>They take in your input words, sentences, or even emotions, and output visuals based on machine learning, trained on lots of existing data.\u003C/span>\u003C/p>\u003Cp dir=\"ltr\">\u003Cspan>Whether you need to create a text pic or require a fancy font image generator for any purpose, or just want a simple text pic maker, they can serve you in the best way possible by allowing you to utilize your imagination.\u003C/span>\u003C/p>\u003Ch2 dir=\"ltr\" id=\"UOWRs7\">\u003Cspan>Purpose of Using Artificial Intelligence for Text-to-Image Conversion\u003C/span>\u003C/h2>\u003Cp dir=\"ltr\">\u003Cspan>People turn to AI that generates pictures based on descriptions for a variety of reasons.\u003C/span>\u003C/p>\u003Cul>\u003Cli dir=\"ltr\" aria-level=\"1\">\u003Cp dir=\"ltr\" role=\"presentation\">\u003Cspan>Imagination:\u003C/span>\u003Cspan> Picture abstract concepts or fantasy worlds\u003C/span>\u003C/p>\u003C/li>\u003Cli dir=\"ltr\" aria-level=\"1\">\u003Cp dir=\"ltr\" role=\"presentation\">\u003Cspan>Design branded Graphics \u003C/span>\u003Cspan>with stylized Fonts before Marketing\u003C/span>\u003C/p>\u003C/li>\u003Cli dir=\"ltr\" aria-level=\"1\">\u003Cp dir=\"ltr\" role=\"presentation\">\u003Cspan>Social media:\u003C/span>\u003Cspan> Quote images or visual memes\u003C/span>\u003C/p>\u003C/li>\u003Cli dir=\"ltr\" aria-level=\"1\">\u003Cp dir=\"ltr\" role=\"presentation\">\u003Cspan>Editor\u003C/span>\u003Cspan>: Visual clarification for complicated topics\u003C/span>\u003C/p>\u003C/li>\u003Cli dir=\"ltr\" aria-level=\"1\">\u003Cp dir=\"ltr\" role=\"presentation\">\u003Cspan>Art\u003C/span>\u003Cspan>: Creating concept art, book covers, moodboard posts\u003C/span>\u003C/p>\u003C/li>\u003C/ul>\u003Cp dir=\"ltr\">\u003Cspan>With just a few words, you can create an image of words that describe exactly what you had in mind.\u003C/span>\u003C/p>\u003Ch2 dir=\"ltr\" id=\"4JjaqB\">\u003Cspan>PixelFox | Free Text to Image Generator\u003C/span>\u003C/h2>\u003Cp dir=\"ltr\">\u003Cspan>PixelFox is one of the most user-friendly and effective tools amongst all available platforms for converting text into visuals. As a popular\u003C/span>\u003Cspan> AI text generator\u003C/span>\u003Cspan>, it allows users to:\u003C/span>\u003C/p>\u003Cul>\u003Cli dir=\"ltr\" aria-level=\"1\">\u003Cp dir=\"ltr\" role=\"presentation\">\u003Cspan>Write your queries in spoken language\u003C/span>\u003C/p>\u003C/li>\u003Cli dir=\"ltr\" aria-level=\"1\">\u003Cp dir=\"ltr\" role=\"presentation\">\u003Cspan>Generate images instantly from AI\u003C/span>\u003C/p>\u003C/li>\u003Cli dir=\"ltr\" aria-level=\"1\">\u003Cp dir=\"ltr\" role=\"presentation\">\u003Cspan>Font-to-image engine for font-based text styling\u003C/span>\u003C/p>\u003C/li>\u003Cli dir=\"ltr\" aria-level=\"1\">\u003Cp dir=\"ltr\" role=\"presentation\">\u003Cspan>Downloading an Image as output\u003C/span>\u003C/p>\u003C/li>\u003Cli dir=\"ltr\" aria-level=\"1\">\u003Cp dir=\"ltr\" role=\"presentation\">\u003Cspan>Pic Typography for\u003C/span>\u003Cspan> Image Generator Features:\u003C/span>\u003Cspan> Give Words an Artistic Style\u003C/span>\u003C/p>\u003C/li>\u003C/ul>\u003Cp dir=\"ltr\">\u003Cspan>PixelFox is the Ideal Platform for creating a Photo with text. Whether you want to create a text photo or something else that is made up of AI picture prompts, PixelFox believes in them.\u003C/span>\u003C/p>\u003Ch2 dir=\"ltr\" id=\"TNQVCU\">\u003Cspan>Highlights of PixelFox Text to Image Generator\u003C/span>\u003C/h2>\u003Cul>\u003Cli dir=\"ltr\" aria-level=\"1\">\u003Cp dir=\"ltr\" role=\"presentation\">\u003Cspan>No login necessary, just free access!\u003C/span>\u003C/p>\u003C/li>\u003Cli dir=\"ltr\" aria-level=\"1\">\u003Cp dir=\"ltr\" role=\"presentation\">\u003Cspan>Illustration, Photo-realistic, Fantasy, and Abstract design modes\u003C/span>\u003C/p>\u003C/li>\u003Cli dir=\"ltr\" aria-level=\"1\">\u003Cp dir=\"ltr\" role=\"presentation\">\u003Cspan>Support for converting type to image, and visual quotations\u003C/span>\u003C/p>\u003C/li>\u003Cli dir=\"ltr\" aria-level=\"1\">\u003Cp dir=\"ltr\" role=\"presentation\">\u003Cspan>Real-time preview and quick rendering\u003C/span>\u003C/p>\u003C/li>\u003Cli dir=\"ltr\" aria-level=\"1\">\u003Cp dir=\"ltr\" role=\"presentation\">\u003Cspan>Add text to image AI style or blend visuals( optional )\u003C/span>\u003C/p>\u003C/li>\u003C/ul>\u003Cp dir=\"ltr\">\u003Cspan>PixelFox \u003C/span>\u003Cspan>is a one-stop site for anyone looking to convert text into an image or even create an AI-generated photo.\u003C/span>\u003C/p>\u003Ch2 dir=\"ltr\" id=\"Q1WzZ9\">\u003Cspan>PixelFox: Word to Image\u003C/span>\u003C/h2>\u003Cp dir=\"ltr\">\u003Cspan>Creating stunning visuals is simple:\u003C/span>\u003C/p>\u003Cul>\u003Cli dir=\"ltr\" aria-level=\"1\">\u003Cp dir=\"ltr\" role=\"presentation\">\u003Cspan>Visit PixelFox.ai\u003C/span>\u003C/p>\u003C/li>\u003Cli dir=\"ltr\" aria-level=\"1\">\u003Cp dir=\"ltr\" role=\"presentation\">\u003Cspan>Type your phrase, prompt, or idea \u003C/span>\u003C/p>\u003C/li>\u003Cli dir=\"ltr\" aria-level=\"1\">\u003Cp dir=\"ltr\" role=\"presentation\">\u003Cspan>Choose the style and/or variant that you like best\u003C/span>\u003C/p>\u003C/li>\u003Cli dir=\"ltr\" aria-level=\"1\">\u003Cp dir=\"ltr\" role=\"presentation\">\u003Cspan>Click generate, and see your words magically transform into a visual image.\u003C/span>\u003C/p>\u003C/li>\u003Cli dir=\"ltr\" aria-level=\"1\">\u003Cp dir=\"ltr\" role=\"presentation\">\u003Cspan>You can save the output or edit it at any time as well.\u003C/span>\u003C/p>\u003C/li>\u003C/ul>\u003Cp dir=\"ltr\">\u003Cspan>Anybody can make a \u003C/span>\u003Cspan>text photo or picture from text with tools\u003C/span>\u003Cspan> like this, at work, school, or just for fun.\u003C/span>\u003C/p>\u003Ch2 dir=\"ltr\" id=\"Kxh2Lb\">\u003Cspan>Top AI Text Pic Generator Applications\u003C/span>\u003C/h2>\u003Ch2 dir=\"ltr\" id=\"9KHdiv\">\u003Cspan>\u003Cbr>\u003C/span>\u003Cspan>\u003Cspan>\u003Cimg src=\"https://lh7-rt.googleusercontent.com/docsz/AD_4nXeO3ot3xzpyQImVaK4CsIJM0w11ZhQ3lpVHno9WQCI29WZsIXqPZu-azl3H-T3AKOAPAJpwLkilBqD-jSEbpqYezaYOQuX952oyU88pHphJHRY-jpJZYXZT9CXLsleEgr9sWJHeaw?key=8YQTkhVfOJ7RAtNhrBFnng\" width=\"624\" height=\"351\" alt=\"Create a Picture from Text – Best Free AI Text to Image Generators Online\" loading=\"lazy\">\u003C/span>\u003C/span>\u003C/h2>\u003Cp dir=\"ltr\">\u003Cspan>Here are some hands-on ideas to play around with these tools:\u003C/span>\u003C/p>\u003Cul>\u003Cli dir=\"ltr\" aria-level=\"1\">\u003Cp dir=\"ltr\" role=\"presentation\">\u003Cspan>Use Picture Text Creator \u003C/span>\u003Cspan>Especially for Highlighting Blog Graphics, Quotes\u003C/span>\u003C/p>\u003C/li>\u003Cli dir=\"ltr\" aria-level=\"1\">\u003Cp dir=\"ltr\" role=\"presentation\">\u003Cspan>Banners and Flyers:\u003C/span>\u003Cspan> Easy Text Tool to Generate Cool Fonts for Titles\u003C/span>\u003C/p>\u003C/li>\u003Cli dir=\"ltr\" aria-level=\"1\">\u003Cp dir=\"ltr\" role=\"presentation\">\u003Cspan>Social Posts: \u003C/span>\u003Cspan>Convert Images from Phrases to Visuals (Convert Text to Picture)\u003C/span>\u003C/p>\u003C/li>\u003Cli dir=\"ltr\" aria-level=\"1\">\u003Cp dir=\"ltr\" role=\"presentation\">\u003Cspan>Create Inspirational Text \u003C/span>\u003Cspan>Picture Cards\u003C/span>\u003C/p>\u003C/li>\u003Cli dir=\"ltr\" aria-level=\"1\">\u003Cp dir=\"ltr\" role=\"presentation\">\u003Cspan>Art therapy: \u003C/span>\u003Cspan>mood AI picture prompt generation\u003C/span>\u003C/p>\u003C/li>\u003C/ul>\u003Cp dir=\"ltr\">\u003Cspan>You could further experiment with a deepfake image generator for free, so get creative & make some stylized characters or visual metaphors, solely from text.\u003C/span>\u003C/p>\u003Ch2 dir=\"ltr\" id=\"ePwH0L\">\u003Cspan>AI Text to Image Tools that Are Not \u003Ca href=\"https://pixelfox.ai/\" target=\"_blank\">PixelFox\u003C/a>\u003C/span>\u003C/h2>\u003Cp dir=\"ltr\">\u003Cspan>PixelFox is a great tool, but other platforms provide similar functionalities as well, such as:\u003C/span>\u003C/p>\u003Col>\u003Cli dir=\"ltr\" aria-level=\"1\">\u003Cp dir=\"ltr\" role=\"presentation\">\u003Cspan>Craiyon (nee DALL·E mini): \u003C/span>\u003Cspan>simple, prompt-based AI.\u003C/span>\u003C/p>\u003C/li>\u003Cli dir=\"ltr\" aria-level=\"1\">\u003Cp dir=\"ltr\" role=\"presentation\">\u003Cspan>DeepAI: \u003C/span>\u003Cspan>Free text to image converter by the bunch contained clearly.Instructions provided.\u003C/span>\u003C/p>\u003C/li>\u003Cli dir=\"ltr\" aria-level=\"1\">\u003Cp dir=\"ltr\" role=\"presentation\">\u003Cspan>NightCafe: \u003C/span>\u003Cspan>Visual Storyboards Artistic Tool\u003C/span>\u003C/p>\u003C/li>\u003Cli dir=\"ltr\" aria-level=\"1\">\u003Cp dir=\"ltr\" role=\"presentation\">\u003Cspan>Artbreeder:\u003C/span>\u003Cspan> Make a merged text and image composition using so far created.\u003C/span>\u003C/p>\u003C/li>\u003Cli dir=\"ltr\" aria-level=\"1\">\u003Cp dir=\"ltr\" role=\"presentation\">\u003Cspan>Dream by Wombo: \u003C/span>\u003Cspan>User-friendly app for fantasy art\u003C/span>\u003C/p>\u003C/li>\u003C/ol>\u003Cp dir=\"ltr\">\u003Cspan>That being said, the PixelFox is unique because it does the perfect job of quality image for speed, and comes with a clean design with free access.\u003C/span>\u003C/p>\u003Ch2 dir=\"ltr\" id=\"pkgLM8\">\u003Cspan>Tips for Better Results\u003C/span>\u003C/h2>\u003Cul>\u003Cli dir=\"ltr\" aria-level=\"1\">\u003Cp dir=\"ltr\" role=\"presentation\">\u003Cspan>Dreamy sunrise over snowy mountains\u003C/span>\u003C/p>\u003C/li>\u003Cli dir=\"ltr\" aria-level=\"1\">\u003Cp dir=\"ltr\" role=\"presentation\">\u003Cspan>Be as descriptive as possible, including style, mood, and format.\u003C/span>\u003C/p>\u003C/li>\u003Cli dir=\"ltr\" aria-level=\"1\">\u003Cp dir=\"ltr\" role=\"presentation\">\u003Cspan>Keep prompts concise but detailed\u003C/span>\u003C/p>\u003C/li>\u003Cli dir=\"ltr\" aria-level=\"1\">\u003Cp dir=\"ltr\" role=\"presentation\">\u003Cspan>Play with different aesthetics for text to photo\u003C/span>\u003C/p>\u003C/li>\u003Cli dir=\"ltr\" aria-level=\"1\">\u003Cp dir=\"ltr\" role=\"presentation\">\u003Cspan>Then there are the abstractions and real-world objects\u003C/span>\u003C/p>\u003C/li>\u003C/ul>\u003Cp dir=\"ltr\">\u003Cspan>The more abstract and unique you make your prompts, the more dynamic your result will be.\u003C/span>\u003C/p>\u003Ch2 dir=\"ltr\" id=\"nyl7u2\">\u003Cspan>Final Thoughts\u003C/span>\u003C/h2>\u003Cp dir=\"ltr\">\u003Cspan>The creative future is now, from AI Now, thanks to platforms like \u003C/span>\u003Cspan>\u003Ca href=\"https://pixelfox.ai/\" target=\"_blank\">PixelFox\u003C/a>, \u003C/span>\u003Cspan>anyone can easily turn words into pictures. Text generation: A new visual IQ. For a designer or even an amateur trying around, they can leverage the \u003C/span>\u003Cspan>AI text generator tools \u003C/span>\u003Cspan>to open a new visual language.\u003C/span>\u003C/p>\u003Cp>\u003Cspan id=\"docs-internal-guid-94dfadea-7fff-38cf-4545-6259316a6f01\">\u003C/span>\u003C/p>\u003Cp dir=\"ltr\">\u003Cspan>Give \u003C/span>\u003Cspan>PixelFox A Try for text-to-image,\u003C/span>\u003Cspan> Convert Text to Image, and real-time text-to-image AI.\u003C/span>\u003C/p>","create-a-picture-from-text-best-free-ai-text-to-image-generators-online",44,1754746567,["Reactive",141],{"$si18n:cached-locale-configs":142,"$si18n:resolved-locale":15},{"en":143,"zh":146,"tw":148,"vi":150,"id":152,"pt":154,"es":156,"fr":158,"de":160,"it":162,"nl":164,"th":166,"tr":168,"ru":170,"ko":172,"ja":174,"ar":176,"pl":178},{"fallbacks":144,"cacheable":145},[],true,{"fallbacks":147,"cacheable":145},[],{"fallbacks":149,"cacheable":145},[],{"fallbacks":151,"cacheable":145},[],{"fallbacks":153,"cacheable":145},[],{"fallbacks":155,"cacheable":145},[],{"fallbacks":157,"cacheable":145},[],{"fallbacks":159,"cacheable":145},[],{"fallbacks":161,"cacheable":145},[],{"fallbacks":163,"cacheable":145},[],{"fallbacks":165,"cacheable":145},[],{"fallbacks":167,"cacheable":145},[],{"fallbacks":169,"cacheable":145},[],{"fallbacks":171,"cacheable":145},[],{"fallbacks":173,"cacheable":145},[],{"fallbacks":175,"cacheable":145},[],{"fallbacks":177,"cacheable":145},[],{"fallbacks":179,"cacheable":145},[],["Set"],["ShallowReactive",182],{"$fQ1ppkrWQLg0a1vHmDc0FnWNEa-4Z8Jnxv422fxedVj8":-1},"/blog/creation-images-stunning-visuals-of-art-amp-innovation-in-motion",{"userStore":185},{"showLoginModal":186,"showLoginClose":145,"loading":187,"inviteCode":15,"bidIdentification":15,"token":15,"userInfo":189,"showPriceDialog":186,"paidBefore":62},false,{"show":186,"message":188},"加载中...",{"avatar":190,"nickname":190,"email":190},null]